Speed up Your Photoshop Retouching Workflow
Review by Gilmar Smith
The Retouching Toolkit, a Photoshop extension to ease, speed, and refine the workflow of photographers and retouchers, was designed by Conny Wallstrom, a photographer, retoucher, and software developer based in Sweden. He previously created the Infinite Color Panel and the Infinite Black & White Panel.
Version 3.1 of Retouching Toolkit comes already loaded with the Conny Wallstrom retouching workflow. Through the years, Conny has developed different retouching techniques to make the retouching process fast, precise, and functional; some of those techniques are already featured in the Retouching Toolkit panel, such as his new Dodge and Burn technique, a Saturation issues fixer, and his own Frequency Separation technique.
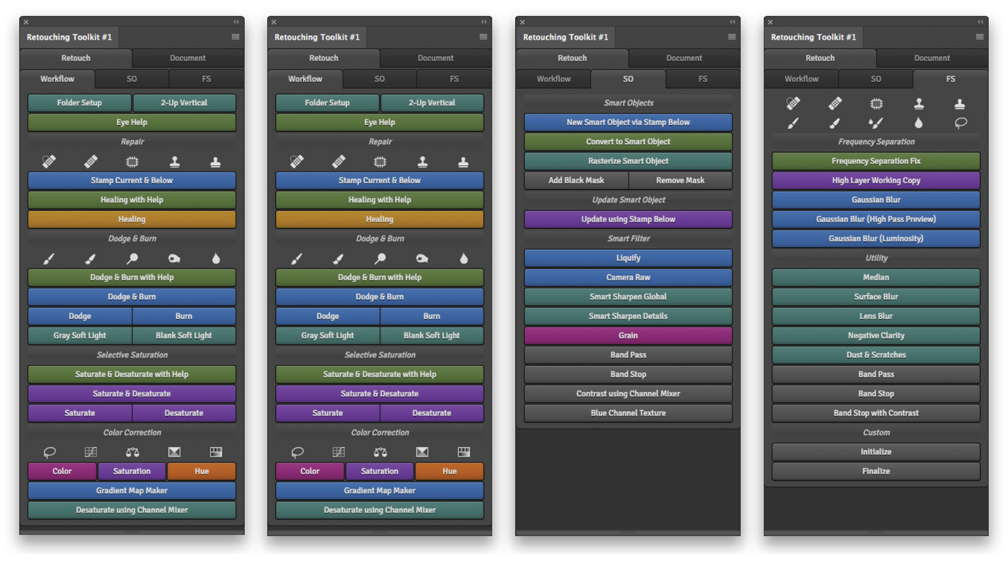
The panel has two tabs: Retouching and Document. Under Retouch, you’ll find three other tabs, Workflow, SO (Smart Objects), and FS (Frequency Separation). In each of these tabs, you’ll find techniques and tools used in Conny’s workflow.
Under the Document tab are features such as Delete Identical Pixels. You can use this when you need to work on a stamp layer to make a few adjustments, but you still want to work nondestructively, and be able to tweak the adjustments. After making any needed adjustments in the stamp layer, click Delete Identical Pixels, and you’ll keep only the modified pixels in an empty layer—mind-blowing!
There are so many features I personally love, but I’ll mention just a few to give you an idea of how amazing this panel is. In the Workflow tab, if you click on Folder Setup, it creates five different groups. This feature will help you keep your layers organized. Now, if you Right-click on any of the buttons in the Workflow tab, say Dodge and Burn with Help, the panel automatically places the Dodge and Burn layers with Help into the Dodge and Burn group previously created with Folder Setup.
Another one of my favorites is the Eye Help. These are layers to help you see details that are usually missed onscreen but, unfortunately, are sometimes easily seen in print. These layers will help you fine-tune your images.
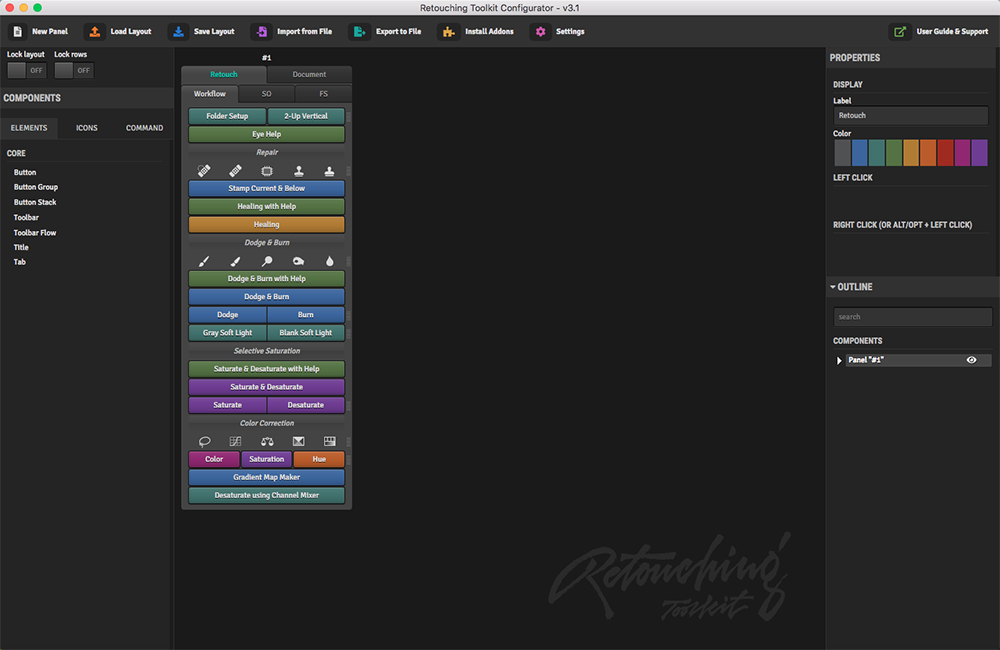
Now, some of you may think this panel is used solely for skin and beauty retouching, but it’s not. Most of the tools already in the panel can be used in any photography genre; but here comes the most amazing feature of the 3.1 Retouching Toolkit: It’s 100% customizable! When you buy the Retouching Toolkit panel, it comes with the Conny Wallstrom Workflow Addon already loaded, but in the Toolkit Configurator, you can create your own panel to fit all of your retouching needs. You can add your own brushes and actions, run your own scripts, add your favorite tools, and customize any folder setup that you desire. You can drag-and-drop features from Conny’s panel to your own. You can even make multiple setups for different photography genres; for instance, you can create a workflow for portraiture retouching and another one for composite work or landscape images. The sky’s the limit.
There are many Retouching Toolkit Addons already available that you can buy separately on the website. And, some soon-to-be-released Addons are: Color Wheels, Color Mapping, Luminosity, Launcher, and Export.
The Retouching Toolkit requires Photoshop CC 2015.5 or later. The license covers up to three personal computers. After installation, you’ll find the panels in Photoshop> Windows>Extensions. Make sure to join the Retouching Toolkit Facebook User Group for tutorials, ideas on how to configure your own panel, and support. ■