Add Surreal Effects to Your Images
Review by Gilmar Smith
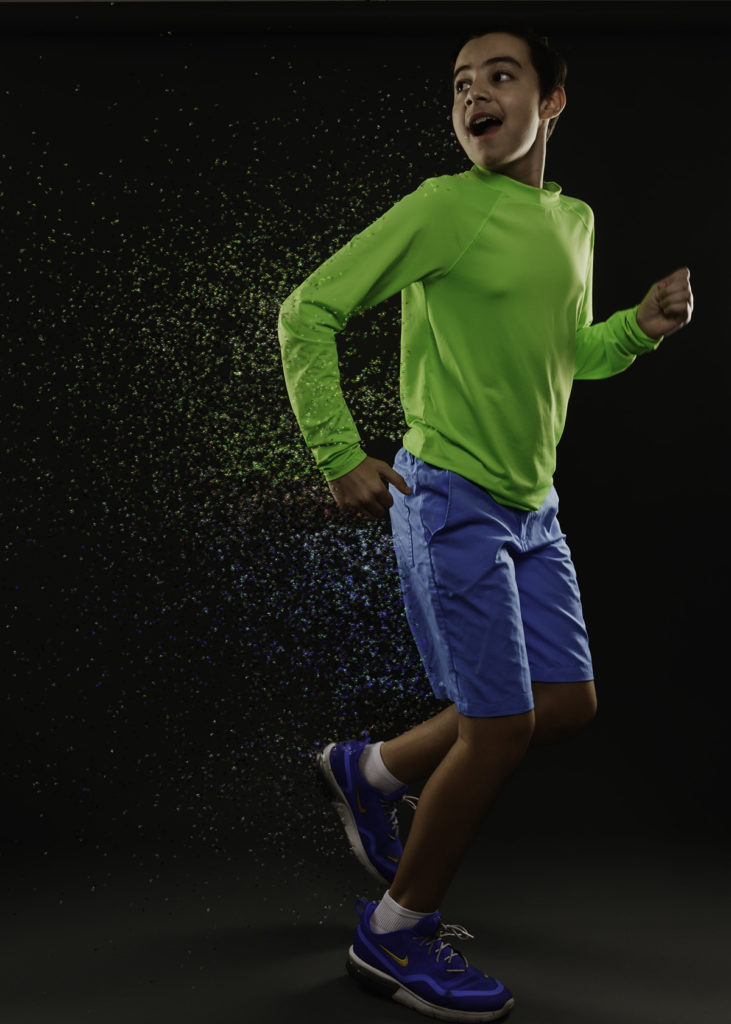
With Explosion 1.5, an updated version of this AKVIS software, you can create destruction and dispersion effects on your photos. It’s available for Windows and Mac, and can be purchased as a plug-in for a photo editor such as Adobe Photoshop, Corel PaintShop Pro, AliveColors, and more; as a standalone application; or as a bundle that includes both the plug-in and standalone versions.
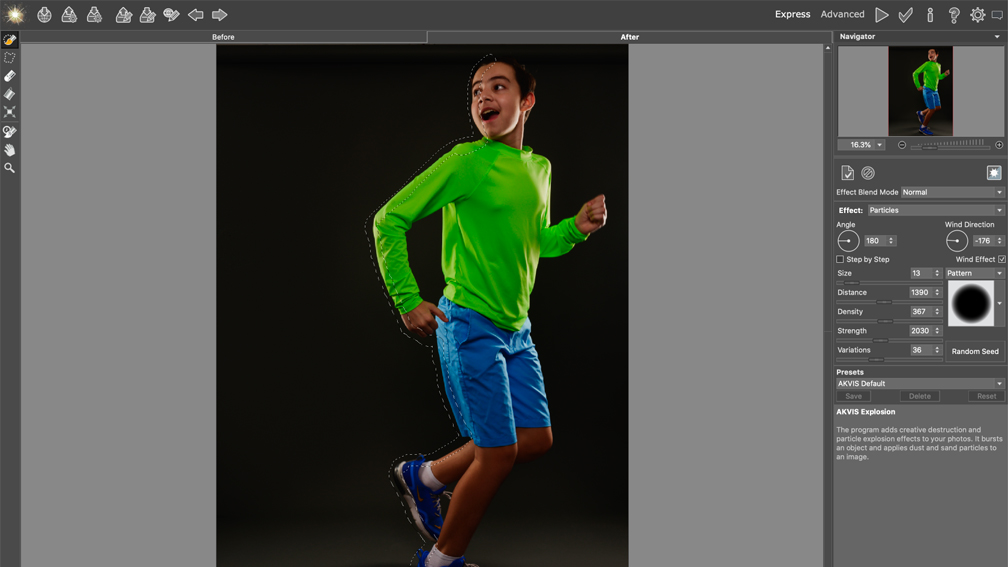
Whether you use it as a plug-in or as a standalone program, Explosion 1.5 offers two interface modes—Express and Advanced—and it works by simply creating a selection of the area where you want the dispersion or explosion to start. Explosion 1.5 has three different selection tools: the Selection Brush, the Lasso tool, and the Selection Bucket, which is usually used to select large areas. There’s also an Erase tool that allows you to fine-tune the selections.
In the Express mode, you can still get pretty amazing effects with a really simplified interface. For your effect, you can choose the Effect Blend Mode, Angle and Wind Direction, Distance, Density, Strength, and Variations. In both Express and Advanced mode, you get the option of choosing the pattern you’ll be using in your explosion. In addition, Explosion 1.5 has a variety of ready-to-use presets that you can modify, or even add your own presets.

In the Advanced interface, the user has access to way more tools and parameters! You get to play with a whole new set of sliders to give the explosion effect a customized look. First, you choose from four menus: Particles, Texture, Wind, and Variations. Then, each one of these menus has their own adjustments: For instance, in the Particles menu, you can use the Motion Blur slider, which I found tremendously useful to get a more believable effect.
My favorite feature about AKVIS Explosion 1.5, however, is the option to add the effect to a transparent layer—incredibly useful, especially when working on composite images. Here’s how: After you add the effect you like in Explosion 1.5, make sure to toggle the Show/Hide Background button. If the background image is invisible, the effect is displayed on a transparent layer. Next, press the Play button (top right), and the effect will be added as a transparent layer in Photoshop. That’s it!
I always want to have the freedom to modify things as I go, and being able to add this effect nondestructively is a winning point for me! ■


