In another article, we looked at using Curves adjustments to lift the color palette from one image and apply it to another. This issue, let’s take that concept further with a close look at color lookup tables, and how to exploit them for expression and consistency across projects or bodies of work.
The first thing to realize about color lookup tables (CLUTs) is that they reassign colors using a “lookup table” that’s effectively a translation. For any given color in your starting image, there’s a directly mapped or interpolated result. This is different from gradient maps that do a simple replacement based on luminosity of an image (that is, any color with the same luminosity will be mapped to the same final color using a gradient map). A CLUT remaps the actual color value.
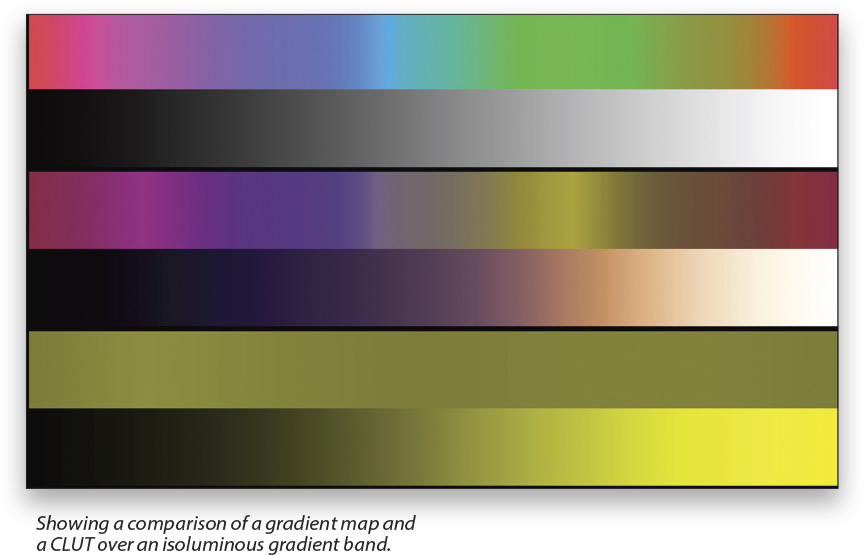
In the top pair of gradients in the image on the next page, the top gradient is a fully saturated RGB spectrum that’s been treated to a B&W adjustment layer so that every color is the same luminosity. The second gradient is a simple Black to White linear gradient for reference. The second pair of gradients shows the result of applying the Late Sunset CLUT preset; you can see the colors have actually been changed. The third pair of gradients at the bottom have a Gradient Map applied instead. The variation is nearly entirely gone because the luminosity is the same for all the colors.
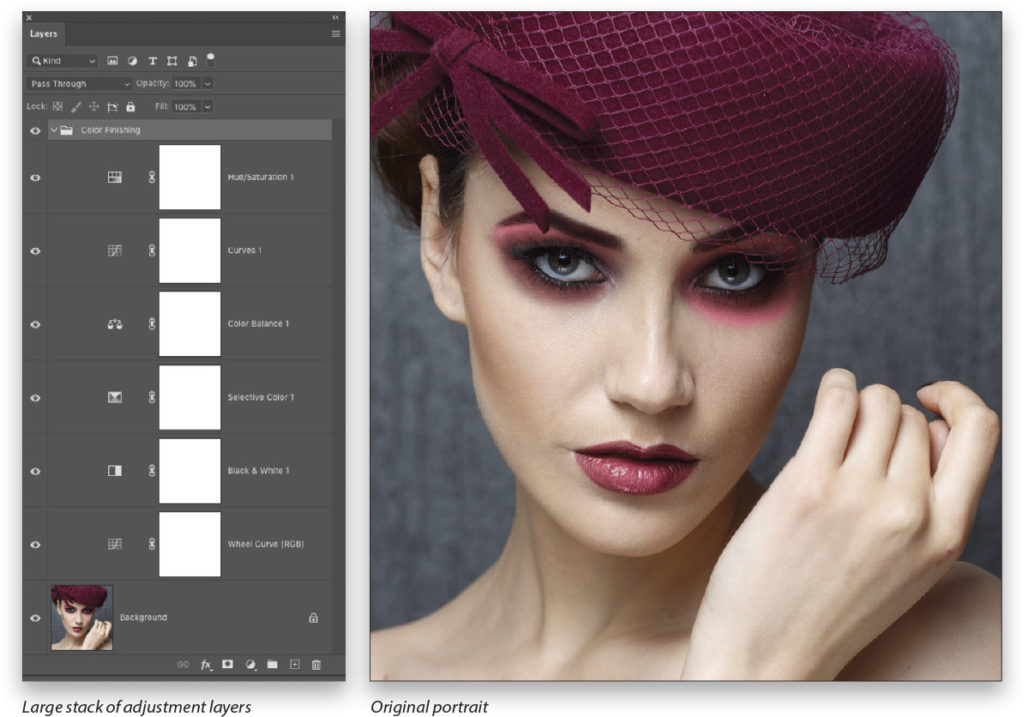
Now that we know the difference, let’s build a custom CLUT (if you’re not familiar with CLUTs, you should certainly try out the built-in presets to get a feel for what results are possible). I want to put together a kind of hilariously complex adjustment layer stack just to demonstrate the potential here.
Note: To access the CLUT presets in Photoshop, click on the Create New Adjustment Layer icon (half-black, half-white circle) at the bottom of the Layers panel, and choose Color Lookup. In the Properties panel (Window>Properties), you can find all the presets in the 3DLUT File drop-down menu.
Using a Test File
For whatever reason, I felt the need to add all these adjustments to get the final color version. Some of the adjustment layers have blending modes, some have different opacity values, and all of them have been tweaked in some way. The point is that however I got there, I have the results I want for this particular image from a collection of adjustment layers.
If I’m shooting a series that starts with roughly the same colors and exposure settings, then I could just immediately export the CLUT file. But there’s a shortfall here that we can address with a simple test image.
Once I export the CLUT file, I can’t change it. Any modification that I want to make permanent means I have to start over and generate a new file. I either have to rebuild the adjustment layer stack, recall it from being saved somewhere, or I have to use the CLUT and add some more adjustment layers, then save out a new file.
Why would you want to change the look? This would typically be done when the image you used to build the CLUT lacks some set of colors that may come up later in the series of images, even pure black or white. Including a color chart in the starting image would help alleviate this. Basically, doing this check helps your final CLUT to be more flexible down the road. If you’re building it only for a specific project where you know the input will always have the same range and tonality, then there’s probably no need for the extra step.
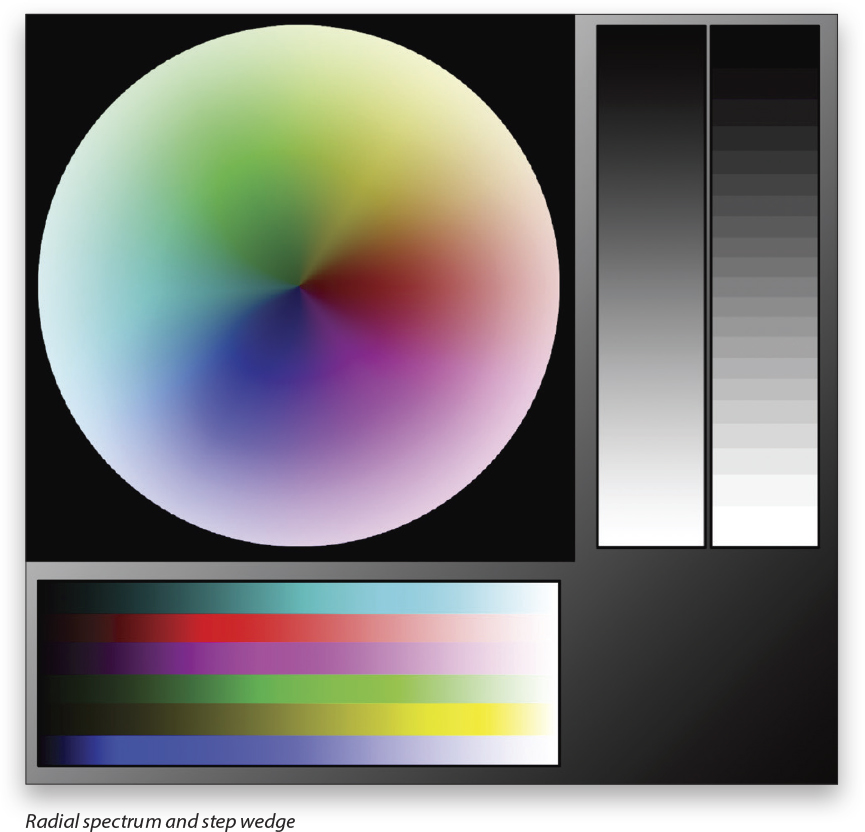
To spare you that repetitive effort later on, apply the layer stack to a spectrum and step wedge. The spectrum in this case is a color wheel that represents the entire RGB spectrum through a range of luminosity values, along with the grayscale step wedge and some individual color bars (see next page). There are lots of ways to generate reference files, and sometimes you’ll want to create a specific set of swatches to check the conversion, such as for advertising to preserve a logo or product color. For now, this test file will give us a reasonable idea of whether we missed anything in the original conversion. [KelbyOne members can download this test file by clicking here, or visiting kelbyone.com/magazine.]
Before we move the layer adjustment stack to the test file, I want to point out a few things. First, there can’t be any masking. The adjustments need to be applied globally, and not clipped together (which can give odd results). Second, any dodge and burn or other painted corrections will be ignored, as will color fill layers, etc. For simplicity, stick with adjustment layers without masks.
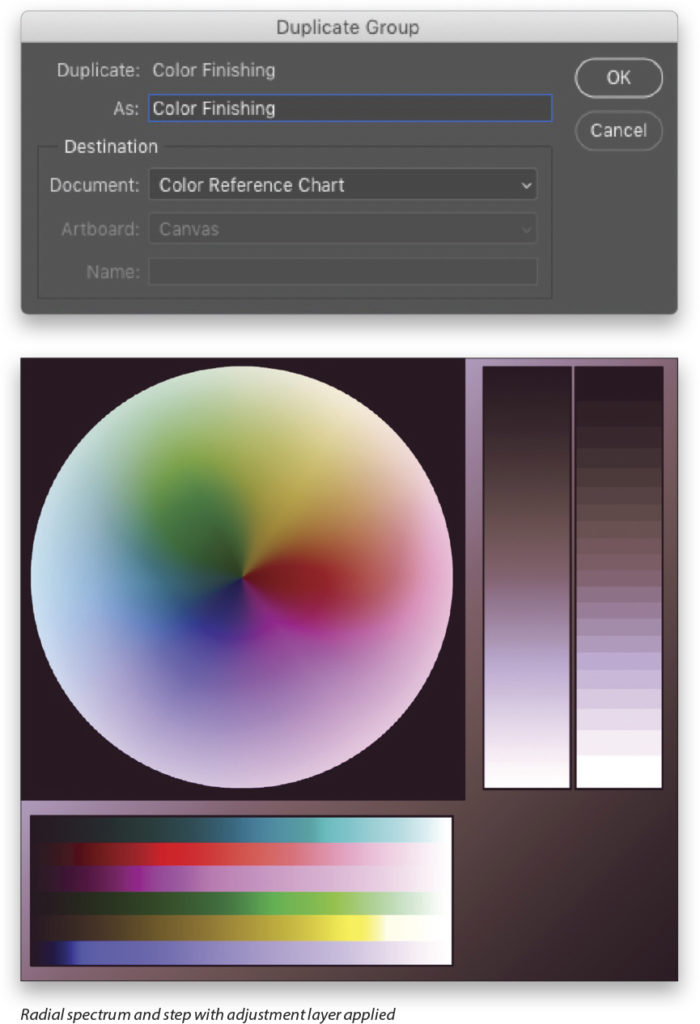
With that knowledge, you can either place the reference file into your current image beneath the adjustments, or you can bundle all the adjustment layers into a group, then drag or copy the group to your open reference file. A neat trick is to Right-click on the group in the original file and choose Duplicate Group from the context menu. In the Destination drop-down menu, pick the open reference file and click OK. The entire stack is now over in the reference image, ready to be checked out.
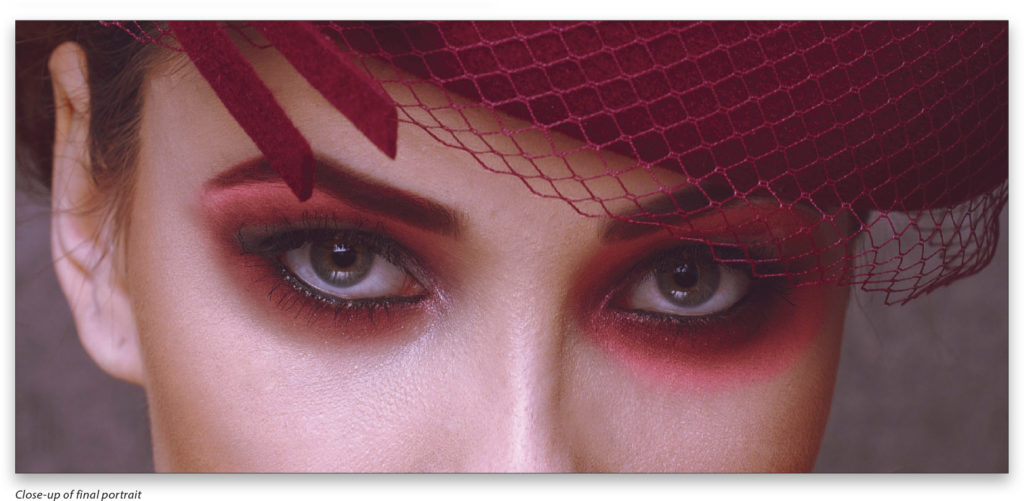
In this case, I’m going to tweak a few settings in the midtones and call it good. In the context of the portrait, I got sidetracked by some of the darker details on which I was focusing, and now with the reference, I can see the mids need a little less green.
At this point, I can either send the adjustment stack back to the original photo and delete the old version, or I can make my CLUT preset directly from my reference. It makes sense to do it from the reference file because the export command looks for a single, locked Background layer.
A Note About Workflow
If you’re working on a master file with lots of other layers for corrections, edits, etc., you should keep the stack of adjustment layers for your CLUT in a separate group at the top of everything. Even better would be to create a flat copy of your image before the CLUT work begins. Because the CLUT file will be used with other images, you want to reduce the potential for error by having hidden adjustments unwittingly contribute.
When the CLUT is created, it compares the color information in the locked background image to the final canvas result from your adjustment stack. Recall that Photoshop processes your images like a set of equations in order from the bottom to the top of the layer stack. That means it will look at everything, in order, including stuff you don’t intend. To keep things clean and organized, finish the master file without the color-grading step, and then build your CLUT stack on a flattened duplicate of the master file.
For a series of images, you’ll have to do some work to ensure consistent starting points. That means using the same white balance and same dynamic range, at a minimum, if you’re looking for consistency. It may be necessary to use a Curves and Color Balance layer below the CLUT on a few images to get the same output each time.
Time to Export
When you’re ready to export, go to File>Export>Color Lookup Table, and you’ll have some options from which to choose. Without getting into the details of each file type, you should default to the Cube format, though I tend to leave both Cube and 3DL selected. If you’re working with other applications for video or production work, you’ll probably get specific directions for file type. Cube appears to be the most universal, and also gives you the option to swap the color matrix when using the file later back in Photoshop. The Description is for your own use, as you’ll need to create a filename at the end, anyway. Finally, I turn on the Use Lower Case File Extensions option, and I set the Quality to High.

I recommend saving the file someplace away from the 3DLUTS folder inside the Presets folder in Photoshop’s application folder, and then creating a copy for loading. The reason for this is that it’s easier to share the CLUT when you can find it, and sometimes the Presets folder gets munged up on updates or other plug-in activity. (It’s rare, but frustrating.) When you’ve saved the file, you can add a copy to the 3DLUTS folder in the Presets folder, or you can load it directly in the Properties panel by selecting Load 3D LUT from the 3DLUT File drop-down menu. Using the Presets folder means you need to quit Photoshop, and restart for the preset to appear in the 3DLUT drop-down menu.
Of course, you can use CLUTs for all kinds of photographs and even illustrations. Creating your own lookup tables is a fantastic way to develop your own unique look, no matter what the subject. Most current movies manipulate emotion through color, with some notable examples in the last few years of superhero movies. The grading concept is exactly the same, if a little more delicate. The point is, using lookup tables for color palettes is a high-end move that’s surprisingly easy to get into.
This article originally published in the October, 2019 issue of Photoshop User magazine.


