At this time of year I get lots of questions pertaining to preparing photos to be printed by an online lab/service. Let’s dig into the decisions you’ll need to make. First, if you want to talk about online printing service providers, I strongly encourage you to visit the KelbyOne Community forum, as there are some amazingly helpful folks there with a lot of personal experience to share on this topic.
I’m just going to focus on the Lightroom prep side of the process. One other recommendation I’ll make is that once you select your print provider (or while you’re investigating options), be sure to check out the support section of that provider’s website, as any good service will provide the criteria they know will give you the best results. The main concerns will be:
- Accepted file type
- Accepted color space
- Print sizes
- Do your photos have enough pixels to print well at the desired print size?
Those are the aspects of this process that Lightroom Classic can help you address.
File Type
It should come as no surprise that JPEG is the most widely supported and recommended file format to choose when sending your photos to be printed. You might shoot in RAW, edit, and save as TIFF or PSD, but when it comes time to deliver your image, keep it simple and safe by choosing JPEG in the Export dialog when saving out of Lightroom.
The main problem people have with JPEG is the type of compression used by the algorithm. It actually does a good job (at high-quality settings) of reducing file size by throwing out some of the image data (and at high-quality levels, you shouldn’t see any visible degradation). Billions and billions of JPEG images are shared, uploaded, downloaded, printed, viewed, bought, and sold each year. Do not fear the JPEG.
As I perused the various FAQ sections of popular print services, I commonly saw that a Quality of 10 from Photoshop was the suggested JPEG compression amount to be used when saving your photos. If you’ve ever exported a JPEG from Lightroom, you’ll have noticed that Lightroom’s Quality slider goes from 0–100, and not 0–12 as it does in Photoshop. What isn’t as obvious, however, is that while Lightroom provides more numbers, it uses the same 12 levels of quality that Photoshop does.
A little math shows that a Quality of 10 (83% of 12) in Photoshop is the same as the 83 setting in Lightroom. Actually, because Lightroom’s range is divided into 12 different levels, any value from 77–84 on the scale is the same as a Quality of 10 (try exporting the same photo at level 77 Quality and level 84 Quality and you’ll see the file size of the resulting copies is the same). So, that’s a long way of saying you can stick to JPEG at level 77 on the Quality slider as your minimum. If you want to go one notch higher because you feel it makes a qualitative difference, use 85 to go to the next level. Higher than that, you’re just getting a larger file size without any real quality benefit.
Color Space
Just as with file type, there are also ideal color spaces for exporting and uploading to a print service. Universally, from all the services I’ve checked, they all request or expect Adobe RGB or sRGB. This is one of those things you should confirm with whichever service you choose, but sRGB is always your safest choice.
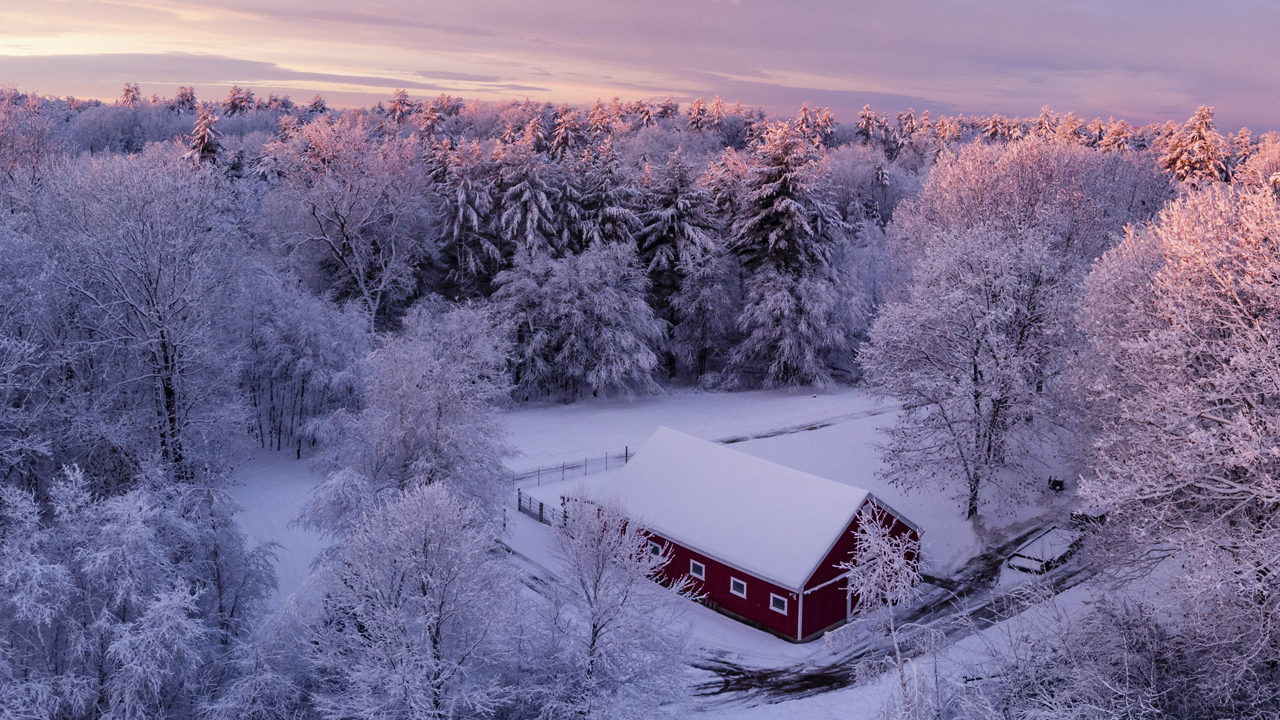
All three of the settings discussed so far can be configured in the File Settings panel of the Export dialog. First, choose JPEG, then set the Quality to 77 (or 85 if you’re feeling fancy), and finally click the Color Space drop-down and choose sRGB (unless your print service says otherwise).
Print Sizes and Resolution
When it comes right down to it, there’s probably no more important decision to make than the size of the print you want to purchase, and there are so many print sizes from which to choose. I can’t help you decide what size you want, but I can help you figure out what sizes you can print with the photos you have, and if needed, crop them to match the aspect ratio of your print.
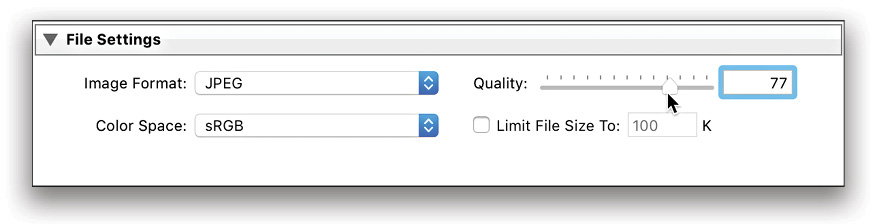
I’m assuming at this point that you’ve done all your postprocessing in Develop, and you may have even cropped your photo for creative reasons. You now need to look at your photo to determine its pixel dimensions so you know what size print you can make at a good quality, and if you need to crop it further to match the aspect ratio of your desired print size. There are a few ways to see pixel dimensions in Lightroom. The first is in Grid view (G). Just configure the Grid view style to display Cropped Dimensions in the cell border (here’s a short article on how to do that). It will look like this:
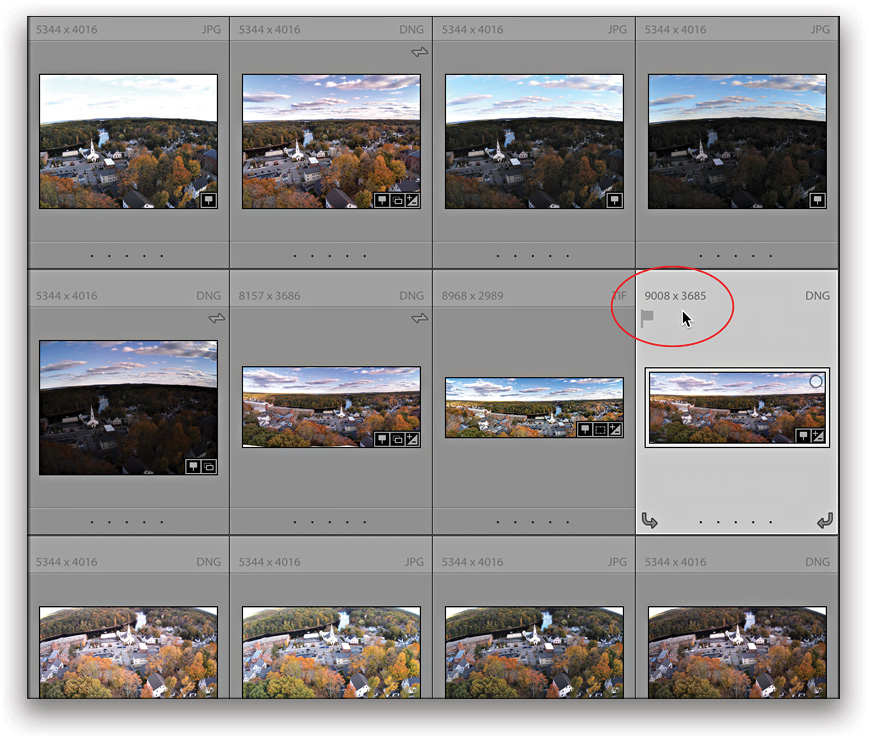
If you’re in Loupe view (E) in the Library, you can configure the Info Overlay to display Cropped Dimensions (here’s how to do that). It looks like this:
The Loupe Overlay even works in Develop’s Loupe view (D) when you have the Crop tool enabled, so you can see the pixel dimensions before and after you crop. But before you bring down the cropping axe on your photos, let’s talk about resolution (not the New Year’s kind either). The first decision you need to make in order to perform the conversion from pixel dimensions to inches (or centimeters for you metric-minded folks) is how many pixels do you want to print for every inch of photo, which is more commonly referred to as how many pixels per inch, or simply PPI. (You might see some places refer to it as DPI, but they mean the same thing in this context.) The number that makes people absolutely jubilant when they hear “PPI” is 300. That’s not to say that you can’t print perfectly good-looking images at a PPI (or resolution) value other than 300 PPI, but for the sake of argument let’s target 300.
Okay, we know how to find the pixel dimensions of our photos, and our goal is to print them at 300 PPI, so now we can do a little math to determine the largest size we can print a given photo at 300 PPI. The formula looks like this:
Pixel dimension / Resolution (PPI) = dimension in inches
If we take a photo with pixel dimensions of 4016 pixels wide x 6016 pixels high, and plug each side’s dimensions into that formula, we’d get the following:
4016 pixels / 300 PPI = 13.39 inches
6016 pixels / 300 PPI = 20.05 inches
So now you know the maximum size you can print that photo at that resolution. If you need to print smaller, then you can resize the pixel dimensions smaller as needed (when exporting). If you want to print larger, well then, my best advice is to consult with your chosen print service about how they handle that. Some may do enlargements, some may just print at a lower resolution. If you simply lower the resolution to 250 PPI (which many services do), then your max print size jumps to 16.06×24.06″.
Keep in mind that as print size increases, so does viewing distance (meaning the viewer stands further back), and as such, lower resolution values can be used with great results. Your results will vary based on the native pixel dimensions of your camera and how much (if any) cropping you may have already done, but now you know how to figure it out.
To Crop or Not
With the knowledge of what the maximum print size is for a given photo, you need to make the final decision on the size print you want, as that will determine if you need to crop your photo to change its aspect ratio to match the aspect ratio of the print. An aspect ratio is simply a way to express the relationship between the long and short side of an image. A square photo has an aspect ratio of 1:1, as the sides are equal. Typical DSLR photos have an aspect ratio of 2:3 or 1:1.5, meaning instead of equal sides, the long side is 1.5 times longer than the short side. Many common print sizes are based on that same aspect ratio, such as 2×3, 4×6, 8×12, 12×18, 16×24, and 20×30. Just divide the long side by the short side for any of those sizes and you’ll get 1.5. If you desire a print at any of those sizes, and your uncropped photo has a 2:3 aspect ratio, then no additional cropping is required.
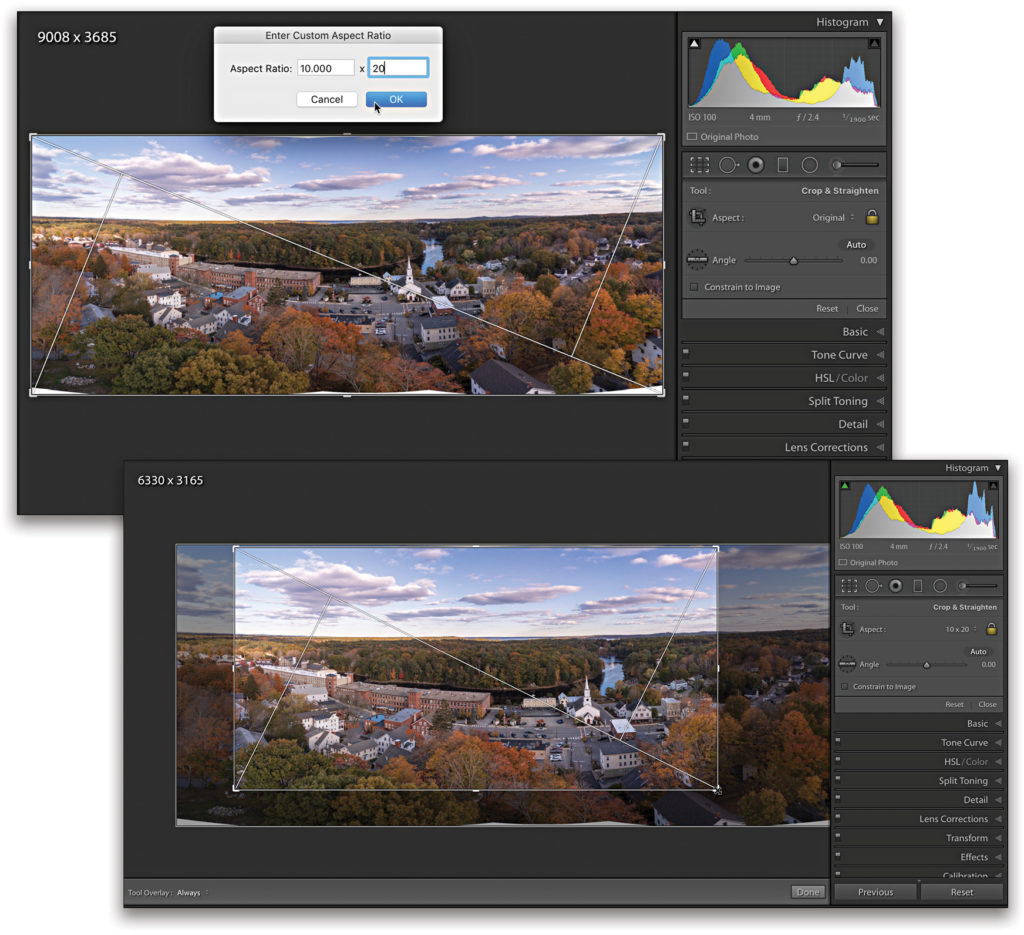
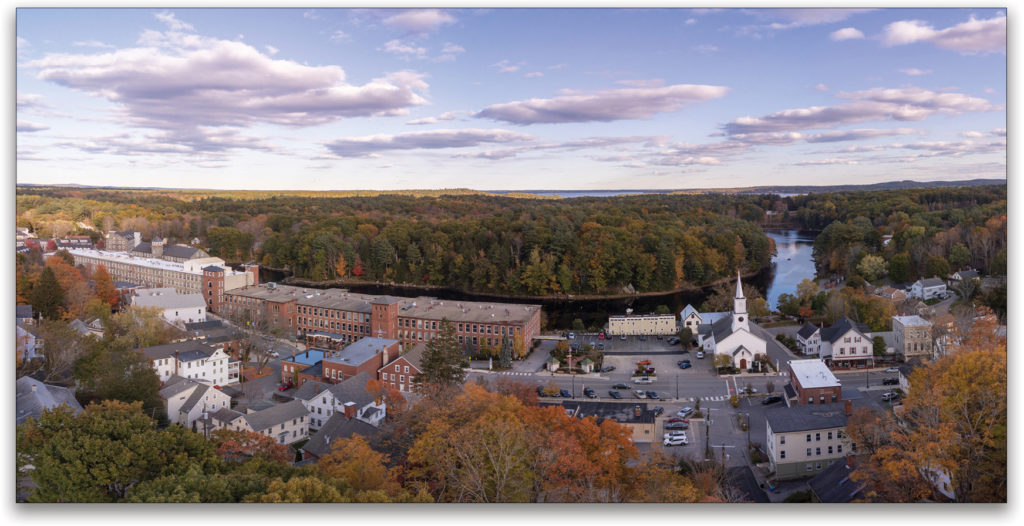
There are, however, common print sizes that are of a different aspect ratio, such as 5×7, 8×10, and 11×14. If we do the same math on the 8×10 we get 1.25. Close, but not quite. If you choose a print with a different aspect ratio, then you need to crop if you want your photo to match the aspect ratio of the print you’re making. To do that, press the R key (for cRop) to jump to the Crop tool, and click the Aspect drop-down menu to pick from one of the common preset aspect ratios in the list, or choose Enter Custom and enter your values in the resulting dialog. For example, let’s say I want to print this pano at 10×20″, which is clearly not the same aspect ratio as the camera or a standard preset aspect ratio.
Step One: Enable the Info Overlay by pressing the I key (for Info) to display the cropped dimensions.
Step Two: To activate the Crop tool, press R.
Step Three: Choose Enter Custom from the Aspect drop-down menu, enter 10×20 in the resulting dialog, and click OK.
Step Four: Adjust the resize handles for best composition
Step Five: Press D, Enter, or R to commit the crop and exit the Crop tool.
Note: Lightroom saves up to five custom preset aspect ratios at the bottom of the Aspect drop-down menu, and the oldest in the list will be pushed off when a sixth custom ratio is entered. Also, if you enter a custom ratio that’s the same as one of the existing presets, it switches to showing the preset values instead of what you entered.
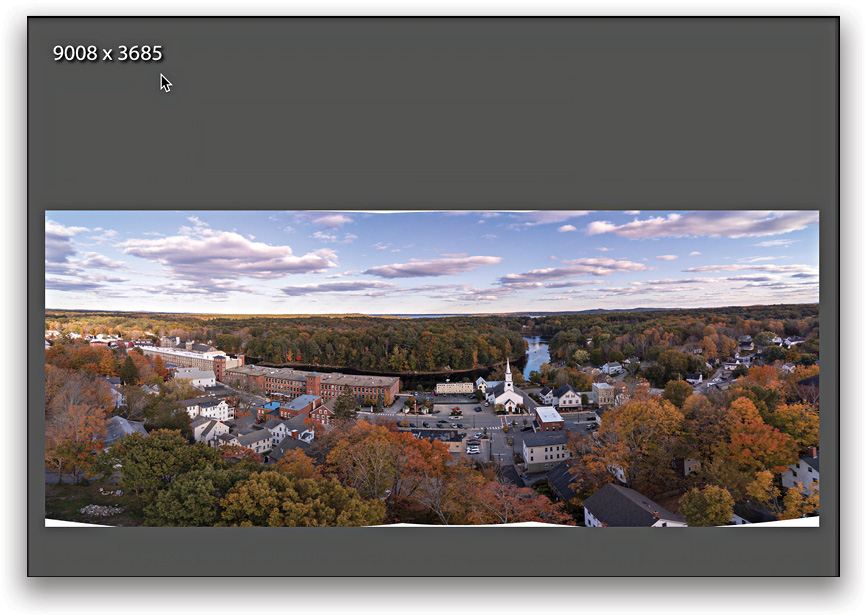
The starting pixel dimensions of my pano were 9008×3685, and after cropping, they were reduced to 6330×3165. Do I have enough pixels for a 20″ print at 300 PPI? 6330 pixels / 300 PPI = 21.1 inches, so yes I do.
Export Time
Once you’ve made all those decisions, its time to put it all together and export. We looked at the File Settings section in the Export dialog already, but when it comes to image sizing and resolution, that’s controlled by the options in the Image Sizing section. In my example above, I would check the Resize to Fit box, select Dimensions from the drop-down menu, enter 10×20 inches, and 300 PPI in the Resolution field. Lightroom would then resize my photo’s pixel dimensions smaller to precisely match my desired size.
If, however, you utilize a print service that simply wants you to upload the “highest resolution” or “largest native file dimensions,” then all cropping and sizing will happen on their end based on the print sizes you choose. There’s nothing wrong with this approach as long as you like the end results. To do this, you simply leave Resize to Fit unchecked and the exported copies will have the same pixel dimensions as the source photos. You can still enter 300 PPI to add that to the exported photo’s metadata.
Output Sharpening?
The Export dialog also gives you the option to apply output sharpening to your exported copies. This is the same algorithm that’s applied in the Print module. Whether to apply output sharpening, and how much, are very subjective decisions. My recommendation would be to do a couple of test prints (with and without sharpening and at different sizes) once you settle on a print service. Your eyes will be the best judge of what you think looks best on your photos.
Enjoy your prints!
This article originally published in Issue 46 of Lightroom Magazine.


