There are (at least) two sides to most everything: day and night, stillness and movement, coins, arguments, etc. The subjects we photograph have multiple sides, too, be it happy and mad or serious and silly; however, that’s tough to capture in one pose. In this column, you’ll learn how to combine two poses into a creative portrait using nothing but color channels.
Step One:
Open two photos from the same shoot on two different layers within a single Photoshop document (this technique works best if the photos have a solid dark or light background). There are many ways to do this; however, a quick and easy method is to choose File>Scripts>Load Files Into Stack. In the dialog that opens, click Browse and then navigate to the photos you want to combine. Click one photo to select it, Shift-click the other, and then click Open. Make sure both checkboxes at the bottom of the dialog box are turned off and then click OK. Photoshop puts each photo on its own layer within the same Photoshop document. Decide on the main pose and then drag that layer to the top of the layer stack.
Tip: If you’re starting in Lightroom, select two thumbnails in the Library module and then choose Photo>Edit In>Open as Layers in Photoshop.
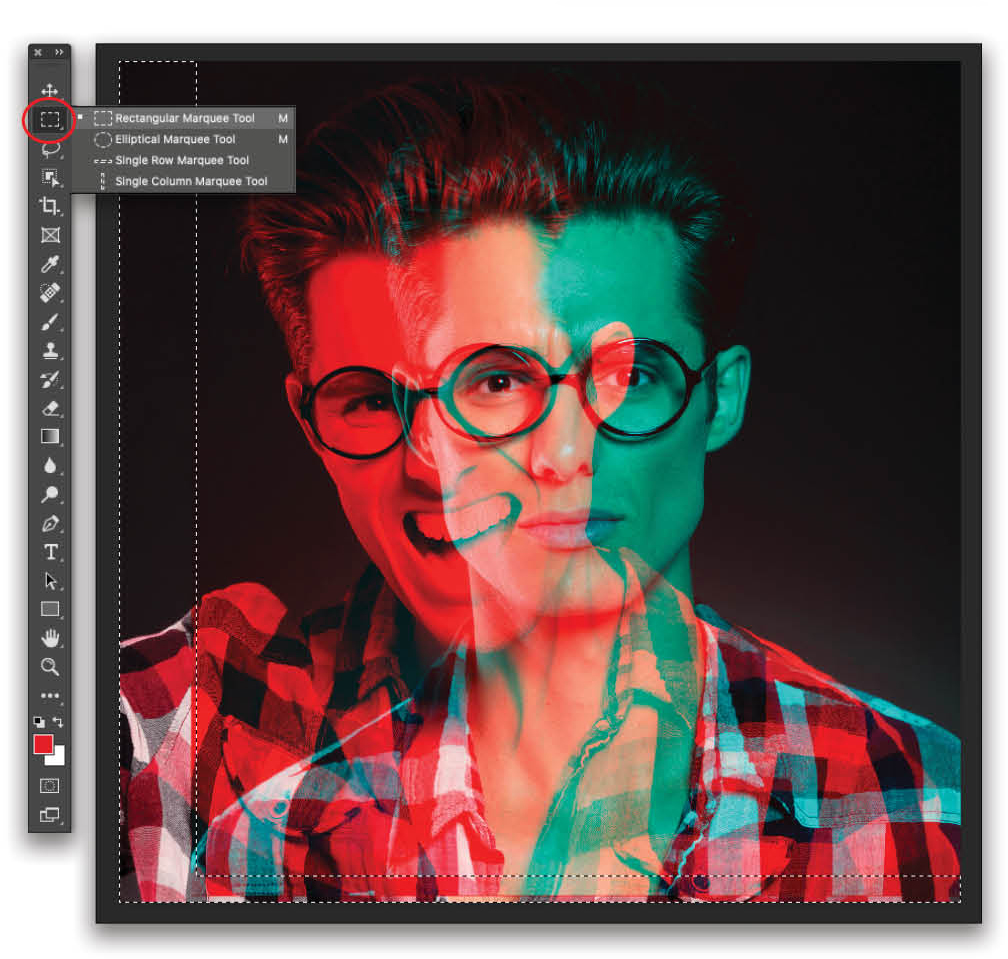
We actually started out with an Adobe Stock image that included several poses in the same document. You can find the image by clicking here. Sign in with your Adobe ID, and then download the preview image to your Libraries panel (Window>Libraries). Double-click the image in the Libraries panel to open it in Photoshop. Use the Rectangular Marquee tool (M) to select the first headshot you want to use, and go to Edit>Copy. Create a new document (File>New), click Create, and then go to Edit>Paste. (Tip: After you copy something, when you go to create a new file in Photoshop, it defaults to the size of the copied element. All you have to do is click Create.) Now select, copy, and paste the second headshot you want to use into the new document.
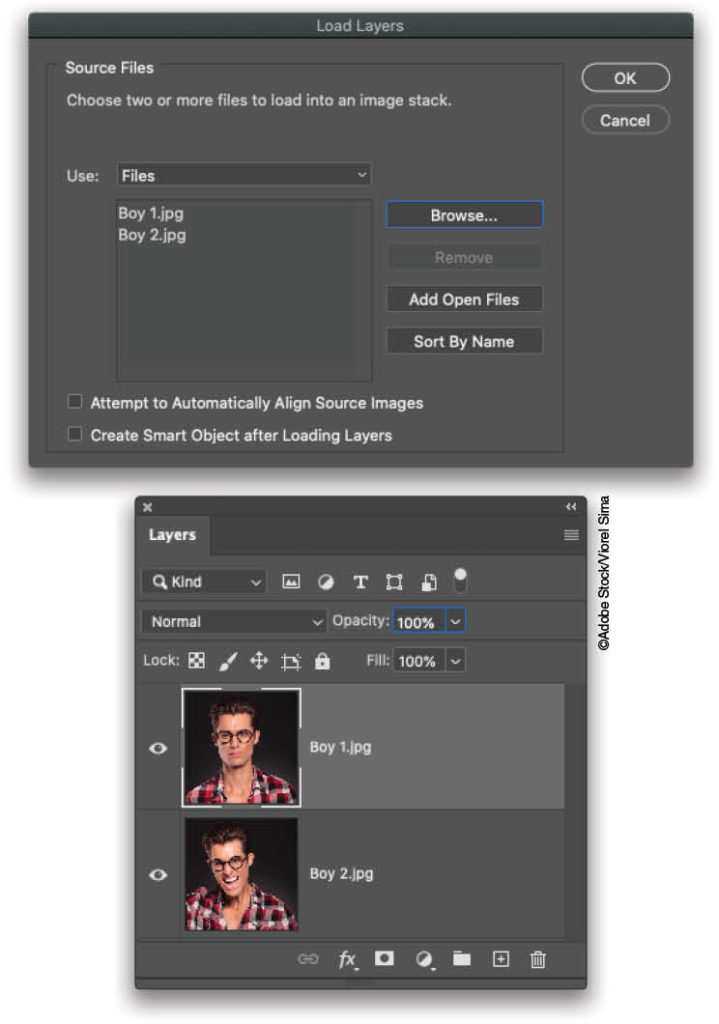
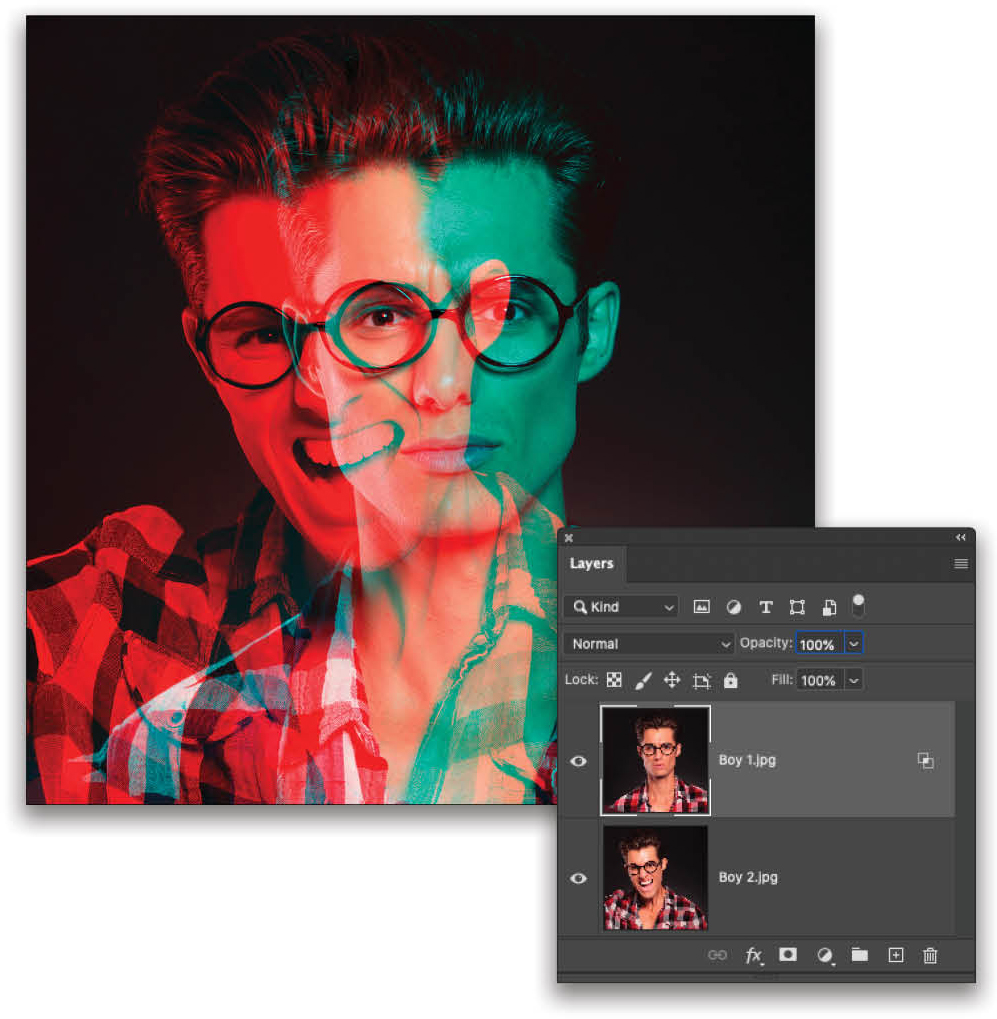
After you have the two images you want in the same document, you can delete the Background layer, and then rename the layers by double-clicking on their names in the Layers panel. To make it easier to work with the Adobe Stock preview image, increase the resolution of the file. (We normally don’t recommend enlarging images, but this is only for practice purposes.) Go to Image>Image Size, turn on the Resample checkbox, select Preserve Details from the Resample drop-down menu, set the Width to 800 pixels, and click OK.
Step Two:
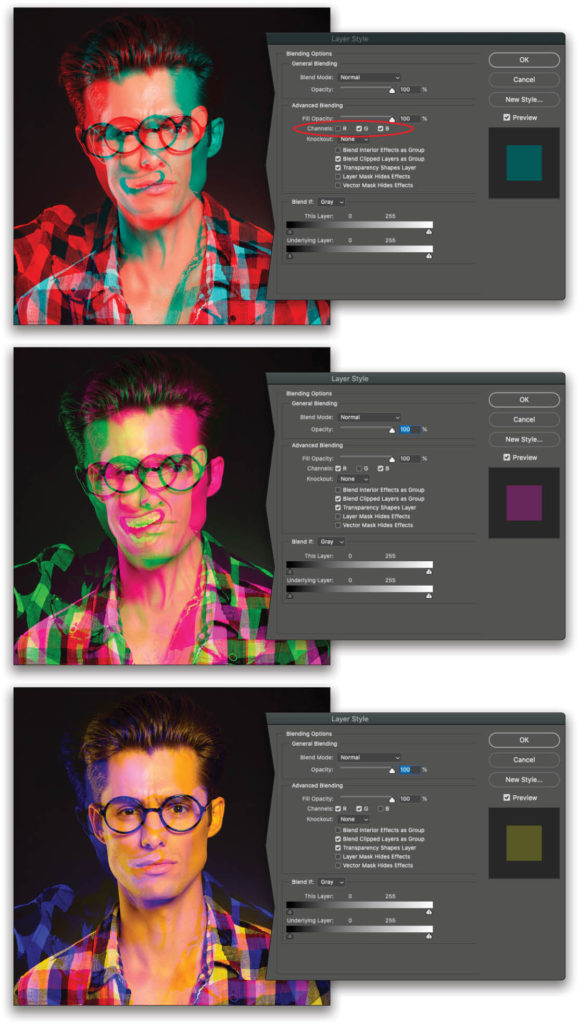
Double-click the top layer’s thumbnail in the Layers panel, and in the Layer Style dialog that opens, turn off one of the color channels in the Advanced Blending section: R, G, or B for red, green, or blue, respectively (the checkboxes are circled here). Photoshop then excludes that channel from blending with the layer below, producing the look of a double color exposure. Here we turned off each of the color channels one by one to see which one we liked best. We’ll continue with the red channel excluded for this example, though excluding green or blue produces interesting looks, too. Click OK.
Step Three:
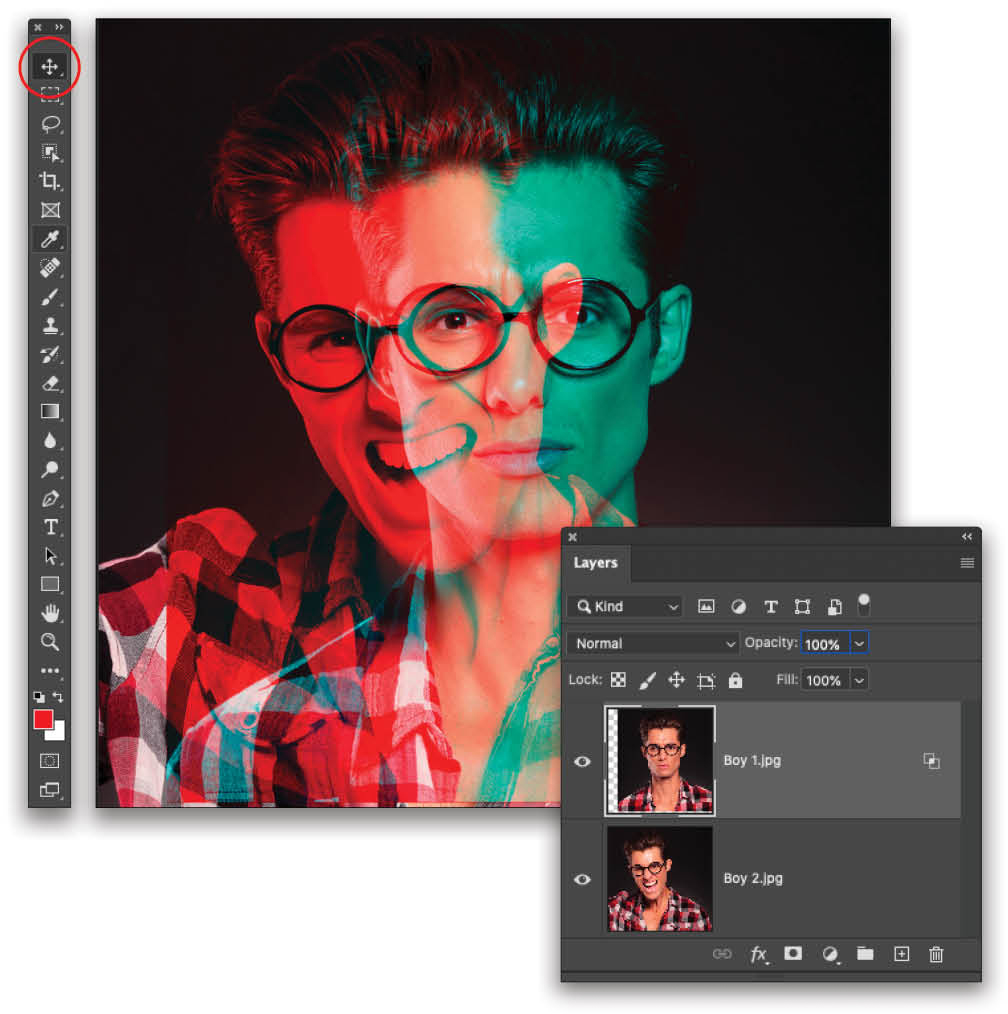
Press V to grab the Move tool (circled) and then click-and-drag, or use the Arrow keys on your keyboard, to reposition the top layer so you can more clearly see both poses. If you overlap the faces like we have here, try to line up one of the eyes (here that’s his left and right eye across the two layers).
Step Four:
Moving the top layer produces empty (transparent) spaces on that layer, which results in visible hard edges. These areas need to be filled or cropped out. Happily, solid colored backgrounds are easy to fill so let’s do that. Press M to grab the Rectangular Marquee tool (circled) and then click-and-drag to select the empty areas on the top layer. Try to include a few nearby pixels along the edge of the top layer in the selection, which gives Photoshop some pixels to work with in the next step. To select two different areas at the same time, Shift-click-and-drag after selecting the first area.
Step Five:
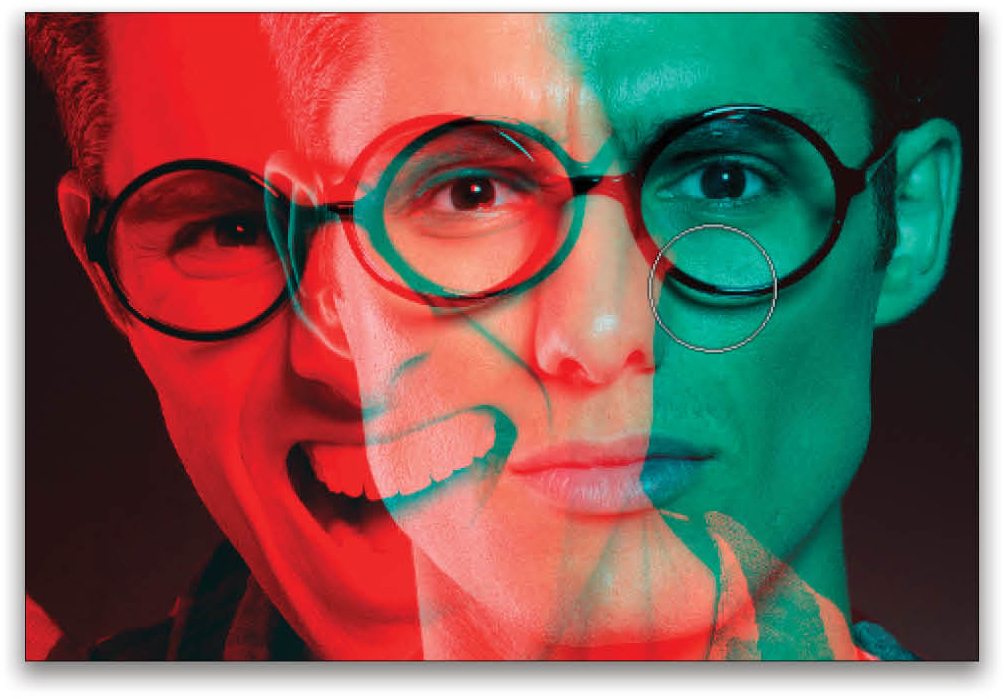
Choose Edit>Content-Aware Fill. In the special workspace that opens, use the Content-Aware Fill panel on the right to tell Photoshop where to sample (copy pixels from) to create the fill. On this image, the default Auto option (circled) works fine. On your own imagery, however, you may need to exclude an area from sampling by painting with the Sampling Brush tool (B) that’s automatically activated when you entered this special workspace (in this example, the brush cursor is visible on the left side of his forehead). In the Output Settings section, set the Output To drop-down menu to Current Layer (also circled) and click OK.

Step Six:
Photoshop fills in the empty areas. If you don’t like the results, choose Edit>Undo Content-Aware Fill and then repeat Step 5. If the results are good, choose Select>Deselect.
Step Seven:
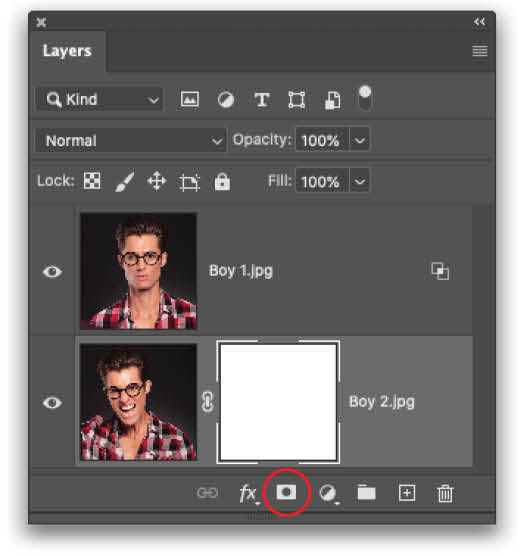
Use a layer mask to hide any odd-looking overlapping areas, such as his left ear on the bottom layer. Start by activating the layer with the pixels you want to hide and then add a layer mask by clicking the circle-within-a-square icon at the bottom of the Layers panel (circled).
Step Eight:
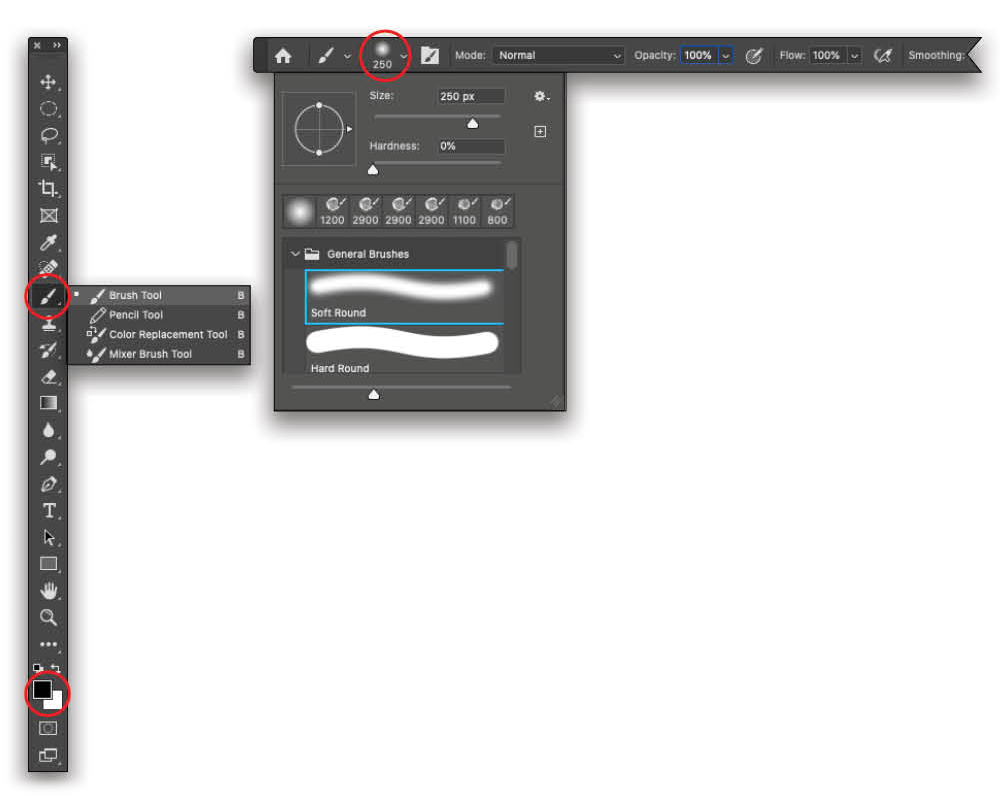
Grab the regular Brush tool (circled) by pressing B on your keyboard. In the Options Bar, click the Brush Preset Picker (also circled) and choose the Soft Round Brush in the General Brushes folder. Set the brush size to be a little bigger than what you’re hiding (250 pixels was used here) and make sure Mode is set to Normal and that Opacity is set to 100%. On your keyboard, press D to set the color chips at the bottom of the Toolbar (circled) to the default values of black and white. Press X to flip-flop the color chips so that black is on top. (In the realm of the layer mask, painting with black conceals and painting with white reveals.)
Step Nine:
With the layer mask active, brush across the area you want to hide (the ear). Don’t worry if you hide too much; simply press X to flip-flop your color chips so white is on top and then brush across an area to reveal it again. Chances are, you’ll do a lot of flip-flopping color chips to get the mask just right.
Step 10:
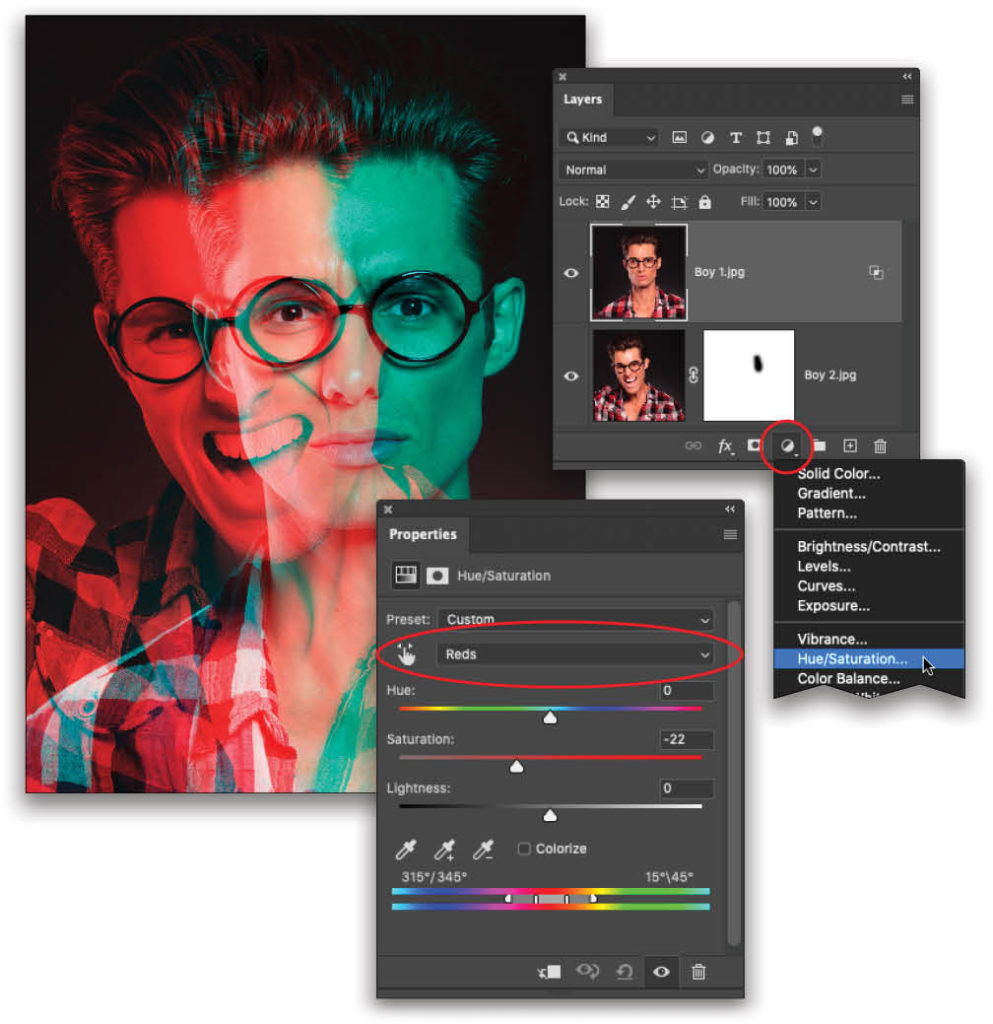
The technique is basically finished, but you can tweak the colors if they’re too intense or if you want to make one pose stand out more than the other. To do that, click to activate the top layer in your Layers panel. Then click the half-black/half-white circle at the bottom of the Layers panel (circled), and choose Hue/Saturation. In the Properties panel that opens, pick the color you want to adjust (say, Reds) from the drop-down menu (also circled) near the top of the panel, and then drag the Saturation slider to the left to make it less intense (a value of –22 was used here).
Step 11:
To adjust contrast, click the half-black/half-white circle at the bottom of the Layers panel again (circled) and choose Brightness/Contrast. In the panel that opens, drag the Contrast slider rightward to increase it (a value of 25 was used here).
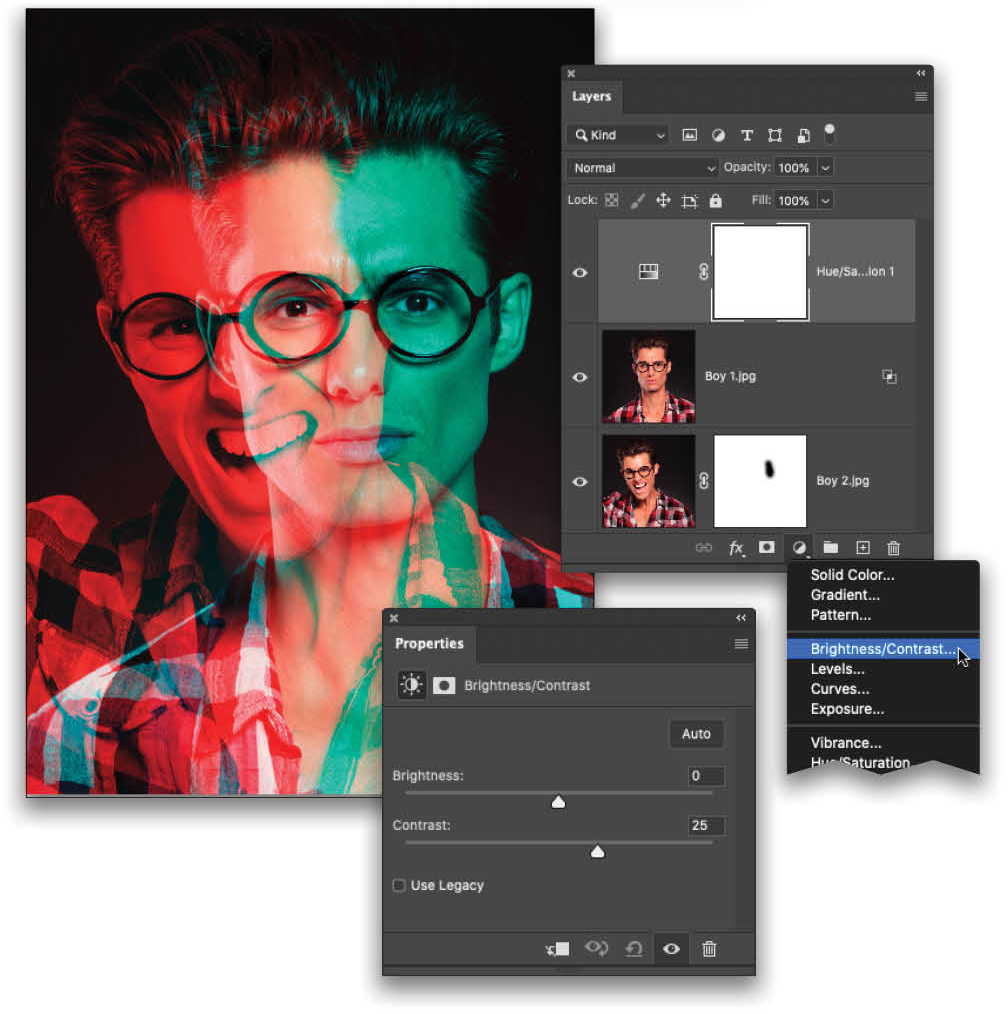
Tip: For more control over the contrast in each color channel, try using a Levels or Curves adjustment layer instead.
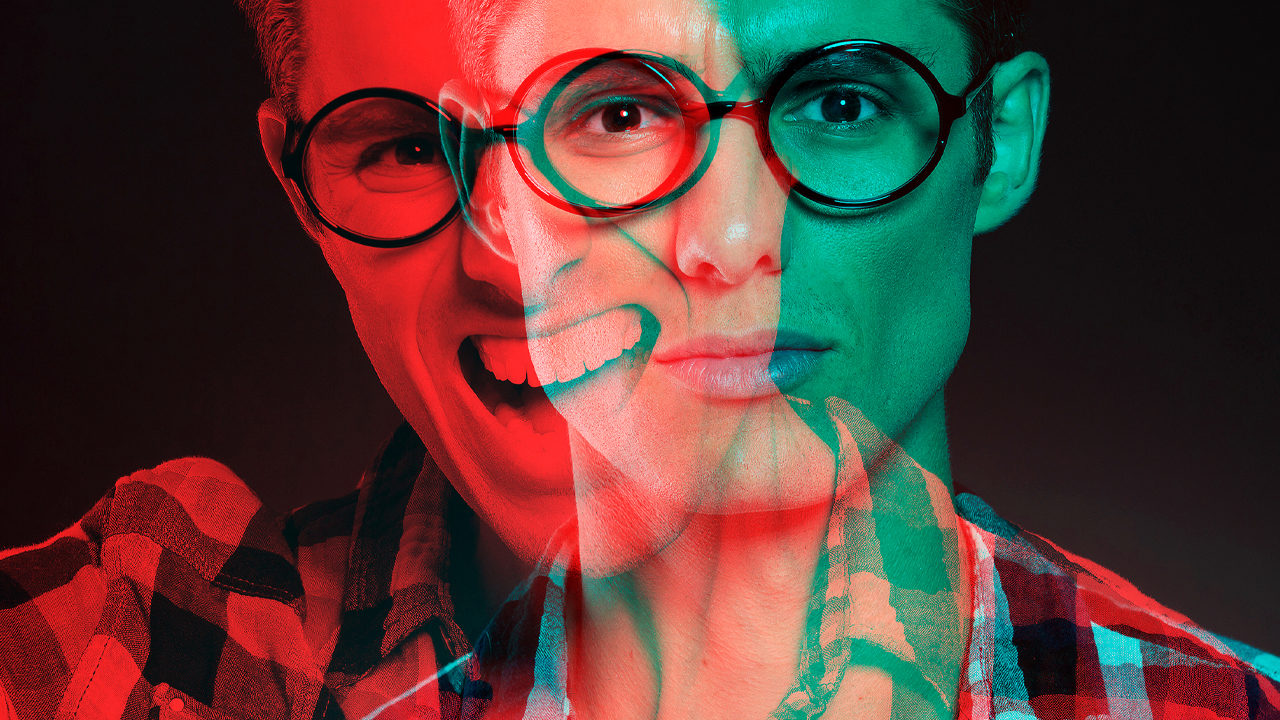
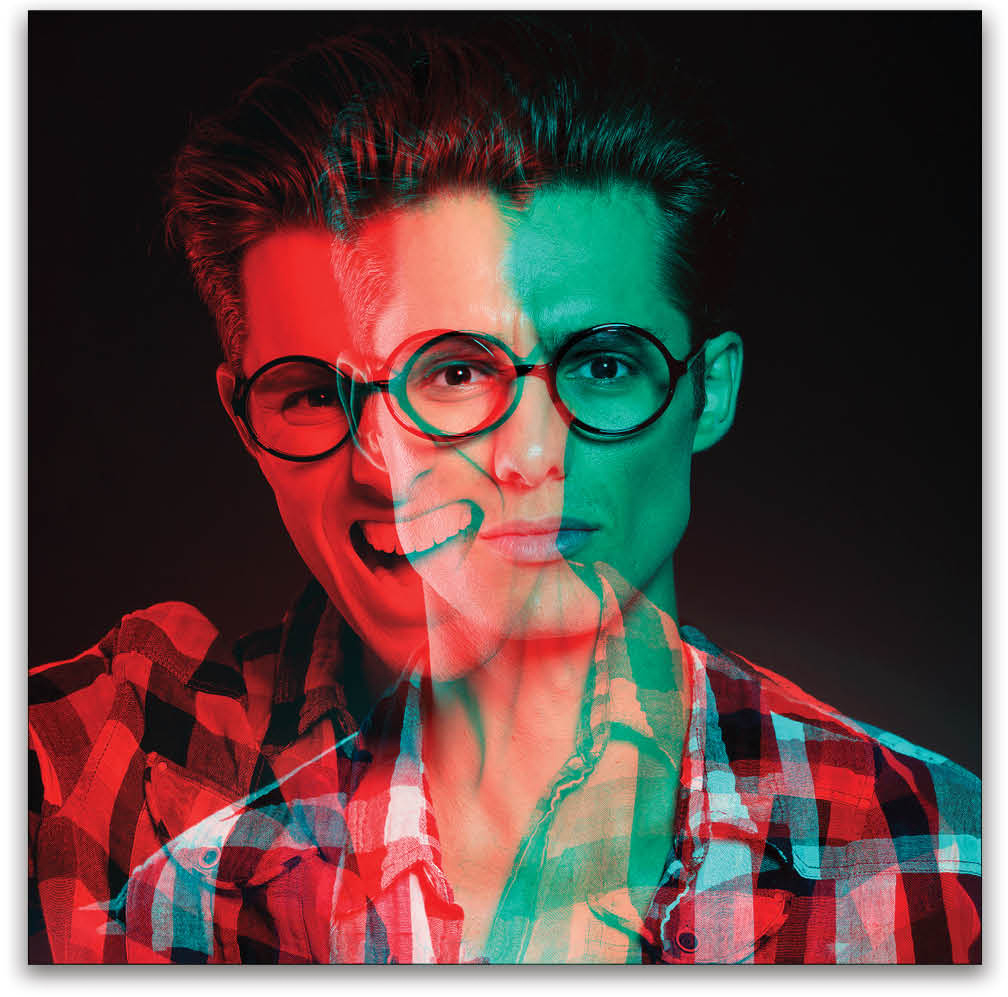
And, here’s our final double color exposure portrait.
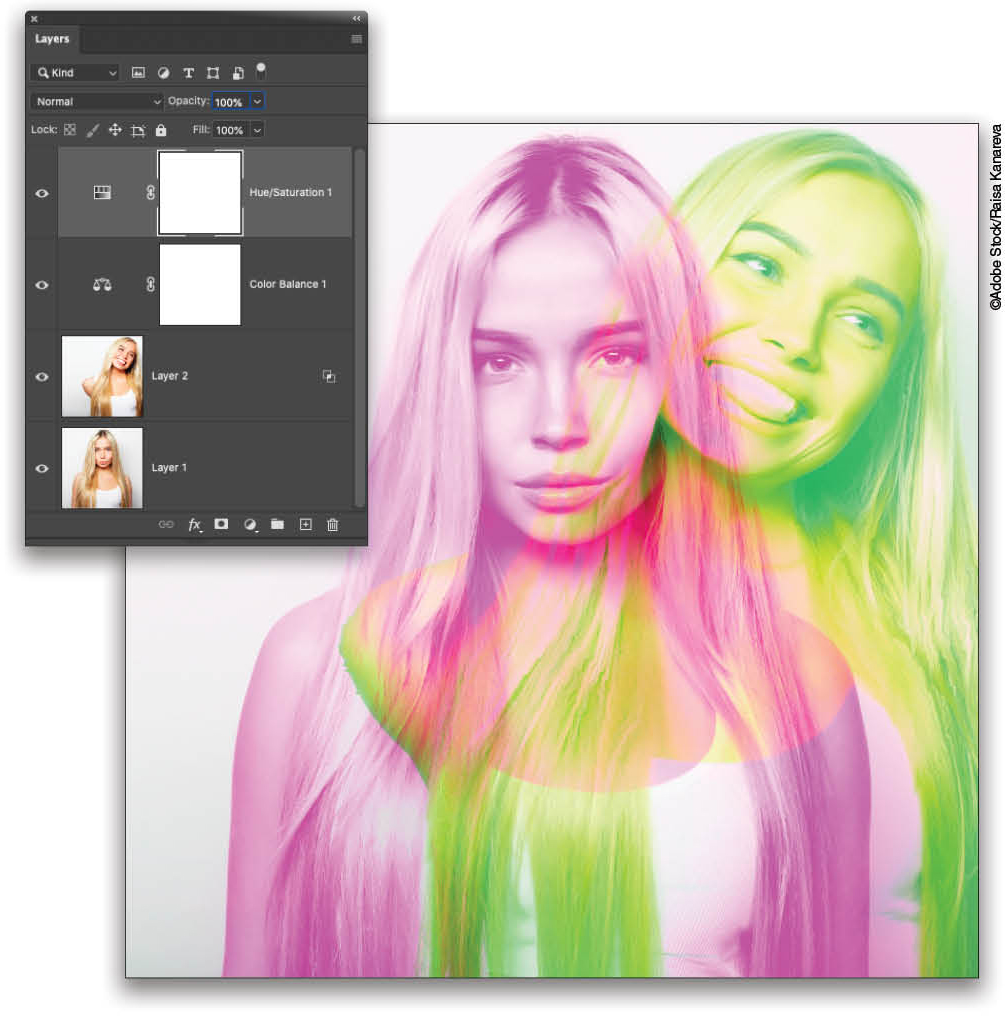
Here’s the result of the same technique on a different image, with the green channel excluded. To make the magenta pose stand out more, your author picked Greens in the Hue/Saturation adjustment layer and then dragged the Lightness slider rightward to make it lighter. You could also pick Magentas and drag the Lightness slider leftward to make it darker. I also used a Color Balance adjustment layer to adjust the colors.
As you can see, this is an easy, yet compelling technique, especially for any kind of student or graduation-related shots. Heck, you can even use it on pet photos! Until next time, may the creative force be with you all.
This article originally published in the May, 2020 issue of Photoshop User magazine.


