This tutorial is all about making art with those photos that you don’t quite know what to do with; you know, the ones that aren’t composited right, are a little blurred, etc. We all have them, and they sit on our hard drives but never get used. So, we’re going to use a couple of these types of images to create some art using effects in Photoshop. These new images can be used for postcard designs, notecards, or even art for your home.
For those of us old enough to remember the days of printing, there were all sorts of print techniques available to us. One in particular was called a Risograph, which was like a photocopier. It printed one color at a time and you could feed the print back through to print a second image or color to get some really cool poster effects. Now, if you’ve followed my past tutorials, you’ll know I’m a big fan of all things retro.
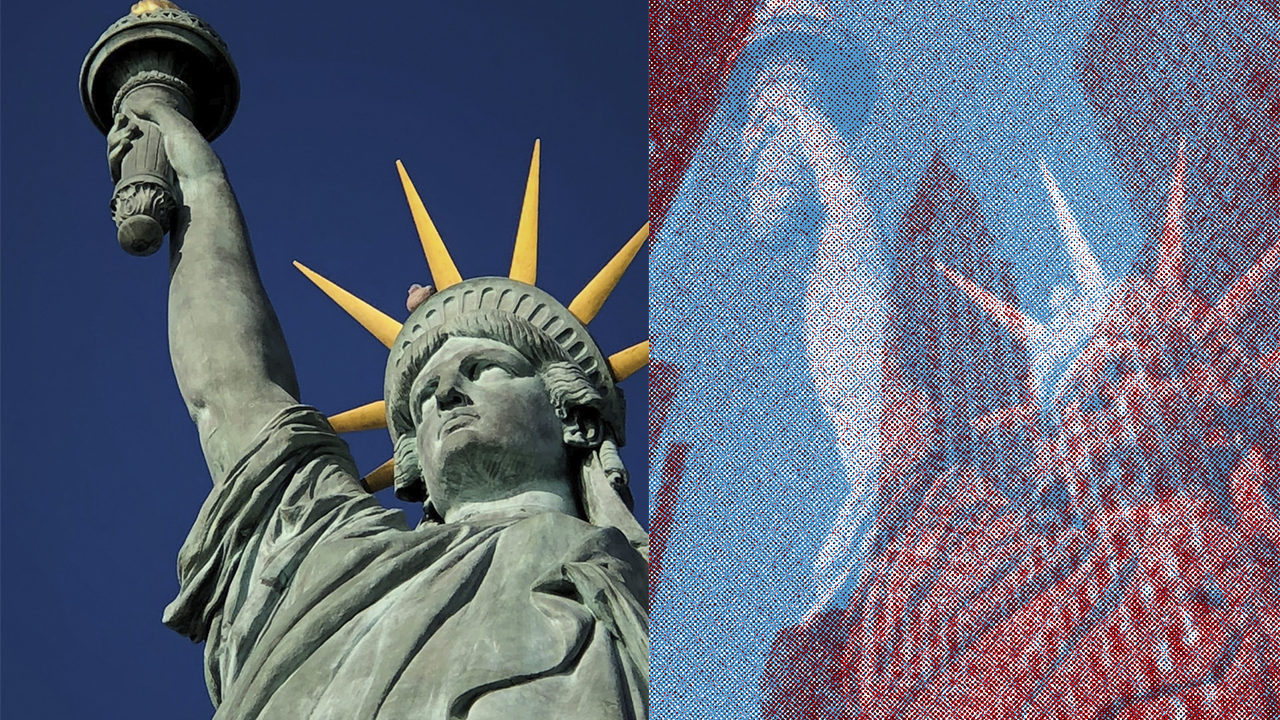
So let’s begin with some images. I don’t actually shoot that much, so I grabbed a couple images from a free photography website called Unsplash, but you can obviously use your own. I’m going to combine an image of the Chrysler Building with an image of the Statue of Liberty.
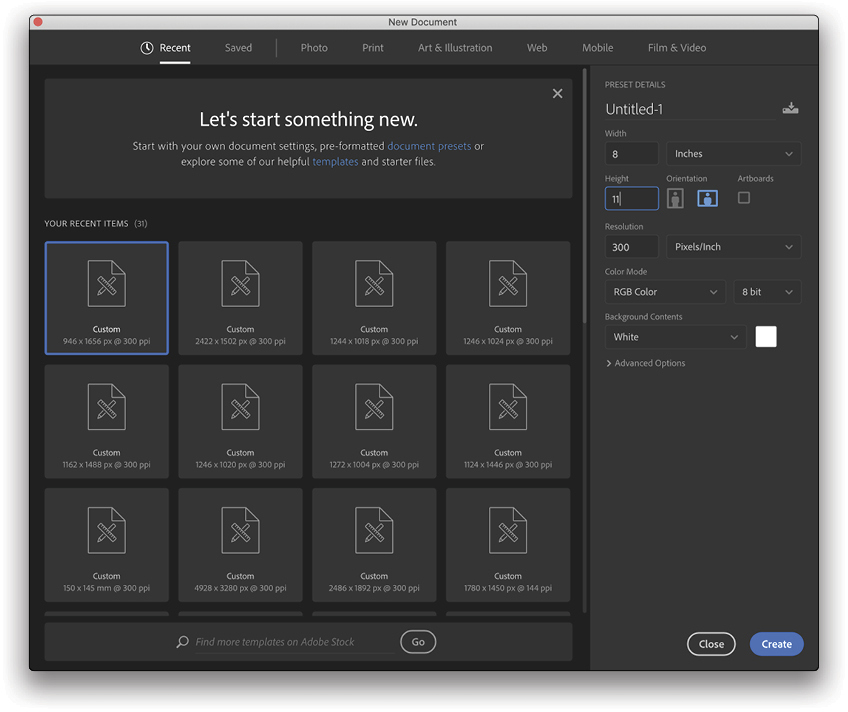
Step One: First, launch Photoshop, go to File>New, and create an 8×11″ document at 300 ppi. Why did I choose this size? So you can print it out and frame it if you come up with a combination of images that you like; plus, you can also make smaller prints.
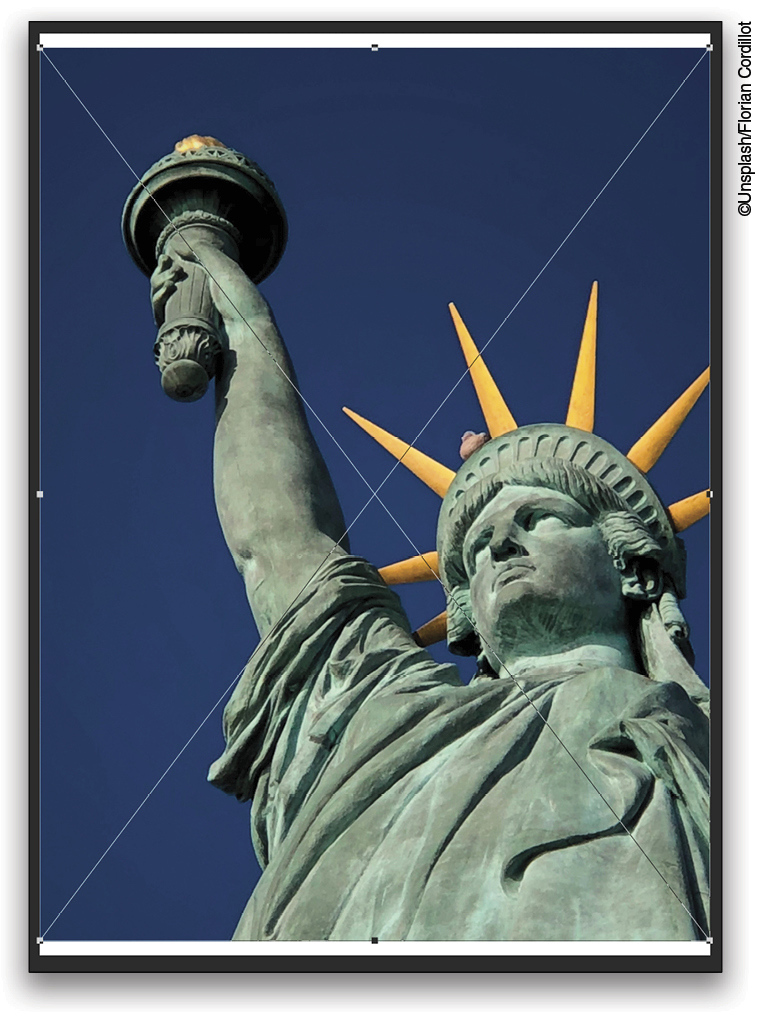
Step Two: We need to place our first image into the document. Go to File>Place Embedded (we don’t need this image linked, as we’ll do all the editing on the embedded copy, leaving the original alone). If the image doesn’t completely fill the document, just resize it by holding down the Option (PC: Alt) key and dragging a co rner point to resize it from the center. (Note: Photoshop CC 2019 users no longer need to hold the Shift key to maintain proportions!) To fill the frame, it’s okay to bleed the images outside the edges of the document. Press Enter to commit the transformation. Here’s a link to the image we’re using here.
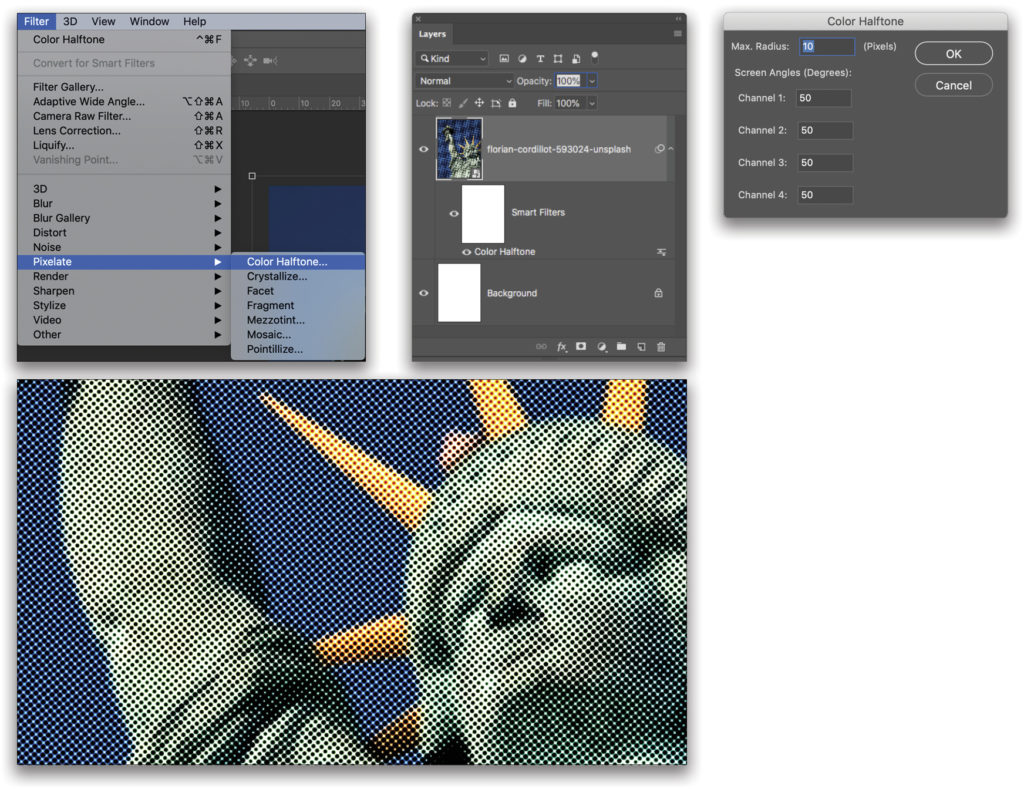
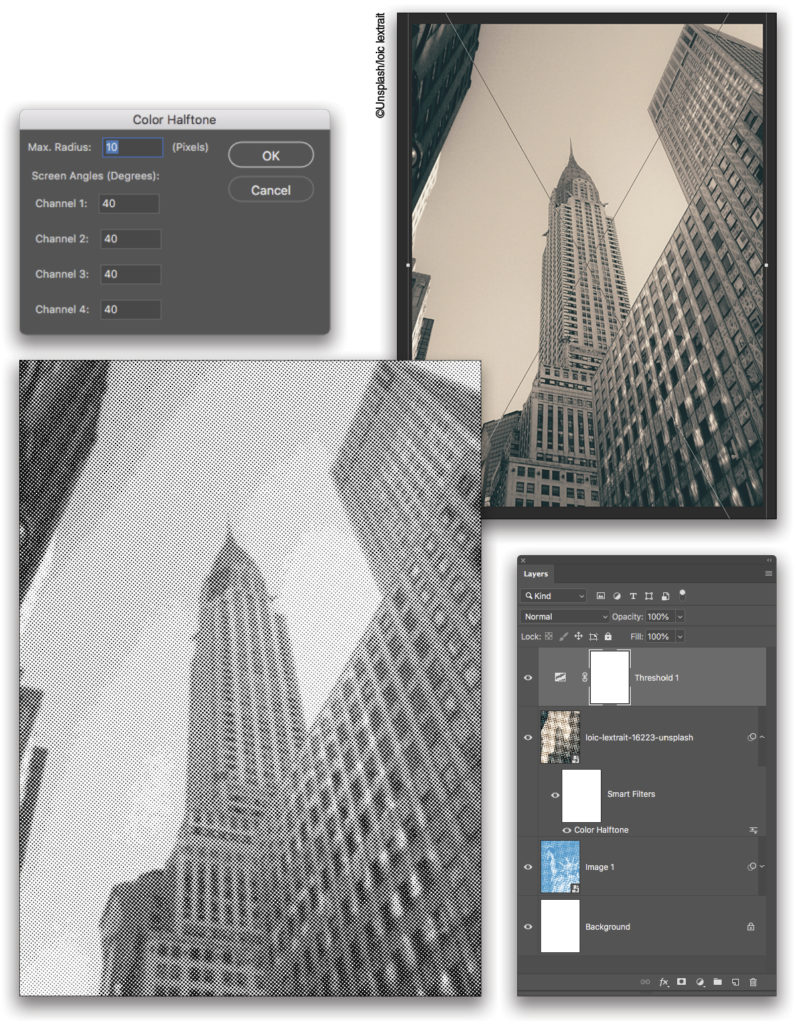
Step Three: The first effect we’ll add is a Color Halftone filter. I love the halftone effect because it can quickly hide a multitude of sins, making any image useable for a project like this. Plus, it looks really cool. Go to Filter>Pixelate>Color Halftone, and you’ll be presented with a settings dialog. You don’t get a preview of the effect (come on, Adobe, add this!), so after experimenting, I set the Max. Radius to 10 and all the other settings to 50. Click OK. Because the layer is a smart object, Color Halftone is added as a smart filter, which means you can make changes to it after you apply it.
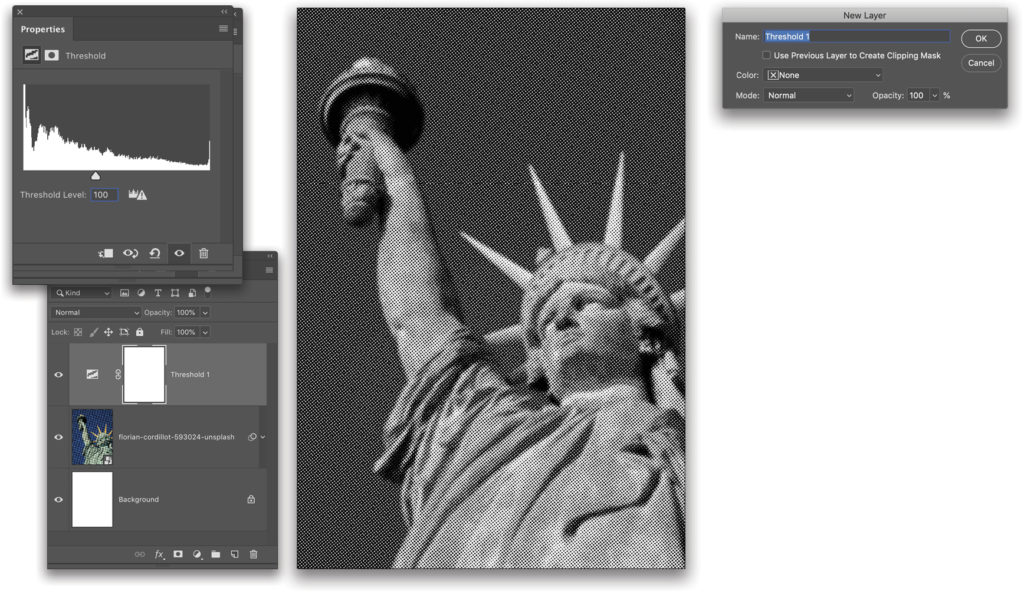
Step Four: We now want to make the Color Halftone effect even less uniform, as well as remove all the color from the original photo. Go to Layer>New Adjustment Layer>Threshold, and click OK to make a simple black-and-white, low-resolution version of the image. In the Properties panel (Window>Properties), play around with the slider below the histogram until you get a satisfactory result; I found a Threshold Level of 100 worked for this image. The rougher you make the image, the cooler it will look—trust me!
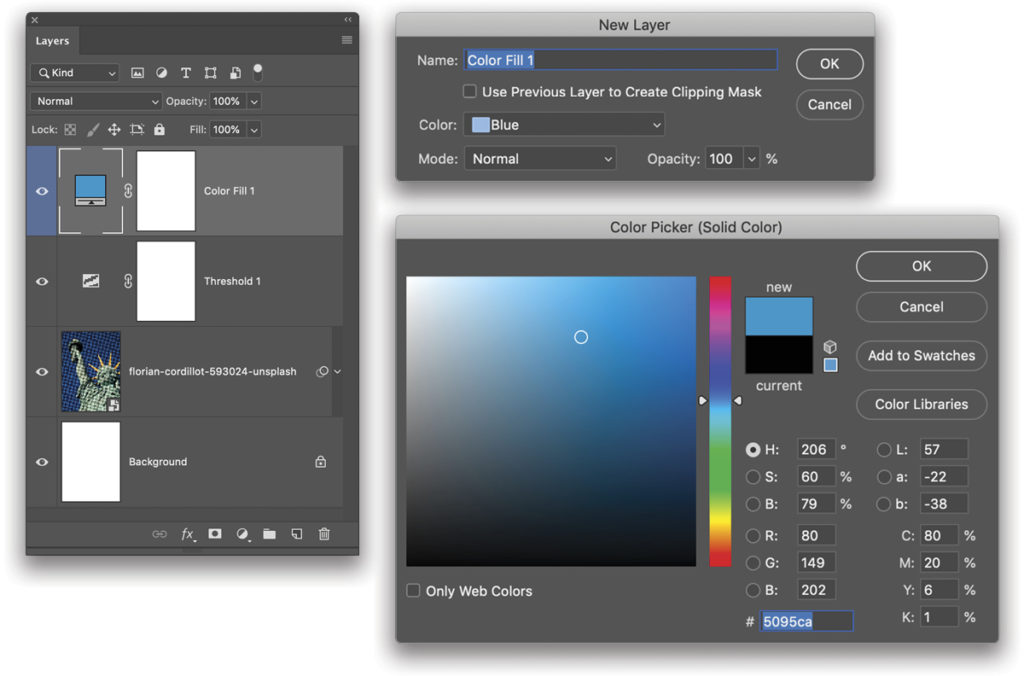
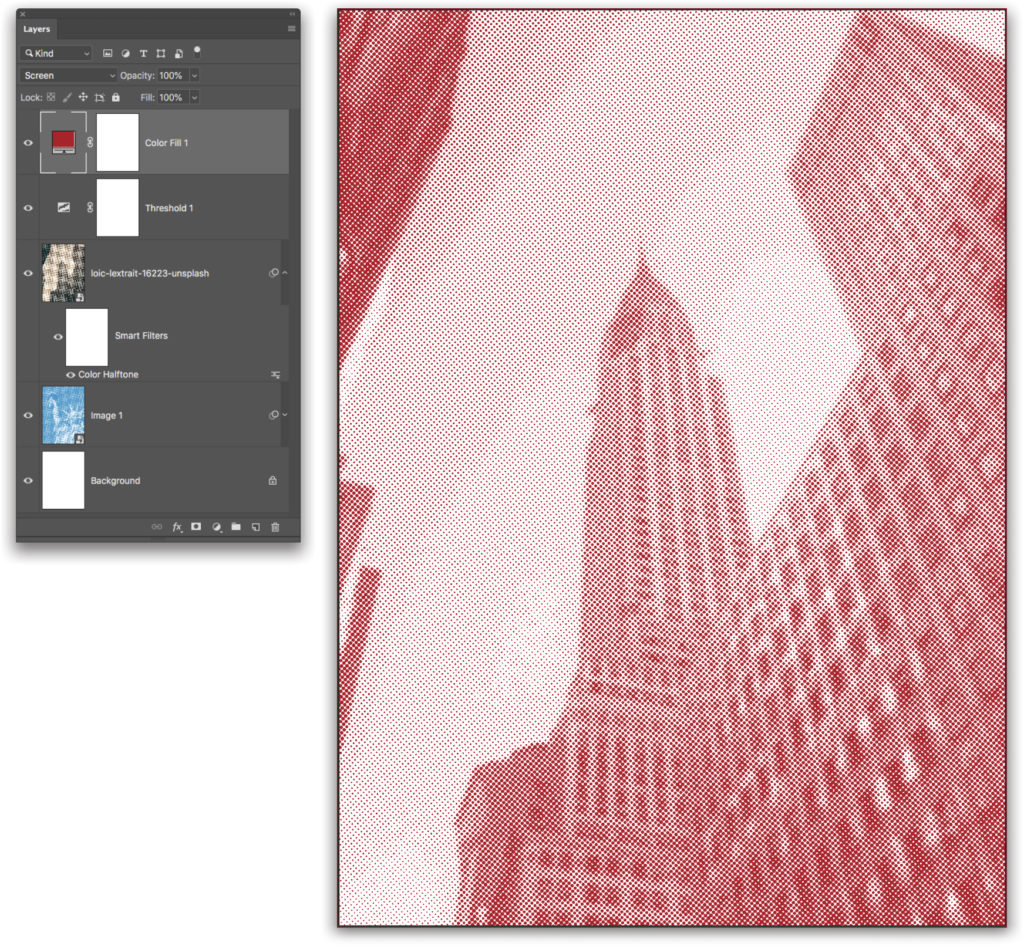
Step Five: Even though we’ve taken this image down a dark alley and roughed it up, we’re still not finished. We can apply another effect to make it look less uniform, but before we do, let’s add a single color to the image, as this effect is for a double-color image that’s supposed to look as if it went through a Risograph printer. The two colors are personal preference, but for this example, I’m going with blue for this first image and red for the second image. To add color, go to Layer>New Fill Layer>Solid Color, click OK, and you’ll be presented with the Color Picker. Pick your first color and click OK. You’ll have a solid color layer and you won’t be able to see the image.
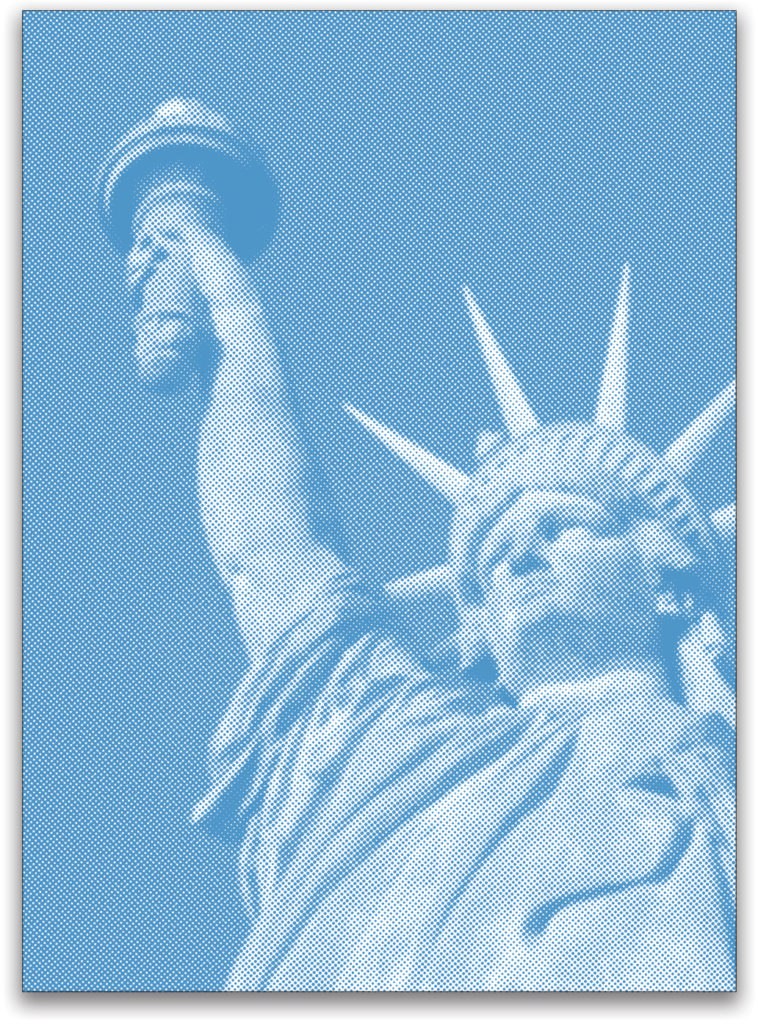
Step Six: Change the blend mode from Normal to Screen near the top left of the Layers panel, and you now have a wonderful blue halftone threshold image. We’re still not finished with this layer; we’re going to rough it up and randomize the halftone dots a little more.
Step Seven: The filter we’re going to apply in the next step is something that you might not think to use, and just like most effects in Photoshop, half the fun is in the trial and error. Before we add that filter, click on the top layer in the Layers panel, and then Shift-click the image layer to select all the layers that make up the effect. Then, go to Filter>Convert for Smart Filters to turn the selected layers into a smart object ready for the next effect, which is in the Filter Gallery. Double-click the name of the new smart object, and rename it “Image 1.” If you need to access any of the layers in the smart object to make an edit, double-click the smart object thumbnail to open a temporary document, make your changes, and save and close the document.
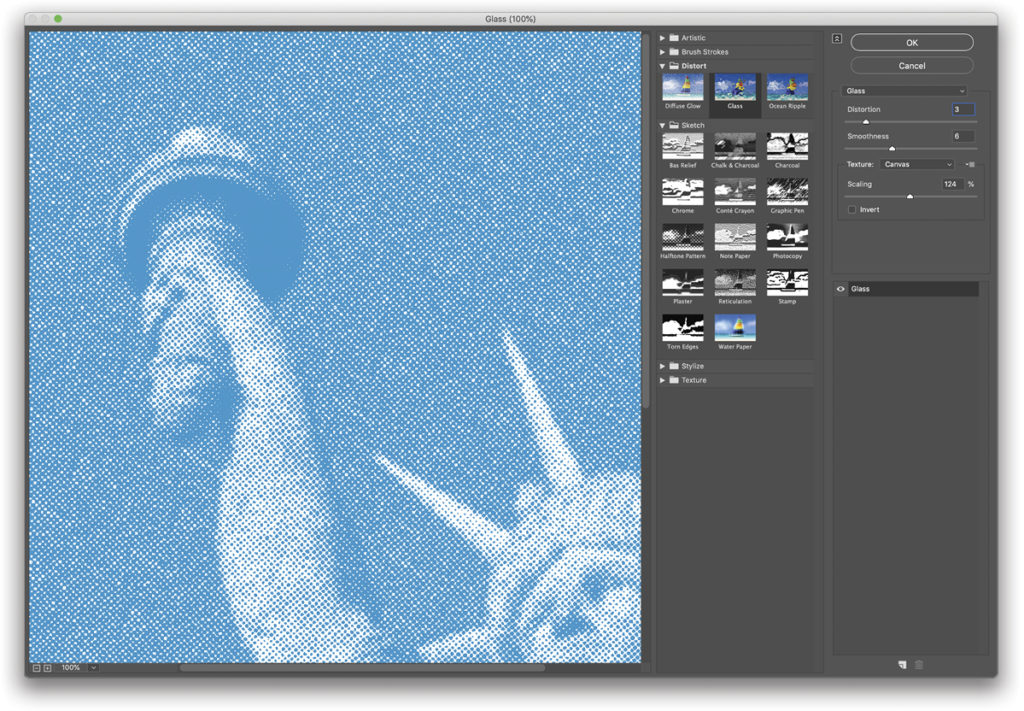
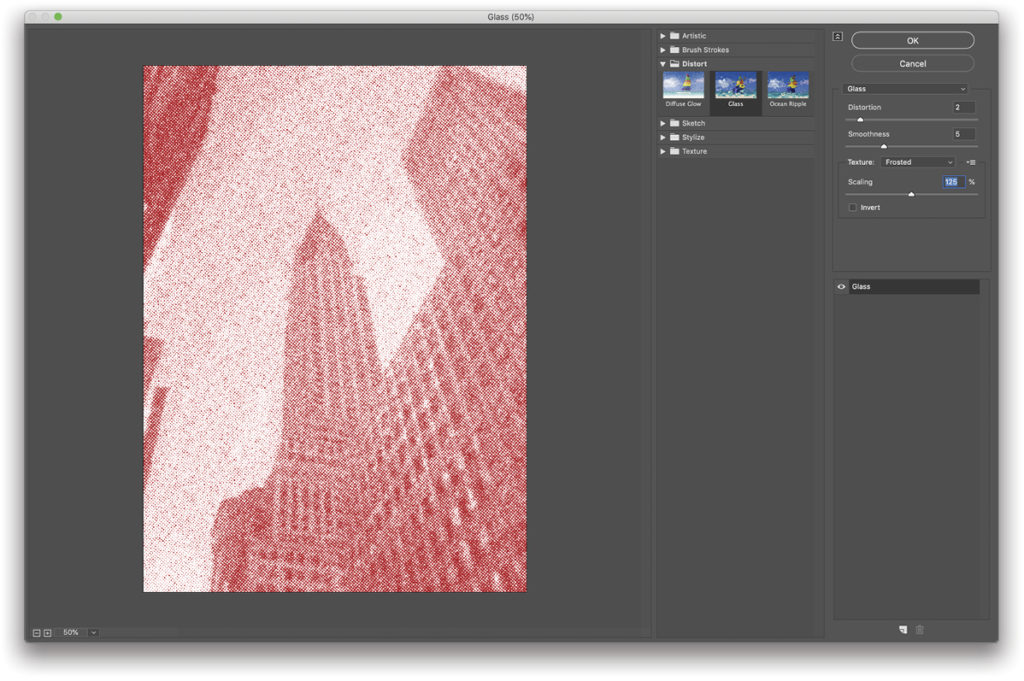
Step Eight: Go to Filter>Filter Gallery, expand the Distort folder in the resulting dialog, and choose Glass. In the settings on the right, change Distortion to 3, Smoothness to 6, Texture to Canvas, and Scaling to 124%. Click OK. This creates a more random, rough-looking halftone effect, but it also looks organic, so no two prints would appear the same. Save your file at this point, as we’re ready to work on our second image.
Step Nine: Next, we need to place our second image, so go to File>Place Embedded and select your image (in this example, we’re using an image of the Chrysler Building, which you can find here ). Once again, resize the image to fill the frame. We’re going to go use the same filters for this image but with slightly different settings, as there’s less color in this image.
Step 10: Go to Filter>Pixelate>Color Halftone again. Set the Max. Radius to 10, as before, but this time set all the Channels to 40 just to make the halftone pattern slightly different. Next, add another Threshold adjustment layer, but this time set the Threshold Level to 10 in the Properties panel; you’ll get a little banding but it all adds to the roughness.
Step 11: Now we’ll add our red color to the second image by using Layer>New Fill Layer>Solid Color and picking a suitable red from the Color Picker. The color doesn’t really matter; we all like different shades, so pick something that you think works. You can always change it by double-clicking the Color Fill layer’s thumbnail in the Layers panel. Once you’ve applied your red color, select the Screen blend mode to lock that red onto the dots.
Step 12: Our next step is to add the Glass filter, so select all the layers that make up the second image, convert them to a smart object, and rename the new layer “Image 2.” Then, apply the Glass filter again, but this time set Distortion to 2, Smoothness to 5, Texture to Frosted, and Scaling to 125%. Click OK, and now we have our second image ready to combine with the first.
Step 13: Now we’re going to combine the two images for a kind of double-exposure effect. We’ll use blend modes for this, which is the fun part. There’s no right or wrong blend mode (well, some aren’t so good, but it’s all about experimentation), and because Photoshop CC 2019 gives you a live preview as you hover your cursor over the blend modes in the drop-down list, it’s easy to find the effect you want. I quite like Darken, Darker Color, Overlay, and Soft Light, but some of the others make for some interesting effects.
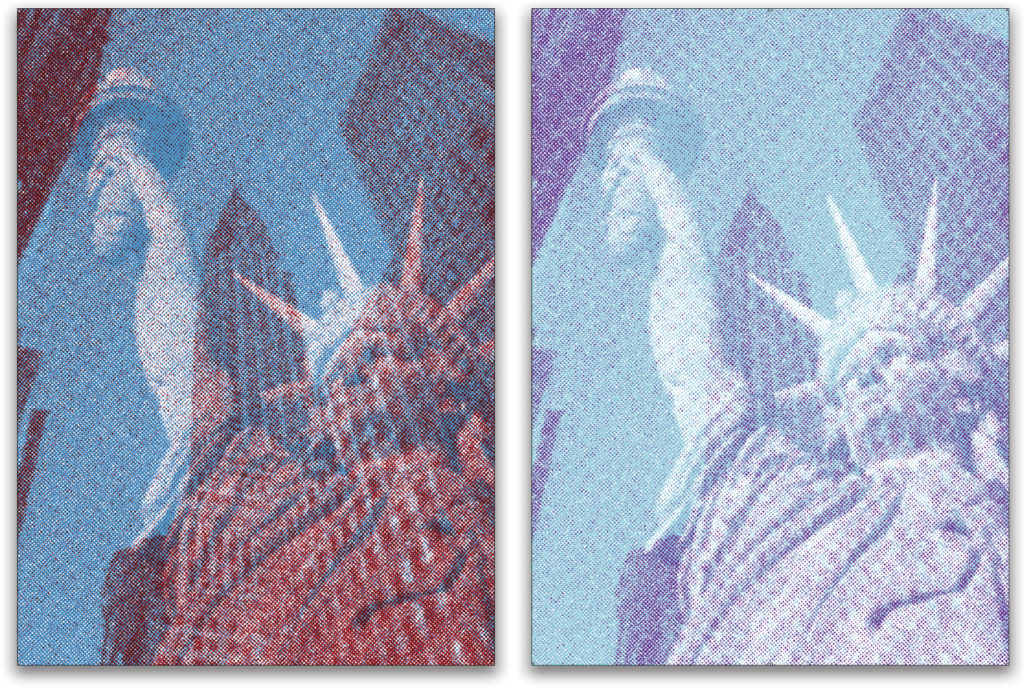
Step 14: The beauty of this kind of image creation is that you can easily experiment with the live filters and effects. You can change any of the attributes to make something different. And the best part is that you can open the smart objects, place new images, and change the colors in the Color Fill layers to quickly create an entirely new image. In this final example, I swapped out the images for a tiger and plant leaves. Have fun, keep playing, and keep experimenting!

This article originally published in the March, 2019 issue of Photoshop User magazine.


