Let me share with you five Lightroom tips that will save you time and energy and give you several tools so, as a photographer, you can focus more on the creation than the complexities! I hope this will truly change your workflow and help you be more efficient using Lightroom.
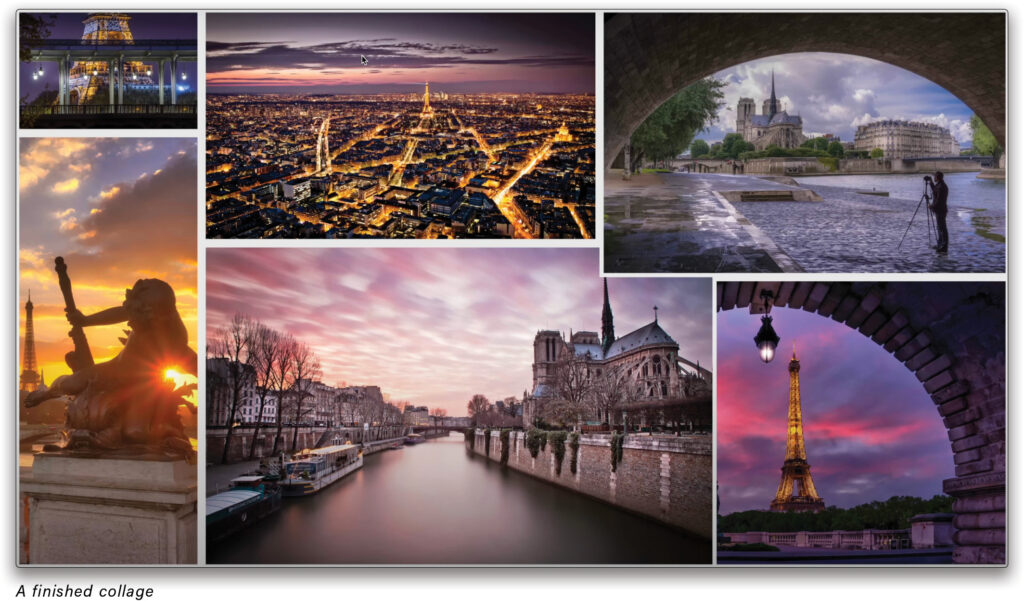
1. MAKE A PHOTO COLLAGE IN LIGHTROOM
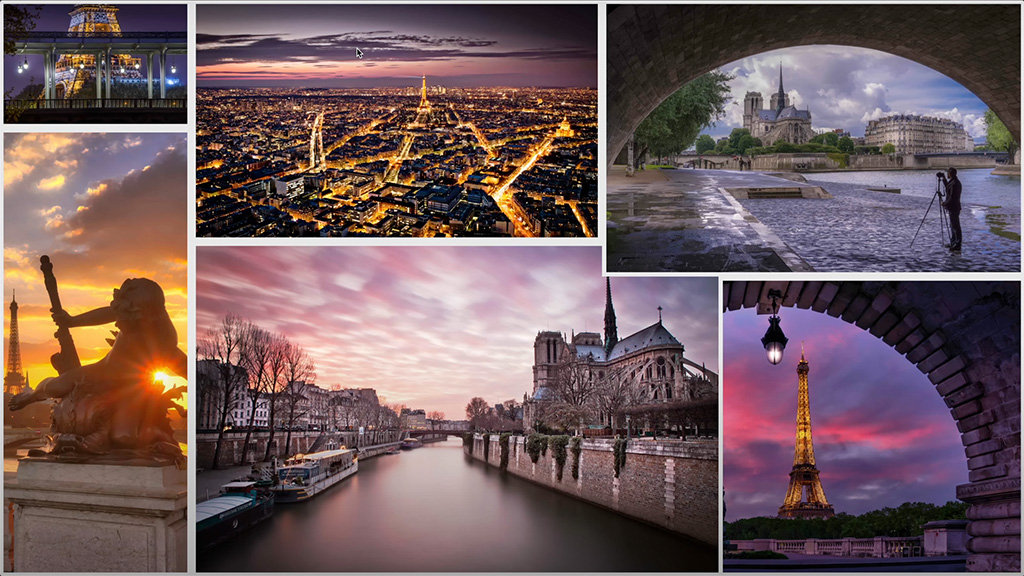
When you have a great collection of photos and need to make a presentation or showcase your work, it’s good to know how to create a beautiful collage that will impress.
- First, place the photos you want to add to your collage into a collection.
- Go to the Print module and choose Custom Package in the Layout Style panel at the top right.
- Below the left side panels, click Page Setup and, for the orientation, choose portrait or landscape, whichever best fits your collection of photos.
- You can either drag-and-drop images from the Filmstrip onto the page or pick one of the custom templates in the Template Browser panel, and drag-and-drop images from the Filmstrip into the cells. You can also drop images outside the existing cells to add
new cells. - When a cell is selected you can resize and reposition it as needed.
- Command-drag (PC: Ctrl-drag) on an image in a cell to reposition it within the cell.
- In the Image Settings panel on the right, add a Photo Border to create separation between the photos.
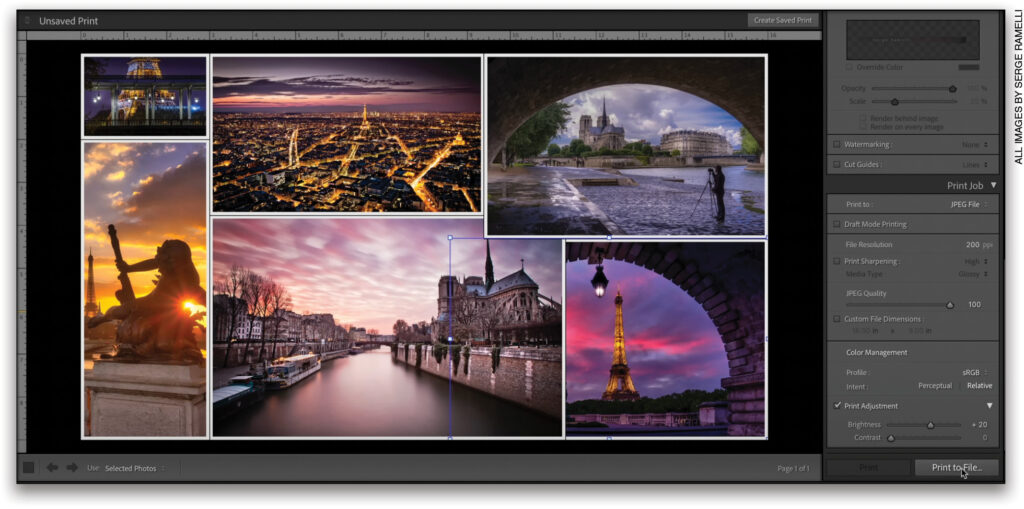
Once you’re satisfied with your collage, go to the Print Job panel, and select JPEG File in the Print To drop-down menu at the top. Set the File Resolution to 200 ppi and click the Print to File button.
2. SYNC A RETOUCH FROM ONE PHOTO TO THE NEXT
This is very useful when you come back from a photoshoot, or have similar photos and want a specific look for all the images from your shoot. First, take one good photo and retouch it. Here’s what we did to our photo:
- Opened up the Shadows to +100.
- Brought down the Highlights to –100.
- Brought down the Blacks to –46.
- Boosted the Whites to +34.
- Set the Temp to 5,629.
- Set the Tint to +37.
- Increased the Contrast to +34.
- Used the Straighten tool in the Crop Overlay (R) panel to level the horizon.
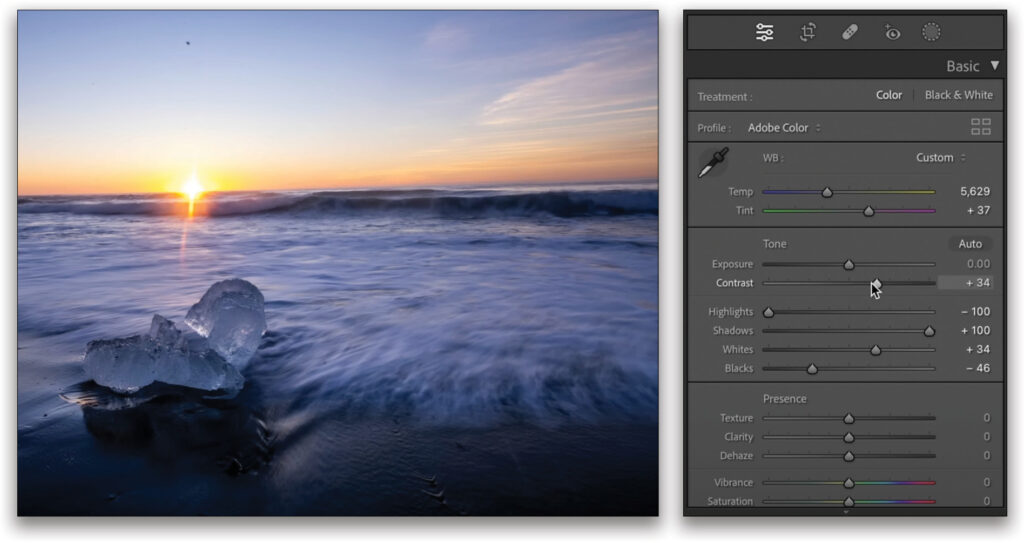
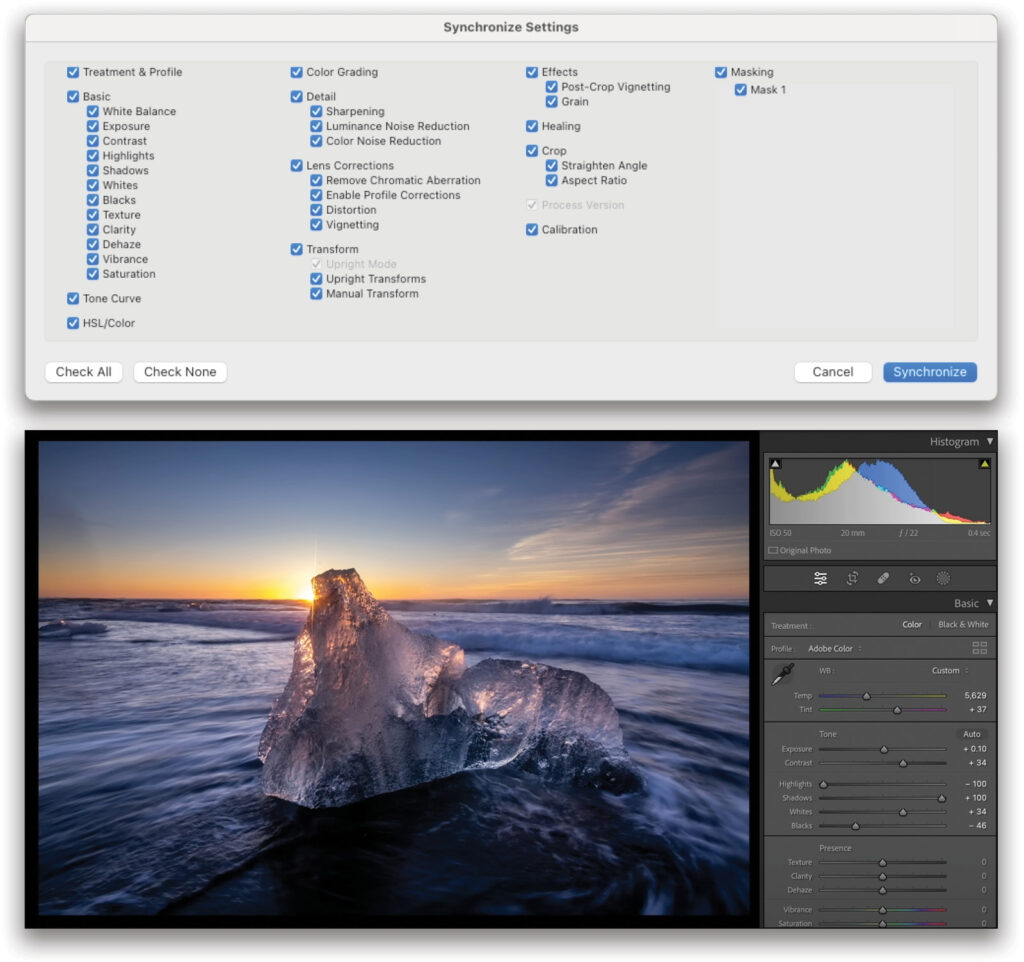
Next, we clicked on the Masking icon (gray circle with dotted outline) below the Histogram and chose Linear Gradient. We drew our gradient at the top of the photo in the sky and then lowered the Exposure to –1.00. Finally, we used the Healing tool with the Mode set to Content-Aware Remove to remove any sensor dust. Once confident with your retouch, you can easily copy those settings to one or more photos.
To paste those settings onto a single photo, select that photo in the Filmstrip and click the Previous button below the right side panels, and it will copy all the settings onto that photo. If you select more than one photo in the Filmstrip, the Previous button will switch to Sync. Click the Sync button to bring up the Synchronize Settings dialog, select all the settings you wish to sync, and click the Synchronize button. If you want to paste all the settings and skip the Synchronize Settings dialog, after you select multiple photos, hold the Shift key to switch the Sync button back to the Previous button.
3. CREATE A LINEAR SKY MASK THAT DOESN’T AFFECT THE TOPS OF BUILDINGS OR OTHER ELEMENTS
Don’t you love this view from la Sorbonne in Paris? It was the perfect time of day! So, to give justice to the sky, we added a Linear Gradient mask at the top and lowered the Exposure –1.42, which darkens the sky more at the very top, and less as it approaches the horizon. The problem is that it darkens the top of the buildings, which is unnatural.
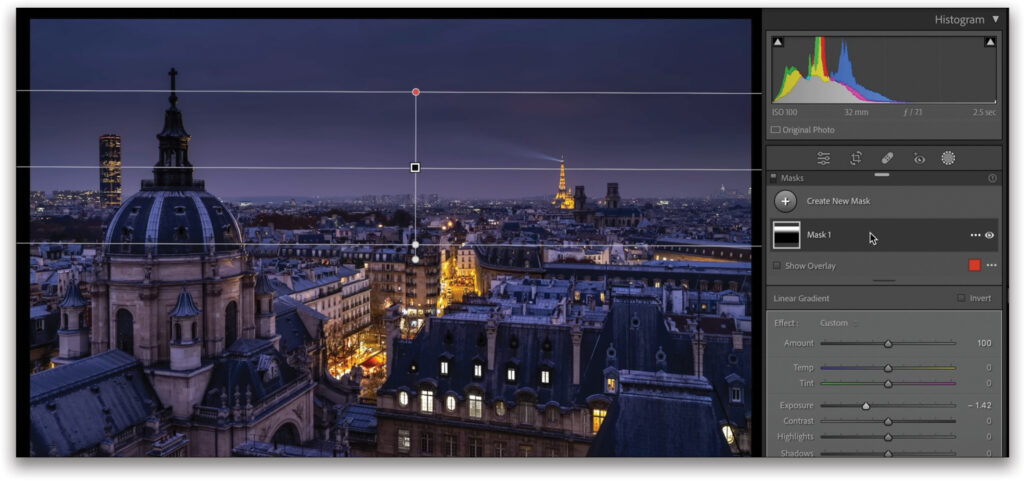
To fix that, click on the three dots to the right of your mask in the Masks panel and select Intersect Mask with>Select Sky. It will use AI to fix that unwanted darkening on the buildings. I love the end result.

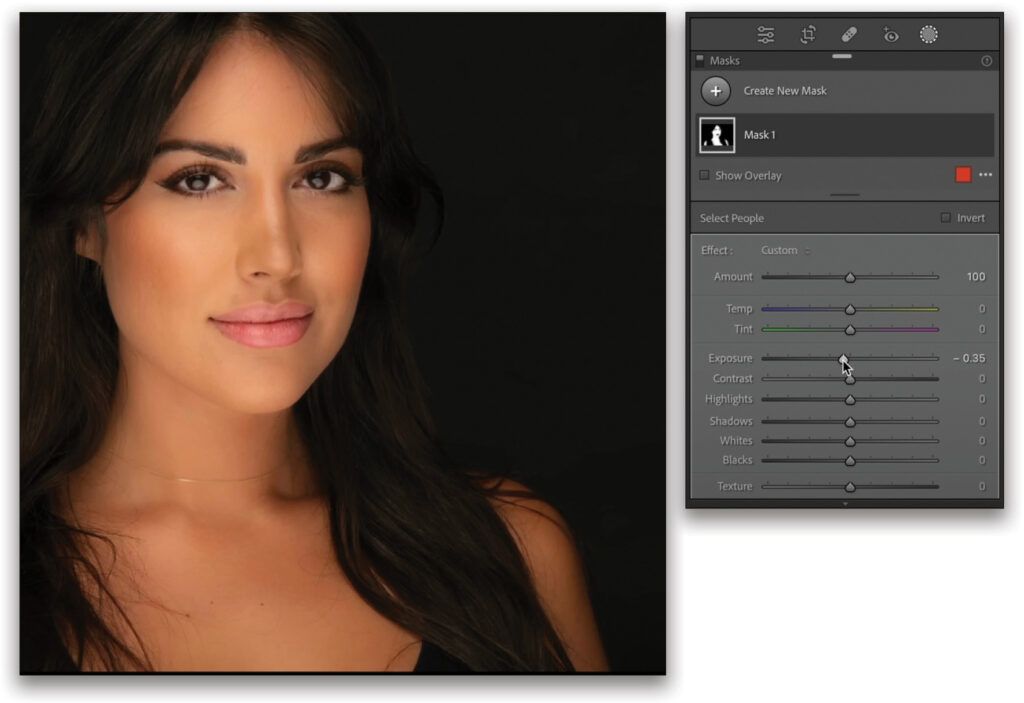
4. LOCALLY RETOUCH SKIN, EYES, AND LIPS
When you have a portrait, you can do some great local retouching of the skin, eyes, lips, and more. When you first click on the Masking icon, Lightroom Classic will look for people in the image, and you’ll see each person appear in the People section in the masking tools. You need to first select the person you want to retouch in the masking tools, and you’ll see that you can choose to retouch each part of the face individually.
We’ll start by selecting both the Face Skin and Body Skin and clicking Create Mask. This will create a single mask for all the skin, so now we can retouch the skin separately from the rest of the image. In this example, we reduced the Clarity to –55 for smoother skin and lowered the Exposure to –0.35 to give a more tan look.
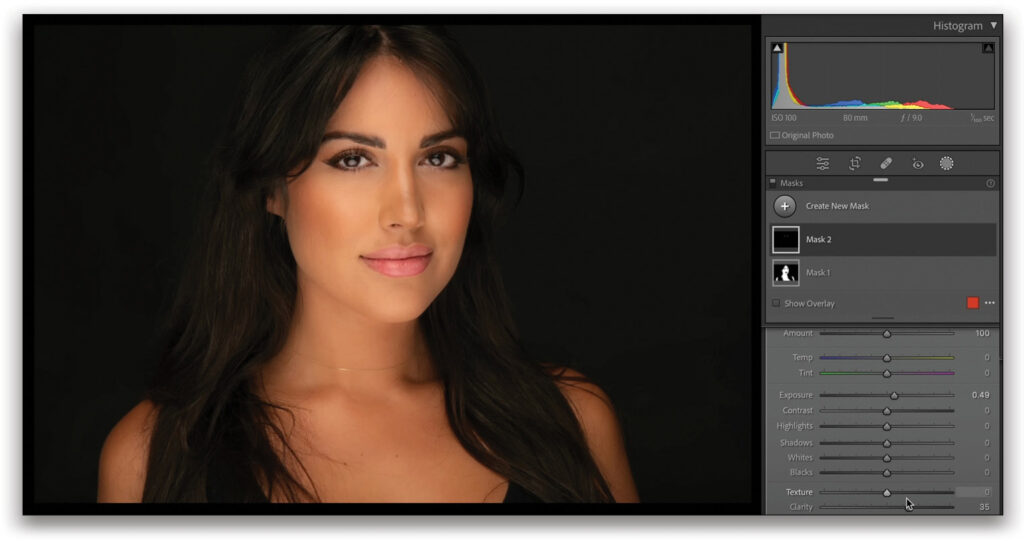
Now to correct the eyes, click Create New Mask in the Masks panel, choose Select People, and click on the person again in the People section. This time, select Iris and Pupil, and click Create Mask. Boost the Exposure to 0.49 and Clarity to 35 to make the eyes stand out.
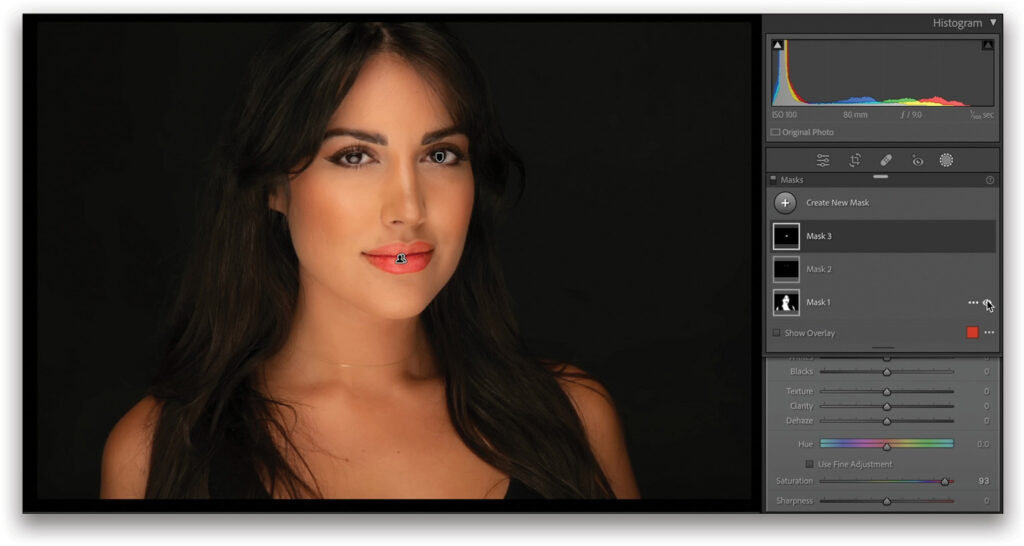
To enhance the color of the lips, repeat the above process, but this time select Lips. Boost the Saturation +93, and you’ll have lips that stand out nicely.
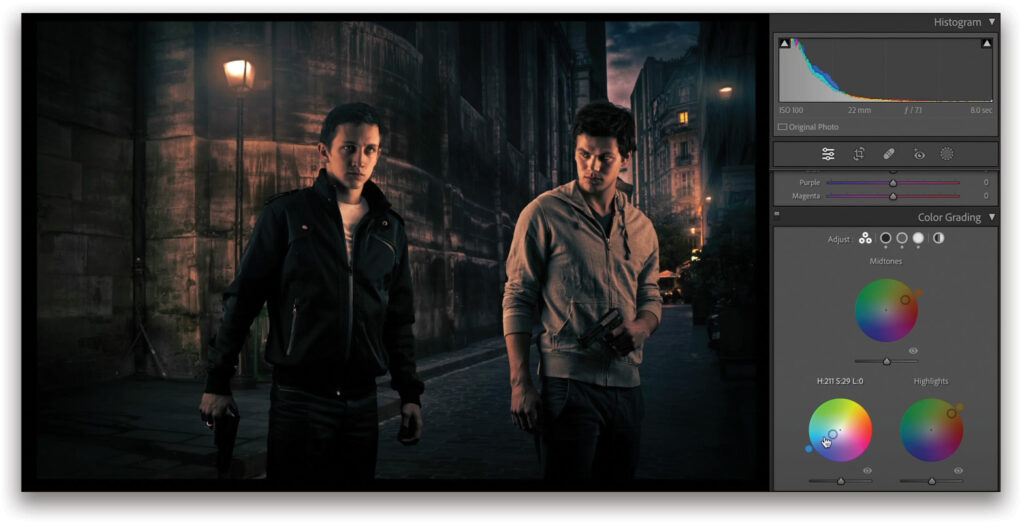
5. GIVE A HOLLYWOOD LOOK TO A PHOTO
You might have noticed that Hollywood movies tend to look quite dramatic. One of the techniques that’s often used in Hollywood nowadays is to use colors to create depth and enhance the main characters. This technique adds blue and green in the shadows and yellow and orange in the highlights or on the main characters. So let’s apply this technique to a portrait.
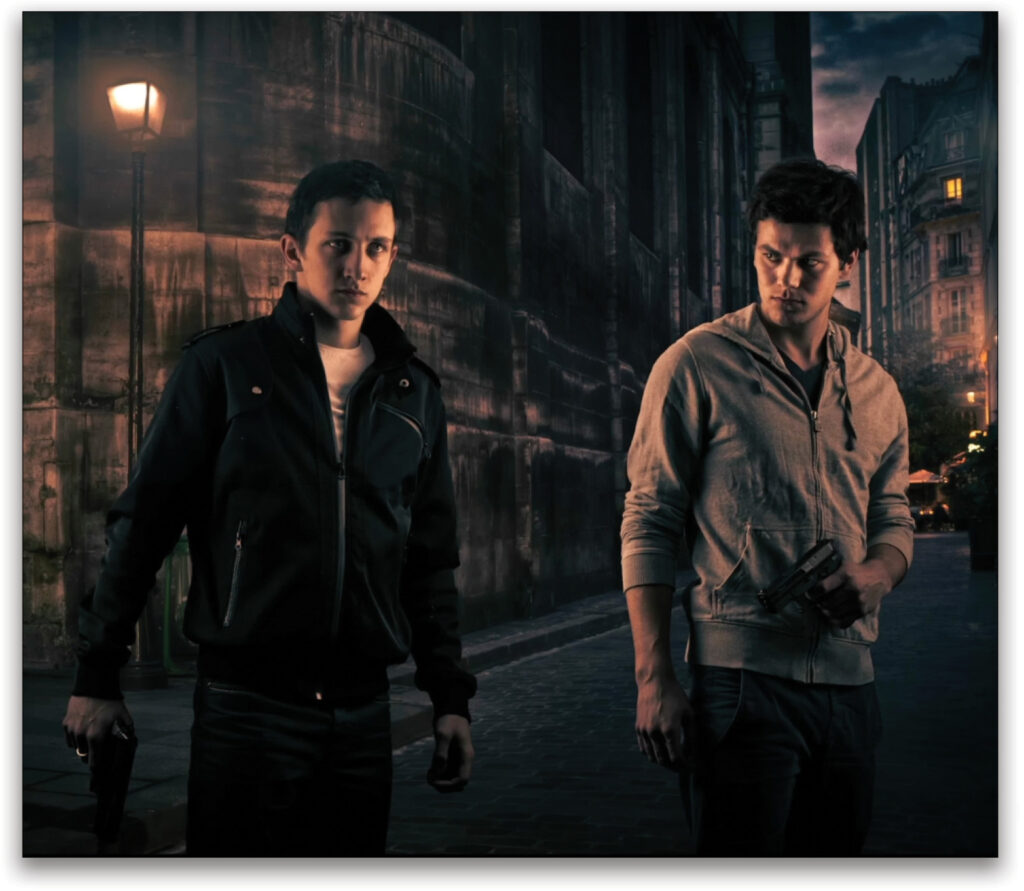
Go to the Color Grading panel and, using the color wheels, add some blues in the Shadows and orange in the Highlights, but don’t go too intense. Then use the Midtones to blend the colors together.
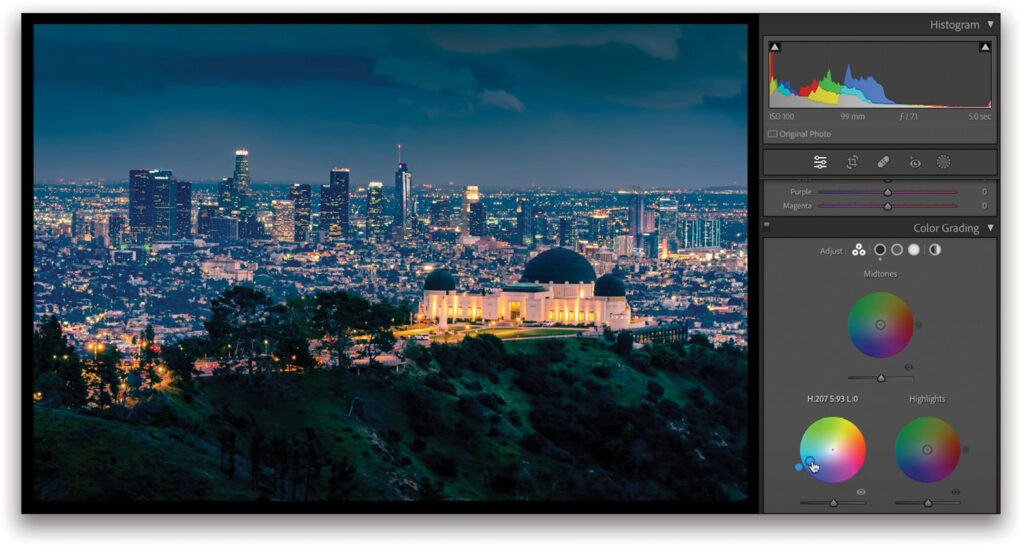
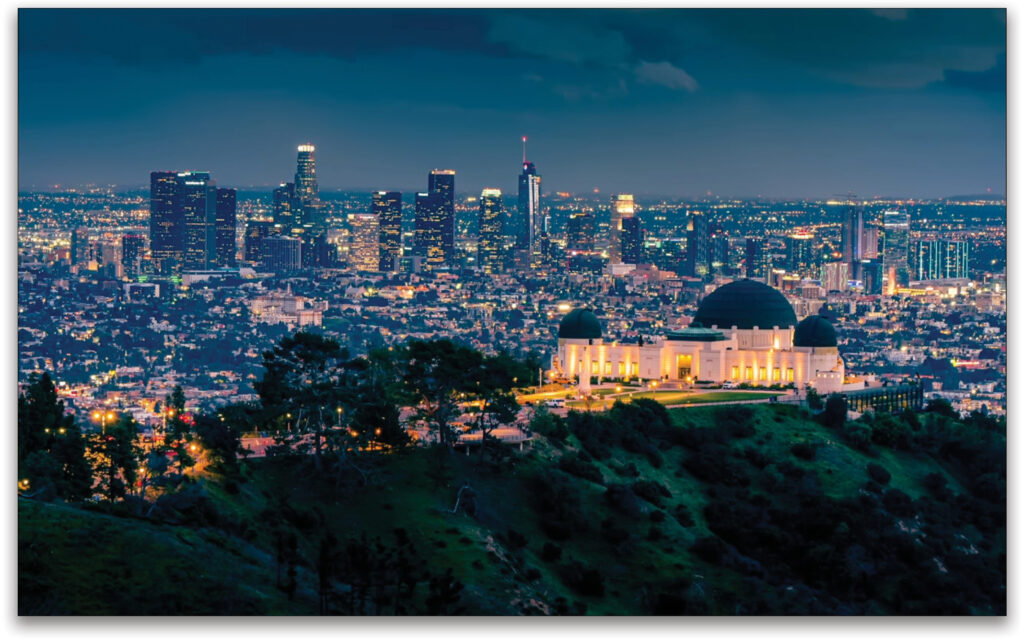
You can do the exact same technique for a cityscape or landscape. Using the Color Grading panel, add blues and greens in the Shadows, oranges and yellow in the Highlights, and use the Midtones to make it harmonious!
And there you have it: five tips to improve your photography and Lightroom skills. I hope you got a lot out of this article and that you enjoy creating in Lightroom without any constraints.
This article originally published in the March, 2023 issue of Photoshop User magazine.
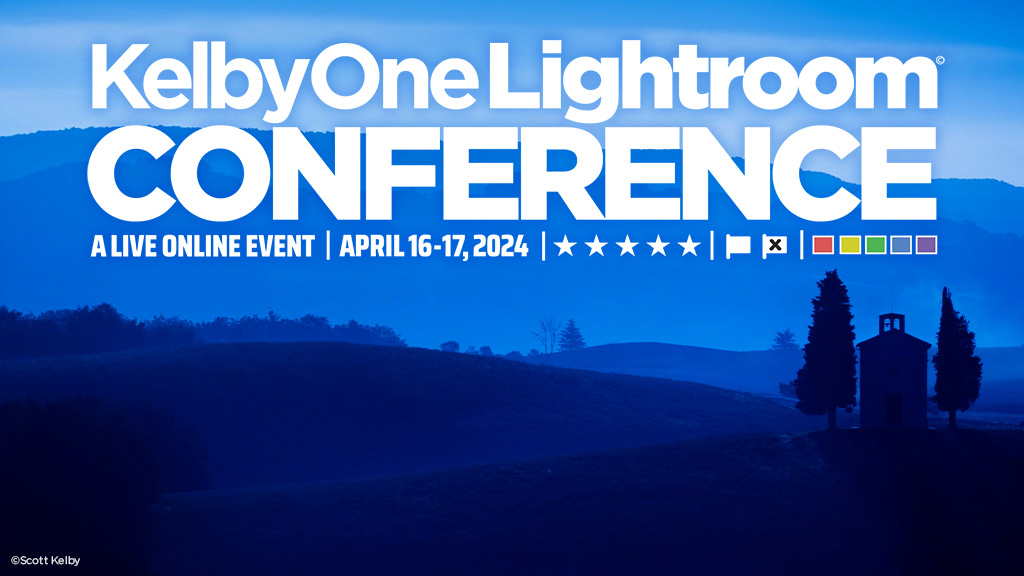
Ready to level up in Lightroom? The KelbyOne Lightroom Conference is back, April 16 & 17, 2024. Don’t miss out on this incredible opportunity to elevate your photography game. Secure your spot today for this immersive online event and equip yourself with the tools and knowledge you need to create breathtaking images like never before. Tickets are available now!