Over the past 40 years, I’ve traveled to more than 100 countries, as well as to many of the awesome national parks throughout the United States. Over those years I’ve learned much about travel photography; mostly that traveling is a great education, but I’ve also made probably every mistake in the book.
In this article, I’ll share with you some tips that I call, “The Five Ps of Travel Photography: Planning, Packing, Photographing, Processing, and being Prepared.” I hope these tips help you to avoid common mistakes, and get the most out of your photography, as well as your travel experience. That experience, I feel, is equally as important as taking pictures. In other words, stop and smell the roses.
Planning
Planning for potential photo opportunities is the key to getting good pictures. The first step is to do a Google, or a 500px search on your destination to give you a good idea of the kind of photographs you want to make. Once you get an idea of the photo opportunities at your intended location, you can plan which lenses and accessories you’ll need, as well as plan your days.
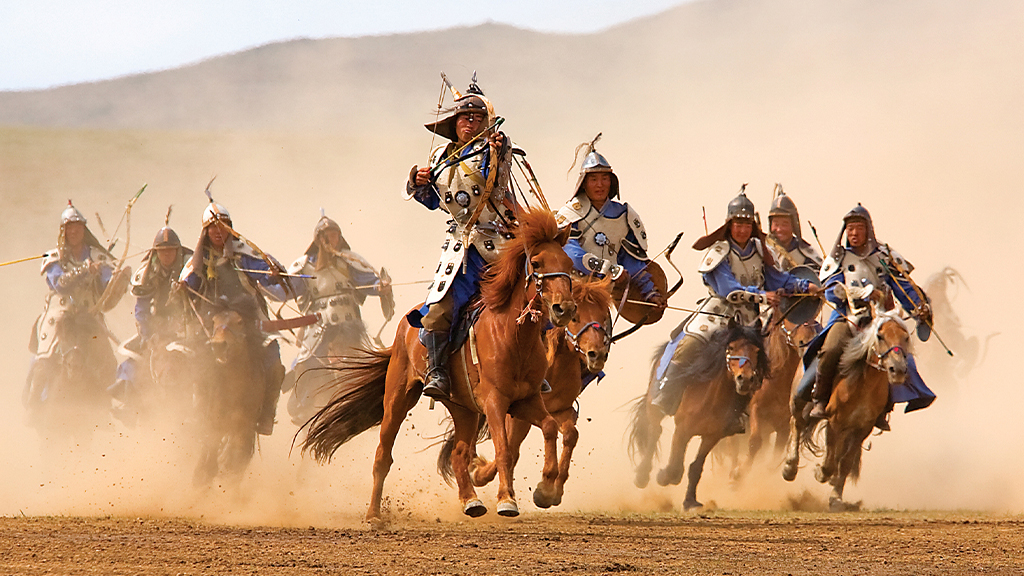
Your gear and day planning will vary from location to location. For example, if you’re going on an African safari, you’ll need both telephoto and wide-angle zoom lenses. If you’re going street shooting in Paris, maybe all you need is a wide-angle zoom and medium telephoto zoom. And, if you’re going to a festival, such as the Nadaam Festival in Mongolia (where I took the opening image for this article), you’ll learn that you’ll be seated in bleachers with lots of other people, so you’ll need to get there early to get a good photo spot, and you’ll need to bring both telephoto and wide-angle zoom lenses to capture the action.
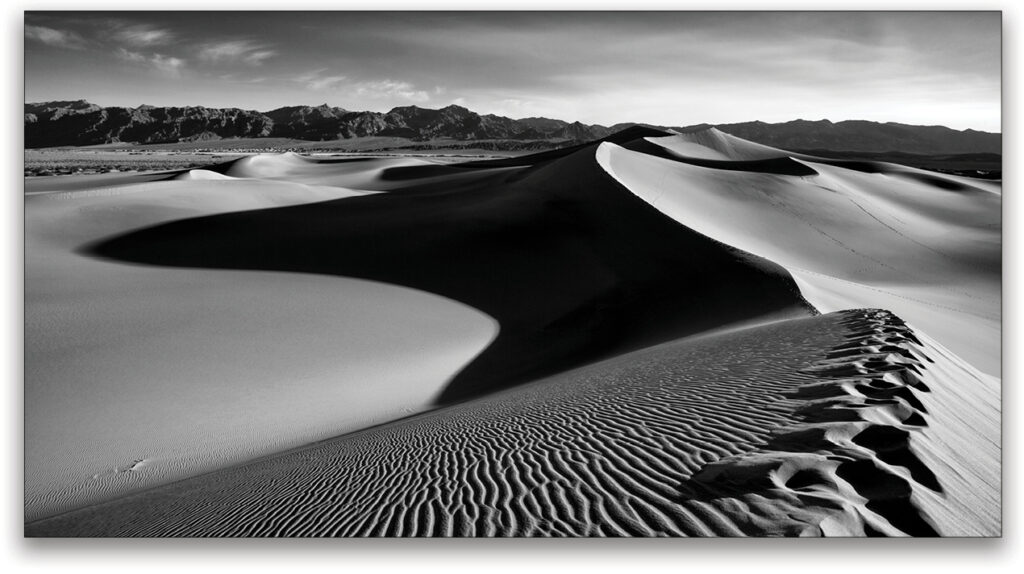
If you download a sun-finder/shadow finder app, such as PhotoPills, you’ll know where the light will be in your location, on-site and in advance. I did that before going to Death Valley, where I photographed these awesome sand dunes in the dramatic early morning light.
Downloading a weather app (we use Dark Sky) is also a good idea. And if you’re planning to shoot by the sea, a tide chart app (we use Tides Charts) is super-important.
Planning which camera bag to bring is also an important decision. For mountain climbing, you’ll need a backpack, while in the city you may want to use a shoulder bag. If you’ll be traveling by small plane, such as the single-engine planes used on an African safari, be sure to check the weight restrictions and number of carry-on bags.
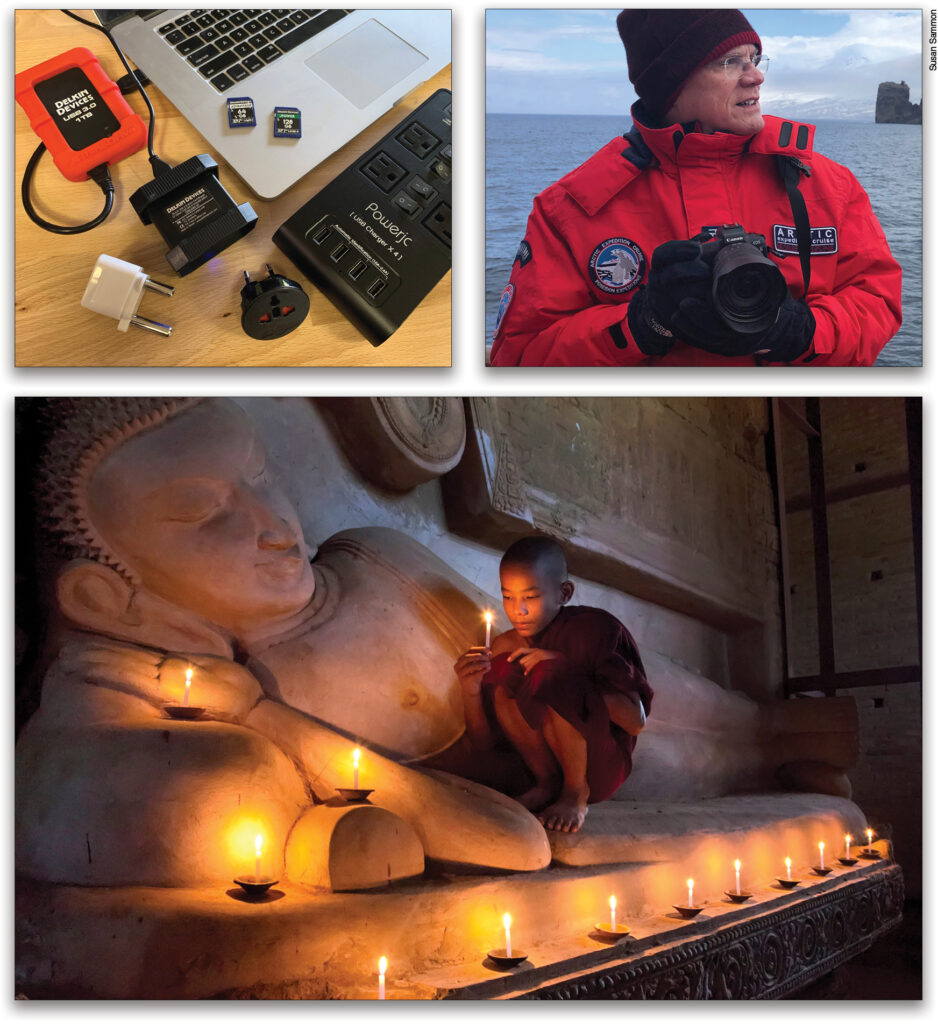
If you plan to bring your laptop, as I always do, test all the latest programs in advance so you can open your RAW files, especially if you have a new camera. I’ve seen workshop participants with brand-new cameras who can’t open their RAW files because they didn’t download the latest versions of Photoshop and Lightroom, and couldn’t do it on site because there was no Internet connection. Also, plan to bring at least two portable hard drives (with plenty of storage space) to store your precious images.
Important: Plan to have, and test beforehand, all your memory cards, card readers, and portable hard drives. In addition, before you leave home, check which power adapter or adapters you’ll need. You also may want to get a multi-charger/plug device to charge your camera and laptop batteries at the same time, as well as your iPhone or iPad.
Planning to keep healthy is also a must. Check with your doctor or the U.S. Centers for Disease Control and Prevention as to which medications or vaccinations you’ll need. And of course, don’t leave home without Imodium or Pepto-Bismol.
If you need to change planes on the way to your destination, plan on having at least 3 hours between flights, especially if you’re flying internationally. You don’t want to be one of those people running through the airport at top speed, trying to catch a flight because your original flight was delayed.
A comfortable photographer is a happy photographer, and being comfortable requires planning. For example, if you’ll be photographing by the sea, you’ll need knee-high rubber boots so you can shoot in the surf. Or, if you’re going to the rain forest during the hottest and most humid time of the year, you’ll need to bring light and fast-drying clothes.
When I was in the High Arctic, I was bundled up in a heavy parka, wool hat, and heavy gloves. Speaking of gloves, try a few pairs before you go to a chilly location. Make sure you can operate your camera while wearing your gloves.
Because the weather is changing all over the planet, choose your travel season carefully; even then, be prepared for the unexpected. For instance, I was in Antarctica on New Year’s Eve one year and I was wearing a T-shirt. Yes, it was their summer, but the weather that year was a big surprise: Two days later I was all bundled up because the temperature dropped severely, to near freezing.
Of utmost importance when planning a trip is to research the local rules, customs, and religions. If you plan to go to a Buddhist temple, you’ll learn that you have to remove your shoes before going into the temple. That might suggest you plan to wear slip-on shoes rather than lace-on hiking boots. You’ll probably also learn that taking photos isn’t allowed in some locations.
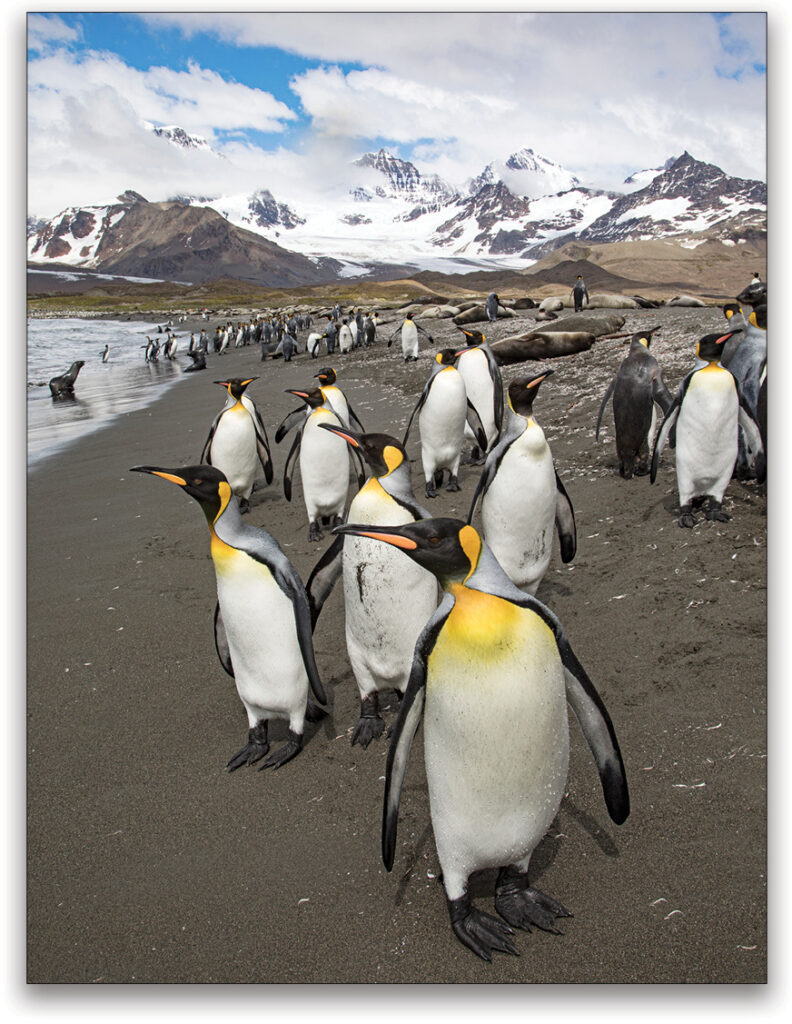
If you make a trip to the bottom of the world—say, Antarctica, the Falkland Islands, or South Georgia Island (where I took this photograph of king penguins)—you’ll need to know and follow the rules, such as not getting closer than 15′ to the animals. This will help you determine which lenses to pack. (Of course, the animals don’t follow those rules, so sometimes they walk right up to you!)
Planning a trip to Africa? Some camps don’t let you drive off the roads, which greatly restricts your photo possibilities, because you may not be able to get close to the animals. So, if you’re planning a safari, make sure you can drive off-road.

Packing
My basic rule of packing is simple: I carry everything that I need to take pictures in my carry-on bags on the plane. I also carry all my meds. The only photo accessory I check is my tripod, but I keep my ballhead with me in my camera bag. On-site, I can buy an okay tripod, but I can’t (and don’t want to) buy a good ballhead. Another option is to ship your gear well in advance to your location, or to rent it on-site.
Sure, I have lots of lenses at home, but I only pack essential lenses when I travel. I do pack backup lenses, too; for example, I always have two 24–105mm IS lenses (that’s my favorite lens). On safari, my favorite wildlife lens is a 100–400mm IS lens, but my backup lens is 70–300mm.
In my two allowed carry-ons (my backpack camera bag and rolling computer bag), I pack all my stuff two weeks in advance to make sure everything fits. In my computer bag I pack an extra T-shirt, one pair of socks, and one pair of underwear, using those items to cushion the sides of my laptop, and I always pack my laptop with the screen facing inward (to avoid a cracked screen if someone jams a hard case into the overhead storage compartment). When I have a lot of small gear (extra batteries, chargers, filters, etc.), I’ll wear a photo vest, which acts as a third carry-on.
It’s a good idea to keep a copy of your passport in all your bags, just in case there’s any question about whose bag it is, if it’s lost or delayed.
One more tip on packing, which goes along with planning: Because a bag can get delayed, always get to your destination one day before the trip officially starts. This is especially important if you’re traveling by ship. (You and your bag don’t want to miss the boat, so to speak!) I’ve seen this happen in Antarctica and Fiji.
Photographing
Finally, after all the planning, packing, and traveling, it’s time to take pictures. My basic travel photo philosophy is this: You can sleep when you’re dead; you snooze, you lose! And, to catch the best light, you have to get up early in the morning and stay out late; however, if you have an IR (infrared) converted camera, you could photograph landscapes at any time of day and still get good results.
In most cases, the key to getting the best possible shots in any location is to get the best possible guide. You can arrange for one through your hotel, camp, lodge, or even in advance online by doing a web search.
I can’t stress enough the importance of a good guide. In fact, my guides get credit for many of my photographs. For instance, on a photo safari to Kenya, my guide Simon (top picture above) gets much of the credit for my photographs. He could spot an animal from what seemed like a mile away, and get me into the perfect position for a shot. I share this story with you because it’s important to give credit where credit is due.
I usually walk or drive around in a safari vehicle with two camera bodies and two lenses. On one body I have a wide-angle zoom and on the other body I have a telephoto zoom. In my pockets are extra memory cards and batteries. I also carry a tripod on a camera strap for low-light and blurred motion shots.
As always, respect the subject, be it a person, animal, or even the landscape. Also, never overstay your welcome. Have your camera all set up, and be ready to shoot…fast. The more you fumble with the dials and buttons on your camera, the less interesting the subject will become.
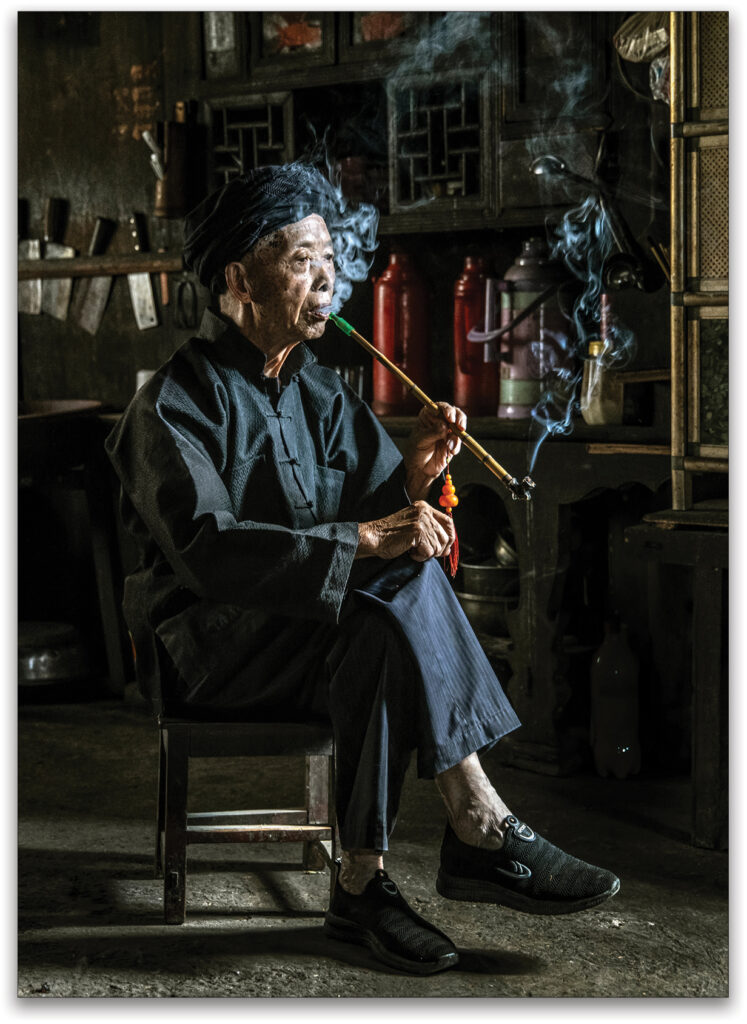
Quick tip: Don’t be afraid to boost your ISO. It’s better to get a sharp shot at a high ISO (ISO 3200 in the image at left) with a bit of noise than to get a blurry shot at a low ISO. Also, remember this: If a picture is so boring that you notice the noise, it’s a boring picture.
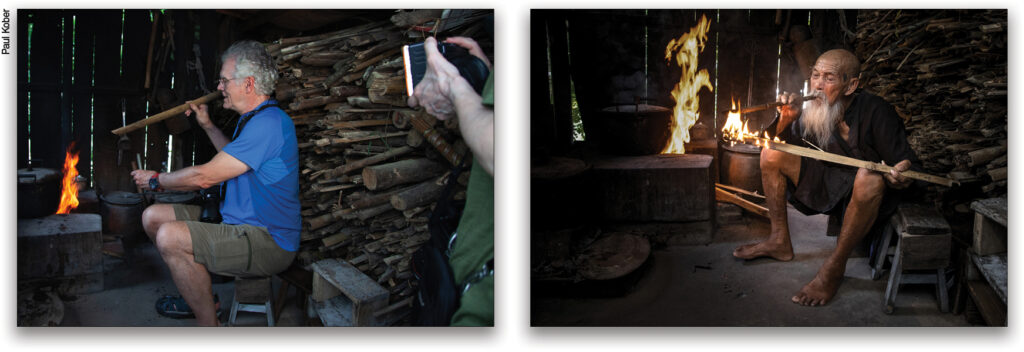
When I lead a photo workshop, I often stand in for the intended subject so the students can set their camera and basically shoot-and-scoot, and then let the next person move in fast to take a shot. Paul Kober took this photo (above left) of me sitting-in for a shot on a workshop in China with Scott Kelby.
Processing
To begin with, I know my on-site process is different than that of most Lightroom users, who take the time to add keywords, make lens corrections as a starting point, fine-tune the exposure, etc. My process lets me work fast, and then get to happy hour, dinner, and then to bed for a good night’s sleep. Sleep is important, as people make mistakes when they’re tired.
When I’m on location, however, I never go to sleep without selecting my favorite images from that day’s shoot. On-site, I only select images; I don’t process/enhance them (except maybe for a quickie slide show or to post on social media), because being tired, drinking coffee and alcohol, and stress all affect how we see color. What’s more, the room/tent/lodge light affects the color on my laptop. I do all my serious Lightroom RAW processing on my calibrated computer at home.
Here’s my on-site processing (actually selection) system:
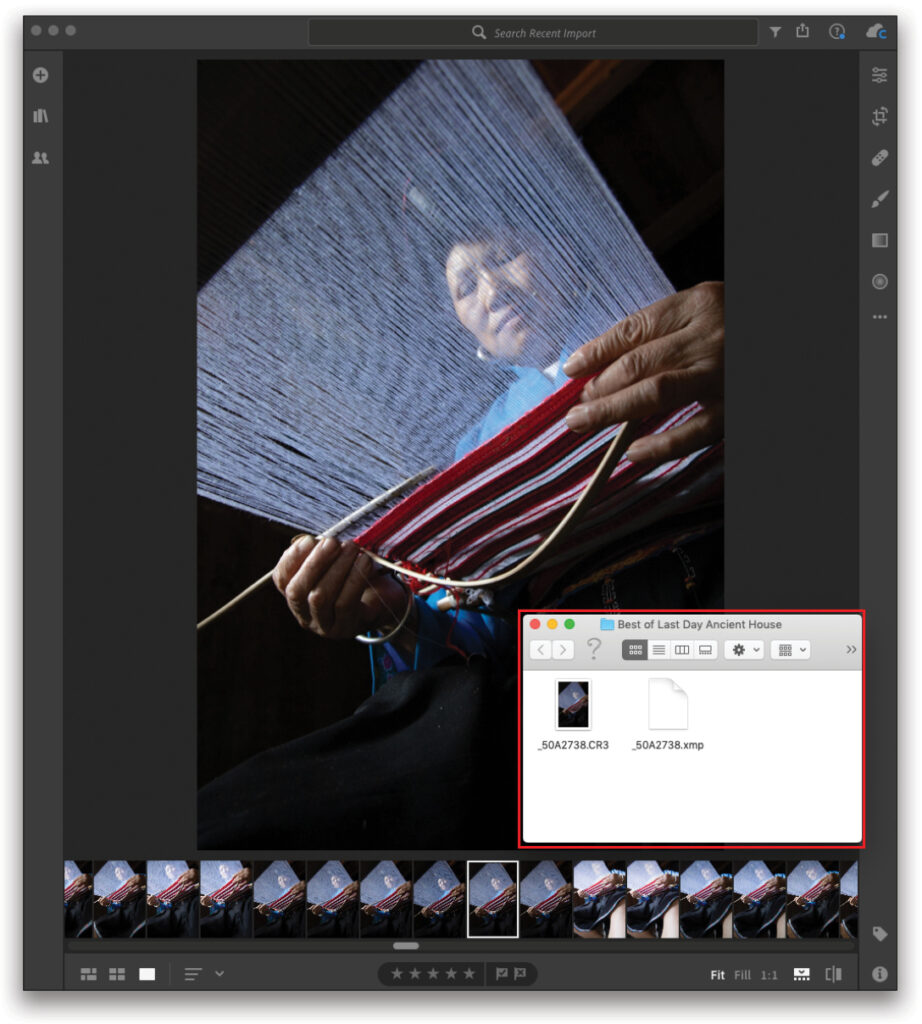
• First, on my desktop, I create a folder with the location and date; for my China workshop, it was China 2019.
• In that master folder, I create a folder for each memory card, labeled with the location, number of the day for that trip, letter for that memory card, and then a descriptive word or two; for example, China Day 1a Fishermen, China Day 1b Mountains/People, etc. I do this for each day of the trip.
• Next, I create “Best of” folders (not in my master folder) for each day: Best of Day 1 Fishermen, Best of Day 2 Ancient Village, etc. I export from Lightroom the best RAW files to those folders (as you can see in the screen capture top left).
• At the end of each day, I copy these folders to my two portable hard drives, so my pictures are in three places.
One final note: I never empty my Trash on location, just in case I’d accidentally dragged a file into it.
After selecting my “Best of” images, I rarely go back to look at the other images. For me, the advantage of this system is that all I need to do to find my “Best of” images is go through the “Best of” folders. It’s super-fast and super-easy.
At home, I always keep all my files on the portable hard drives I used in the field. From there, I transfer my folders to one hard drive in my office and one hard drive in my home, so my images are in four places.
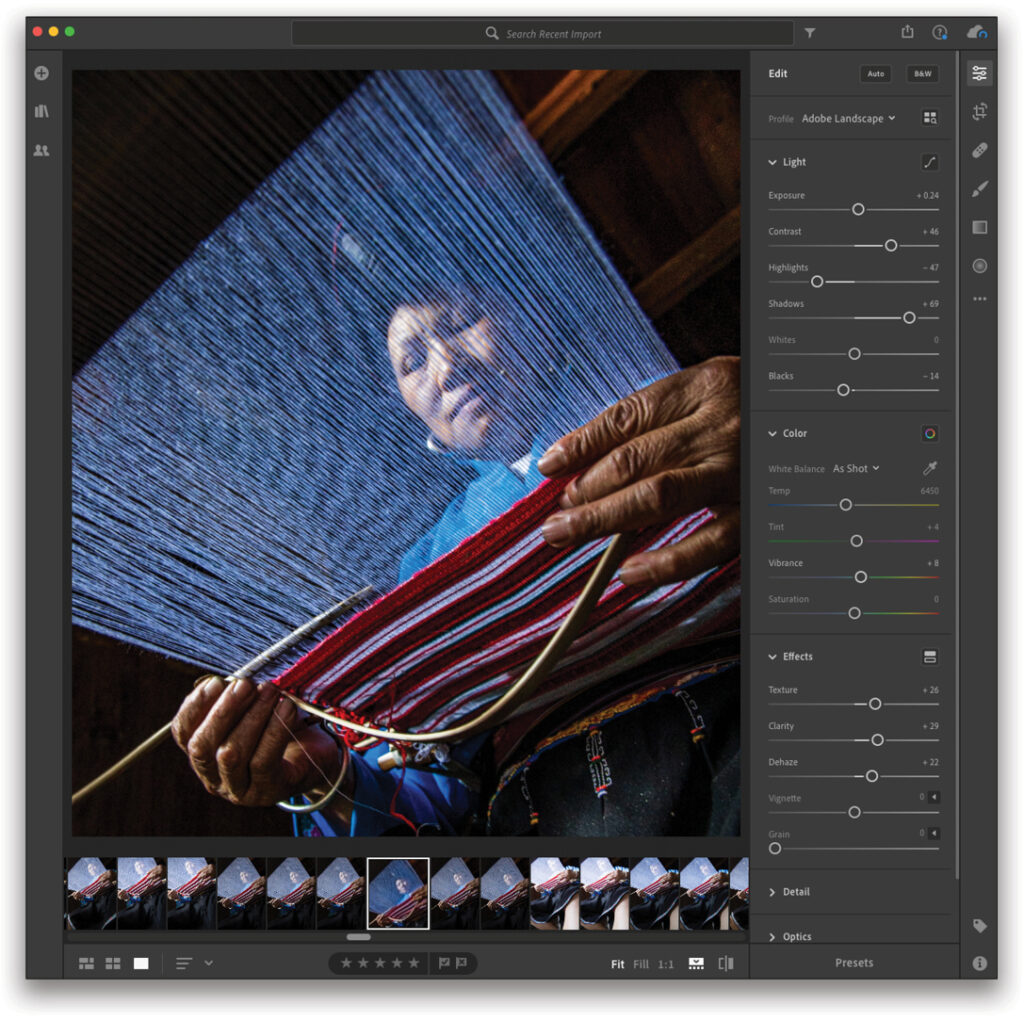
In my KelbyOne class, Improving Your Creative Vision by Getting It Right in Camera, I suggest getting the best possible in-camera shot. Well, I’ve found that oftentimes even the best in-camera image can be enhanced in Lightroom. Check out some of my enhancements in the Light, Color, and Effects panels in the screen capture shown at the bottom of the previous page. Sure, they’re basic adjustments, but I think they made the photograph look a bit more dramatic.
If I could suggest a starting point for processing, I’d start with lens corrections, because Lightroom knows what lens you used to take a picture. Then I’d move on to fixing whatever bothers you most, perhaps adjusting the shadows and highlights.
Being Prepared
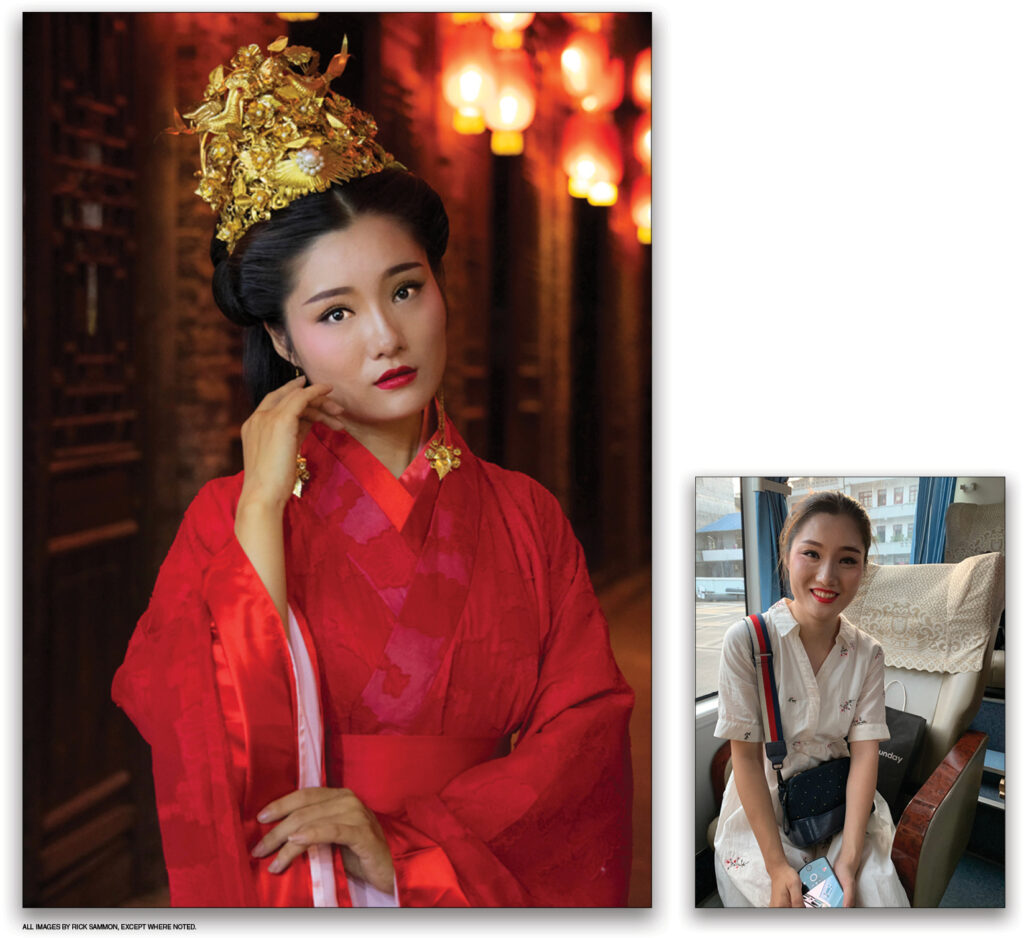
When traveling, especially while participating in a photo workshop, you must be prepared for the unexpected. That starts with having an open mind and being flexible. Next comes being prepared to shoot unexpected subjects in unexpected locations—fast.
That’s what happened to our students, Scott Kelby, and me during our recent China photo workshop. One afternoon, our guides Andy and Mia Beals, surprised us with a beautiful model. The model and background were perfect, but the light was very low. Rather than setting up tripods and lights, which would have taken time, changed the feeling of the scene, and reduced the shooting time of each workshop participant, we decided instead to boost the ISO to 6400 and capture the moment and mood. When it comes to photography, mood matters most!
One closing travel photography tip: Offer to send your photographs to the subjects, including the fun, behind-the-scenes shots. This will make the subjects happy, and will help pave the way for any photographers who follow in your footsteps.
Well my friends, I wish you safe and healthy travel adventures, and I hope you come back with some amazing images.
This article originally published in Issue 55 of Lightroom Magazine.
Capture the World. Perfect the Edit.
Join us online for the ON1 Travel Photography Conference, July 15–16, 2025! Learn how to plan, shoot, and edit like a pro using ON1’s powerful tools.
👉 Get your ticket now and save $150 with Early Bird pricing.
*Early Bird Price Expires July 15, 2025, 11:00 am EST