Last year’s updates to Masking in Adobe Lightroom have made AI-based selections easier and more powerful than ever. You’ll definitely want to check out previous articles and KelbyOne classes that get you up to speed on how to use the upgraded Masking tools. In addition, our ability to incorporate those AI-based technologies into presets has evolved as well, and that’s what I want to cover in this article.
Exploring Included Adaptive Presets
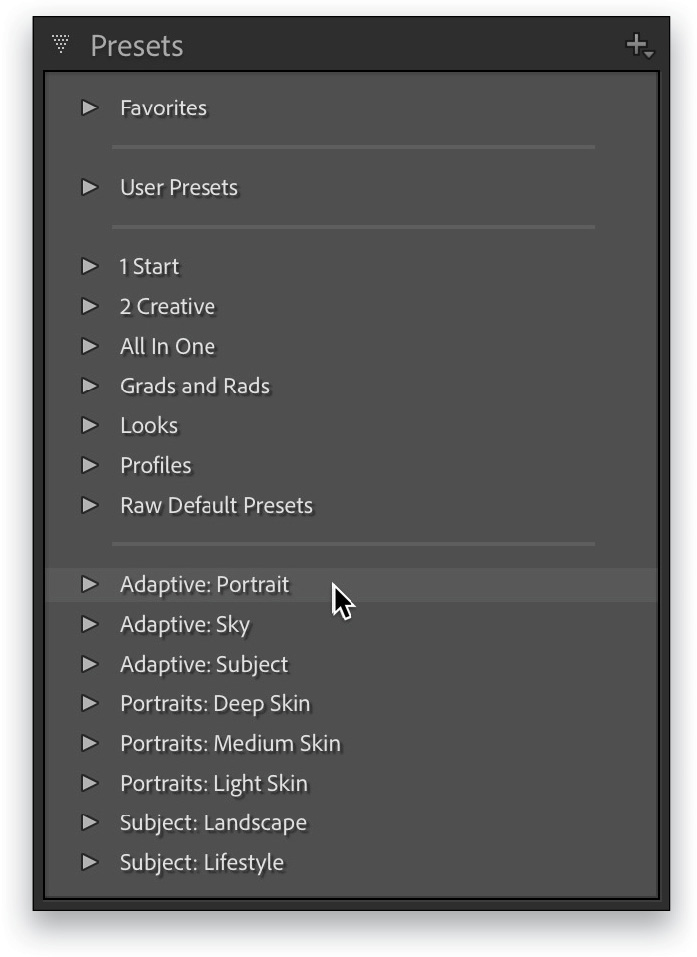
You may have noticed new additions to your Presets panel in the Develop module that start with the word Adaptive. There are now three Adaptive groups: one for Portrait, one for Sky, and one for Subject. The presets in these groups were created by Adobe to give you a taste of what’s now possible to include in a preset. We’ll use these to understand how they work, and then I’ll show you how to create and modify your own.
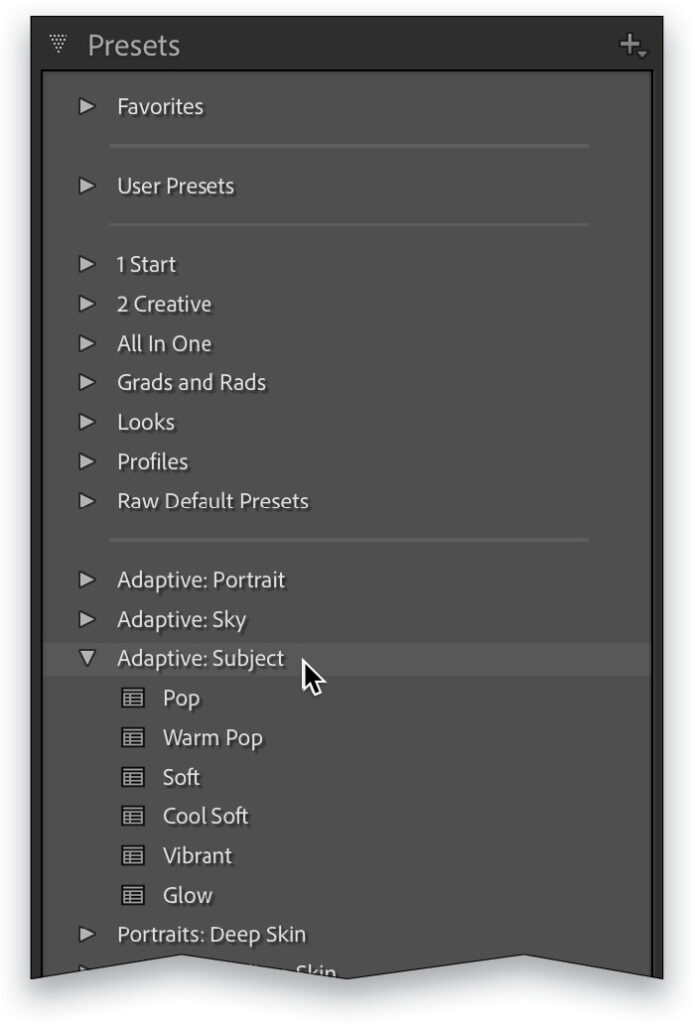
Let’s expand the Adaptive: Subject group and see what’s included. You should see presets named Pop, Warm Pop, Soft, Cool Soft, and so on. What all the Adaptive groups of presets have in common is that they’re designed to leverage one of the AI-based types of Masking tools to automatically detect either a person, sky, or subject respectively, then create a mask for it, and then apply the included settings to that mask. So, select an unedited photo that has some kind of obvious subject (I’m always curious to see if the AI thinks the subject is the same subject I expect), and move your cursor over each preset slowly (as it may need a moment to generate a mask on the fly based on the photo’s subject), and you should see the look of the subject change based on the settings in the respective preset.
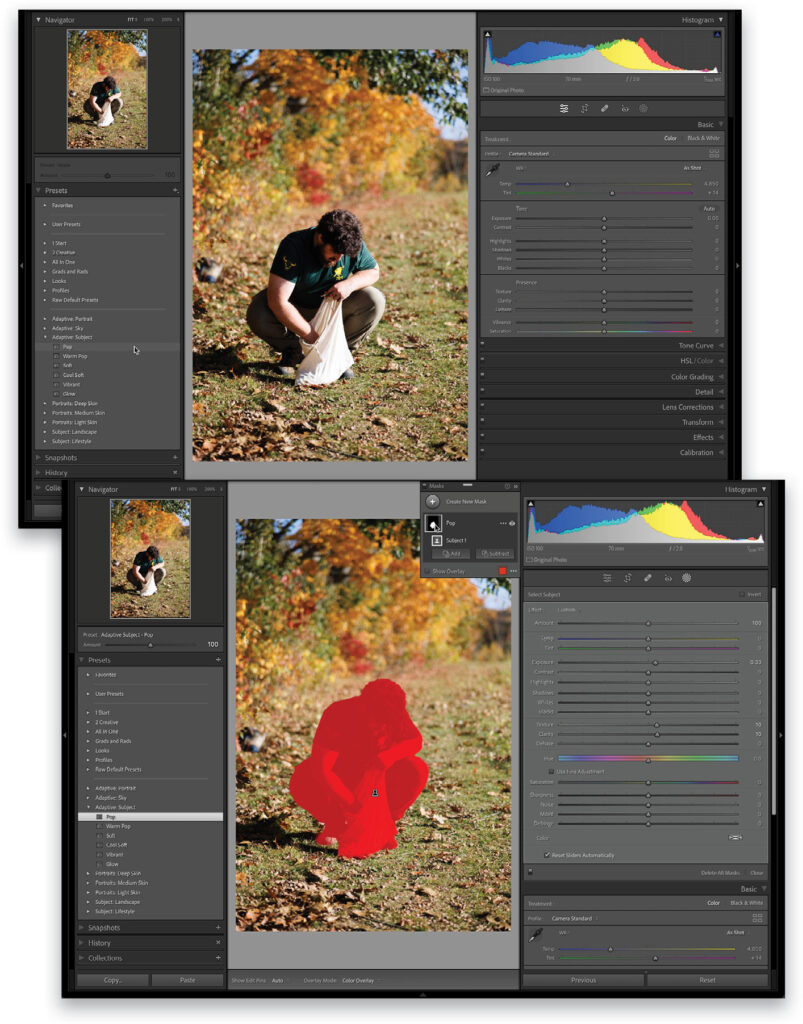
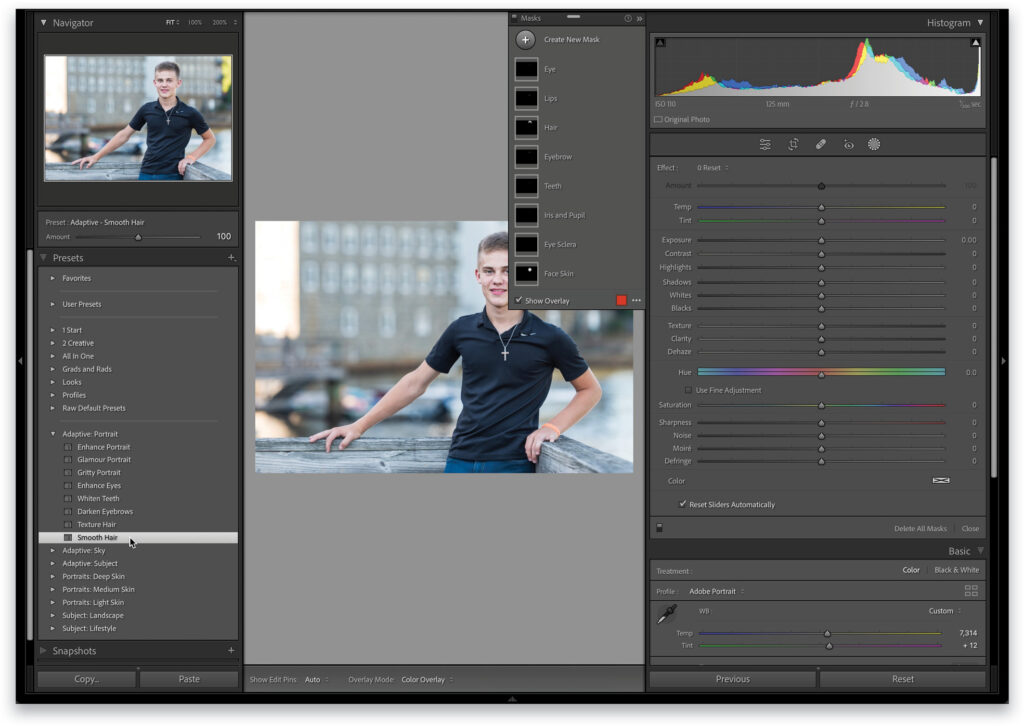
When you find a look that you’re curious about, click on it to apply it to the photo. Then, click the Masking icon (in the toolbar beneath the histogram) to open the Masking tools so you can select the mask it created and examine the settings. Here, I clicked on the one called Pop, and it included settings for Exposure, Texture, and Clarity, which were applied to the mask it created for what it considered the subject (and in this case, I’d agree).
Now, you may or may not like the look of any of the included presets, but I highly encourage you to click on each one in the Adaptive: Subject group and examine what it masked, how well it masked, and what settings it used to get its look. As you explore those presets, think about what you’d do differently, what settings you’d change, and what other mask types you’d like to create.
Now, select an unedited photo of a person where you can see their eyes and teeth (along with the rest of their face). Expand the Adaptive: Portrait group to see the included presets and click the Masking icon to open its panel (there should not be any masks yet). Click the first preset, Enhance Portrait to see what masks are applied to your photo. You should see a mask for Teeth, Iris and Pupil, Eye Sclera, and Face Skin. Explore each mask’s settings.
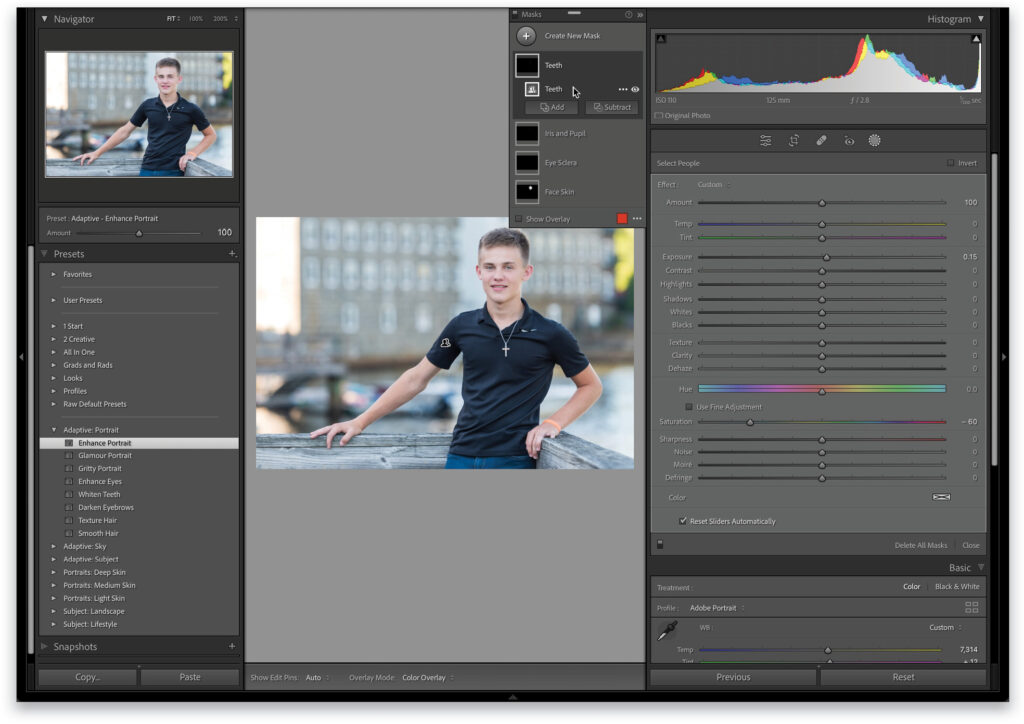
Now, in turn, click each of the other presets in the Adaptive: Portrait group to see those masks added to and, in some instances replace, the masks created by the first preset. By the end, your photo may not look great, but that’s not the point. The point is that because of the updates to how portrait masks can be generated, it’s now possible to automate the creation of masks (with settings) for individual features, such as hair, teeth, face skin, and so on. Furthermore, you can create an individual preset for each feature alone and know that later you can apply them all to a single photo, and they’ll stack accordingly. This is incredibly powerful when applied to a single photo, but now think about applying presets to a batch of photos at once, and it just may change your workflow!
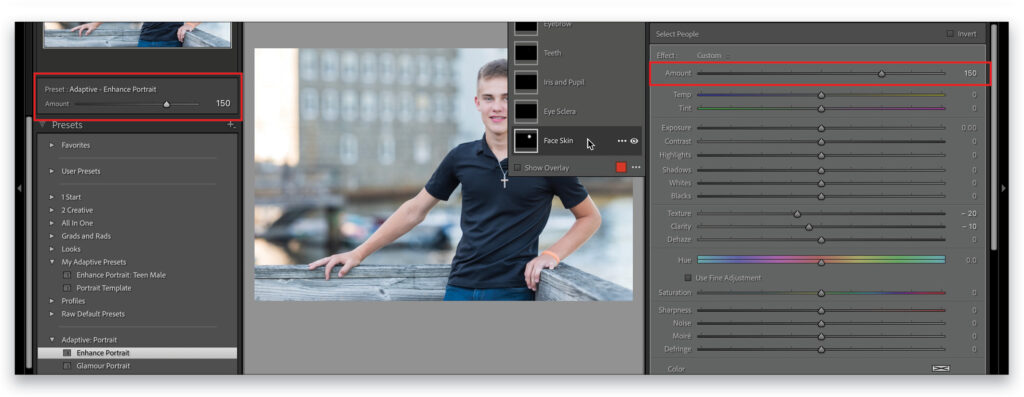
In addition, notice that at the top of the Presets panel, the Amount slider should be enabled for all the included Adaptive presets, which means you can fine-tune them after they’ve been applied for even more control. Let’s say you apply the Smooth Hair preset, and then move the Amount slider to 78. If you look at the top of the Masking panel, you’ll see the Amount slider there corresponds to that same amount. If you apply Enhance Portrait and move the Amount slider to 150, then each respective mask created by that preset will see its settings moved to 150 as well, but without affecting any of the other masks created by other presets or manually by you. What amazing control!
CREATING CUSTOM ADAPTIVE PRESETS
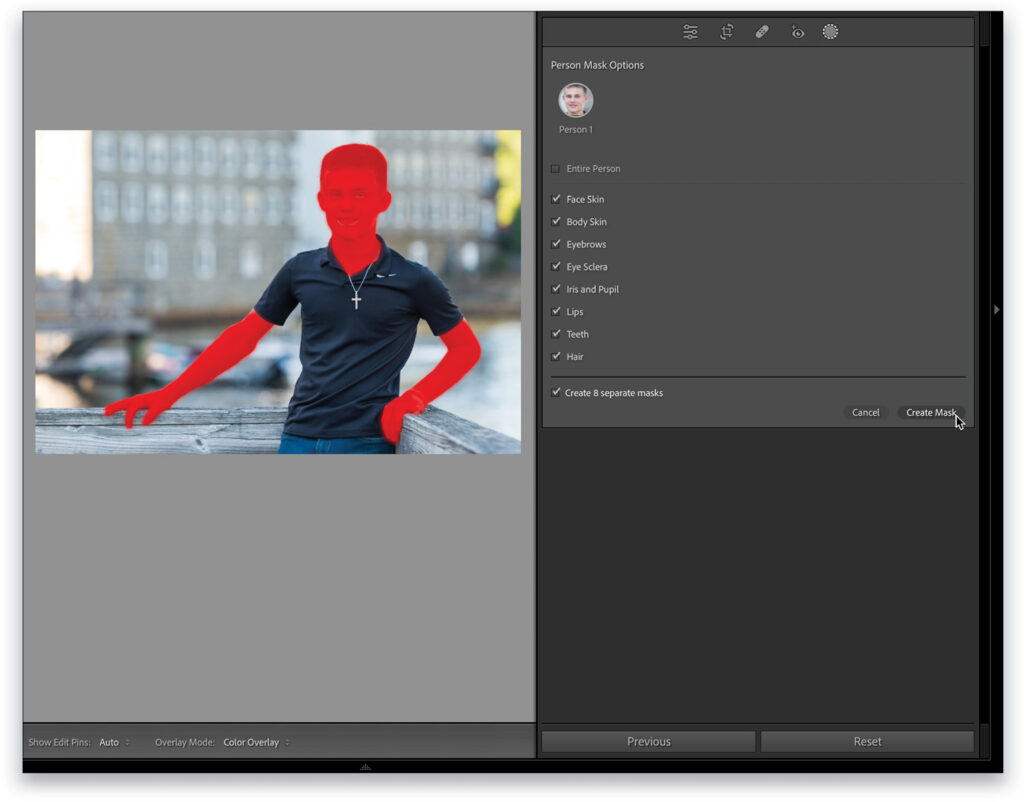
Hopefully, the creative wheels in your mind are turning now as you think about all the possibilities for customizing these to your own personal workflow and taste. Let’s keep working with that portrait photo you selected, and click the Reset button (at the bottom right) to clear away any existing masks and settings. Click the Masking icon (if not still in Masking mode) and look for the People section under Add New Mask (at the bottom). Click the icon for the person shown to see all the individual features that can be detected and masked. Now, you could check Entire Person, and have a single mask for the whole person but, for this exercise, uncheck Entire Person and instead, check each individual feature. Then, at the bottom, make sure Create 8 Separate Masks is checked and click Create Mask.
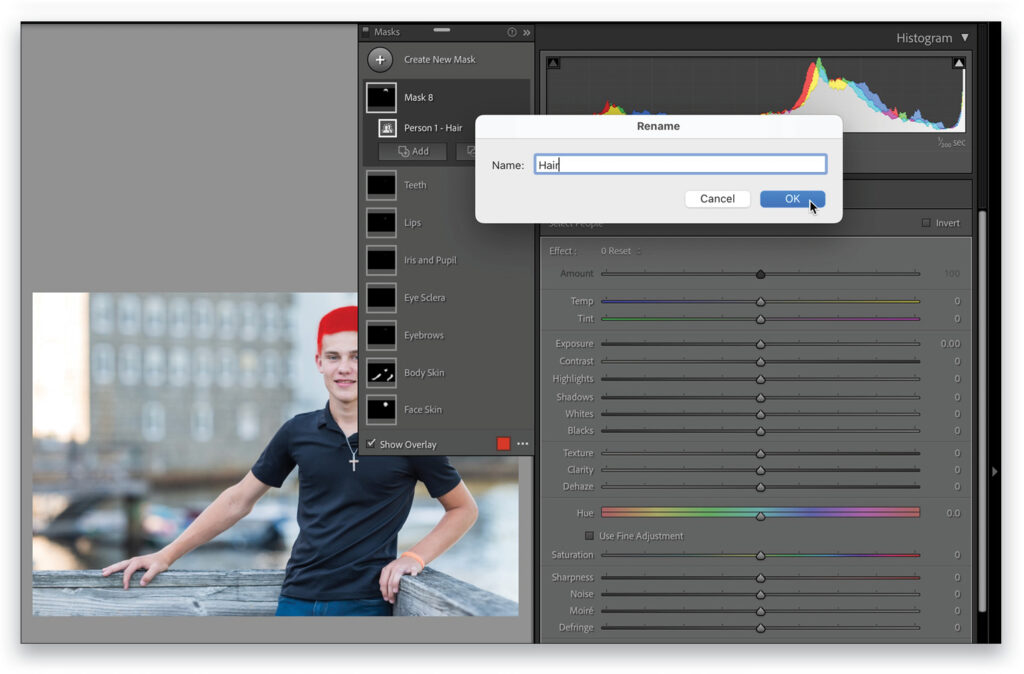
Eight individual masks will be applied to the photo and, at this point, each mask has no settings included—think of it as a blank canvas awaiting your brush. You can make this a template that you can use to make new presets quickly down the road. In the Masks panel, double-click on each mask and rename the Mask Group to reflect the feature being masked (instead of Mask 1, and so on). When you’re done, your masking panel will be a lot easier to read what each mask is affecting.
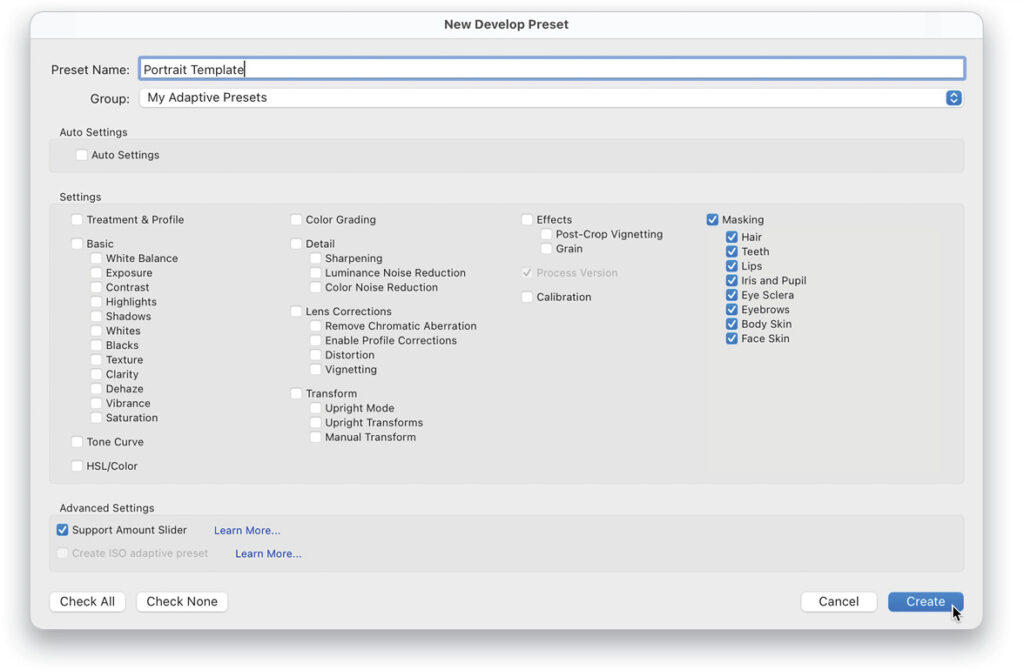
Let’s save all that work as a preset. Click the + sign at the top of the Presets panel and choose Create Preset. In the New Develop Preset dialog, click the Group drop-down menu, choose New Group, and name the new group something like “My Adaptive Presets,” or whatever makes sense to you. Then, click the Check None button at the bottom left to clear all the checkboxes. Under Masking, check the box next to each Mask Group name (this is why we renamed those Mask Groups previously). I’d leave the Support Amount Slider checked, but that’s all. Give your preset a meaningful name, like Portrait Template, and click Create.
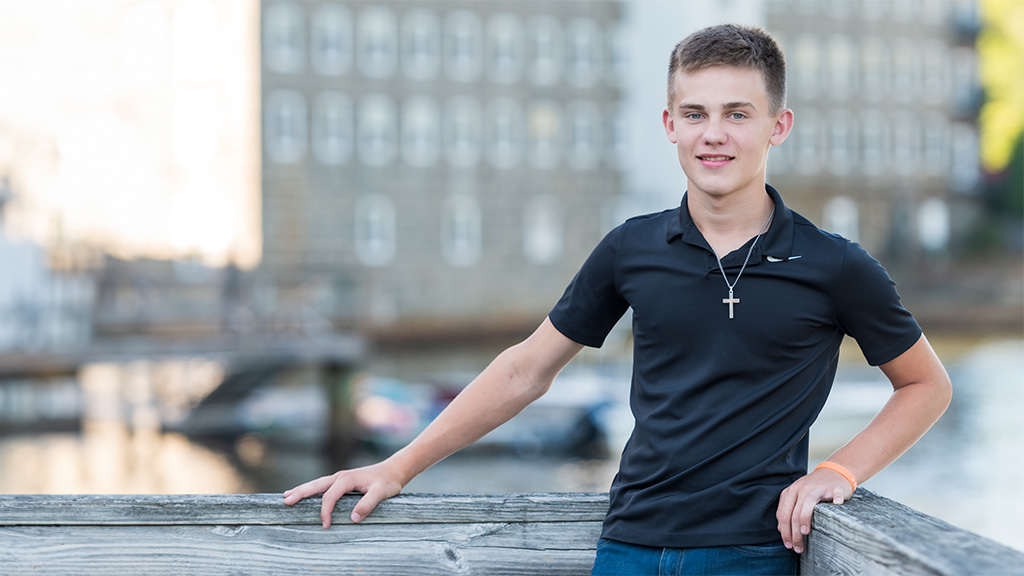
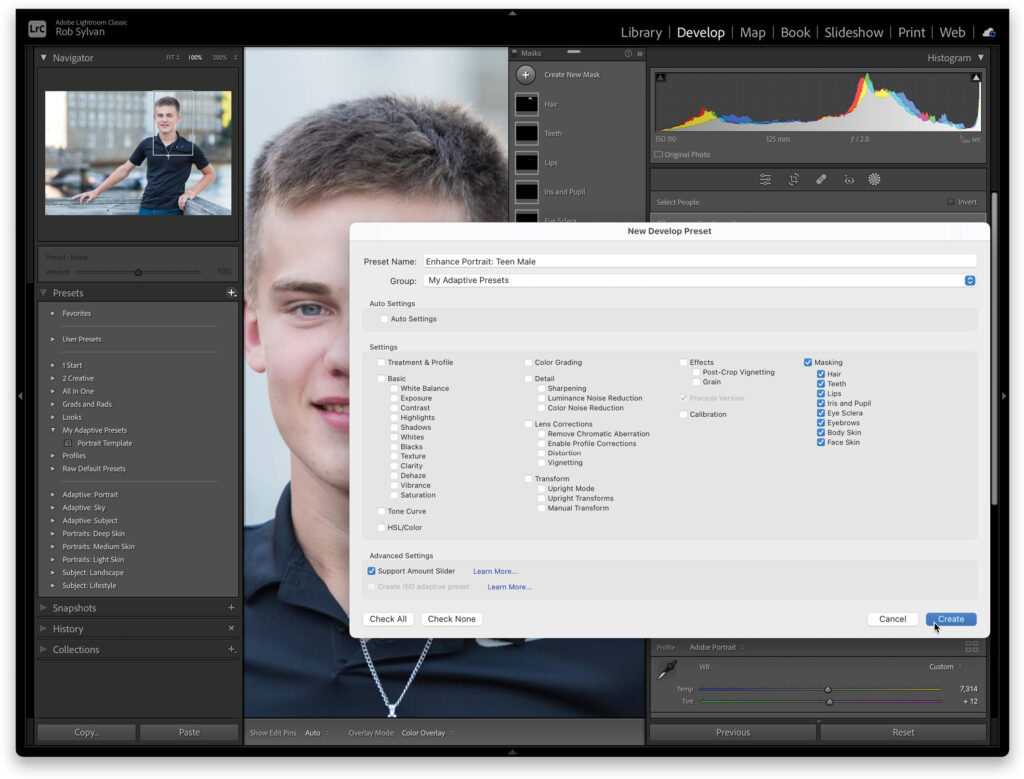
That will create a new preset group in the Presets panel and place your new preset within it. Now you’ve got a powerful preset that does nothing except create masks for each portrait feature, and here’s where you get to customize and play with the settings. One at a time, click on each Mask Group and adjust the settings for that specific feature to make it look good to your taste. Don’t worry about it being perfect for all photos, just tweak and adjust it for this one. Once you’ve adjusted the settings for each feature, click the + sign at the top of the Presets panel and create a new preset. Give it a meaningful name (in my case, “Enhance Portrait: Teen Male”), and make sure all the Masking boxes are checked (as well as the Support Amount Slider). The preset group you created previously should still be selected, but it’s always worth double-checking so you can find it again. Then, click Create.
That preset will be added to your preset group along with your template. Now that you know how this works you can use your template preset as a starting point for creating new presets for different looks, and different portrait subjects. If you want to make presets for single features (like just hair), then check only the box for the Hair Mask Group in the New Develop Preset dialog. You can be as granular as you wish. If portraits aren’t really your thing, then try those same steps with a landscape photo that has an obvious sky for applying the Select Sky masking tool. Or experiment with Select Subject and Select Background for automating the creation of masks for the subject in your photo with different settings for the background. Use the included presets for inspiration.
When you’re comfortable with applying these presets to individual photos, try selecting a batch of photos in Develop, enable Auto Sync, and apply one preset to all the selected photos to really speed up your workflow. (Note: Some time is needed to generate the masks in your batch, but once it’s done, you’ll be further ahead.) Then, you can walk through each photo and tweak as desired. Have fun!
This article originally published in the January, 2023 issue of Photoshop User magazine.
Ready to level up in Lightroom? The KelbyOne Lightroom Conference is back, April 16 & 17, 2024. Don’t miss out on this incredible opportunity to elevate your photography game. Secure your spot today for this immersive online event and equip yourself with the tools and knowledge you need to create breathtaking images like never before. Tickets are available now!