
If you look closely at a professionally printed newspaper or magazine, you’ll notice the images are made from millions of tiny dots (typically circles, but sometimes diamonds or squares). To prevent overlap, the dots are printed at specific angles according to ink color, creating a pattern called “halftone” (versus the “continuous tone” of an inkjet print). In this issue you’ll learn two ways to create a halftone pattern for a pop-art feel.
Creating a CMYK Halftone Pattern
This method produces a multitude of cyan, magenta, yellow, and black dots offset at different angles, just like a commercial offset printing press would make.
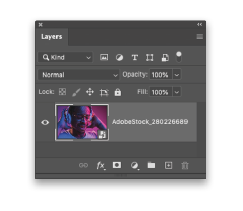
Step One: In Photoshop, choose File>Open As Smart Object and navigate to the image you want to open. If you’re starting in Lightroom, select a thumbnail in the Library module, and choose Photo>Edit In>Open as Smart Object in Photoshop. Alternatively, in Photoshop you can activate the image layer and choose Filter>Convert for Smart Filters. Either way, you’re placing a protective wrapper around the image layer so the filter you’ll run next happens to the wrapper and not the image.
If you’d like to download the low-res watermarked version of this image to follow along, click this link, log in with your Adobe ID, and click the Save to Library button. Right-click the image in the Libraries panel (Window>Libraries) and choose Edit to open it in Photoshop, and then convert it to a smart object as described above.
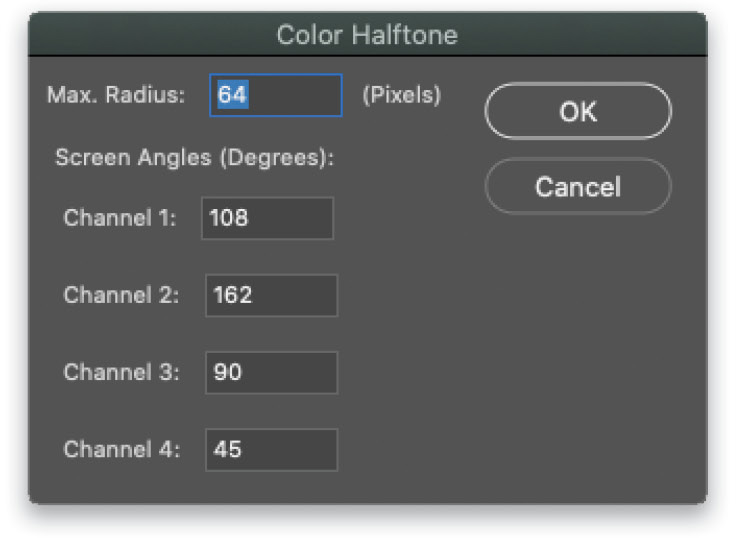
Step Two: Choose Filter>Pixelate>Color Halftone. In the dialog that opens, enter a Maximum Radius of 64 pixels (try 8 pixels on the Adobe preview image). Leave the Screen Angles at their default settings; these are the different print angles mentioned earlier. Click OK and Photoshop applies a color halftone pattern to the image.
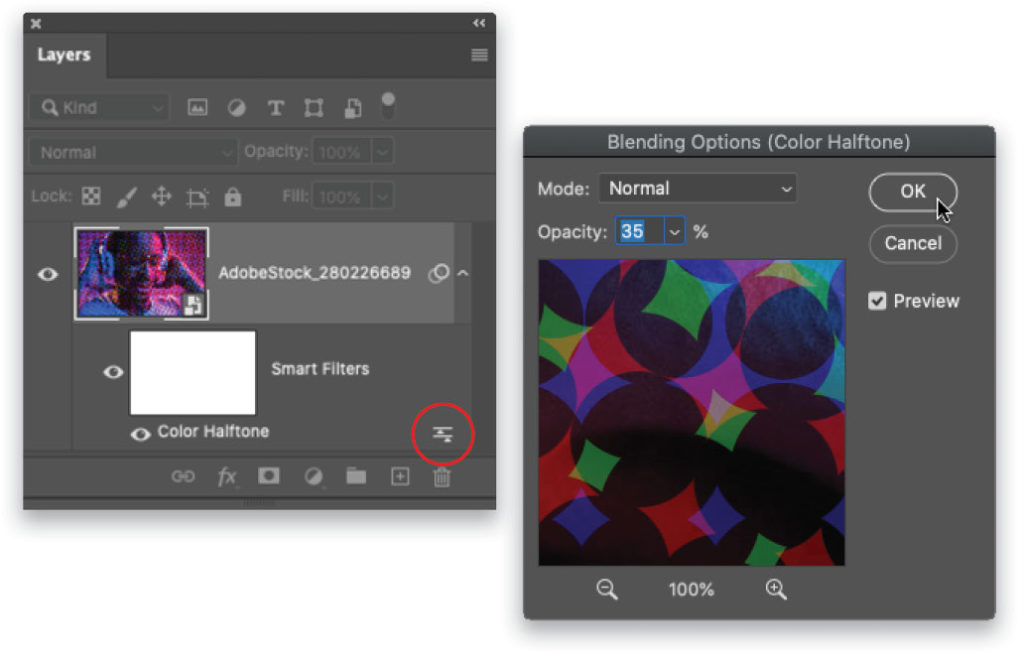
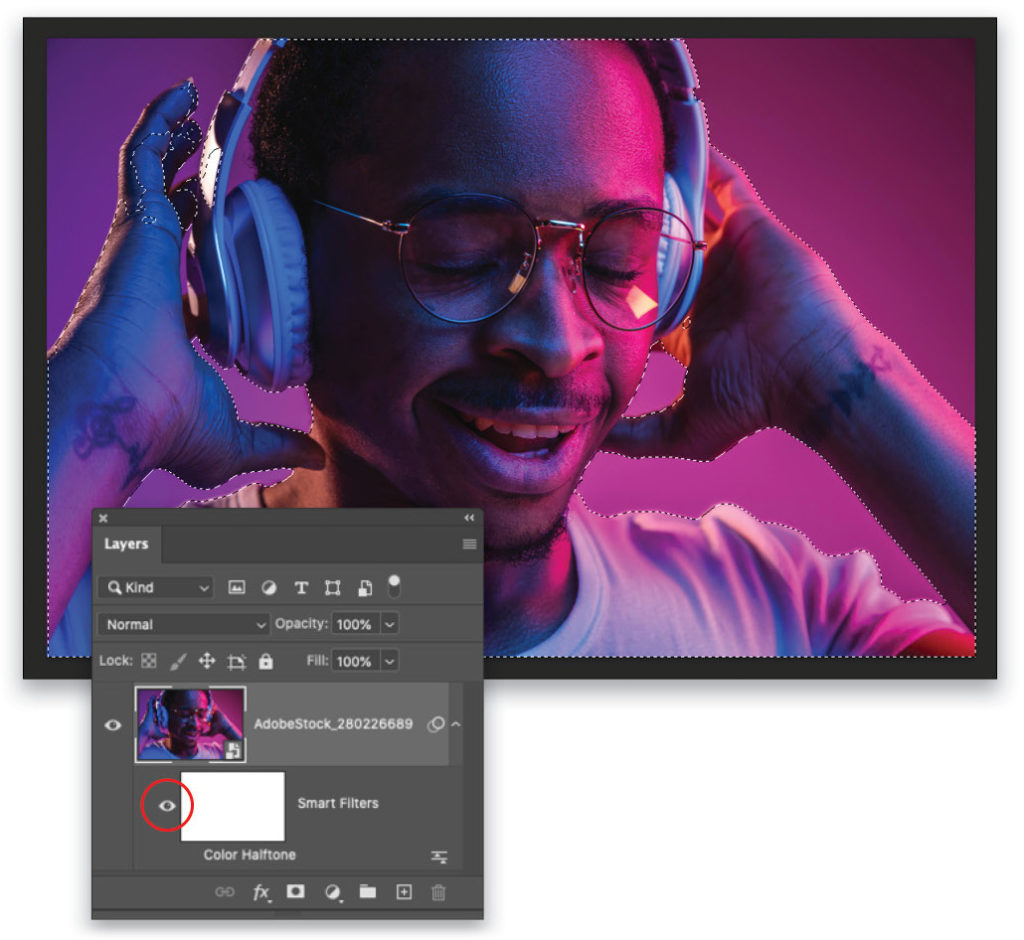
Step Three: To adjust opacity of the halftone filter, double-click the blending options icon to the right of the filter in your Layers panel (circled). In the Blending Options dialog that opens, you can see a close-up of the halftone pattern in the preview box. In the Opacity field, enter 35% and click OK.
Tip: Because you ran the filter on a smart object (i.e., you used smart filters), you can go back and tweak the filter settings at any time. Simply double-click the filter name in the Layers panel to reopen the Color Halftone dialog and adjust the radius.
Step Four: To apply the halftone pattern only to the background, use the filter mask that Photoshop automatically made when you ran the filter. You can make a selection before or after running the filter, so let’s do the latter. Turn off the visibility Eye for the Color Halftone filter (the area where it used to be is circled here) in the Layers panel to temporarily hide it, and then choose Select>Subject.
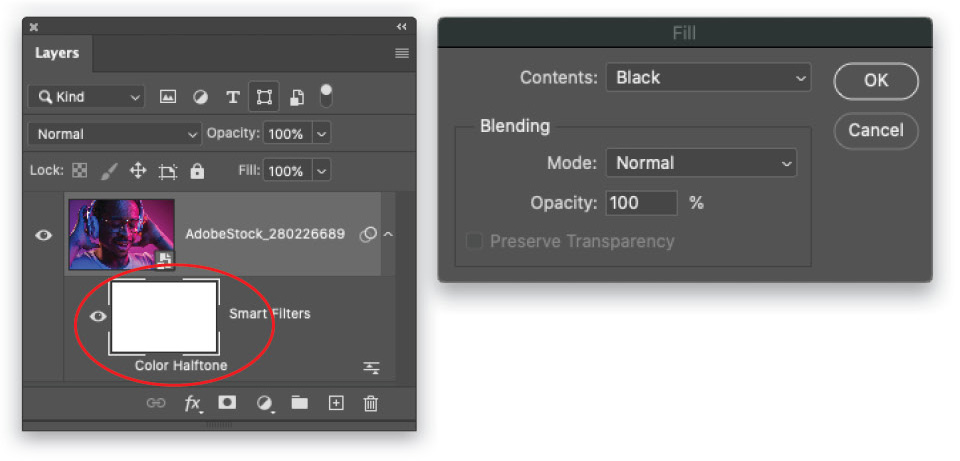
Step Five: Click the filter mask thumbnail in your Layers panel (circled); white brackets will appear around its corners. In the realm of masking, black conceals and white reveals. To hide the filter from the selected area, we need to fill it with black. To do that, choose Edit>Fill. In the dialog that opens, set the Contents drop-down menu to Black and make sure Mode is Normal and Opacity is 100%. Click OK.
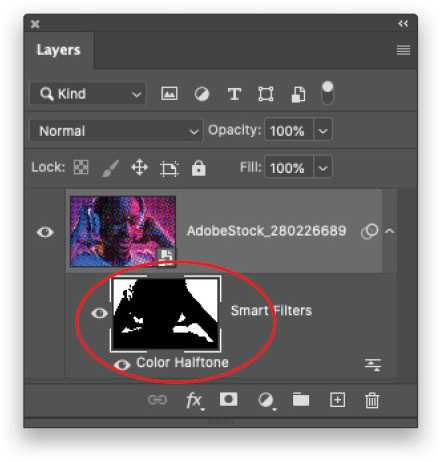
Step Six: Choose Select>Deselect or press Command-D (PC: Ctrl-D) to get rid of the selection (marching ants). Turn on the visibility of the Color Halftone filter in your Layers panel by clicking the empty spot to the left of the filter’s name (circled).

Step Seven: Let’s refine the filter mask. Start by activating the filter mask again in the Layers panel (circled).
Step Eight: Take a peek at the color chips at the bottom of your Toolbar (circled) and press the D key on your keyboard to set them to the default of black and white. Remember the rhyme, “black conceals and white reveals.” Since we need to hide the filter from his hand at the upper left, press the X key to flip-flop your color-chips so that black is on top.
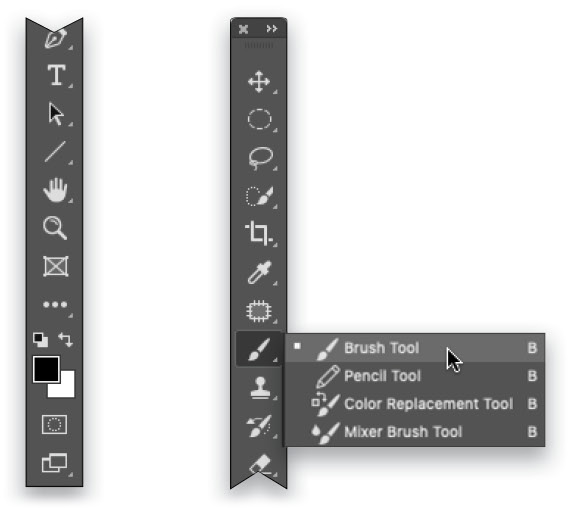
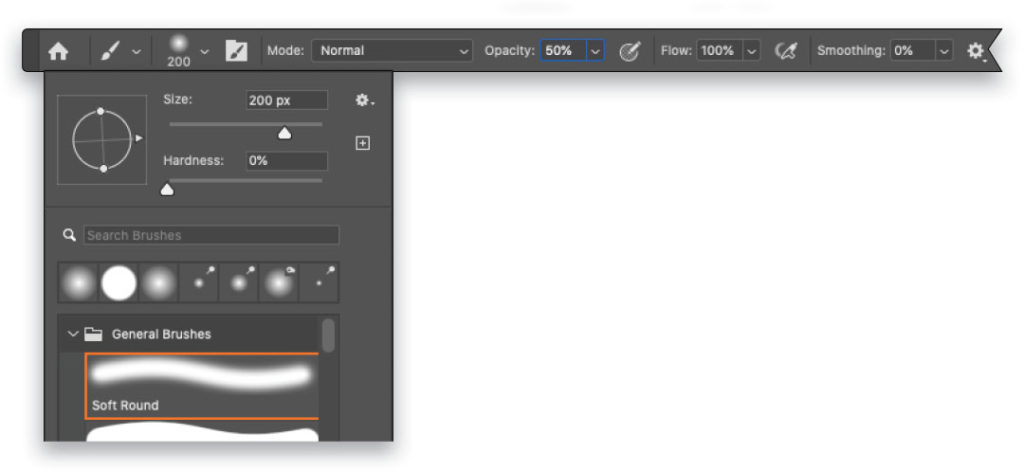
Step Nine: Grab the Brush tool (B) in the Toolbar (circled) and in the Options Bar, use the Brush Preset Picker to choose a Soft Round brush that’s slightly smaller than the area you need to hide (200 px was used here; try 40 px on the Adobe preview image).
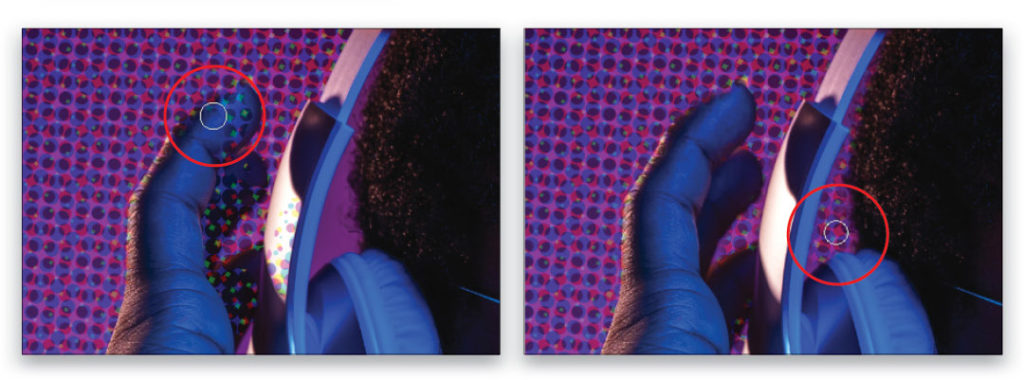
Step 10: Paint across the area where you need to hide the filter with black (left image). To reveal the filter, press X on your keyboard to flip-flop your color chips so white is on top and then paint across that area. In this example, that’s the area just above the earphone (right image). In the Adobe preview image, you may need to reveal the pattern between his left hand and face, as well. Adjust brush size as necessary as you go. Tip: Use the Bracket keys ([ ]) on your keyboard to quickly adjust the size of the brush.
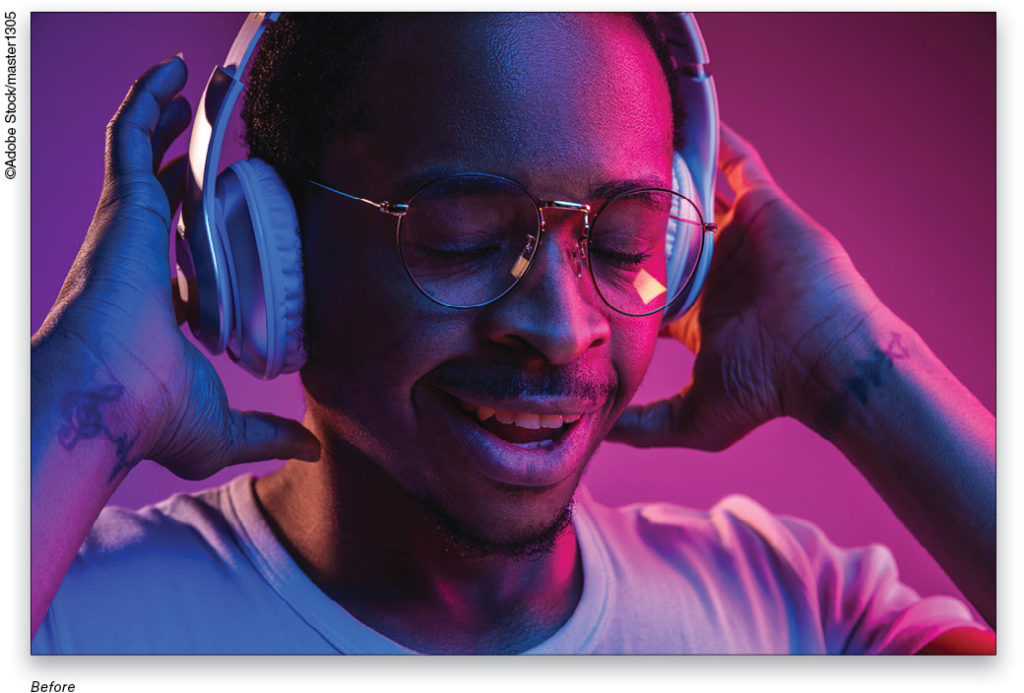
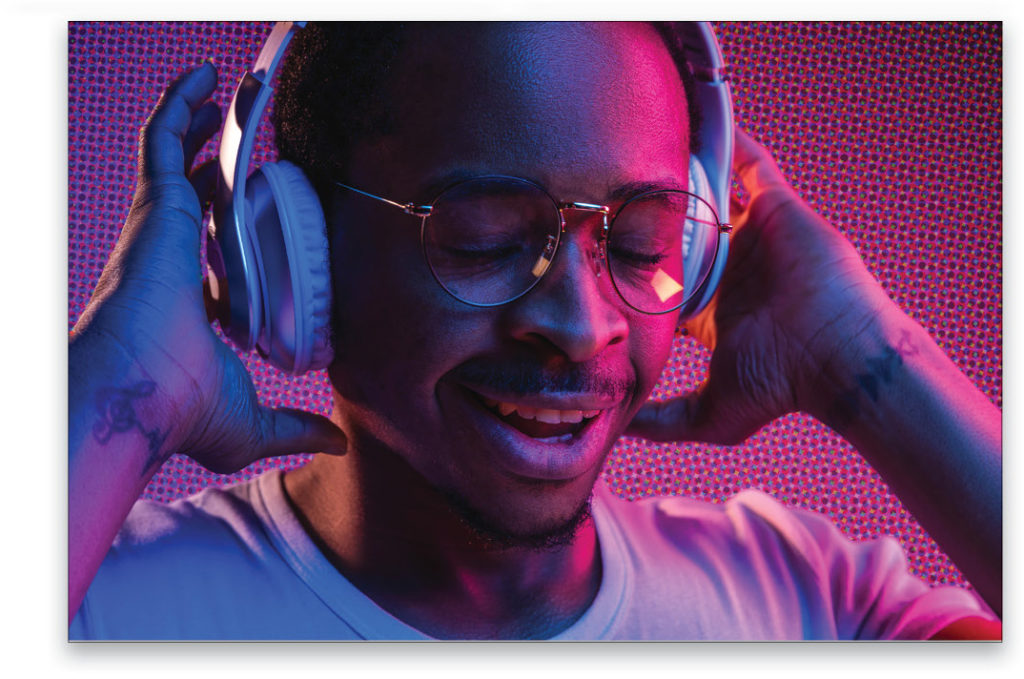
As you can see, the halftone pattern added some nice energy to the finished piece.
Creating a Two-Tone Halftone Pattern
This method produces a pattern of solid black dots that you colorize yourself: you’ll pick one color for the dots and another color for the background. Using adjustment layers in conjunction with the Color Halftone filter makes this technique a snap.
Step One: Click the half-black/half-white circle at the bottom of the Layers panel and choose Solid Color. When the Color Picker opens, click OK. It doesn’t matter what color the layer is because we’ll add color in the next step.
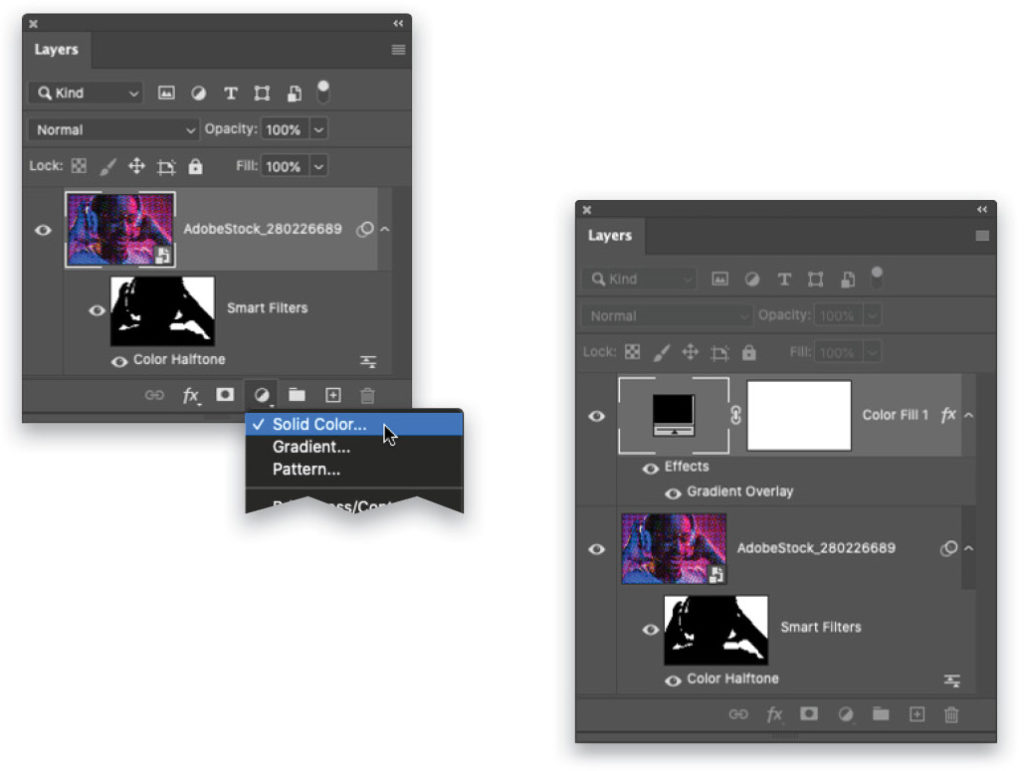
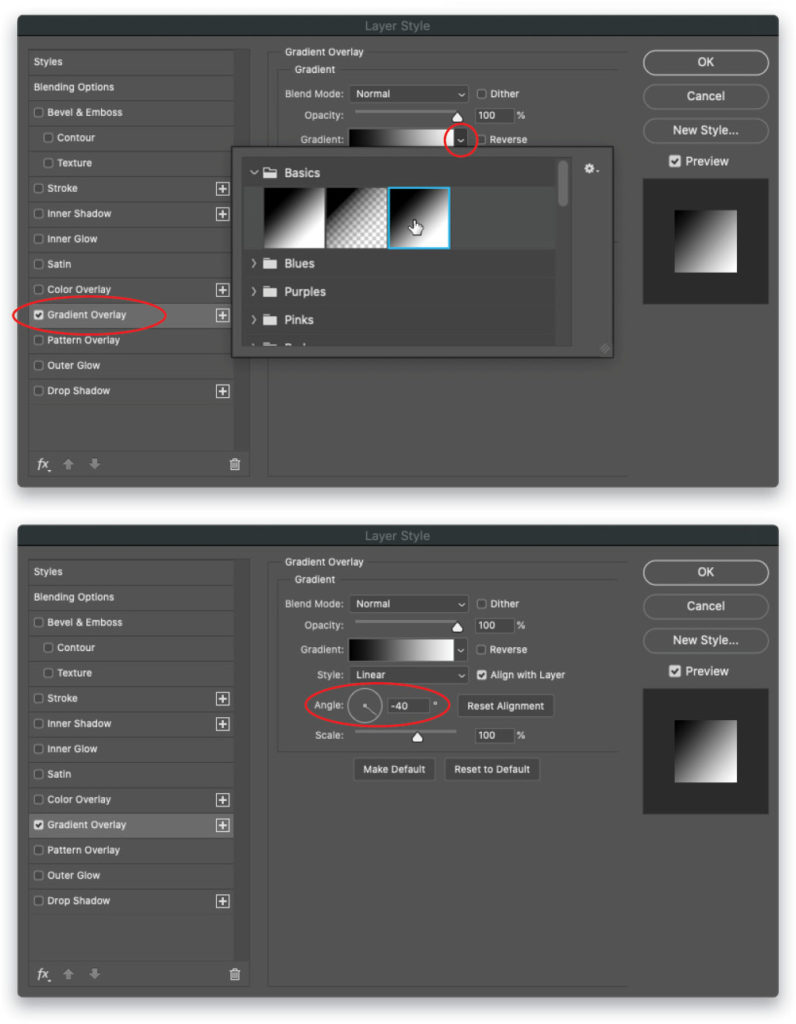
Step Two: Double-click below or to the right of the Color Fill 1 layer’s name to open the Layer Style dialog. Click Gradient Overlay (circled) in the list on the left, and set the Blend Mode to Normal and the Opacity to 100%. Click the down-pointing triangle next to the Gradient preview (also circled) to open the Gradient Picker and, from the Basics folder, choose the Black, White preset. Click the same triangle to close the preview panel. Now set the Style to Linear and the Angle (circled) to reflect the direction of your halftone dots (–40° was used here). Set the Scale to 100% and click OK.
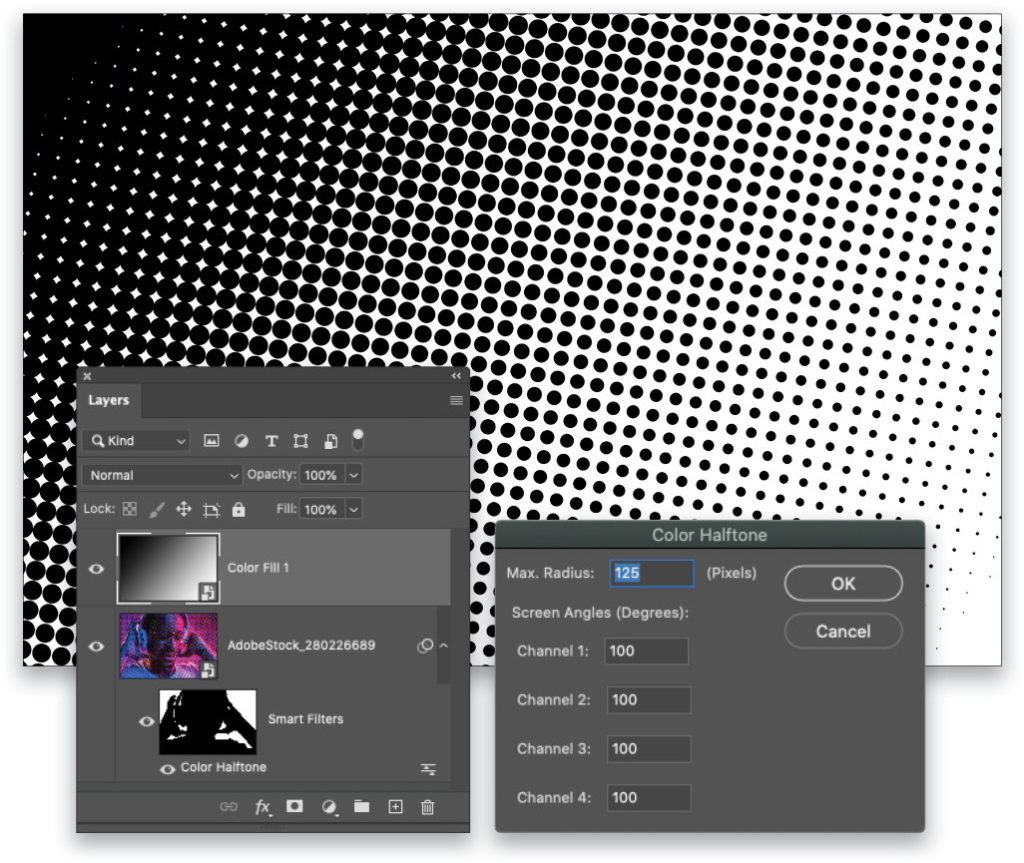
Step Three: Choose Filter>Con-vert for Smart Filters to turn the Color Fill 1 layer into a smart object. Now choose Filter>Pixelate>Color Halftone. In the dialog that opens, enter a radius of 125 pixels (for big dots!) and then set all four Channel fields to 100 to produce overlapping and thus solid color dots (try a radius of 15 pixels on the Adobe preview image). Click OK. Notice the angle of the pattern matches the angle you set in the previous step.
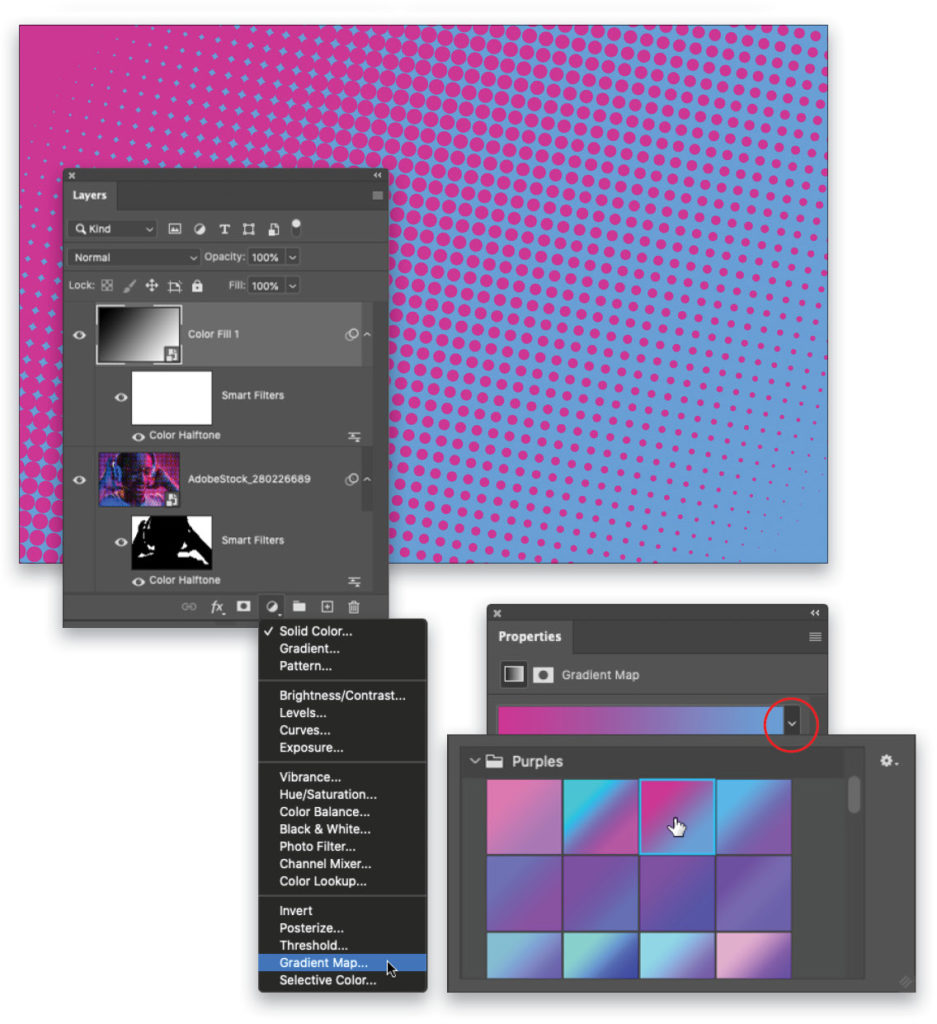
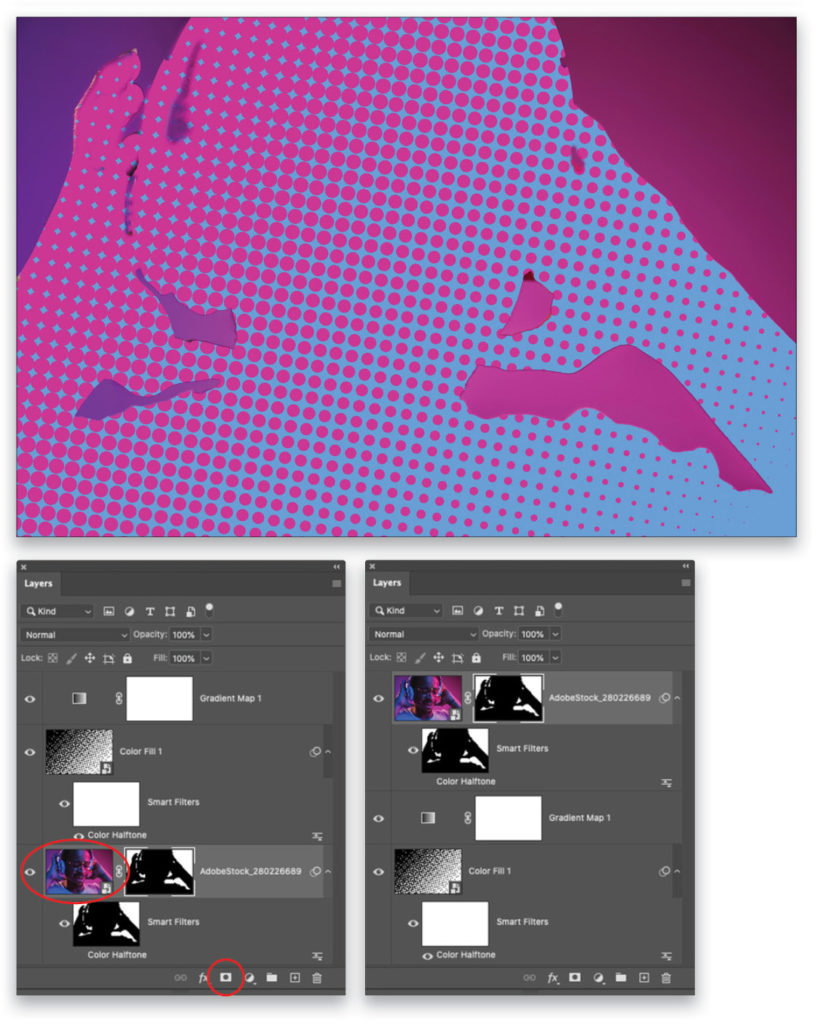
Step Four: Now let’s colorize the new pattern. Click the half-black/half-white circle at the bottom of the Layers panel again and choose Gradient Map. In the Properties panel (Window>Properties) that opens, click the down-pointing triangle next to the Gradient preview to open the Gradient Picker and, from the Purples folder, pick a preset (Purple_03 was used here). The first color in the gradient is used for the dots and the second color in the gradient is used for the background.
Step Five: Turn off the visibility Eye on the first Color Halftone filter you made. Now Command-click (PC: Ctrl-click) the filter mask thumbnail (circled) to create a selection of the filter mask we made earlier. You should see marching ants atop the pattern.
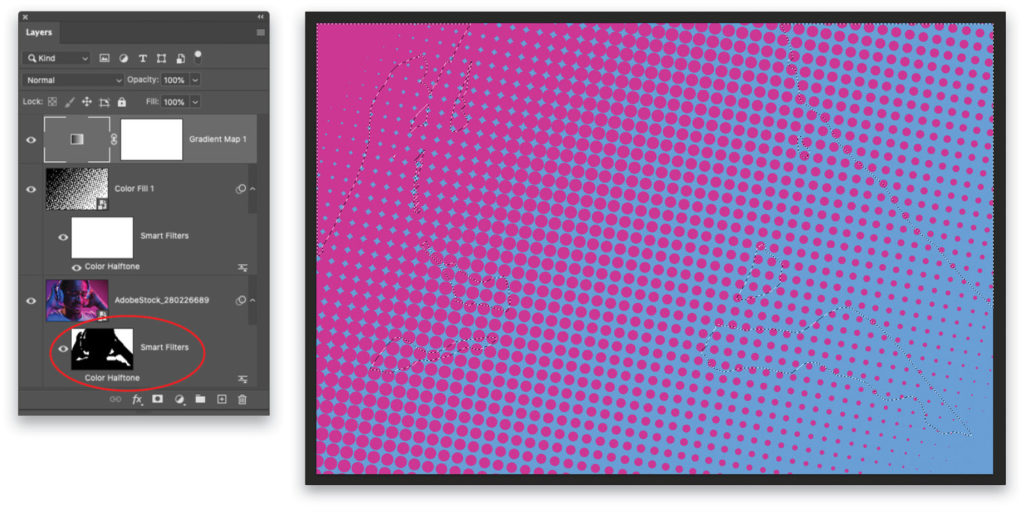
Step Six: Click the image thumbnail (circled) and then click the circle-within-a-square icon at the bottom of the Layers panel to add a layer mask. Photoshop will use your selection to create the mask. Click the top layer, Gradient Map 1, and Shift-click the second layer, Color Fill 1, to activate them both, and then drag them down beneath the image layer to the bottom of the layer stack.
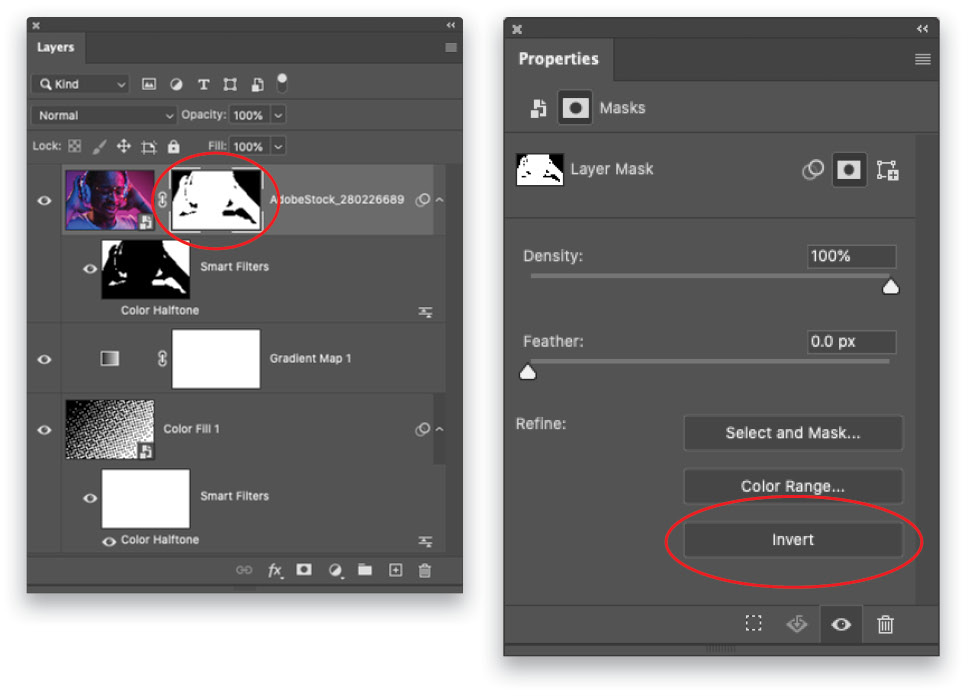
Step Seven: Since black conceals and white reveals, we need to flip-flop the colors in the layer mask you just made. That way you conceal the background and reveal the area inside the selection. To do that, double-click the layer mask (circled) and, in the Properties panel that opens, click the Invert button (also circled).

Remember, you can double-click the filter’s name in the Layers panel to reopen the Color Halftone filter and tweak the Radius. You can also double-click the Gradient Map adjustment layer and fiddle with different gradient presets. Until next time, may the creative force be with you all!
This article originally published in the April, 2021 issue of Photoshop User magazine.


