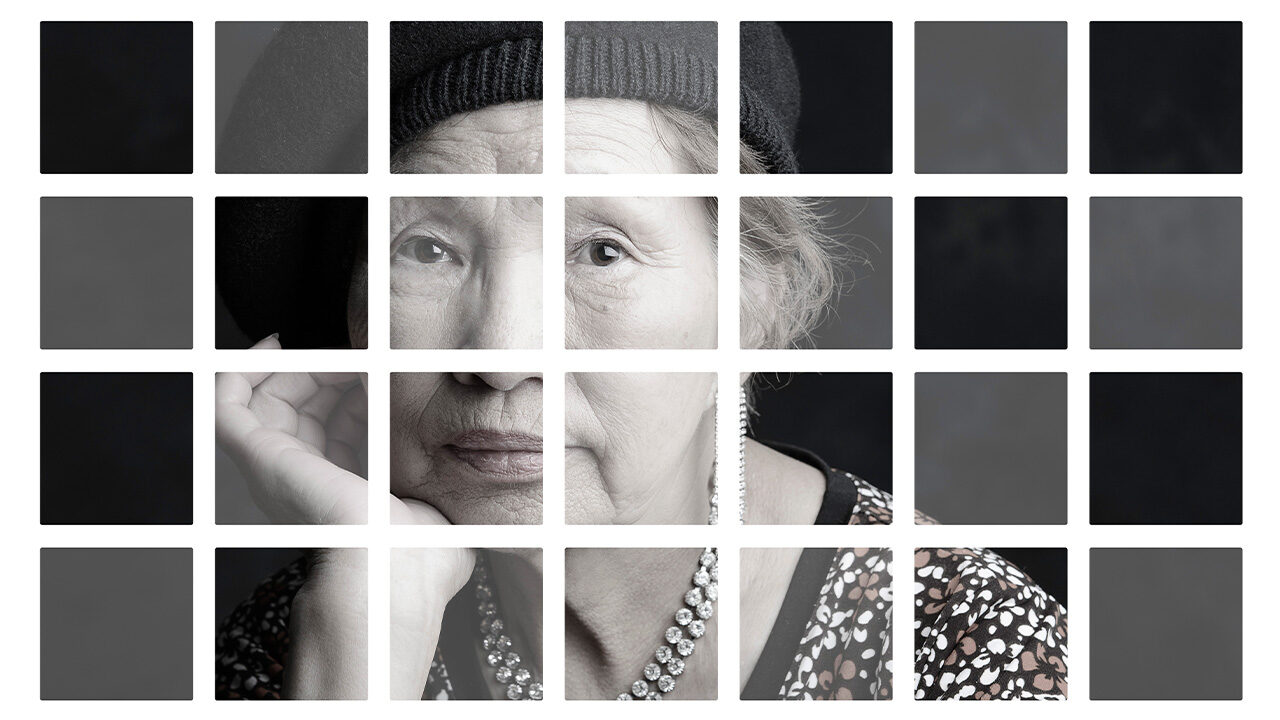
Photoshop’s ability to clip one layer to another lets you push the top layer’s content through the shape of the layer or layer group underneath it. That could be a shape drawn with one of the built-in shape tools, a shape made with the Lasso or Pen tool, a brushstroke, or even text. In this column, you’ll learn how to push a portrait through a grid of squares.
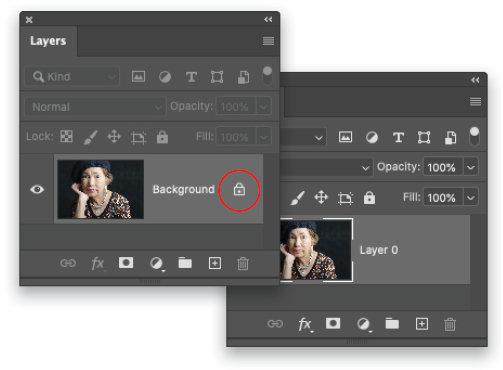
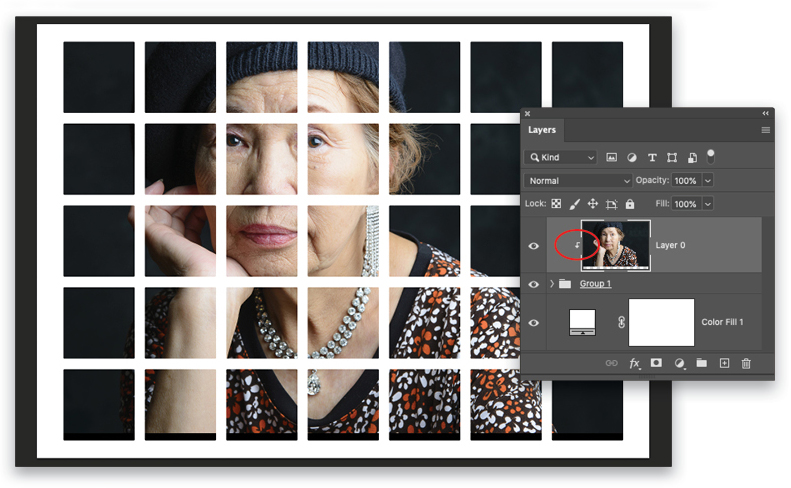
Step One: In Photoshop, choose File>Open and navigate to the portrait you want to open. If necessary, unlock the Background layer by clicking the padlock on its right (circled), so you can add more layers below it. If you’re starting in Lightroom, select the image thumbnail in the Library module and choose Photo>Edit In>Edit In Adobe Photoshop 2021.
If you’d like to download the low-res watermarked versions of these images to follow along, click this link, log in with your Adobe ID, and click the Save to Library button. Right-click the image in the Libraries panel (Window>Libraries), choose Edit to open it in Photoshop, and then unlock the Background layer as described above.
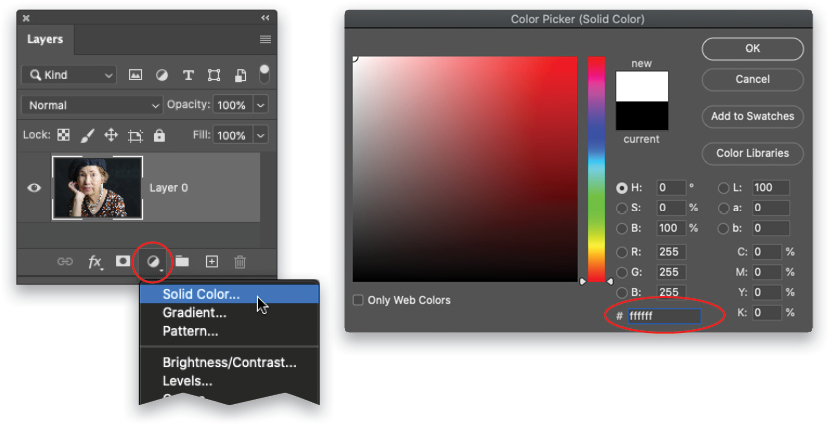
Step Two: Click the half-black/half-white circle at the bottom of the Layers panel (circled) and choose Solid Color. In the Color Picker that opens, enter #FFFFFF into the hex field (also circled) and click OK.
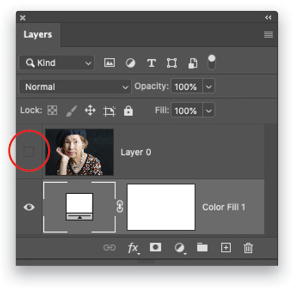
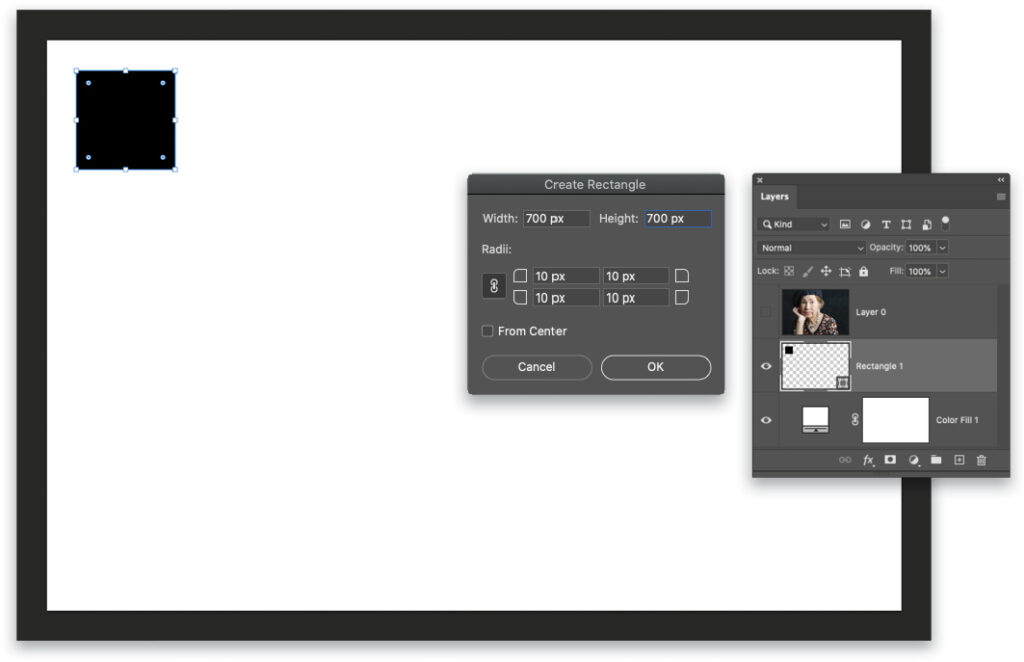
Step Three: In the Layers panel, drag the Color Fill 1 layer beneath the image layer and then turn off the visibility Eye (circled) on the image layer to temporarily hide it. This makes it easier to draw and place the shapes precisely in the next few steps.
Step Four: Press U to grab the Rectangle tool. In the Options Bar, set the Tool Mode menu to Shape (circled), and then set the Fill to black and Stroke to No Color.
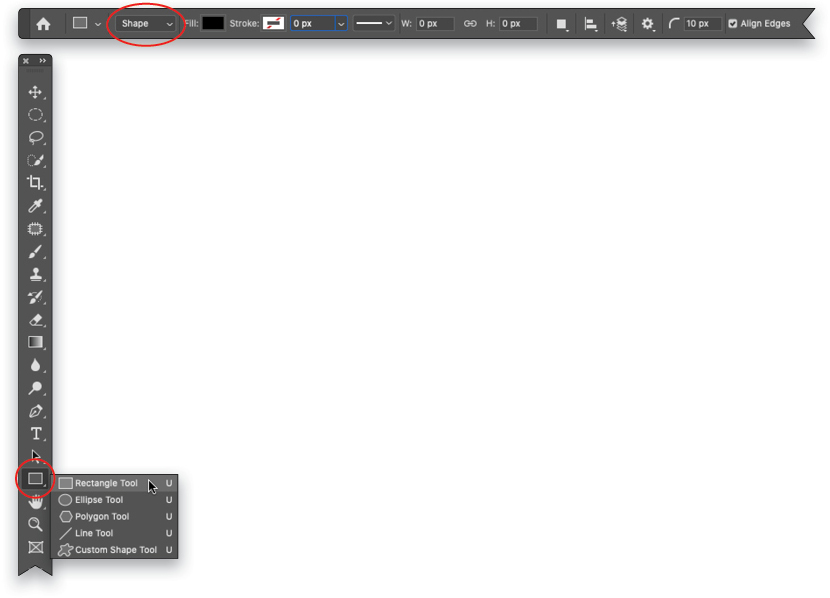
Step Five: Point your cursor near the upper-left corner of the canvas and Shift-click. In the dialog that opens, enter 700 px for both Width and Height and click OK. (If you’re working with the Adobe preview image, try 125 px, and set all the Radii to 5 px.)
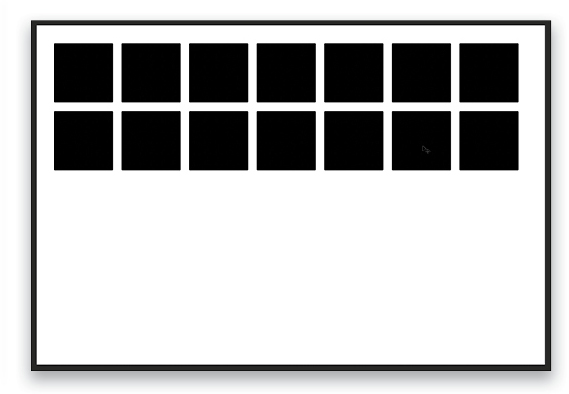
Step Six: Choose View>Snap and make sure there’s a checkmark next to Snap. If not, then click on Snap. Press V to grab the Move tool (circled). Press Command-J (PC: Ctrl-J) to duplicate the Rectangle 1 layer. Shift-drag the Rectangle 1 Copy layer to the right approximately 100 pixels past the right edge of the first square as shown here. (If you’re working with the Adobe preview image, try moving it 15 pixels past the right edge of the first square.)

Step Seven: Repeat Step Six until you have seven squares in a row. A pink display appears as you Shift-drag that shows the spacing between each square, which helps ensure equal spacing, plus you should feel the squares “snap” into place because you turned on snapping in the previous step.

Step Eight: In the Layers panel, make sure the topmost shape layer is active (named Rectangle 1 copy 6) and then Shift-click the bottommost shape layer (named Rectangle 1) to activate all of them. Press Command-J (PC: Ctrl-J) to duplicate them.
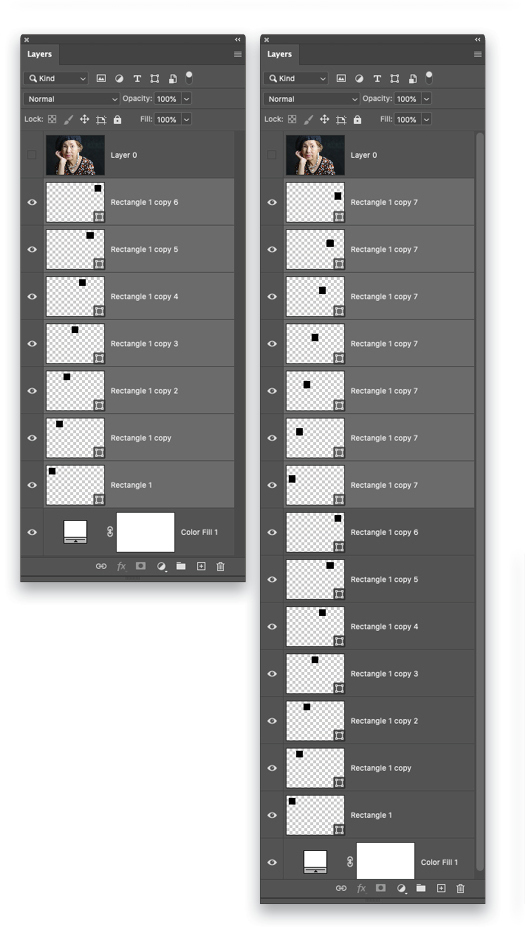
Step Nine: With the Move tool active in the Toolbar (it should be), click within one of the squares and then Shift-drag downward to move the duplicated layers 100 pixels below the first row. (If you’re working with the Adobe preview image, move it 15 pixels below the first row.)
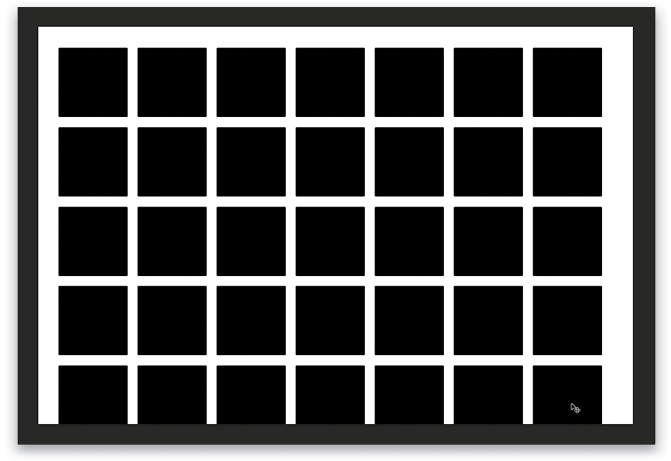
Step 10: Press Command-J (PC: Ctrl-J to duplicate the active shape layers and repeat Step Nine. Keep doing this until you have five rows of squares. Don’t worry if a little bit of the fifth row falls outside the canvas; we’ll fix that in a few steps.
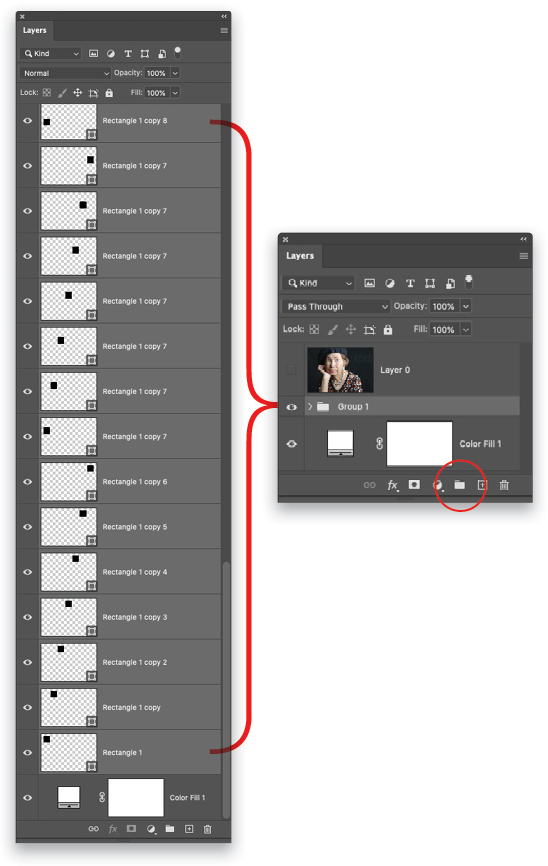
Step 11: Click to activate the topmost shape layer and then Shift-click the bottommost one to select them all. Click the folder icon (circled) at the bottom of the Layers panel and Photoshop puts them all into a single layer group.
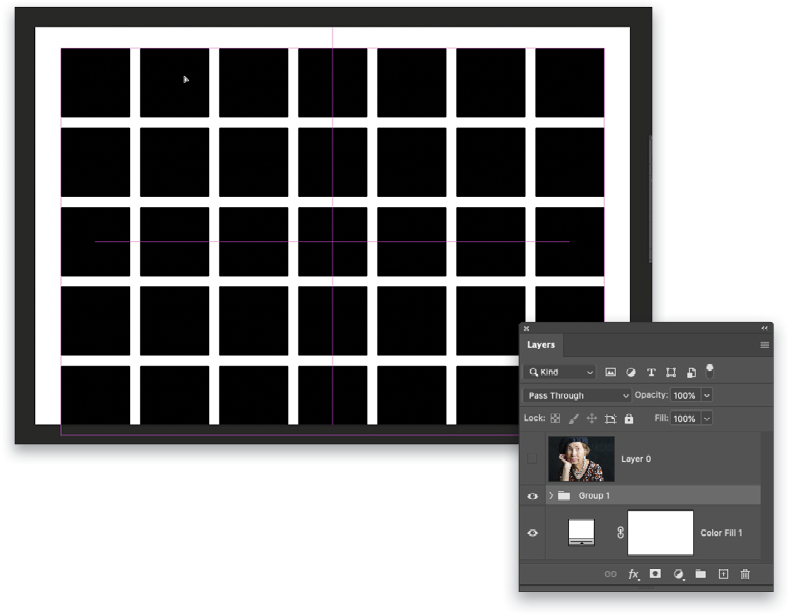
Step 12: With the layer group active in the Layers panel, and the Move tool active in the Toolbar, drag atop one of the squares horizontally until the group of squares are centered horizontally within your canvas. Pink lines help you line it up correctly.
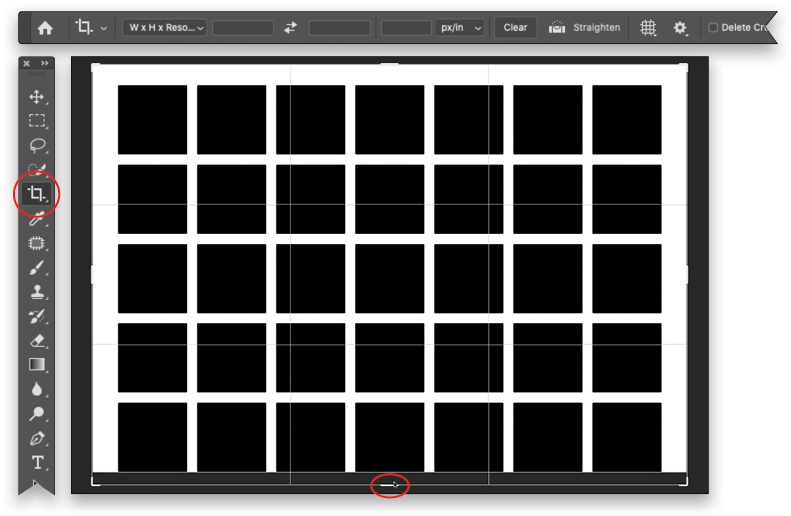
Step 13: If you need to add more canvas space at the bottom, as we do here, press C to grab the Crop tool (circled). In the Options Bar, click the Clear button to clear any previously used settings and then drag the bottom crop handle (also circled) downward beyond the canvas edge. Press Enter to accept the crop.
Step 14: In the Layers panel, activate the image layer and turn on its visibility Eye. Choose Layer>Create Clipping Mask and Photoshop clips the image layer to the layer group and pushes the image through all the squares. In the Layers panel, notice the image layer scooted to the right and it has a down-pointing arrow on its left (circled).
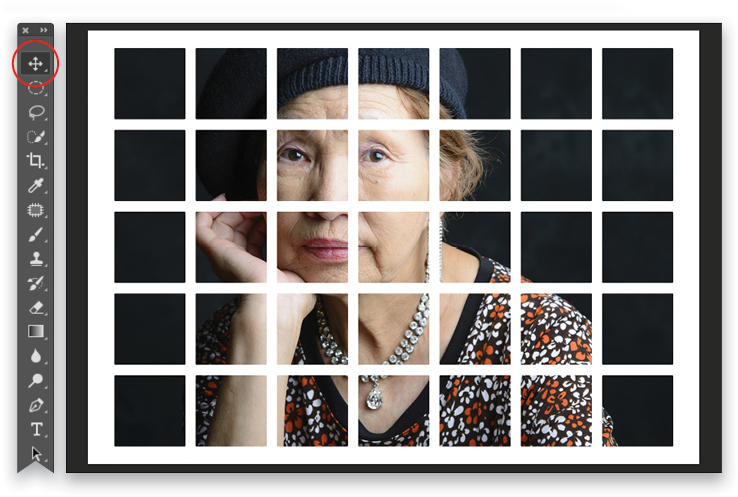
Step 15: Press V to grab the Move tool (circled) and use the Arrow keys on your keyboard to reposition the subject so it fills all the squares. In addition, make sure your subject’s eyes aren’t obscured. If the subject doesn’t fill all the squares, press Command-T (PC: Ctrl-T) for Free Transform, drag one of the control handles outward, and press Enter.
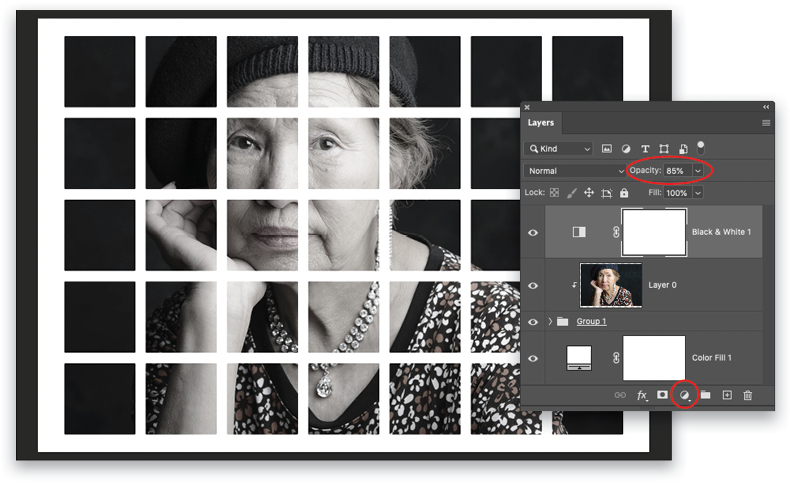
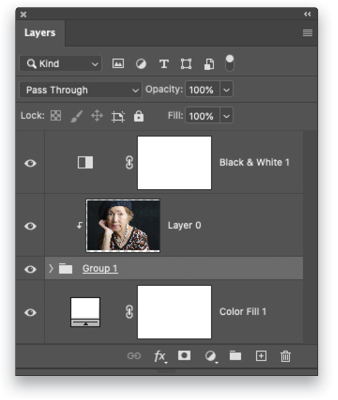
Step 16: Now let’s turn the portrait into a black-and-white. In the Layers panel, click the half-black/half-white circle (circled) and choose Black & White. Reduce the Opacity setting (also circled) to approximately 85% so that some of the original color shows through.
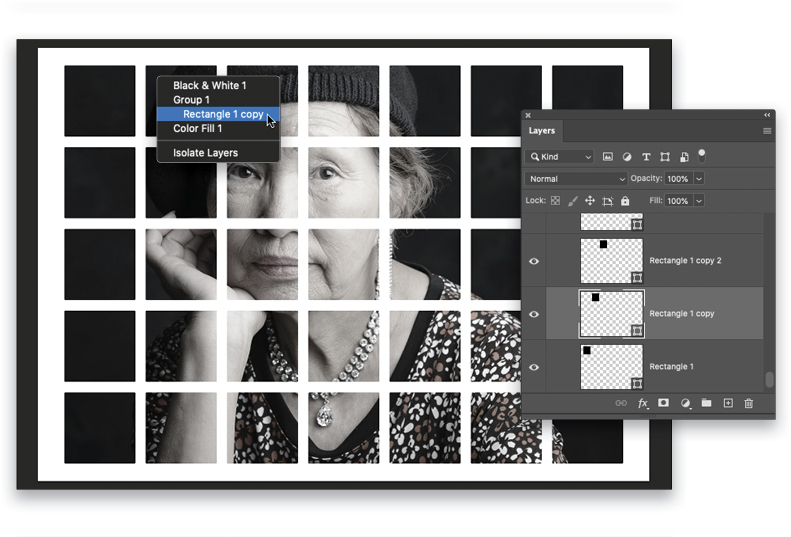
Step 17: For more creativity, select every other square and lower its layer Opacity. To do that, Right-click the second square in the top row and, from the menu that appears, click Rectangle 1 copy to activate that layer. In the Layers panel, notice Photoshop expanded the layer group and activated that layer. Lower the Opacity setting to approximately 75%.
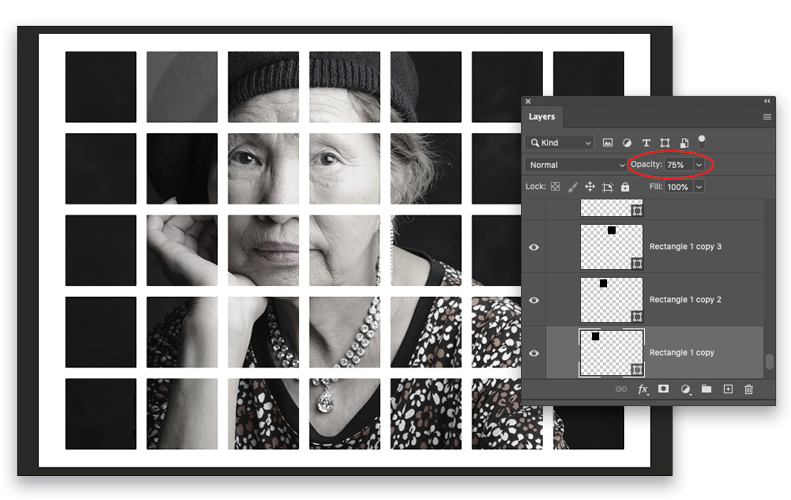
Tip: To hide a square completely, creating an empty space in the grid, lower its layer Opacity to 0%!
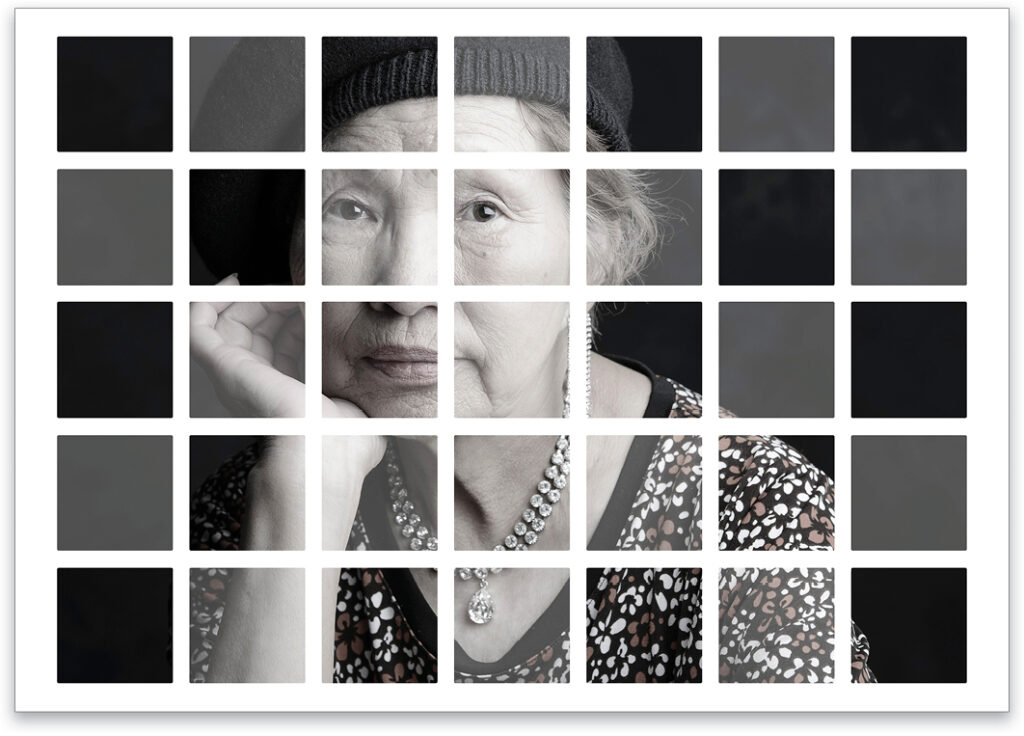
Step 18: Repeat Step 17 to reduce the layer Opacity of every other square in the first row to 75%. On the second row, start with the first square and then lower the Opacity of every other one. On the third row, start with the second square, on the fourth row, start with the first square, and so on. Here’s the final result.
While this technique takes a little time, the results are worth it, both in creativity and in the core Photoshop skills learned. Until next time, may the creative force be with you all!
This article originally published in the June, 2021 issue of Photoshop User magazine.
About Photoshop User and KelbyOne
Photoshop User magazine comes out digitally 12 times a year and is part of KelbyOne, the leading educational resource for Photoshop, Lightroom, and photography. Pro members have access to more than 900 video courses and 100 back issues of Photoshop User. To learn more about KelbyOne, click here.


