Do you remember when Content-Aware first became available in Adobe Photoshop? It was a game-changer. Not because of how well it worked at the time, but because the feature laid out a path toward intelligent auto-corrections in Photoshop. For those new to this feature, it allows you to replace pixels, or areas on the canvas, by
evaluating the surrounding pixels. It looks at colors, patterns, and tonality, then the software tries to “jigsaw-piece” the replacement fill based on the neighboring pixels of the area you’re replacing. It can be really impressive with the right image.
A Starting point: Edit>Content-Aware Fill
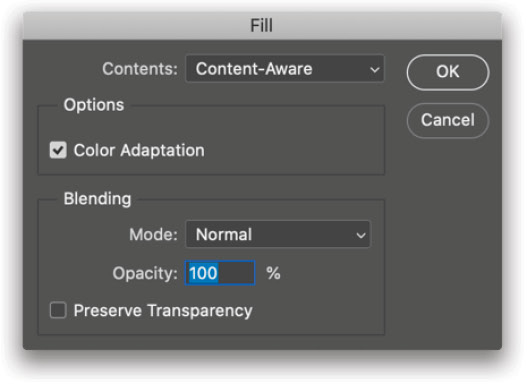
In recent versions of Photoshop, Content-Aware has started using a mode/interface to control how pixels get replaced. There are two areas that we usually apply Content-Aware. The legacy approach is to navigate to Edit>Fill, and in the Contents pull-down menu, choose Content-Aware. This looks at the whole image and fills a selection with new pixels based on what it has scanned from the document.
There were some hacks used for years around hiding pixels you didn’t want replicated through the use of layer masks. Ultimately, this led to the more recent Content-Aware Fill interface which can be found directly by navigating to Edit>Content-Aware Fill.
Content-Aware Is Not a Pattern Engine
Before we dive into the interface, though, let’s cover some basics of when this feature works best. Many users assume that it’s a form of pattern engine, but it’s really not. In the following image, you might think Content-Aware would do a perfect job because the content is so simple, but you’ll find out fairly quickly that it can be challenged with something this simple.
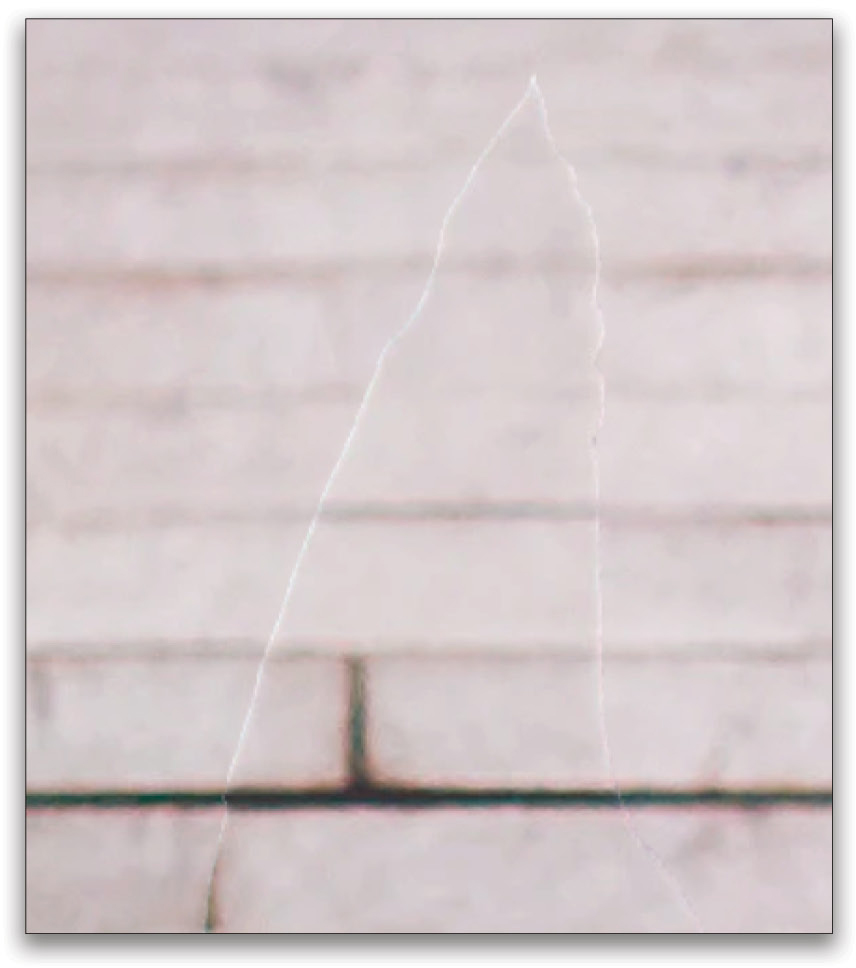
It’s a very basic grid pattern with a red organic shape placed on top. It’s all flattened on one layer, just as if it were a photo where you wanted to remove an element from the shot. The area around the red pixels is about as basic a pattern as you can have in pixels: It’s square, black-and-white, and has plenty of the repeated forms available from which to sample and make a pattern.
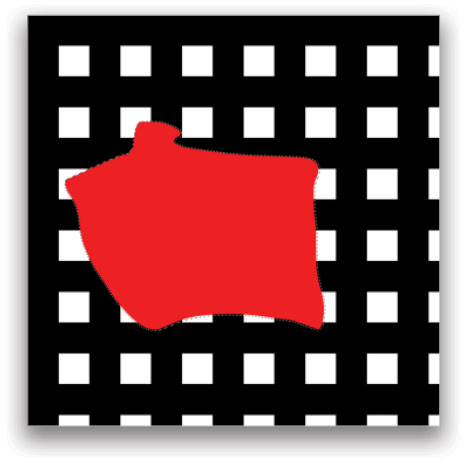
But as you can see after selecting the red pixels and going to Edit>Content-Aware Fill, the auto-result isn’t generating a geometric pattern to fill in the red pixels.
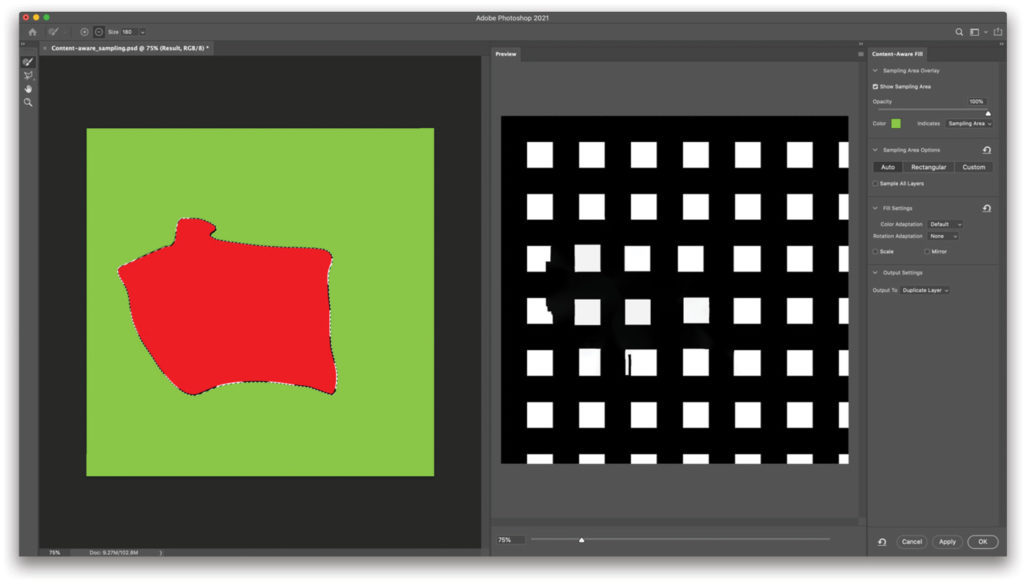
The Content-Aware Workspace
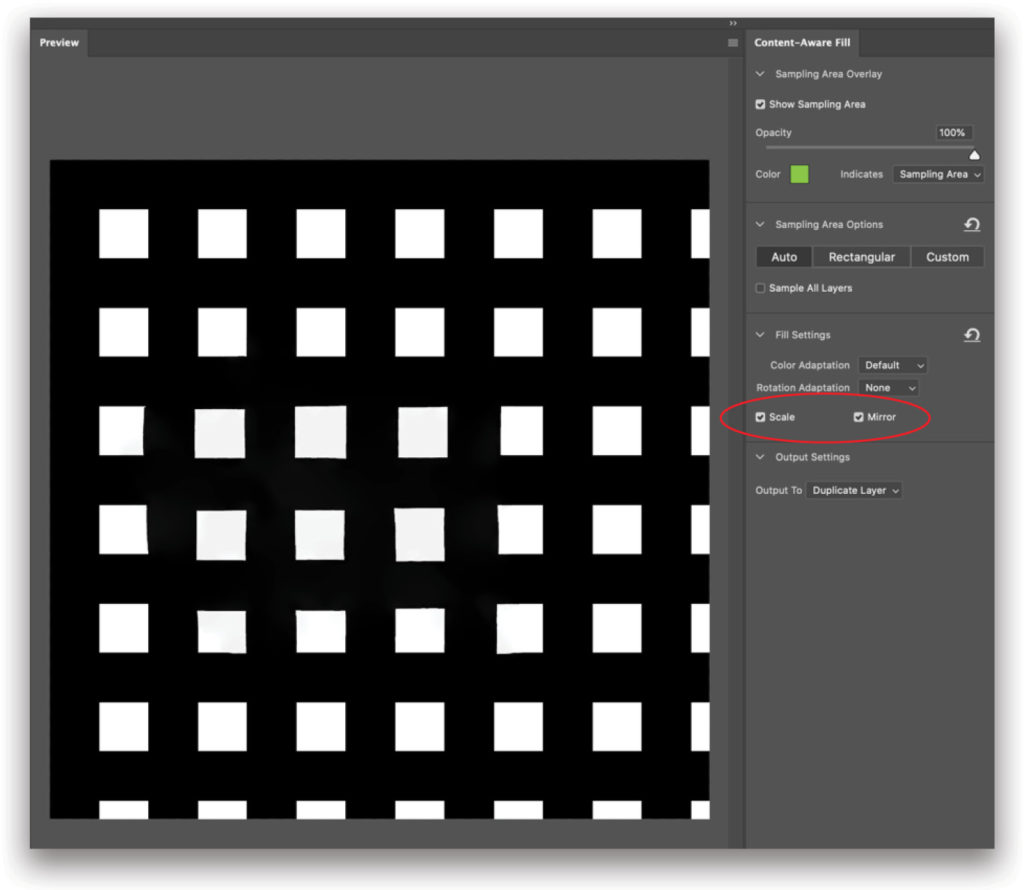
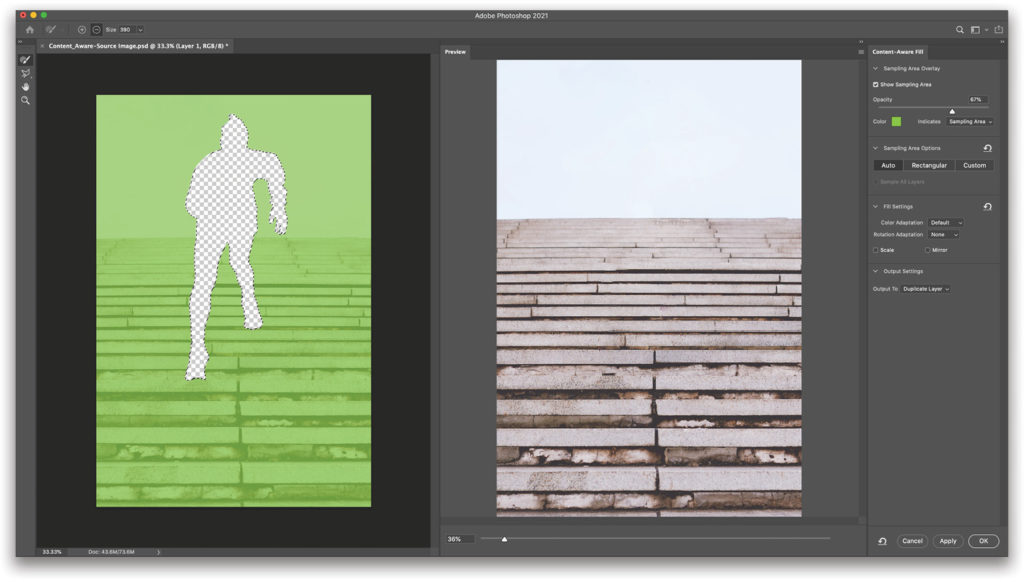
In the Content-Aware Fill workspace, you’ll see the original image on the left, the preview of the result in the middle (which can be resized by dragging the left edge of the Preview panel), a series of tools on the far left, and various controls in the Content-Aware Fill panel on the right.
By default, any area that’s green in the original image window is a part of the image Content-Aware can use from which to sample pixel data. You can modify this by using the Sampling Brush tool (B) from the top-left Toolbar. There are plus and minus icons in the Options Bar at the top of the interface so you can choose to add or subtract from the sampling area, although pressing-and-holding the Option (PC: Alt) key will temporarily toggle the brush between the two options while you paint.
If we run this same sample again, but turn on the Scale and Mirror functions in the Fill Settings in the Content-Aware Fill panel, it yields much better results. Although not perfect, it allows Content-Aware Fill to do further processing on how the sampled pixels might be applied to the replacement area. Because the results are generated behind a magic curtain, it’s always worth trying some of these options to see if they give you better results. But first, always make sure you’re only sampling from areas with pixel content that you believe is relevant.
Because of this, it’s widely believed that Content-Aware Fill will give the best results in real-world applications if there are visual textures that aren’t so rigid in a formulaic pattern. This allows for some randomization that isn’t as discernible by the human eye in the final result.
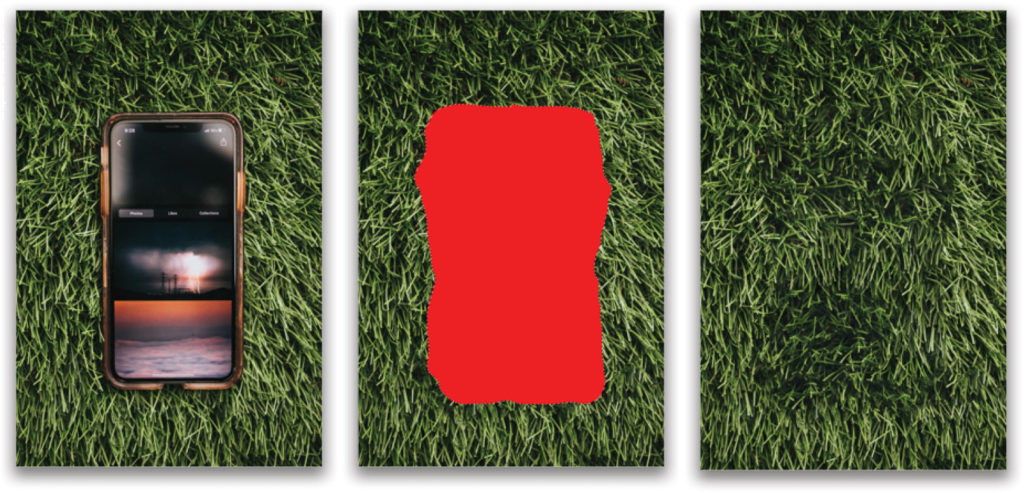
For example, in this image, the phone on top of some grass is replaced easily by default, and it’s nearly impossible to tell that the phone was ever there at all. The variance that can be replicated in a seemingly random way helps keep the texture looking believable, because the viewer can only look at so much of the image detail at any moment.
Understanding that Photoshop creates variance, it’s worth mentioning that, although the phone is a basic rectangular shape, you’ll improve the results by making your selection more organic in nature so that it can blend better. If you were to make a rectangular marquee selection on such a random texture, you’ll often see horizontal and vertical edges in the replaced area. The red area in the middle image below represents the shape of the selection used to Content-Aware Fill the phone area.
Project: Recomposing with Content-Aware
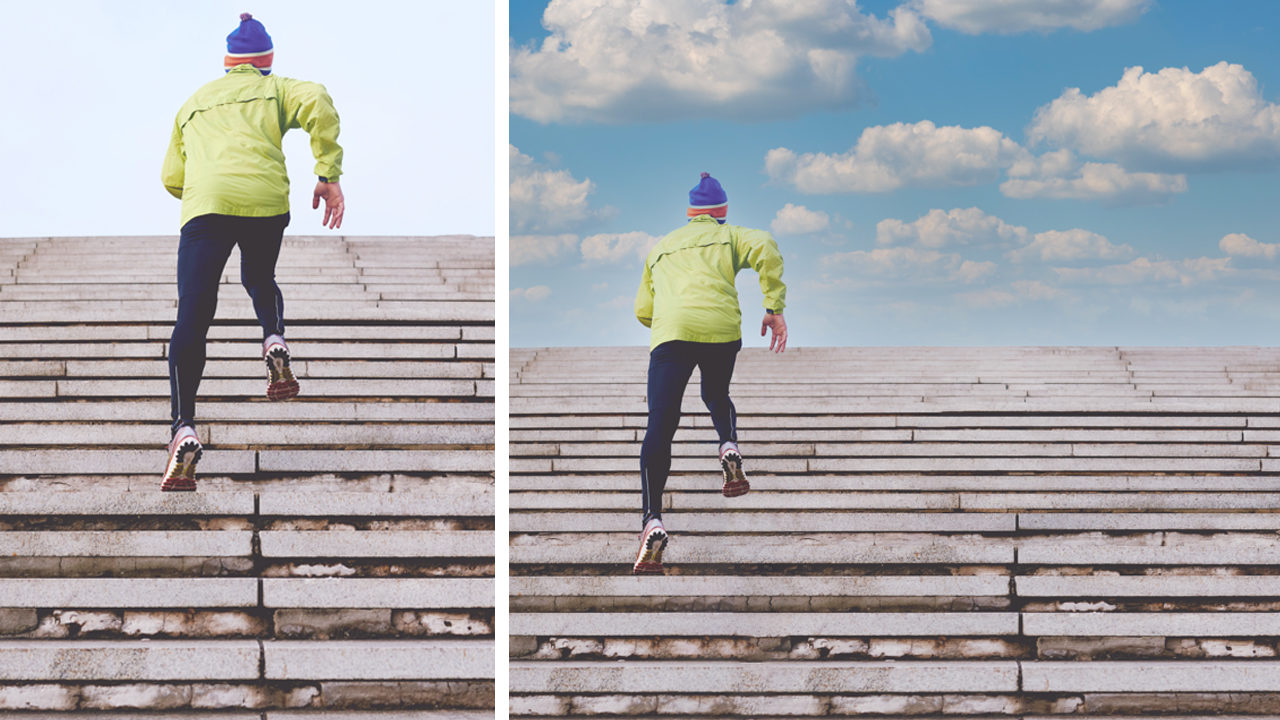
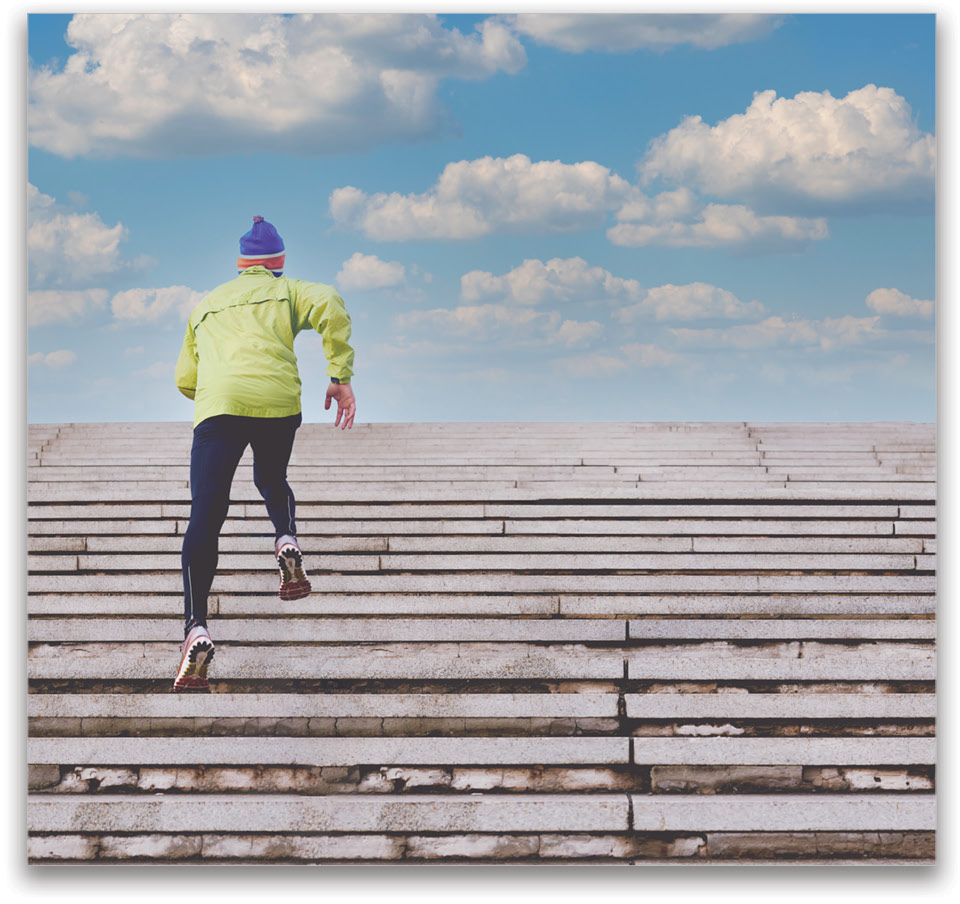
Here’s an image from Un-splash that you can download and use to practice re-creating the final result shown here. This image is perfect for a Content-Aware reconstruction.
We want to modify the image so that it suits a different orientation for layout purposes. This is a very common task in real-world projects because a client may ask for a design treatment of “more photo to place text.” Rather than going back to the location to recapture the image, try some of the following techniques.

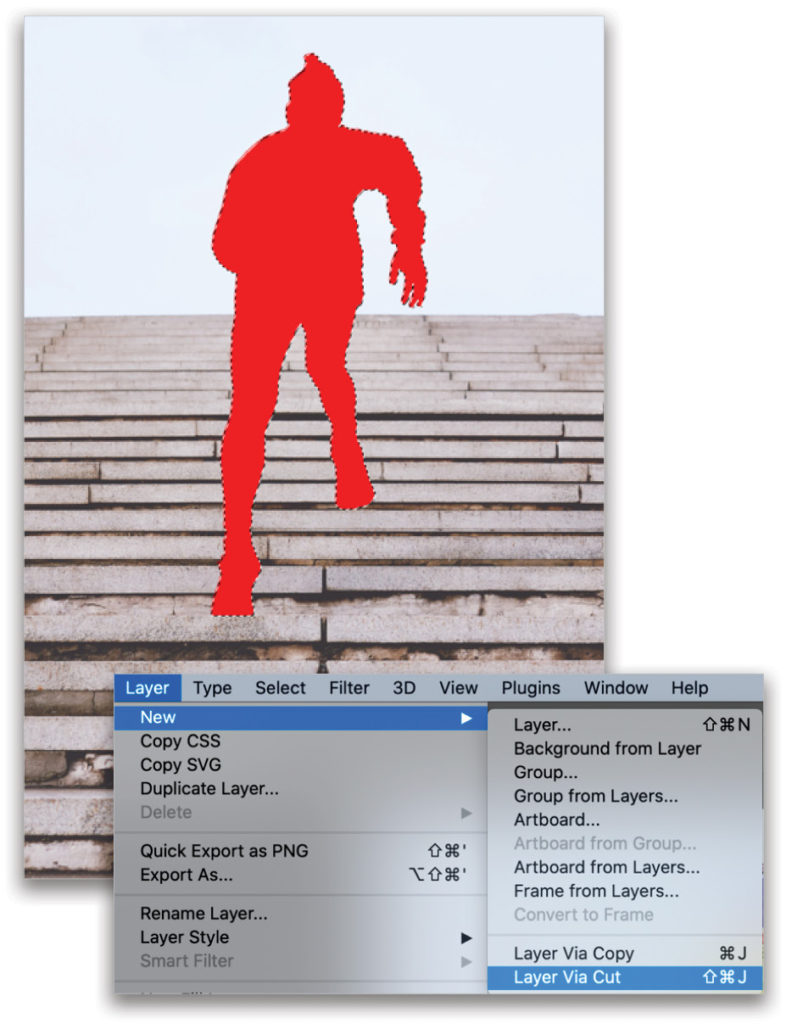
Step One: Open the image in Photoshop and go to Select>Subject. This will generate a great starting selection of the runner. (The red shown here represents the selected area for illustration purposes only.) Zoom in and look for any areas missed during the creation of the selection, and clean them up using traditional selection tools. For quick little modifications, use the Lasso tool (L) with the Shift or Option (PC: Alt) keys to add and subtract to the current active selection.
Step Two: Click on the lock icon on the Background layer to unlock it and make it an editable layer. In the Layer menu, go to New>Layer Via Cut (Shift-Command-J [PC: Shift-Ctrl-J]) to place the runner on his own layer. You can click the Eye icon next to the runner layer in the Layers panel to see the transparent hole left on the original Background layer. Double-click the name of the runner layer and rename it “Runner.”
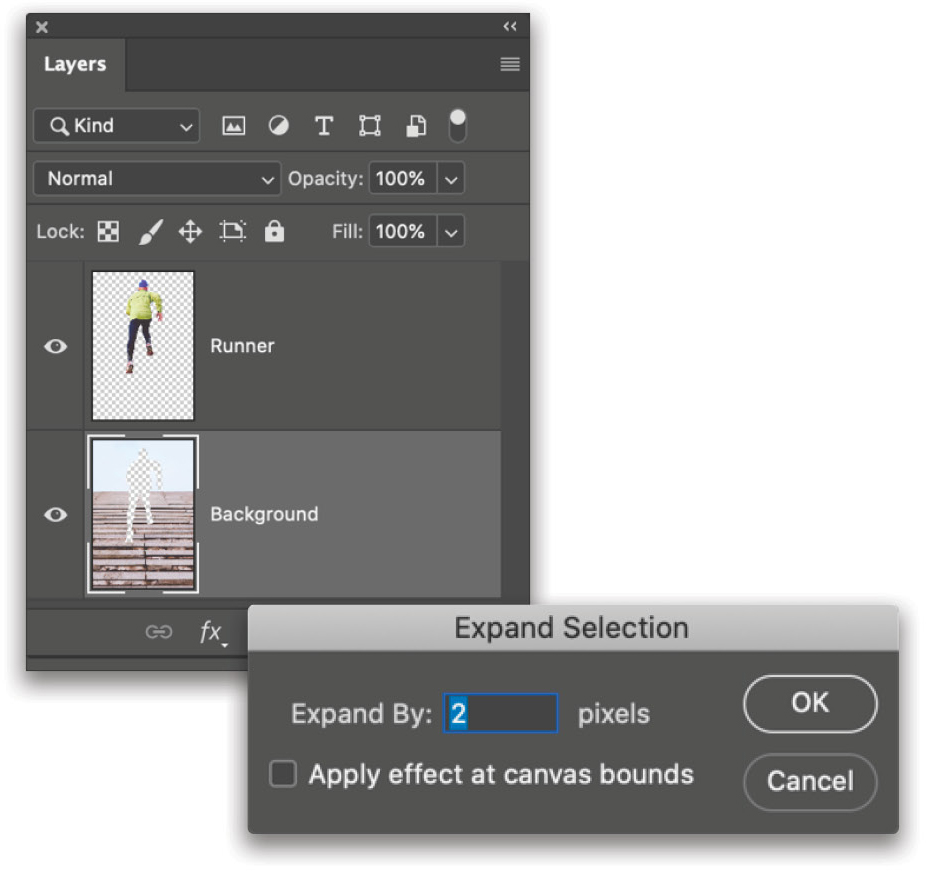
Step Three: We need to make a selection of the hole so we can repair it with Content-Aware Fill. A quick way to do this is to hold the Command (PC: Ctrl) key, and click on the layer thumbnail of the Background layer. This will select all the active pixels on that Layer. Then go to Select>Inverse and it will reverse the selected pixels, leaving you with a selection of the hole of the original runner.
Step Four: With both the Background layer and your selection of the hole active, go to Select>Modify>Expand. Set the Expand By value to 2 pixels and click OK. This will help ensure that you don’t have a gap that can create artifacts when you replace an area with Content-Aware.
Here’s an example of a single-pixel artifact that was left behind after Content-Aware Fill was used and the original selection wasn’t expanded by a few pixels. It’s always a good idea to zoom in and check for edge artifacts after you use Content-Aware Fill. You may need to use the Clone Stamp or Healing Brush to fix a few elements.
Step Five: Now go to Edit>Content-Aware Fill. Using the Sampling Brush, paint over every area of the steps so they’re green, giving the feature a larger area from which to sample. Look at your preview and see if it’s filling the hole left from the runner’s silhouette. Remember some of the features mentioned earlier in this article if you need to try and get different results. In our process, no adjustments were needed other than using the Sampling Brush to add to the sample area. If you’re happy with the results, set the Output To drop-down menu in the Output Settings section to Duplicate Layer, and click OK. Double-click the name of this new layer in the Layers panel and rename it “Background.”
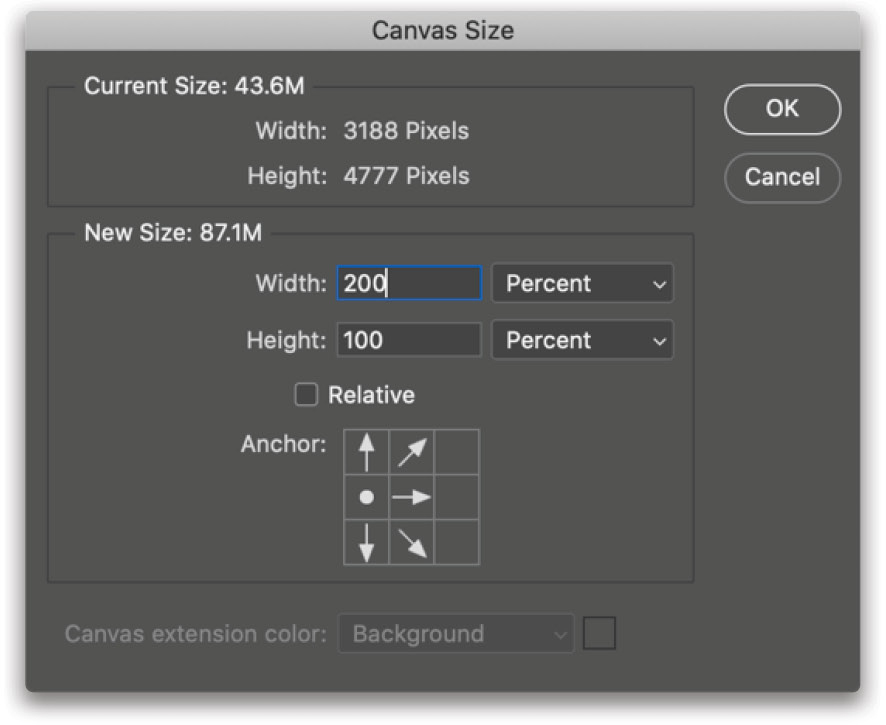
Step Six: Now we need to extend the right side of the canvas. Go to Image>Canvas Size (Option-Command-C [PC: Alt-Ctrl-C]), and in the dialog, change the Anchor marker to the left-middle position, and change both the Width and Height values to Percent instead of Pixels. Set the Width to 200% and click OK to double the width size of the canvas. You should now have a canvas that has the left side filled with your image layers and the right side is empty and transparent.
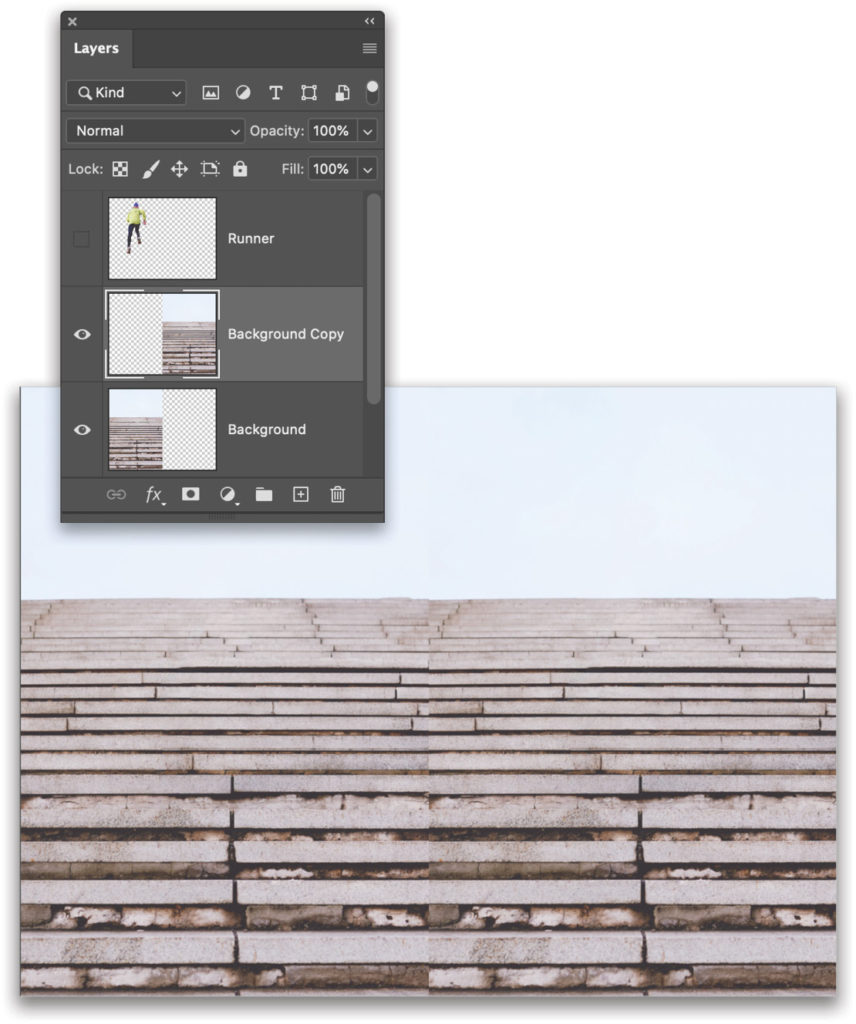
Step Seven: Make a duplicate of the Background image of the stairs by either pressing Command-J (PC: Ctrl-J), dragging it onto the Create a New Layer icon at the bottom of the Layers panel, or Right-clicking on the layer and choosing Duplicate Layer. Whichever method you prefer, we’re going to use this duplicate to fill the right side of the image. Using the Move tool (V), drag the duplicate of the background to the empty portion on the right side of the image. Holding Shift with the Move tool will keep it aligned with the original. (We’ve hidden the Runner layer here.)
Step Eight: To create some differentiation between the two sets of stairs, we’re going to modify the set on the right side of the canvas. Make sure that layer is the active layer in the Layers panel and go to Edit>Content-Aware Scale. This will add a bounding box with transform controls around that layer. But instead of distorting when you resize the image, it will attempt to apply Content-Aware settings to the details as you resize it, modifying the image in the process.
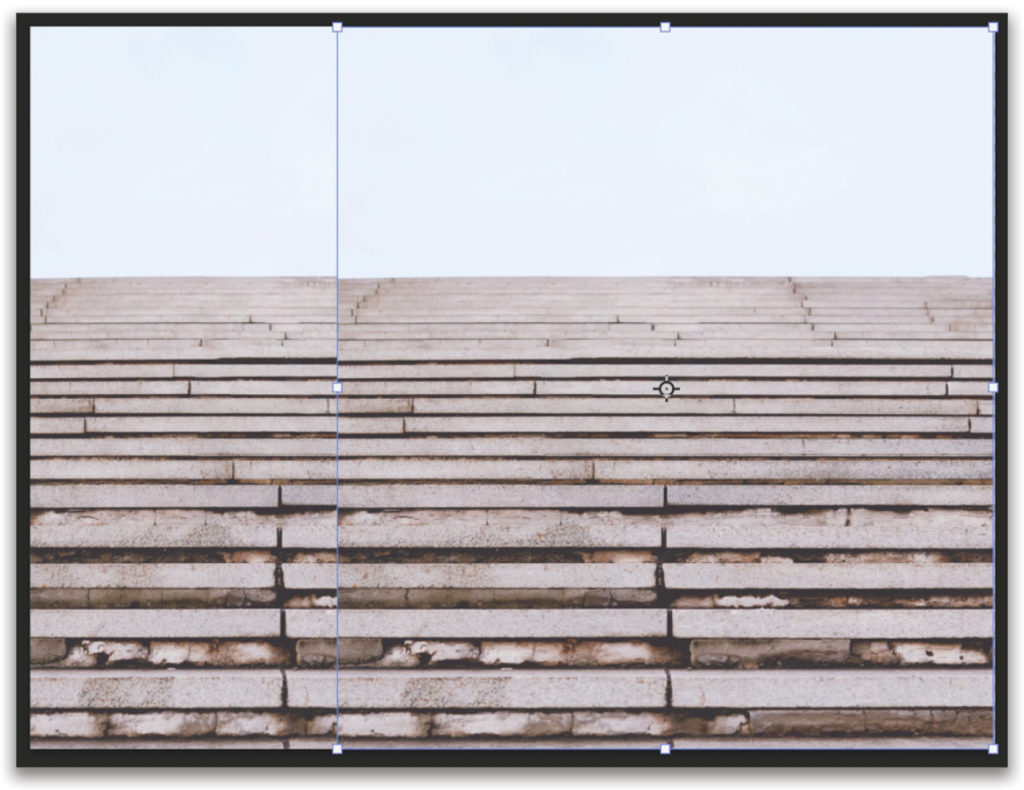
Holding Shift, grab the left transform control handle and drag it to the left. Don’t go all the way across, just enough to overlap the original image by roughly a third. Now press Enter on your keyboard to apply the transformation. Content-Aware Scale has some great uses for resizing images to fit aspect ratios that don’t match the source image. It even has the ability to protect people in an image so they don’t get distorted when you resize a layer. You can learn more about Content-Aware Scale by clicking here.
Step Nine: There’s clearly an overlapping edge between our two background images. First, we need to merge these two background images. With the top stair layer active, go to Layer>Merge Down, or you can press the Command-E (PC: Ctrl-E) shortcut.
Step 10: With the background images merged, use the Rectangular Marquee tool (M) to make a large selection over the seam that was left from the overlap. Then use Edit>Content-Aware Fill to replace the pixels where the overlap exists. Notice in the example shown here, we also included the grout dividers in the stairs nearest to the camera in the selected area. This way, it’s not obvious that the detail that was duplicated to the right side is a copy. Set the Output To drop-down menu to Duplicate Layer and click OK.
Repeat this approach for any other details you’d like to replace. As an alternative approach, you can also use the Spot Healing Brush tool (J), which also relies on Content-Aware technology.

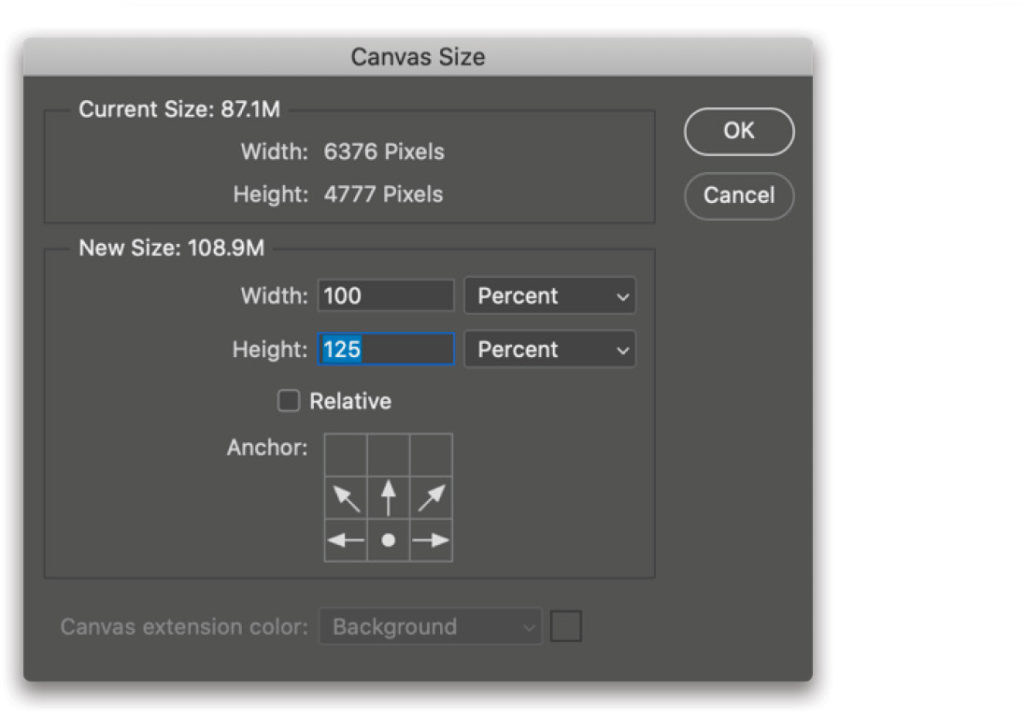
Step 11: Similar to before where we expanded the canvas to add more stairs, we now want to create more room for the sky in this image. Go to Image>Canvas Size, click on the lower-center Anchor marker, change your values to Percent, and resize the Height by 125%. Click OK.
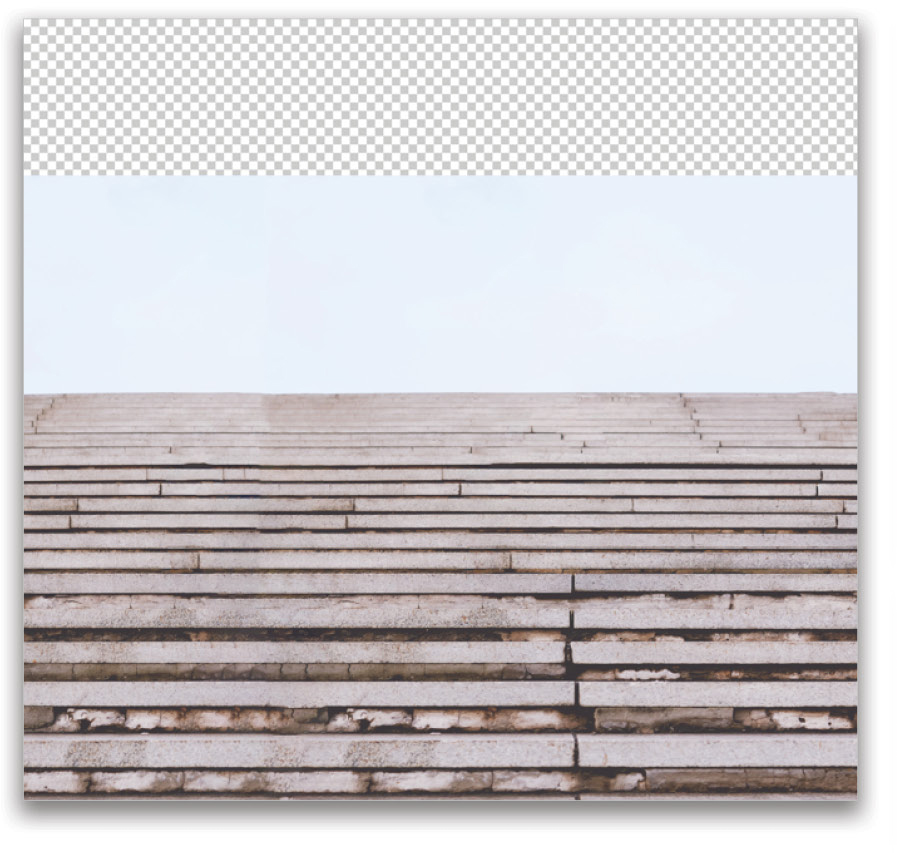
Step 12: With the background stairs layer active, use Content-Aware Scale again, but this time use it to resize the image to fill the canvas at the top. Remember to hold Shift so that you’re only scaling it vertically, and drag the top-middle control point up until the top of the original sky touches the top of the new canvas size. This should mostly stretch the blank sky area over the new canvas and do very little modification to the stairs. If this gives you a challenge, you can marquee-select just the sky area before choosing Content-Aware Scale.
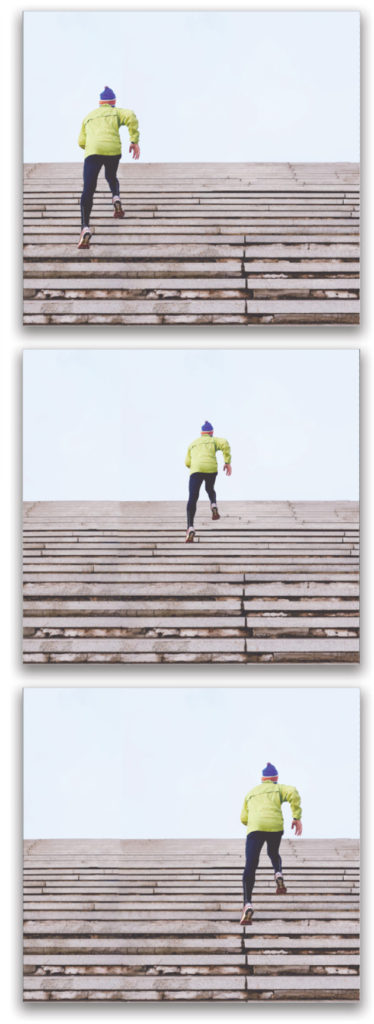
Step 13: Turn on the visibility of the Runner layer, and feel free to reposition or resize him any way you like. Try to make sure his left foot is in alignment with the edge of a step. Here on the right are a few examples of how he can be repositioned. But remember, you wouldn’t flip the runner horizontally because then the highlights and shadows on his body wouldn’t match that of the background!
Step 14: This step isn’t necessary, but it’s a lot of fun! Merge your runner layer with the stairs background layer. Yes, this is a destructive edit, so if you want to retain your original layers for modification or editing later, make sure the top layer of your document is active, hold the Option (PC: Alt) key, and go to Layer>Merge Visible. This will merge a copy of all visible layers into a new layer at the top of the layer stack without removing the original layers.
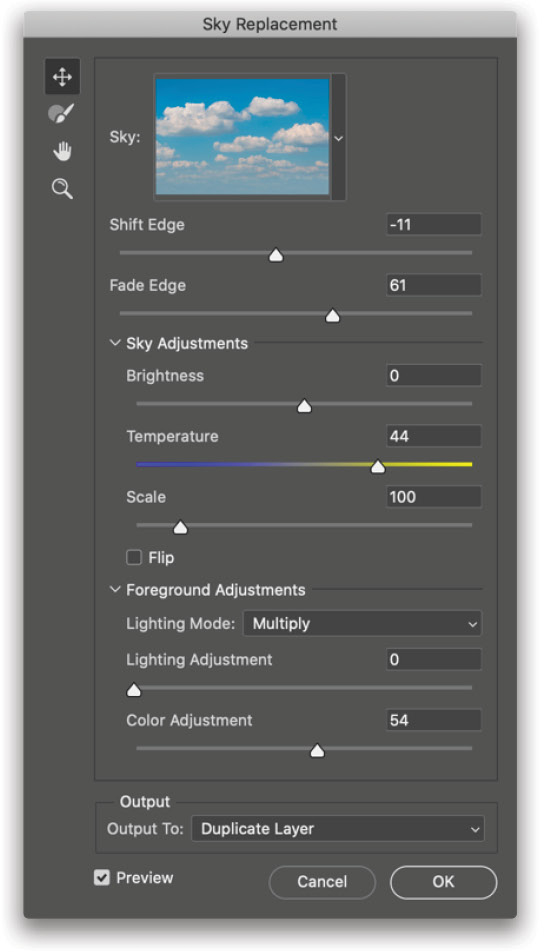
Step 15: With your merged layer active, go to Edit>Sky Replacement to launch the new Sky Replacement feature. This also uses Content-Aware technology in conjunction with Adobe Sensei to auto-generate a selection, and then mask and color map your image based upon the new sky you choose from the pull-down menu in the Sky Replacement dialog. Click OK, and you’re done! [For more on Sky Replacement, see “Sky Replacement, Part 1” last issue, and Part 2 this issue.—Ed.]
Content-Aware Reconstruction
There you have it, a completely reconstructed composition into a different aspect ratio, with modifications all done using the Content-Aware technologies in Photoshop. If you haven’t played with them before, there’s a lot more to the Content-Aware range of tools and features that will really surprise you. So give it a try, explore, and see what you can produce! As always, share your work with the KelbyOne Community and keep the learning going.
This article originally published in the January, 2021 issue of Photoshop User magazine.


Great Lesson – Thank you