We’re coming to the end of our start-to-finish workflows here at “Maximum Workflow.” It’s been about everything from gear to camera settings, to file management and postprocessing, to our favorite apps and plug-ins. For this issue, we’re looking at the thing that brought me to photography in the first place: concert photography. You may not know this, but despite studying Electronics in college, my side hustle was, and still is, sound engineering.
Back before the millennium, I worked in clubs and traveled with a few bands. I worked on the website of one particular band, so we needed photos of the gigs to add to the site and help generate interest in the band. I’d been interested in photography and had taken a course on black-and-white film development with my film camera. The singer’s girlfriend happened to be a photographer. I bought her old digital camera when she upgraded, which allowed me to get digital photos for the band, and that was the start of it.
Getting Started
The concert environment is a little strange, as it combines very dark spaces with bright lights. This creates a large contrast range that can often be difficult for cameras. With a little practice, this is easy to overcome. Let’s talk about equipment.
Equipment
Despite most stages being lit, concert photographs are generally in dark environments. To overcome this, you need fast lenses. Smaller gigs are especially prone to poor lighting, generally requiring prime lenses. Larger concerts with moving heads and LED lights still require fast lenses, but often fixed fast-zoom lenses work well, for example, a 70–200mm f/2.8 or equivalent. You still need to keep shutter speeds high to prevent motion blur, but the advantages of a zoom is that you can get a variety of compositions quickly and easily in limited time.
Speaking of time, these large gigs generally only allow you to shoot the first three songs and, of course, no flash is allowed. Some venues give you pit access, while others give a location at the back of the venue. Full-frame, 24–70 f/2.8 and 70–200 f/2.8s are perfect here. On my Fuji, I use the 18–55mm and the 50–140mm with two camera bodies on a dual strap.
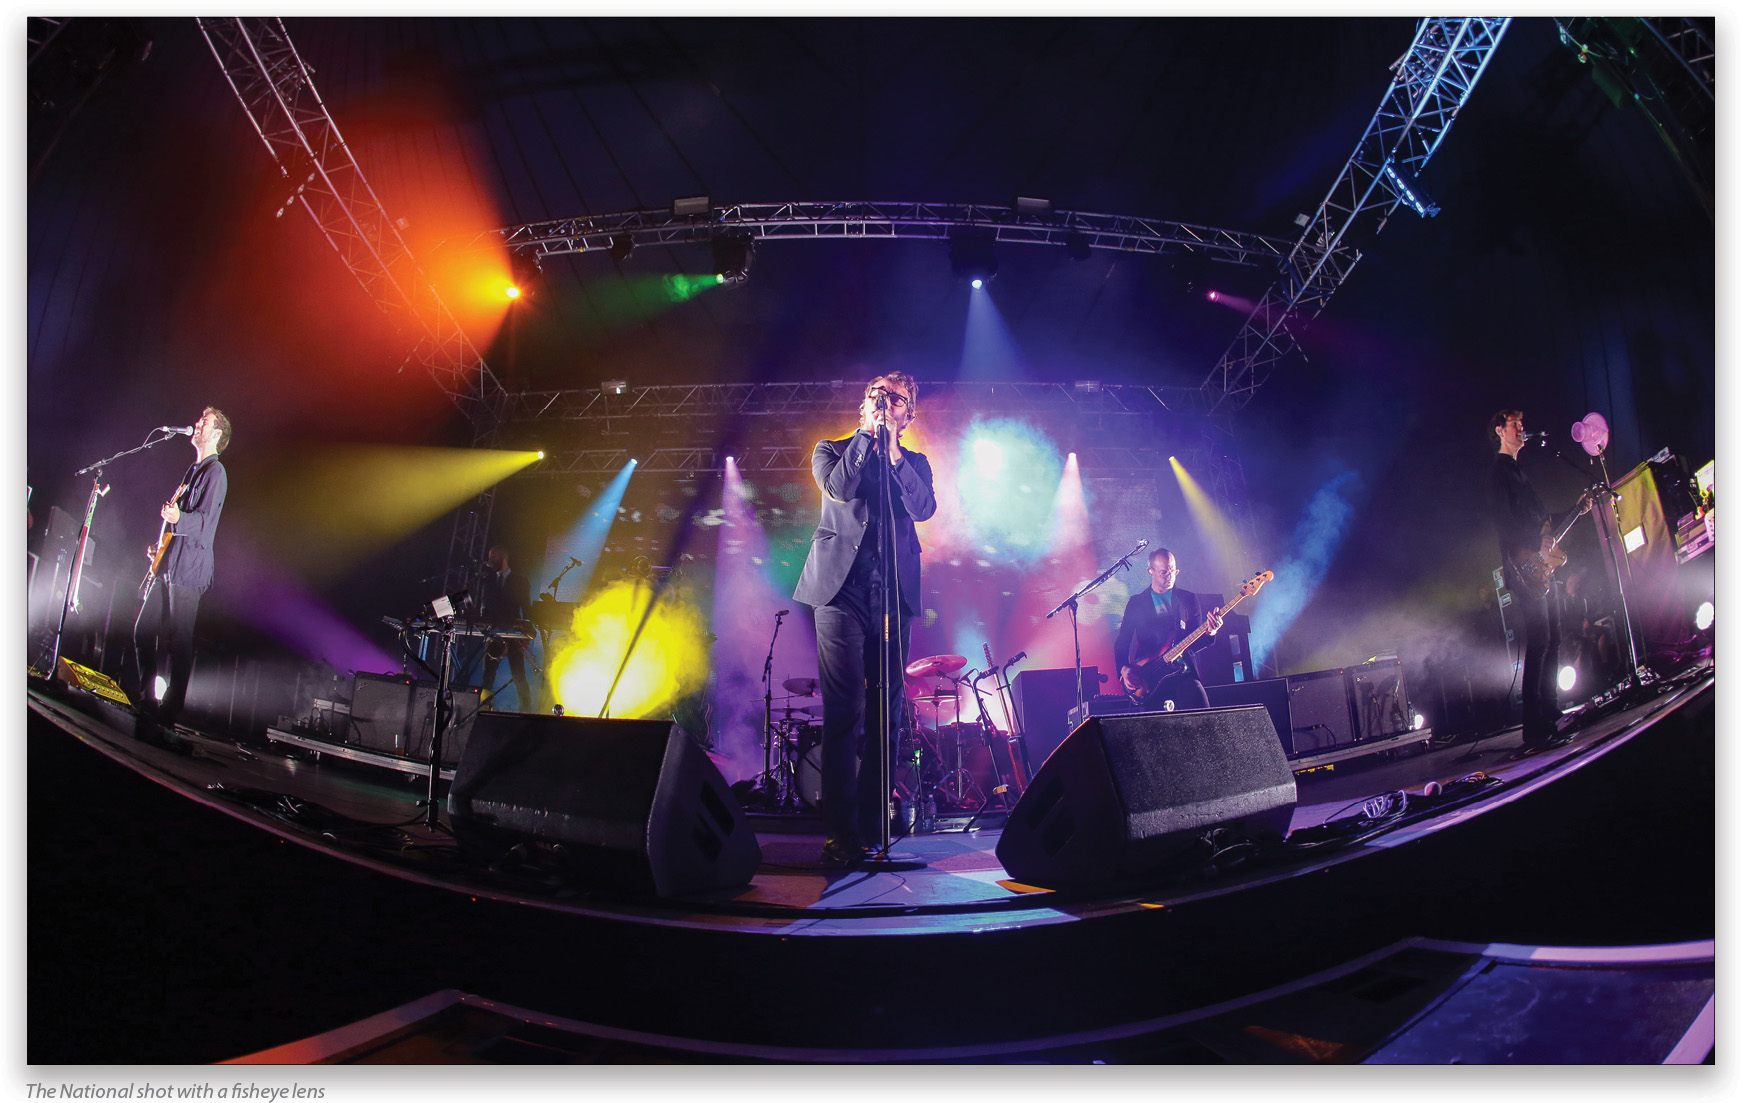
If you’re just beginning in concert photography, the nifty 50 is the lens to get. This f/1.8 aperture lens is quite cheap, and offers good shutter speeds even on poorly lit stages. For something different, a fisheye lens can have a cool effect. It’s a bit of a one-trick pony, though, so not an essential buy. I’ve even used tilt-shift lenses for effect on concerts where I had more time and less
artist movement.
Settings
For settings, it’s best to take complete control and shoot in Manual. Aperture Priority will work too, but you need to watch the shutter speed, as mentioned earlier, to prevent motion blur.
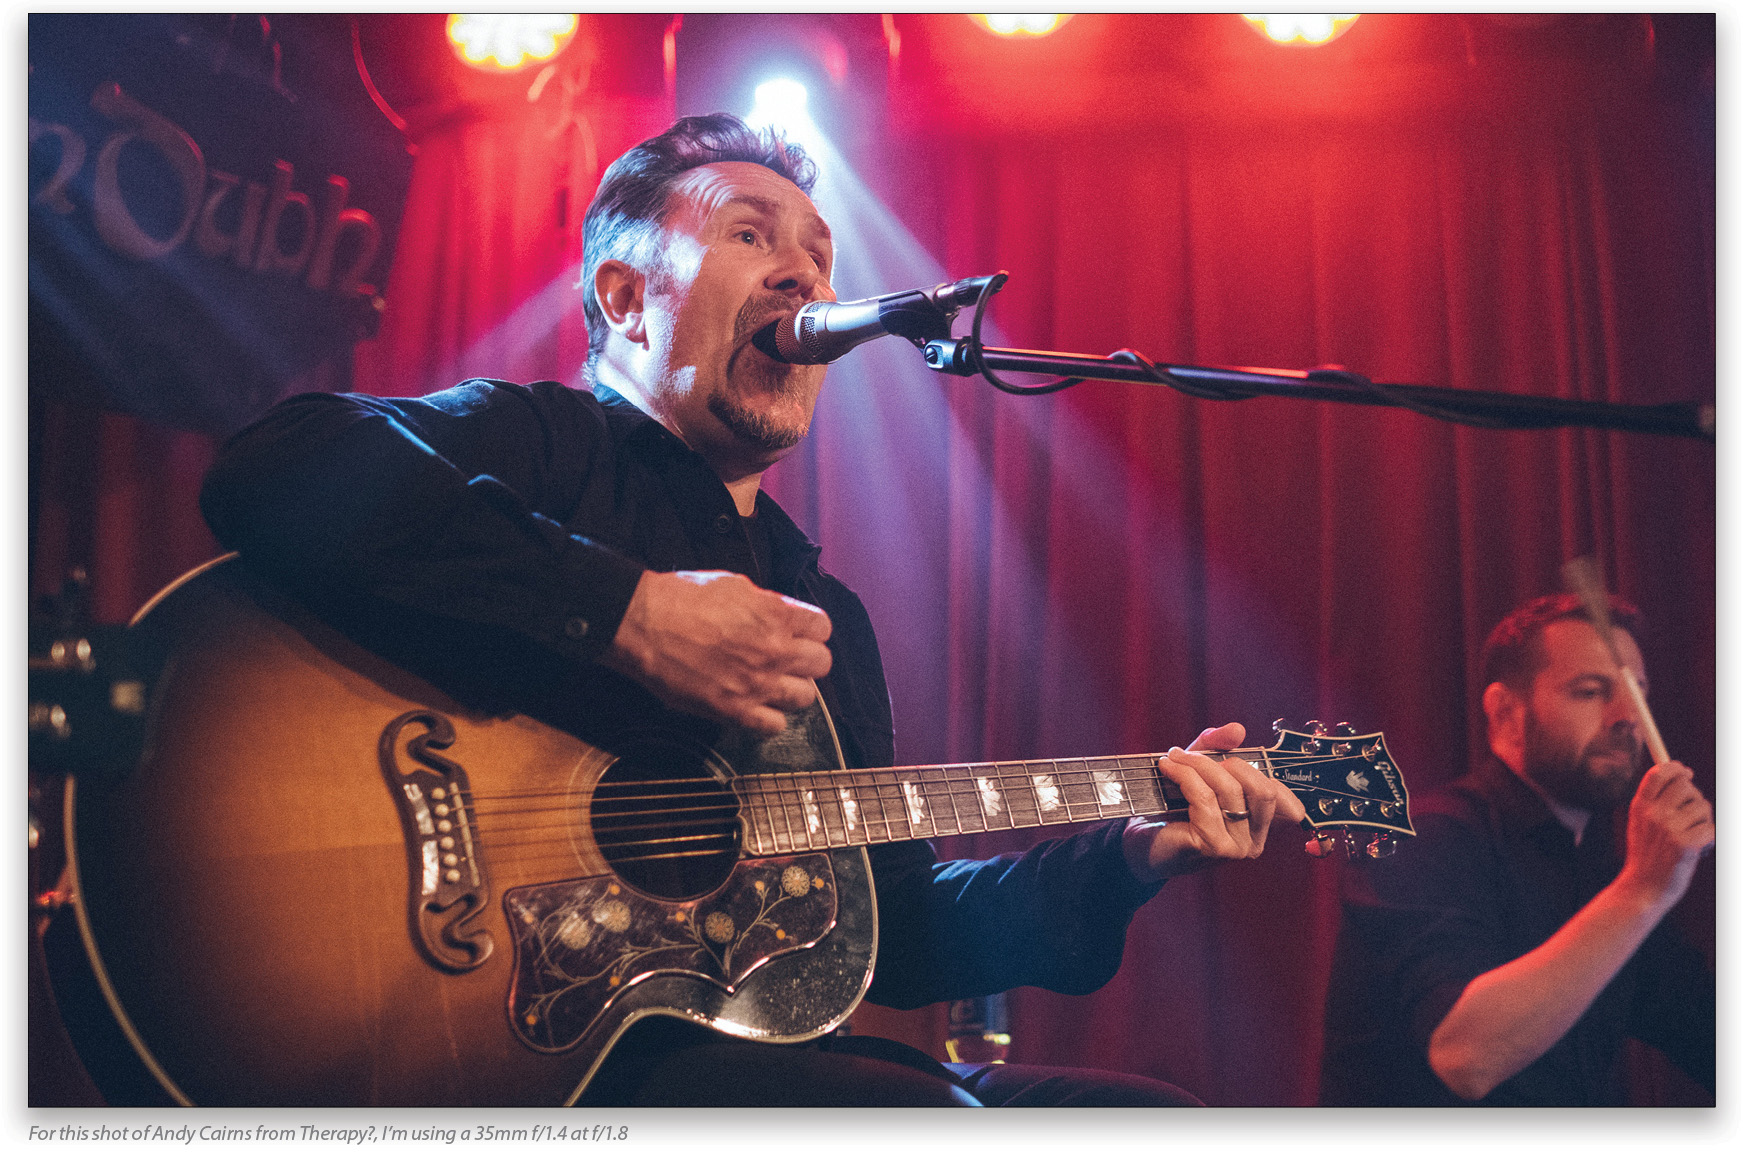
One smaller venue where I shoot regularly is the Roisin Dubh. While the lighting is reasonable, it’s often set at lower levels, so I generally use fast primes, such as the 35mm f/1.4 and the 56mm f/1.2 (50mm and 85mm equivalents).
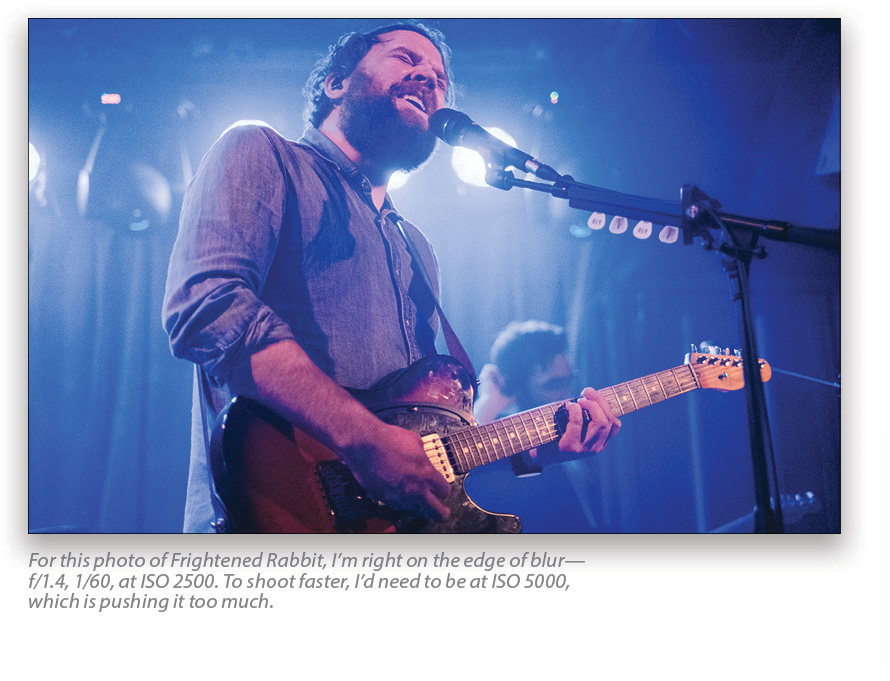
As well as using fast apertures, you generally need to use high ISO settings. Because you’re shooting at faster shutter speeds in this environment, you need fast apertures and high ISOs. The obvious downside of high ISO is noise, but for me it’s always better to have noise and to get the shot; I can always fix the noise later. Newer cameras tend to handle noise better, so for concert work, it can often pay to upgrade your camera. If I’m at a high ISO and still getting motion blur, I’ll underexpose the shot to stop the blur.
Getting Concerts to Shoot
Don’t imagine that walking up to the door of your average concert with the camera will get you permission to shoot. For these, you’ll need to be commissioned by a magazine or newspaper. The only way you’re going to get that job is if you have a portfolio that impresses them enough to give you the work. It’s a catch-22: No portfolio, no work; no work, no portfolio. You need to work to get the photos.
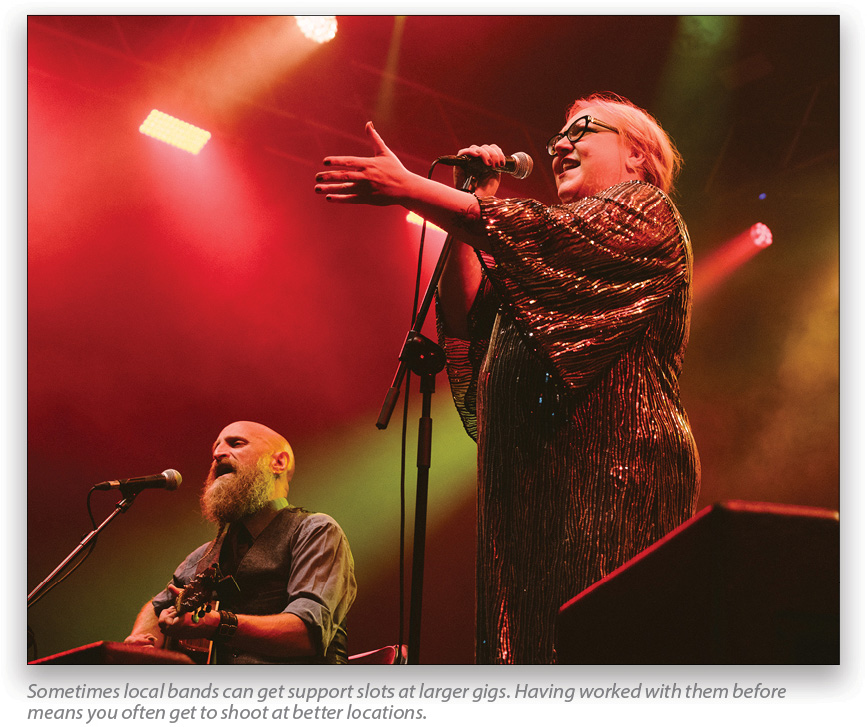
I do believe that most people with an interest in music photography know a few musicians. Simply offer to shoot their band and their gigs for practice. Just let them use the images. Yes, the copyright is yours, but you’re trading here to get the portfolio. If you don’t know any musicians, look around for local venues that do free gigs. Bring your camera along to these gigs. Talk to musicians and the venue to get permission. Most musicians and venues are more than delighted to have photographs to use for social media and promotion, so it benefits everyone. I want to be really straight here and tell you that there’s not a lot of money in concert photography. But there’s a lot of fun and great music.
What to Shoot
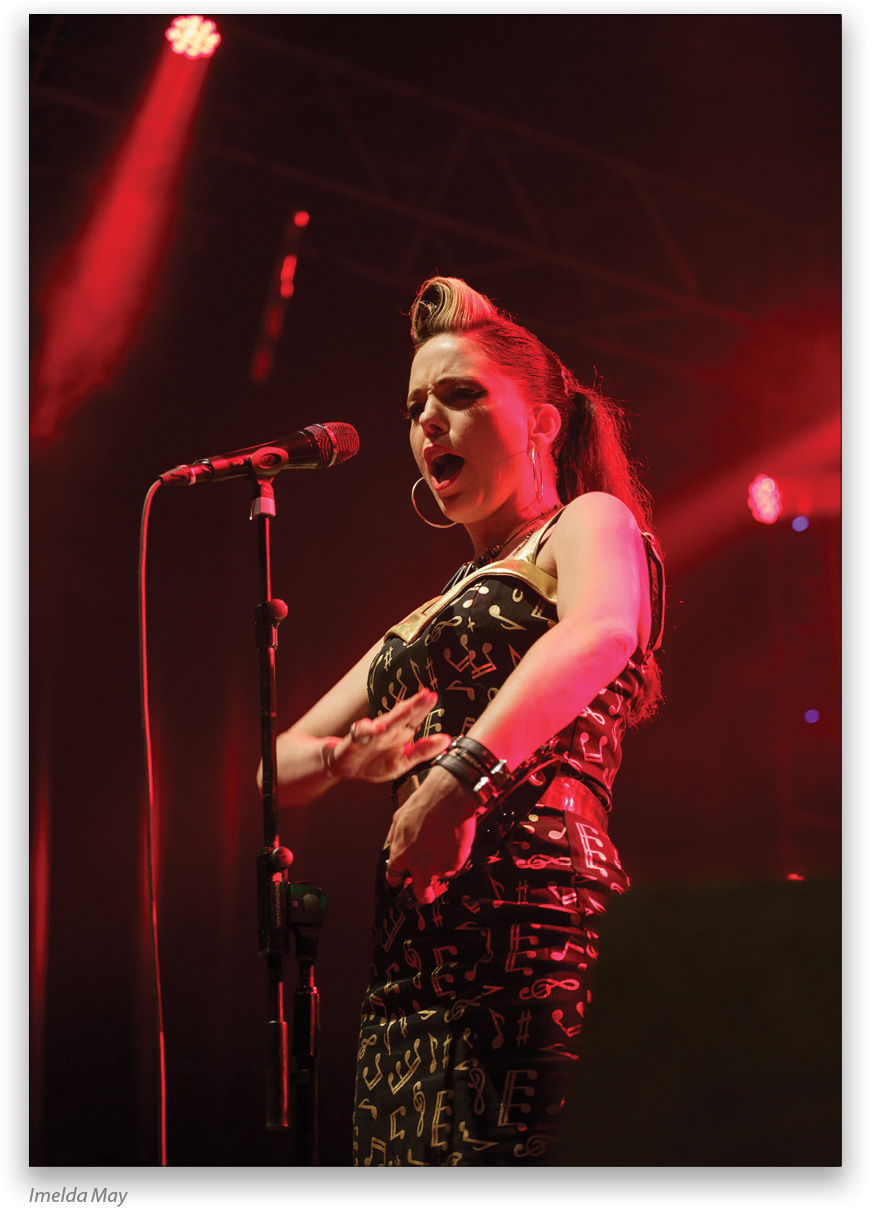
The main aim of your shots in music photography should be to catch peak moments. By knowing the songs, you’ll know when the singer is going to sing expressively, or when the guitar solo is coming. By anticipating these moments, you stand a better chance of getting a better shot.
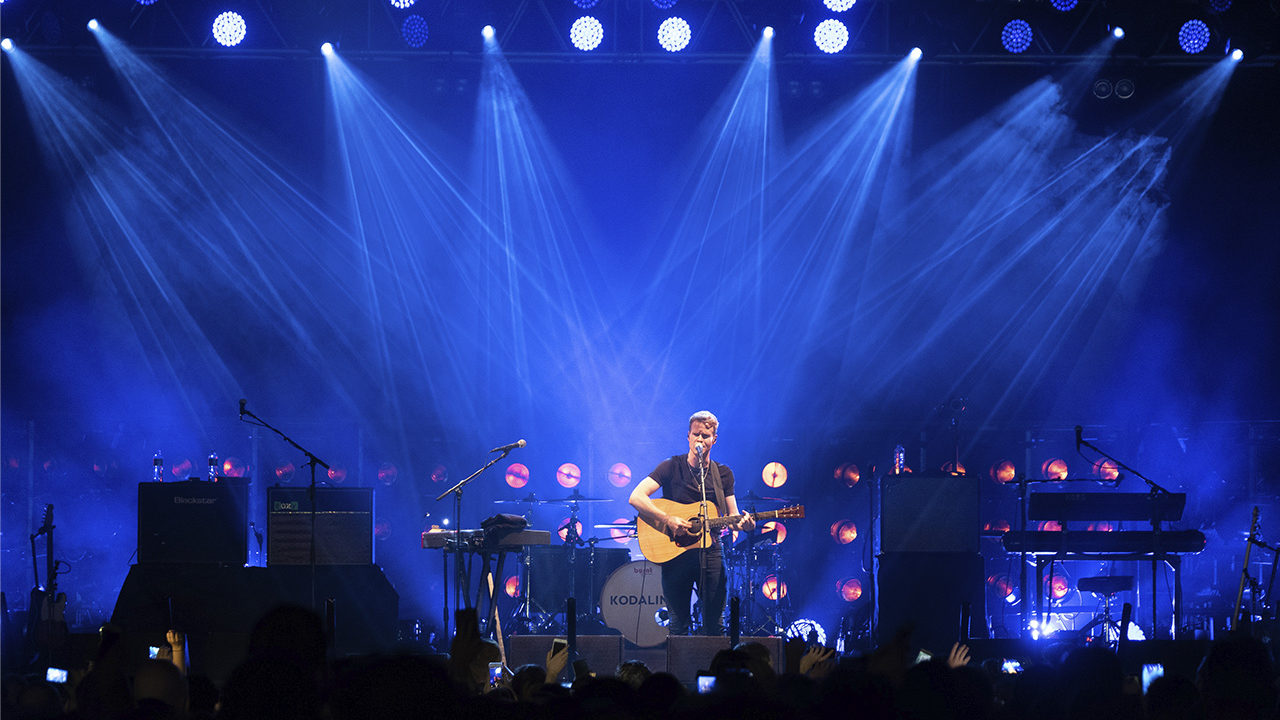
Be aware of the lights, especially if they’re moving. By shooting against the light, you can create more drama in the photo. I often look at the shadows the light creates and try to capture that. While I can’t control the lighting, I can control my position in relation to the lighting. By observing the motion of the light, I can time it just as the light hits the performer’s face, creating light patterns the same way I would in studio. If the timing is right, for example, I can mimic Rembrandt lighting.
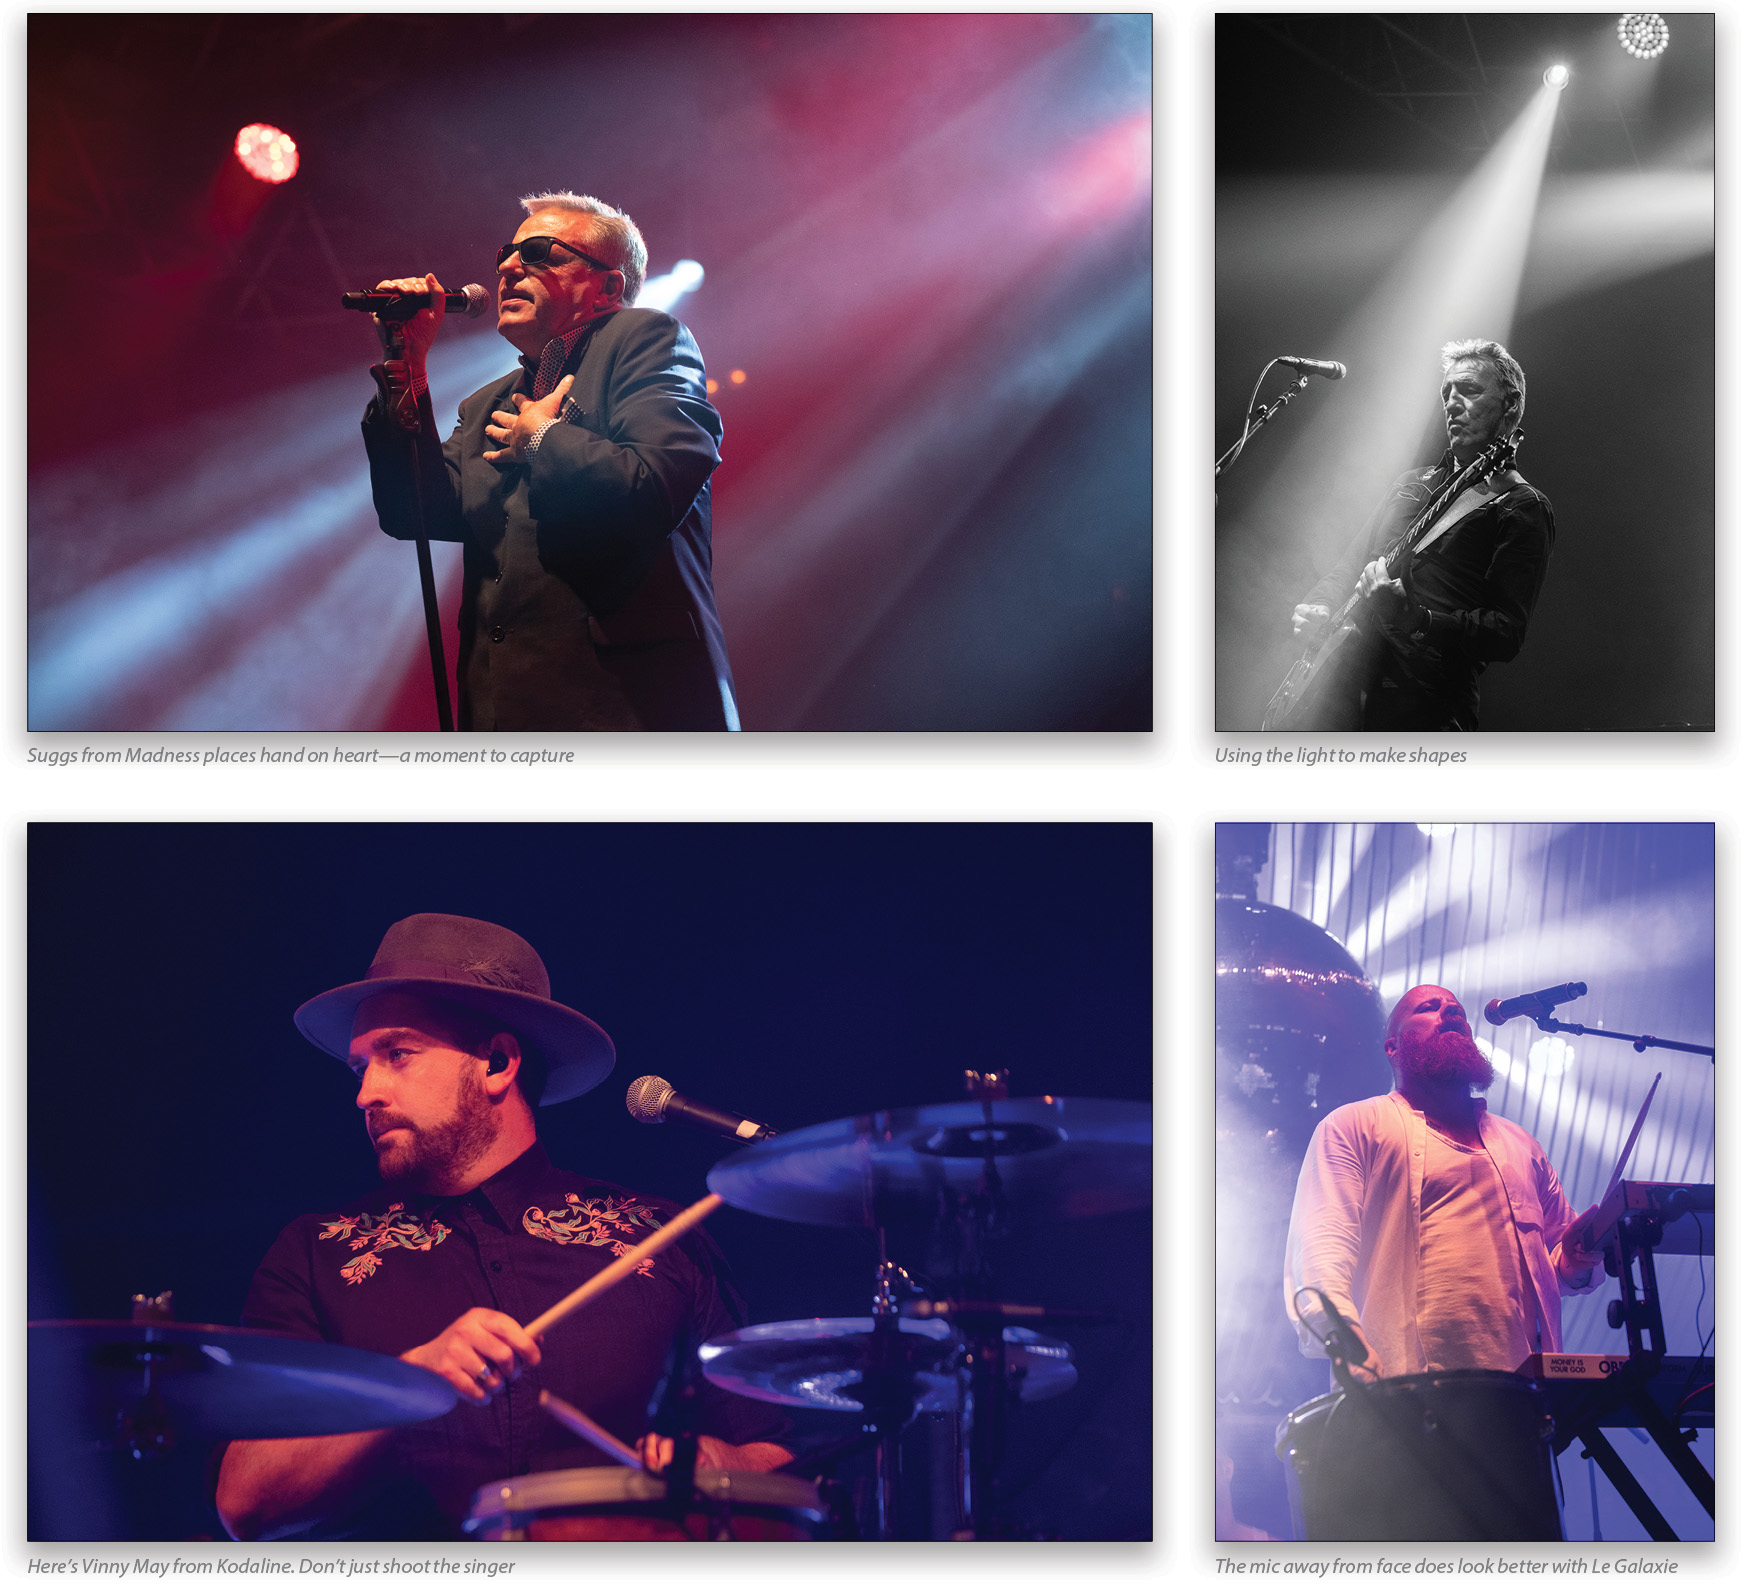
Aim to capture the whole band. Often the drummer in the back gets left out. Dedicated magazines for drummers and bass players often request images of specific players, so it’s good to have these in your archive.
During vocal breaks or solos, you’ll occasionally get band members interacting. These make for great moments. Again this is about anticipation.
One point that was a key element for NME magazine when I was shooting for them was the microphone. They didn’t want it blocking the singer’s face. While most sites don’t mind, I’m aware of the mic and try to get shots from the side, or when the singer is off mic, so their face isn’t blocked. It’s not always possible, though.
Post Concert Workflow
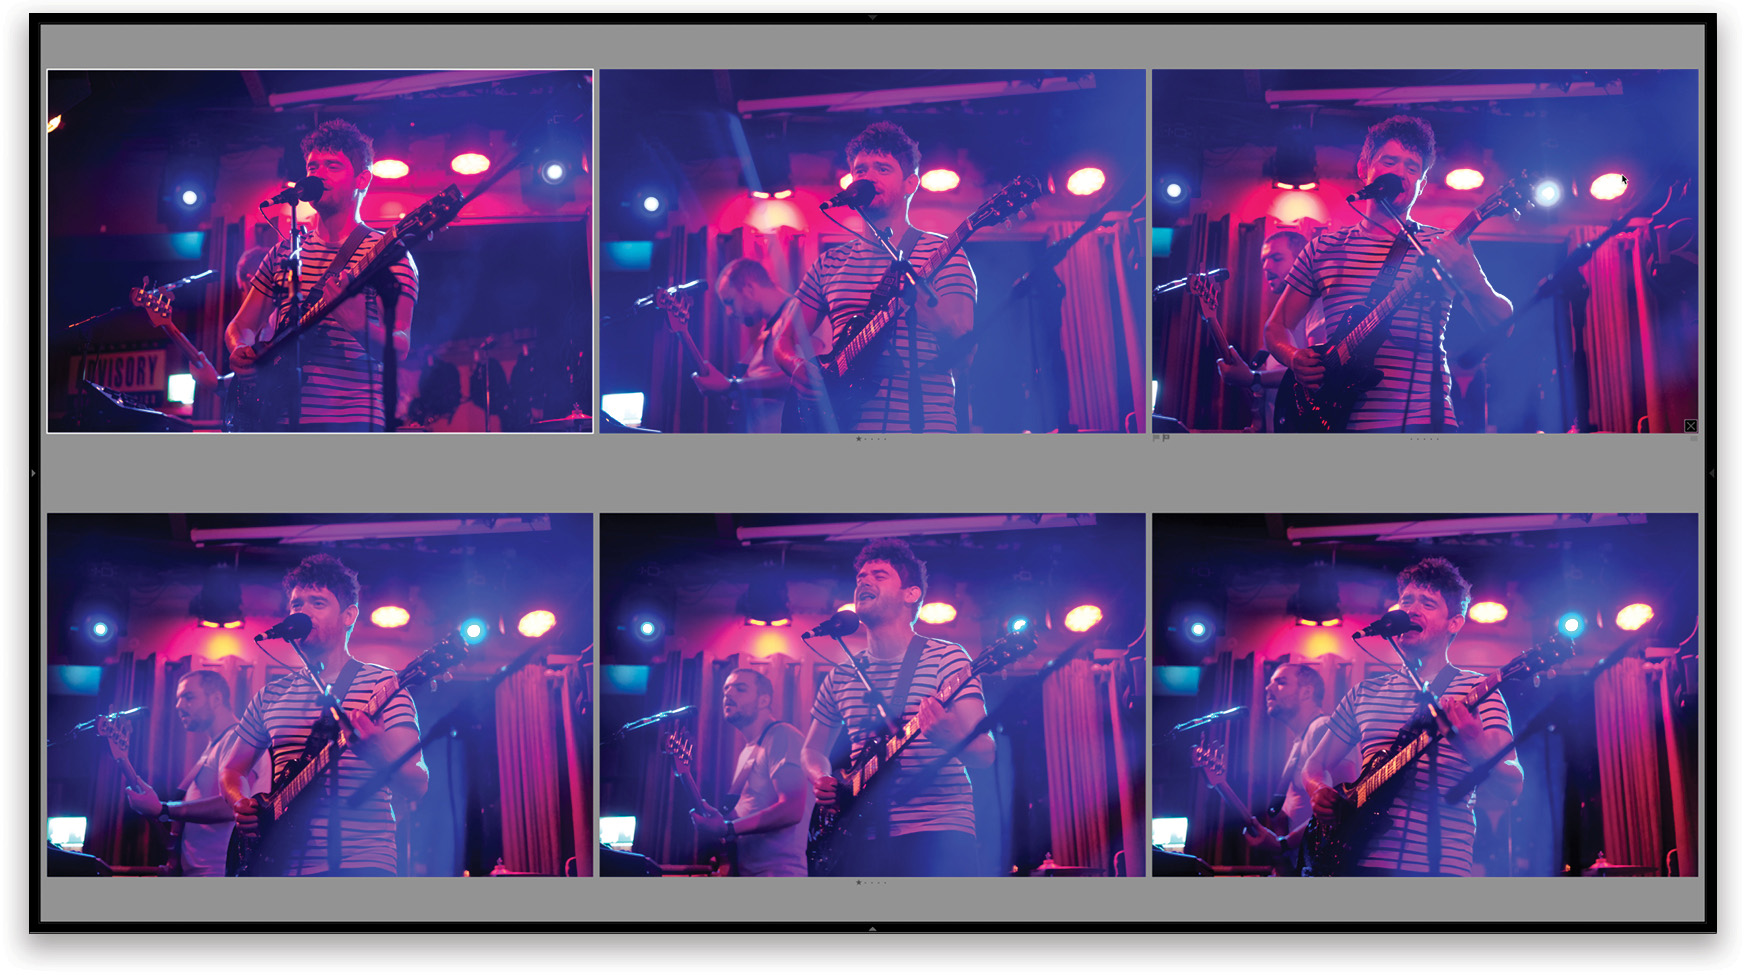
The Cull: After importing the photos into Lightroom as normal, it’s time to make selections. I generally bring up six photos at a time in Survey View (N). I give the images I like and will keep forever a 1-star rating by pressing 1 on the keyboard (I rarely delete, but when I do, it’s the photos that didn’t even make 1 star). I use the Right Arrow key to navigate through the photos in Survey View. After rating a group of six images, I choose the next group of six images in the Filmstrip below. Again, I rate the ones I like with 1 star, repeating this until I’ve seen all the photos (above).
Next, I click on Attribute in the Filter bar and set it to 1 star and above, which hides the non-rated photos. I then repeat the process for a 2-star rating. If needed, I’ll repeat for a 3-star rating. The 3-star selects are the ones I’ll edit and deliver. (By deliver, I mean any output use, even if it’s just for Facebook.)
Editing: To edit the photos, I’ll generally use the Basic panel to correct for Exposure, Shadows, and Highlights. I use the face as a guide for Exposure, because I want it to be the correct brightness. From there, I’ll turn down the Highlights to bring back the lighting. If needed, I’ll open up Shadows.
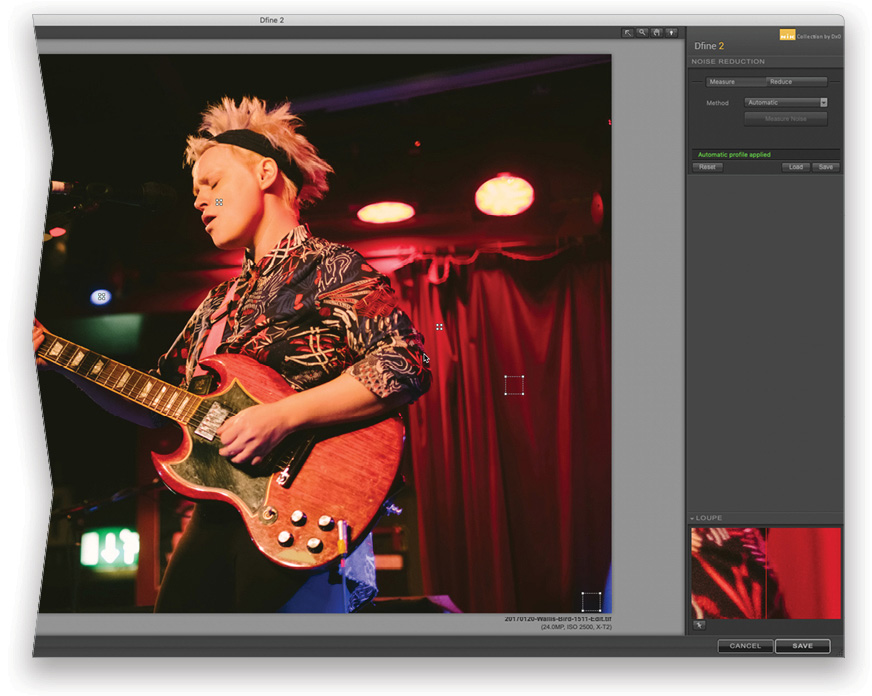
Fixing Noise: To fix noise, I use Dfine 2 from DxO’s Nik Collection. Here’s how:
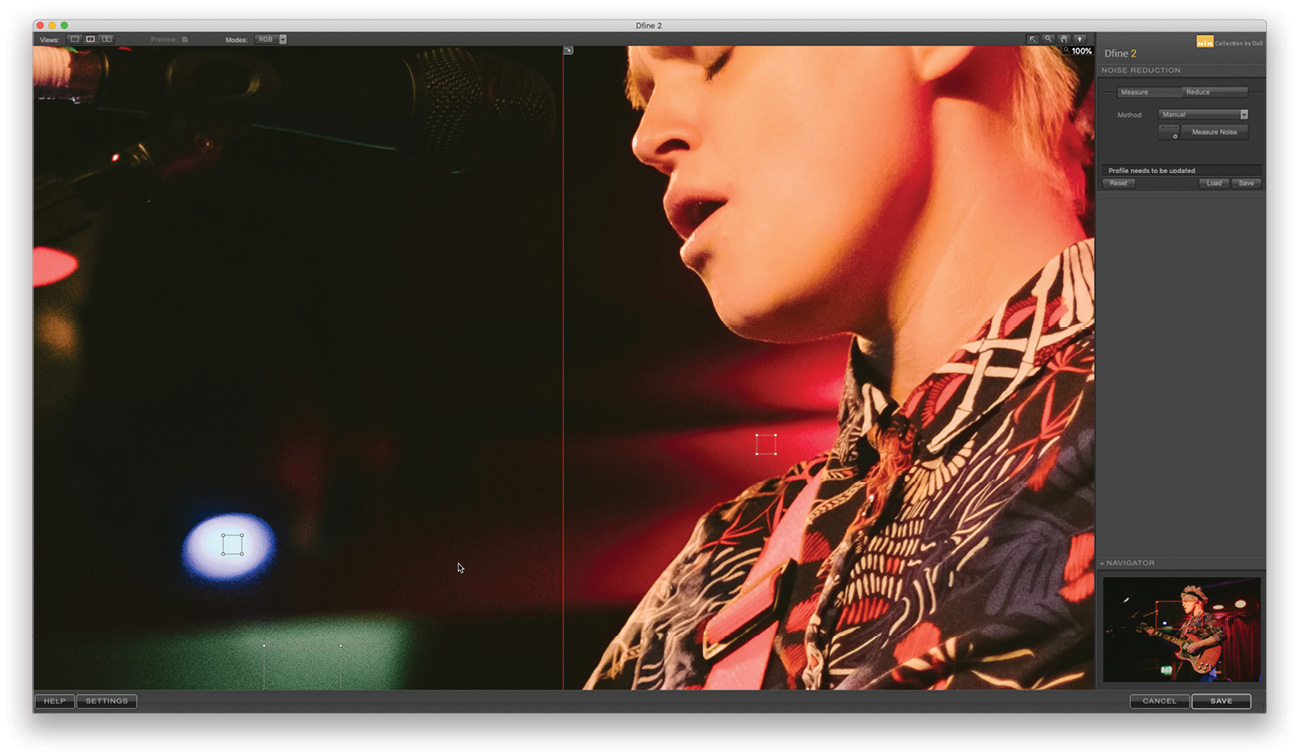
Step One: From the Photo menu, choose Edit in>Dfine 2. The plug-in opens and sets an automatic profile based on selected measurement areas.
Step Two: You can move these selection boxes to places you feel better suit the noise. This switches to a manual profile. You can also do a before-and-after view by clicking on the second Views icon in the
top toolbar.
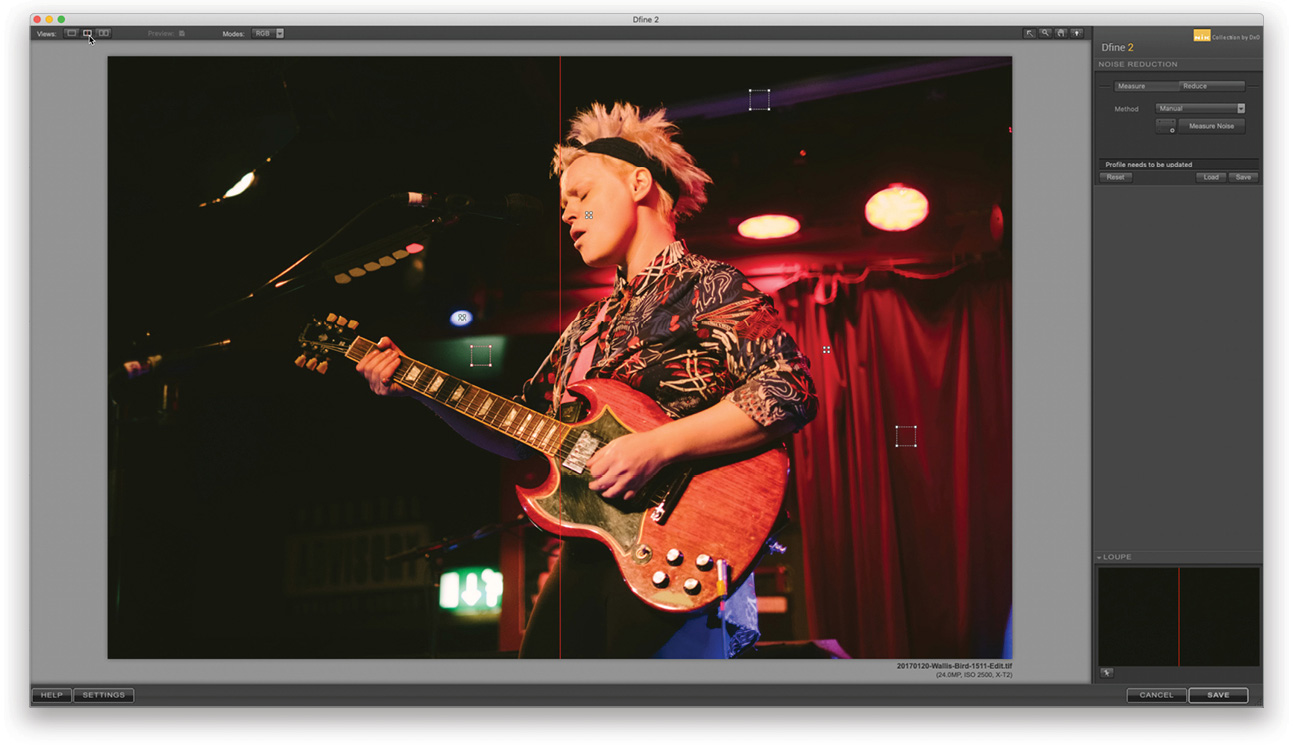
Step Three: Zoom in to get a better look at the difference.
Step Four: Click on the Reduce tab to access the Contrast Noise and Color Noise sliders.
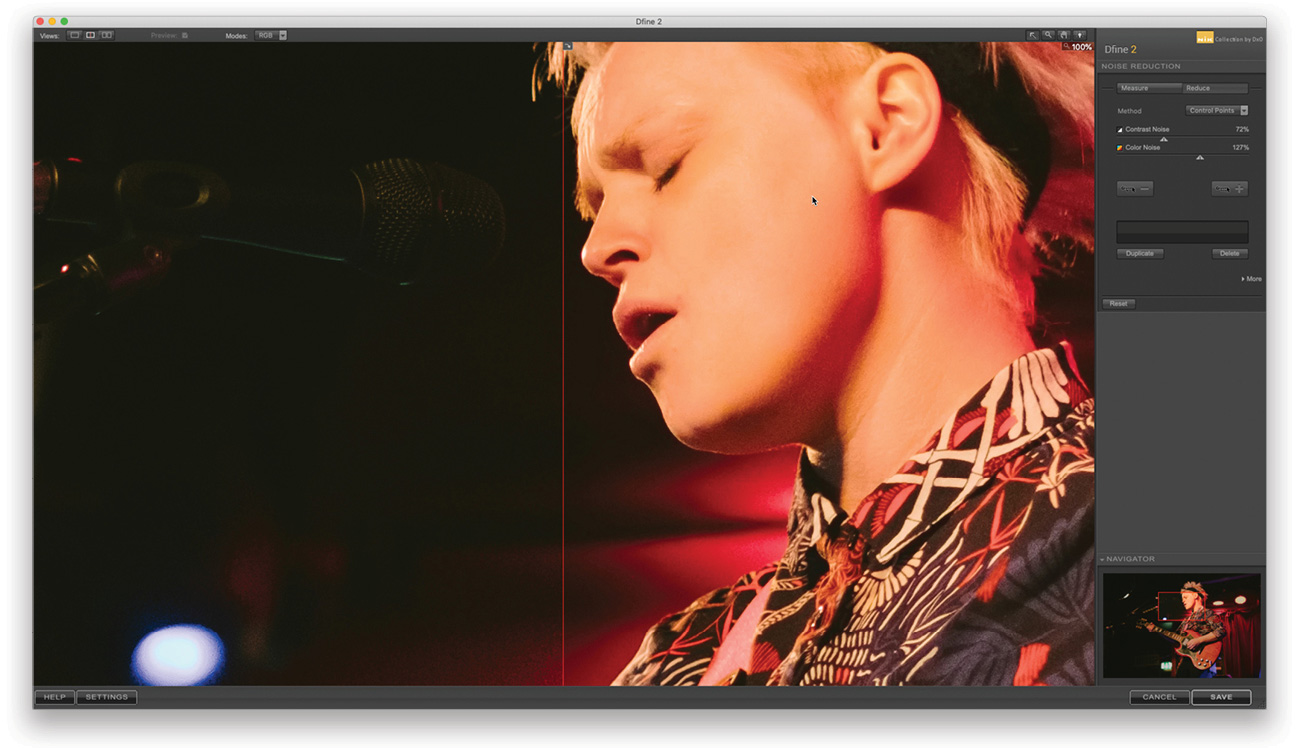
Step Five: My final step is to add a Control Point on the face and use the on-image controls to remove the Contrast Noise and preserve detail on the face.

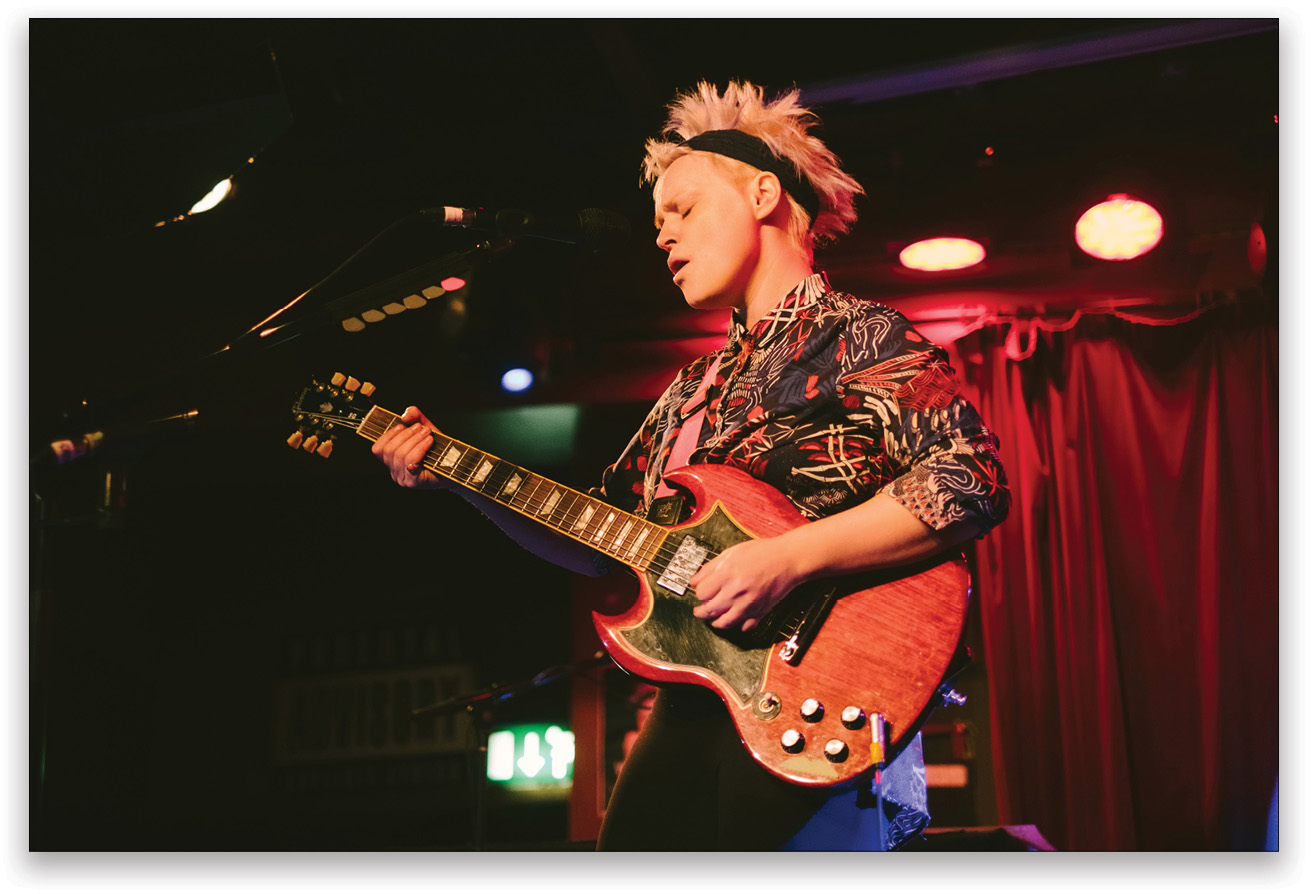
And here’s the final image.
Get Out!
Concert photography truly combines the love of photography with the love of music. Get out to gigs, support local musicians, and most of all, have a ton of fun doing it!
This article originally published in Issue 46 of Lightroom Magazine.


