My first visit to the United States was in the early 80s on a trip to the southern counties of Georgia. At the time, I was assisting an advertising photographer who had been booked to photograph the “Big D” peanut calendar. This was courtesy of the Peanut Commission of Georgia, who were our hosts and looked after us incredibly well, treating us like minor celebrities.
Having grown up watching so many American-made TV programs (not least The Dukes of Hazzard), much of what we encountered was very familiar. Yet, it was amusing to turn the tables and ask our Georgia hosts what they thought of us. The impression we got was they imagined the London we came from to be a cross between the movies Oliver! and Mary Poppins. Now, my father, who was brought up in London, could certainly remember the days of horse-drawn omnibuses and dense fogs, but those had long since gone by the 1980s!
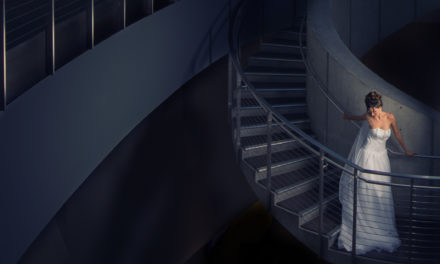
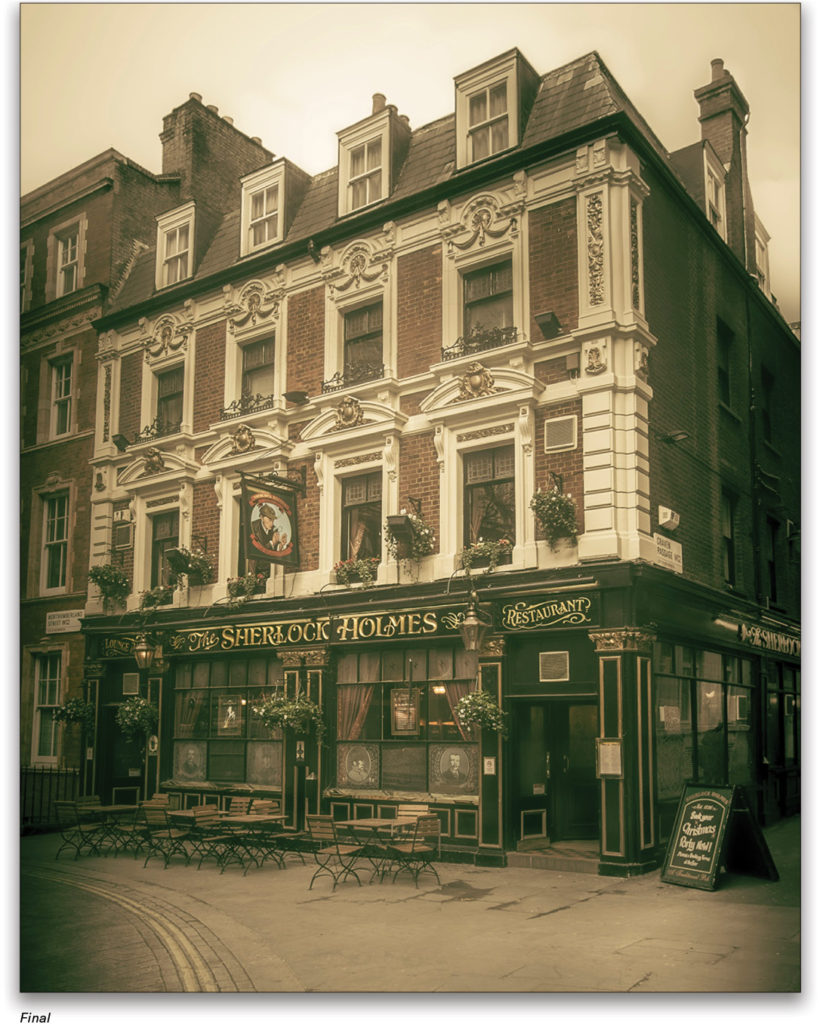
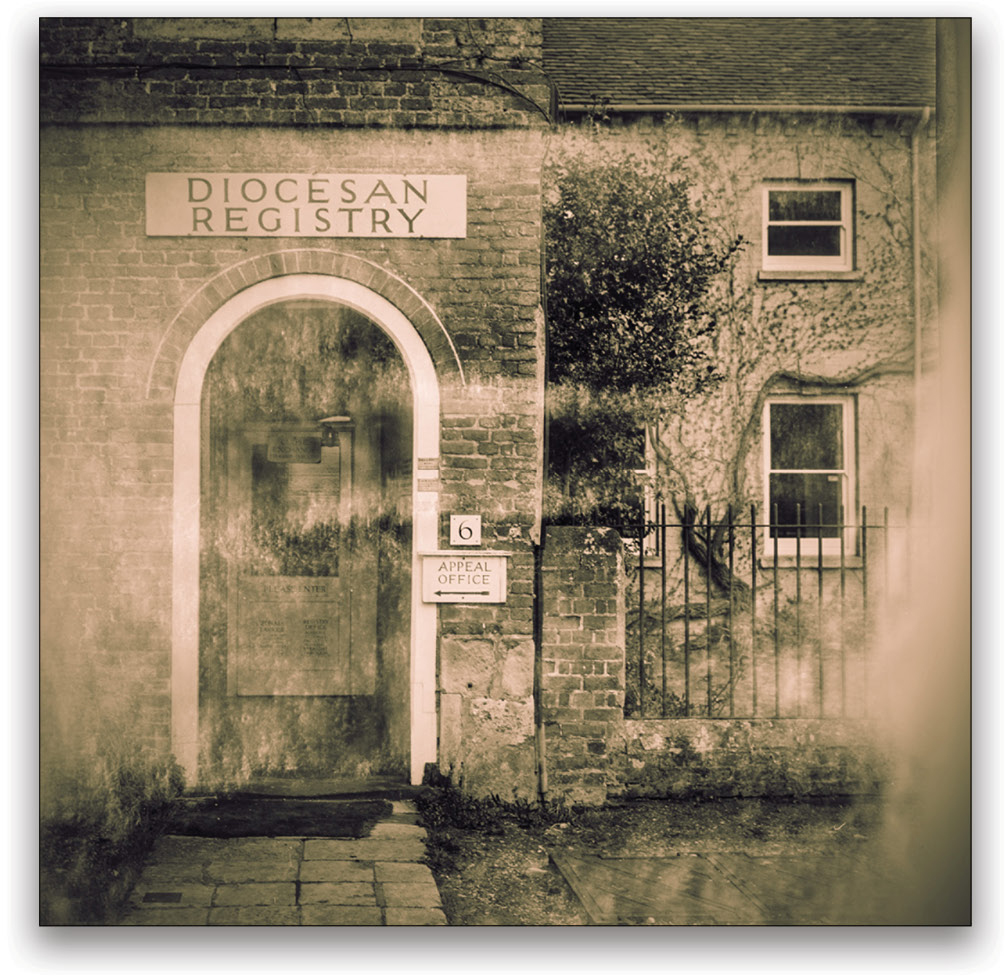
This photograph I took of The Sherlock Holmes pub in London inspired me to transform a modern-day photo into an antique scene with that famous London fog. I should mention this pub is actually located behind Charing Cross Station and therefore several miles away from the Baker Street address of the fictional detective. But leaving that small detail aside, this gave me the opportunity to demo a technique I’ve used every now and then to remove unwanted distractions from a street scene.
In urban environments, it can be difficult to find an angle from which to take a photograph where there isn’t either a streetlamp or utility pole in the way. The first time I tried this technique was on a trip to New York, around the time Adobe released the Auto-Align feature in Photoshop. The idea behind this is that you can automatically align layers with similar content to match positioning and perspective. One use is to auto-align layers of different exposures from a group portrait, add filled masks to each of the upper layers, and paint on the masks to reveal the best-looking expressions on each layer. So, if you have a group shot where everyone is looking great except for one or two people, you can use this method to combine better expressions from other exposures and have them align seamlessly.
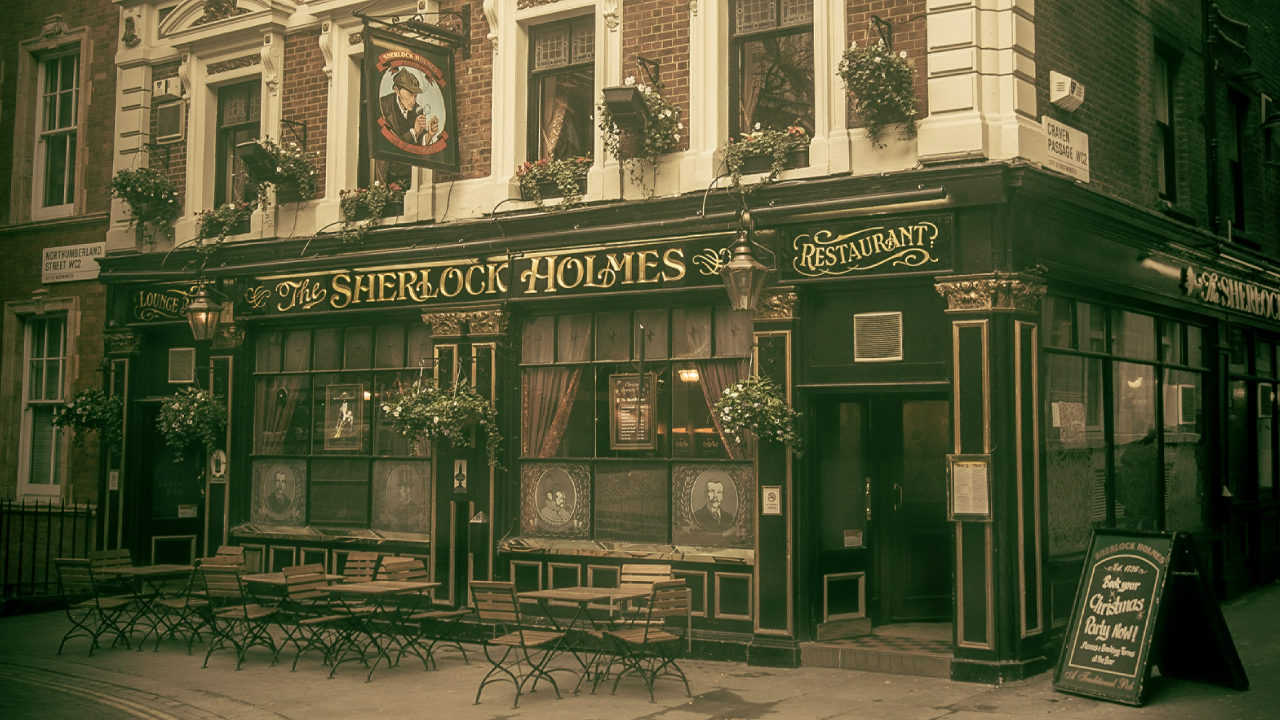
In the steps below, I show how I applied this same principle to remove an unwanted streetlamp. To remove it was actually very simple and required little artistic skill. When I demo this technique, I say it’s as easy as highlighting text with a fluorescent marker. All you need to do is take two or more photographs from different vantage points. What I do is shoot one photo from the desired viewpoint, then side-step to the left and then to the right to capture alternate views. This should be enough to select the best two photos with a big enough physical displacement between exposures of the streetlamp or whatever object it is you wish to remove from the scene.
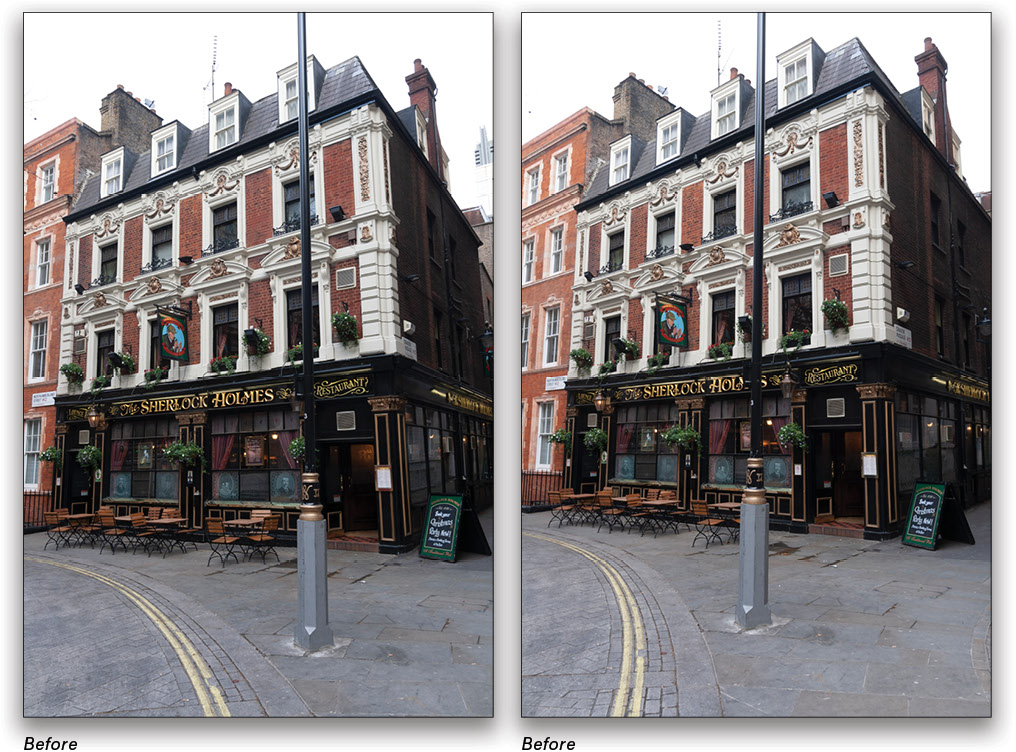
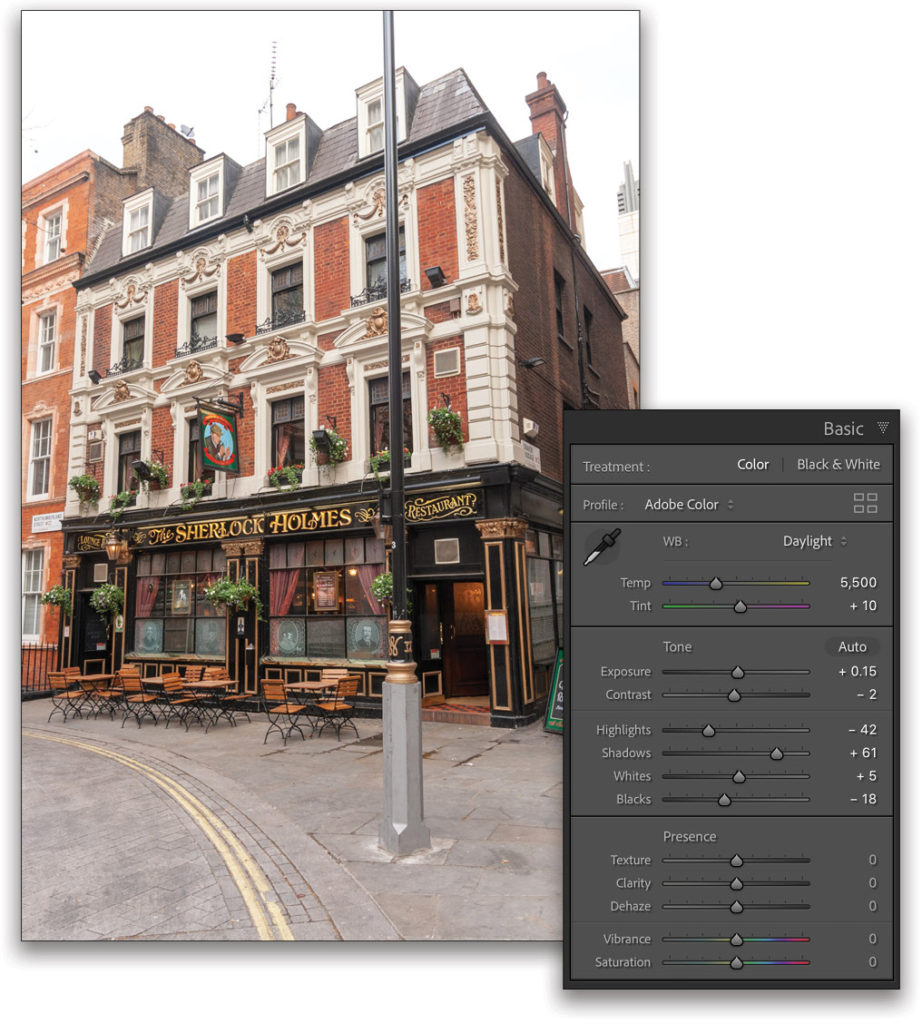
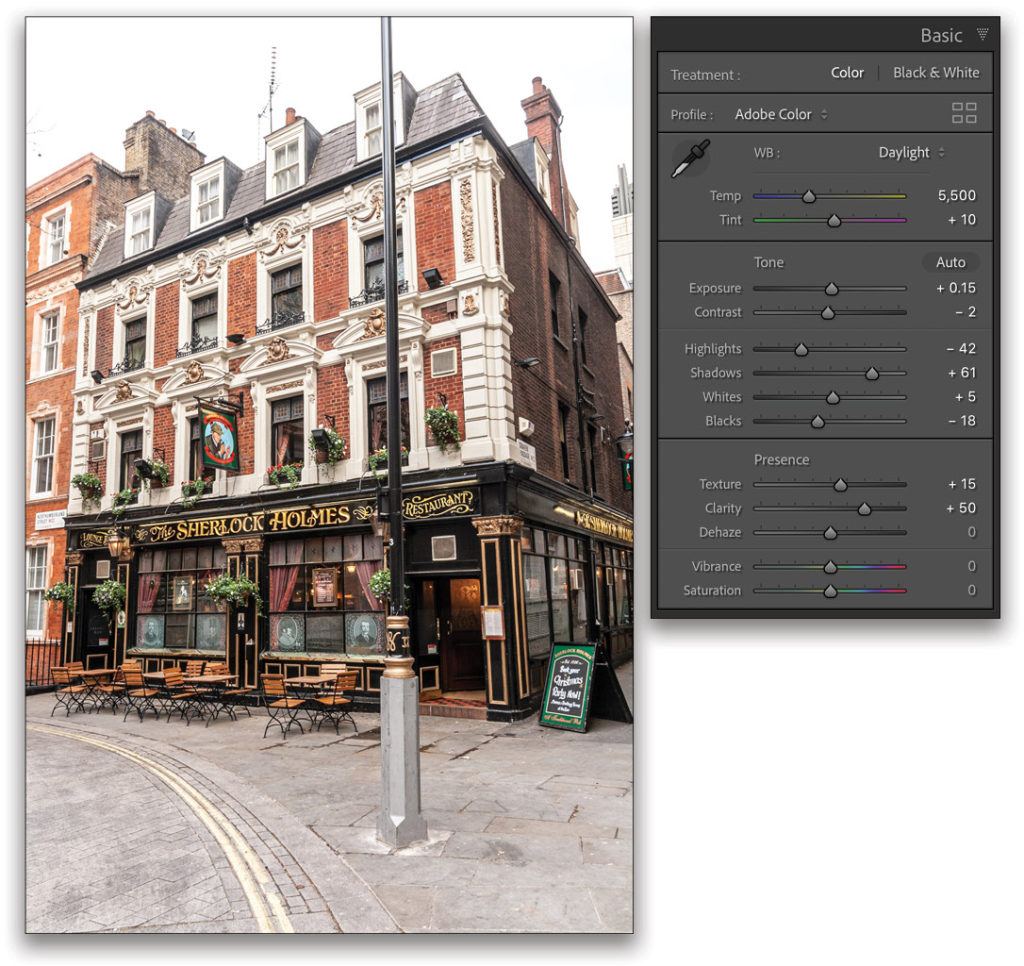
Step One: To start, select one of the two original photos and process it in Lightroom using the Basic panel controls. Here, I set the White Balance to the Daylight preset, and then adjusted the tone sliders to optimize the contrast. You’ll notice that I dragged the Shadows slider to the right to bring out more detail in the darker areas. (KelbyOne members can click here to download smaller versions of these images for practice purposes only.)
Step Two: Set the Clarity slider to +50 to add midtone contrast. I also increased the Texture to add more micro detail to the building.
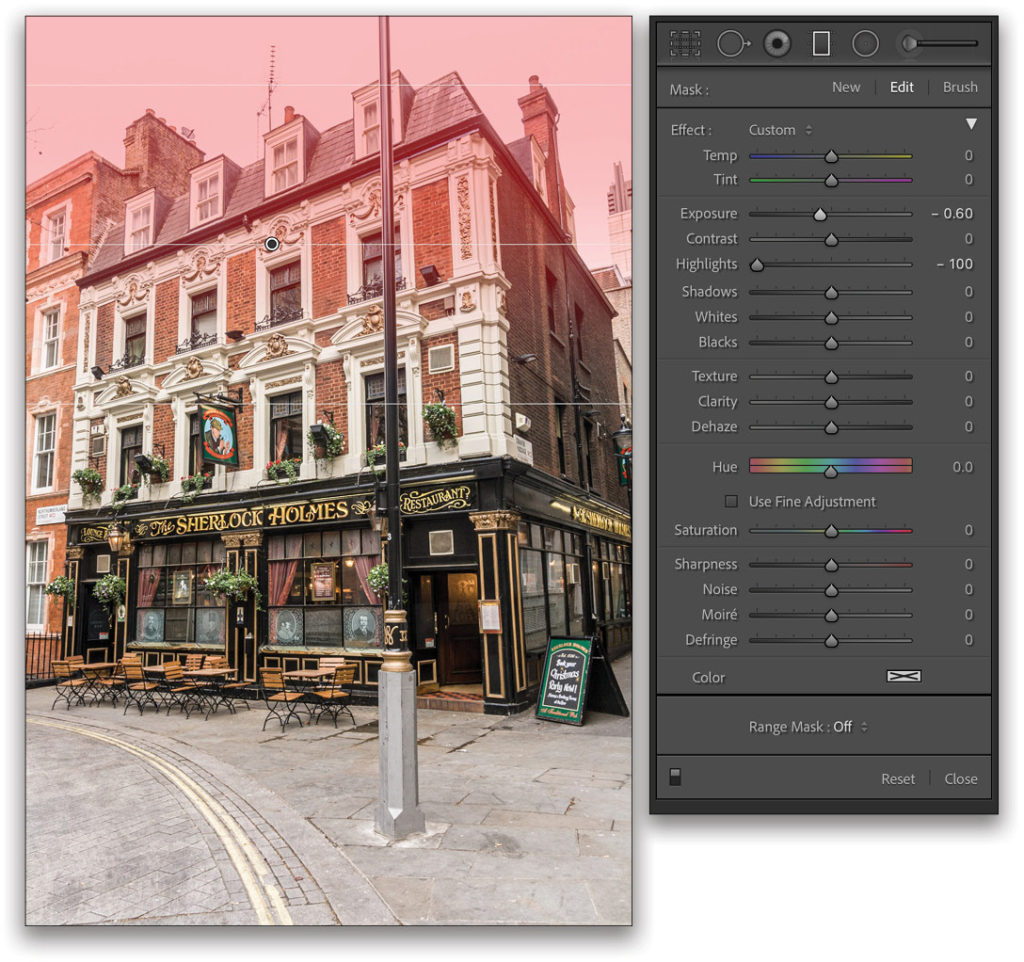
Step Three: The sky appeared a bit washed out in the original photo, so select the Graduated Filter tool (M) and add a gradient filter to the top of the image. Edit the settings to apply a darkening Exposure adjustment combined with a negative Highlights adjustment. Press M again to exit the Gradient Filter.
Step Four: We now want to share the settings applied to the first image with the other photograph. To do this, Shift-click the other photo in the Filmstrip so they’re both selected; the edited photo should be the “most selected” photo. In the Develop module, choose Settings>Sync Settings (Command-Shift-S [PC: Ctrl-Shift-S]), click the Check All button at the bottom, and then click the Synchronize button to sync the Lightroom Develop settings between the two photos.

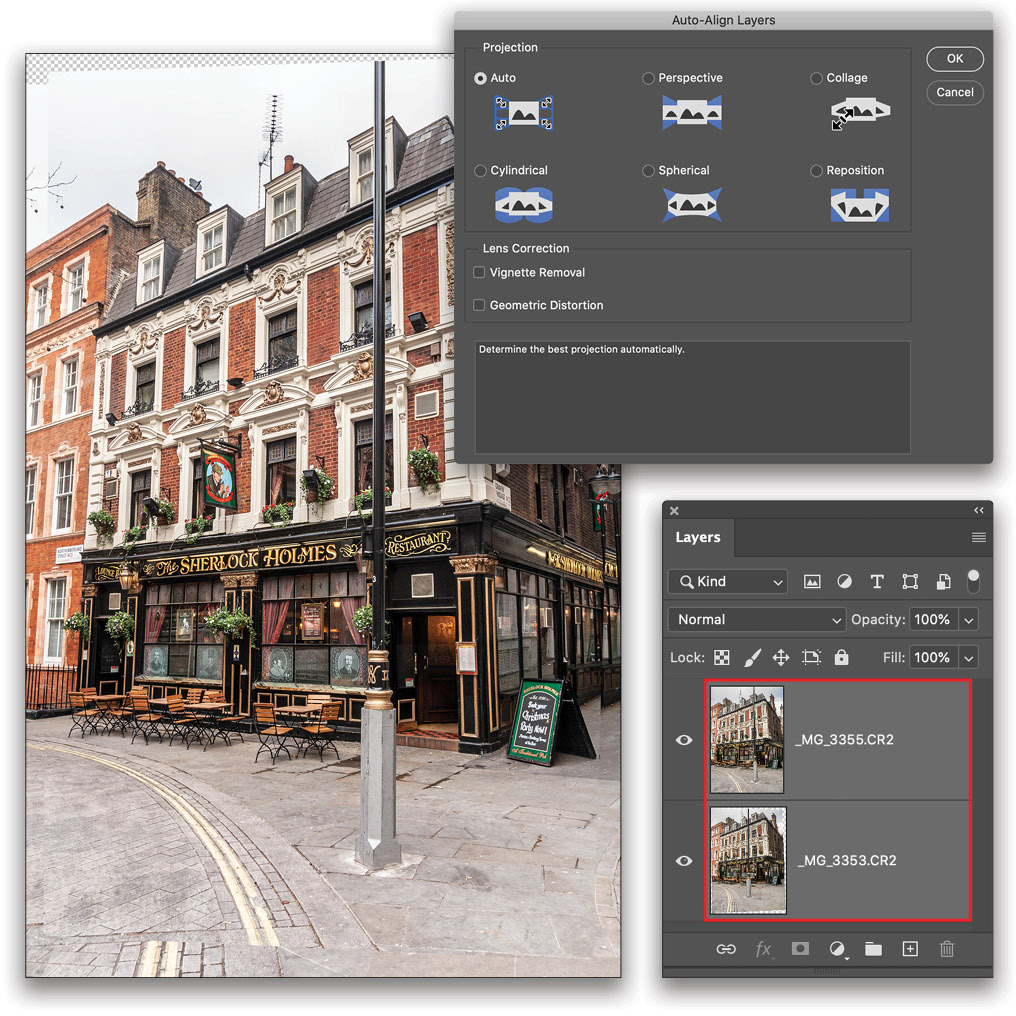
Step Five: Having synced the settings, and with both photos still selected, choose Photo>Edit In>Open as Layers in Photoshop, which will open both photos as a layered Photoshop document. In Photoshop, with the top layer active in the Layers panel, Shift-click the other layer so they’re both selected, and go to Edit>Auto-Align Layers. In the Auto-Align Layers dialog, select the Auto Projection option and click OK. This applies an automated transform to align the two layers. If you’re following along with the supplied images, try toggling the visibility of the upper layer in the Layers panel to see how well they now align.
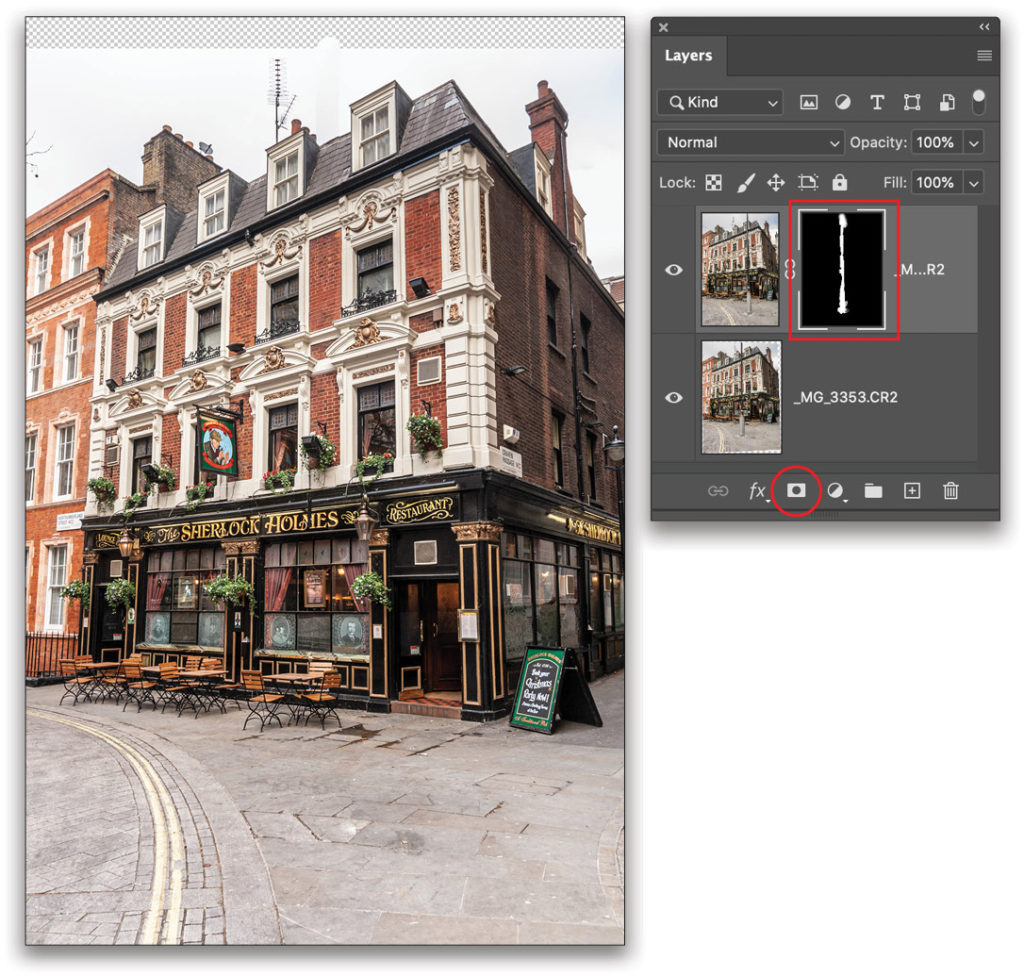
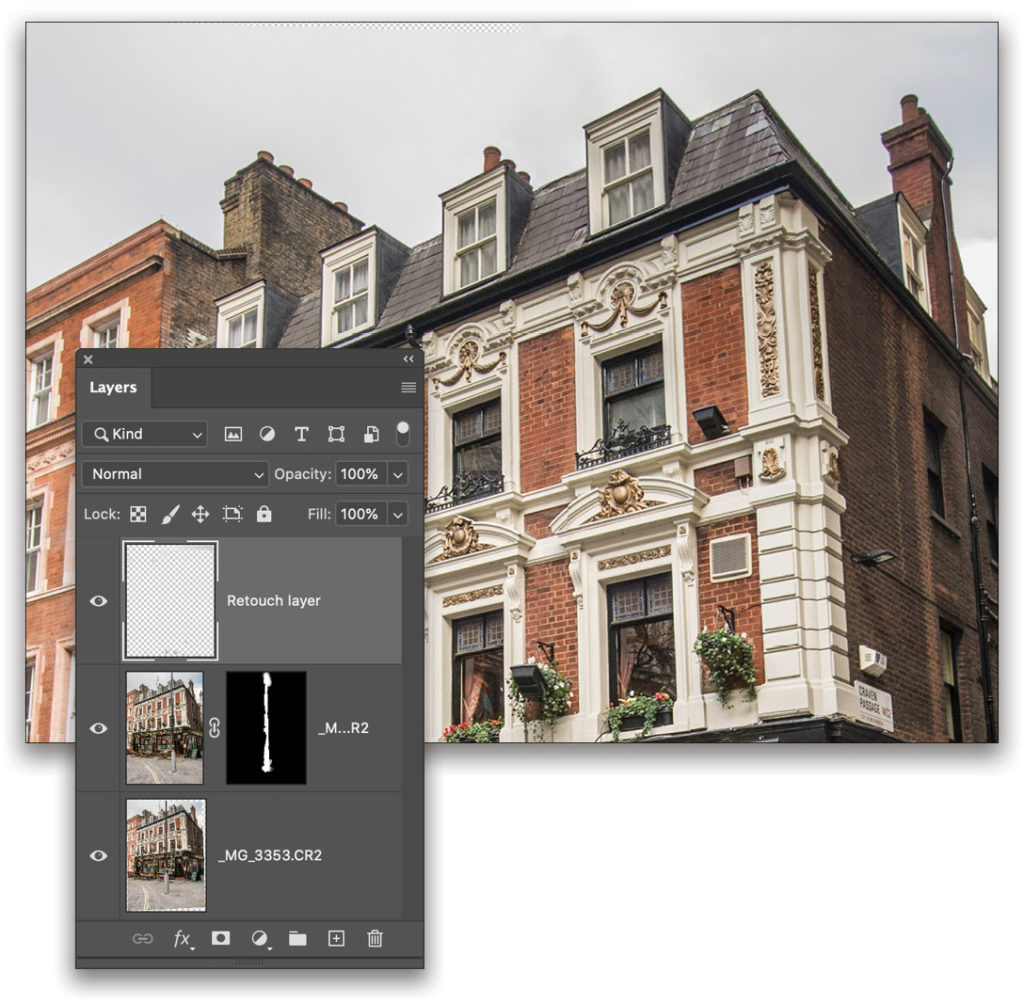
Step Six: Select the uppermost layer in the Layers panel. Hold down the Option (PC: Alt) key and click on the Add Layer Mask icon, which is the third icon from left at the bottom of the Layers panel. Clicking the Add Layer Mask icon with the Option (PC: Alt) key held down will add a new layer mask filled with black, which hides the entire upper layer.
Select the Brush tool (B) and, with white as the Foreground color (D), simply paint on the image with the layer mask active in the Layers panel (highlighted in red in the image shown here) to hide the streetlamp. If you accidentally reveal any of the streetlamp on the layer below, press X to switch the Foreground color to black, and paint it away. Use the Bracket keys ([ ]) on your keyboard to adjust the size of your brush as needed.
Step Seven: Did you notice a television aerial and satellite dish on the roof of the pub? Let’s remove them. Add an empty new layer to the top of the layer stack and use the Spot Healing Brush tool (J) with Sample All Layers checked on in the Options Bar to remove these two items. Use the Crop tool (C) to crop away any transparent or excess areas, and press Enter.
Choose File>Save (Command-S [PC: Ctrl-S]) so that the Photoshop composite image is saved to disk and automatically added to the Lightroom catalog.
Step Eight: In Lightroom, I went to the Basic panel and lightened the Exposure and adjusted the sliders to desaturate the Vibrance and fine-tune the Whites and Blacks settings. Go to the Transform panel and click on the Auto button to apply an automated Upright adjustment so the verticals converge less.

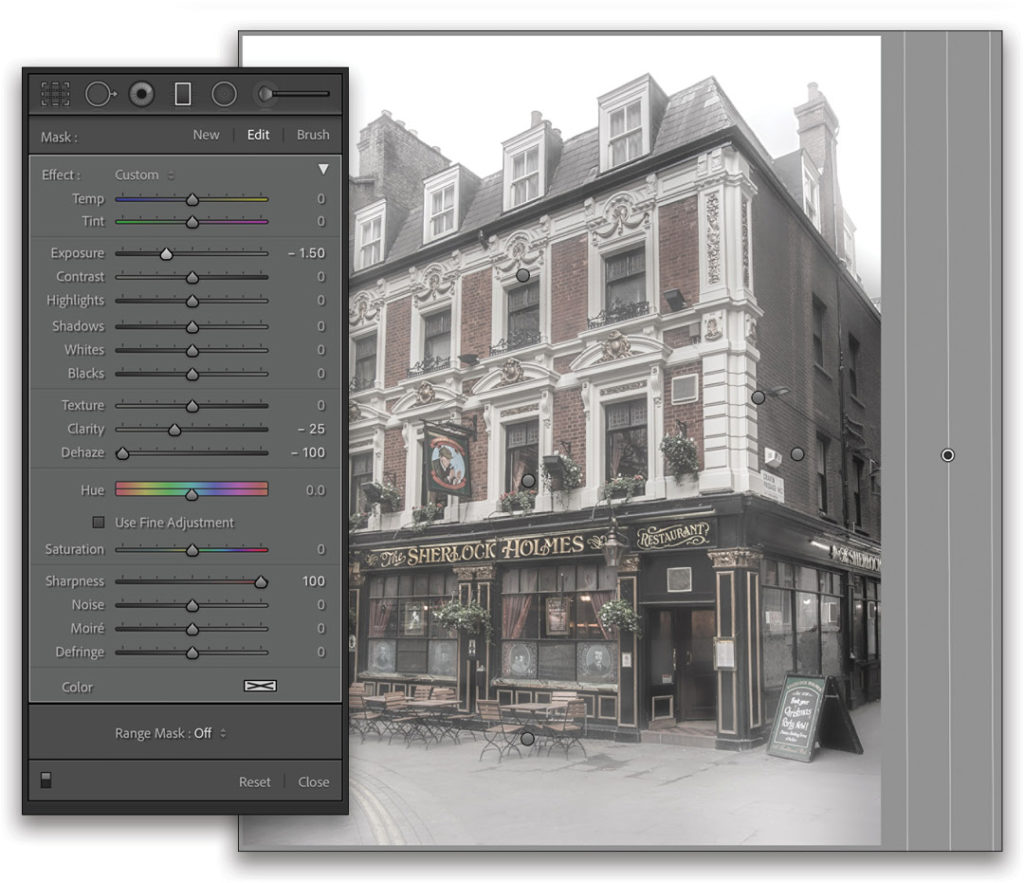
Step Nine: To add some mist and fog to the scene, select the Graduated Filter tool (M) and add a number of gradient filters. Here, I applied negative Clarity and negative Dehaze to the sides and bottom of the frame. I then added one more Graduated Filter completely off-canvas (as shown here) to apply a strong negative, global Dehaze adjustment.
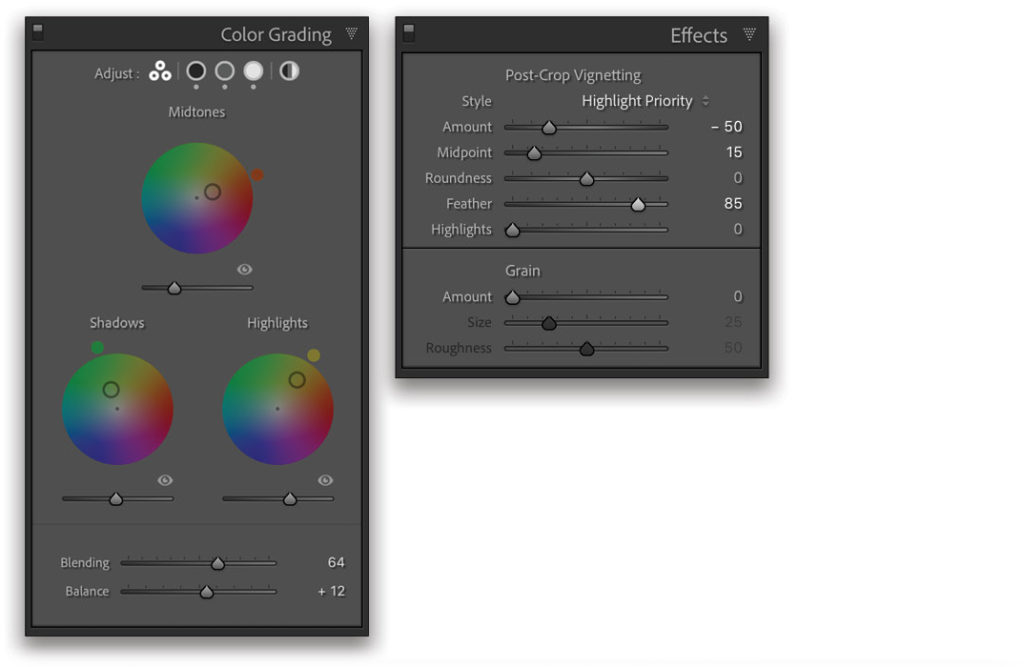
Step 10: I then went to the Color Grading panel and added color toning adjustments to the Midtones, Shadows, and Highlights as shown here. I also made changes to the Blending and Balance sliders. These adjustments gave the photograph an antique-type feel. Finally, I went to the Effects panel and added a strong negative Post-Crop Vignetting effect to darken the edges of the photo.
Color Grading Panel
The Color Grading panel is fairly new to Lightroom and Camera Raw. It replaces the former Split Toning panel by offering a more versatile user interface, while maintaining full backward compatibility. The Color Grading panel can therefore be used to continue creating traditional split-toning effects for black-and-white images; however, the main impetus for creating this panel is to allow users to apply advanced cinematic-type color treatments to full-color as well as black-and-white photos.
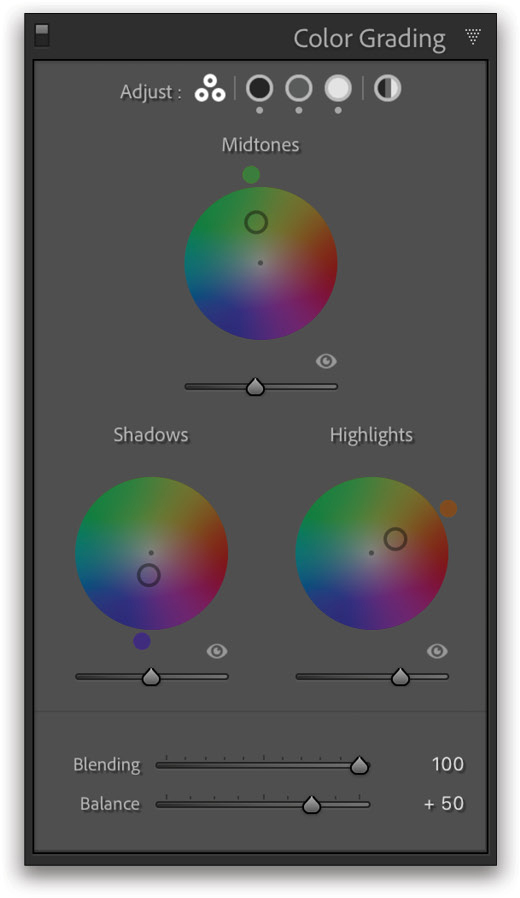
The default 3-way layout features editable hue wheels. Dragging the outer circumference pin sets the Hue color value for the relevant tone section, i.e. Shadows, Midtones, or Highlights. Dragging on the inner pin does the same thing, but also allows you to control the color Saturation. Moving the pin closer to the center applies a low saturation, while moving the pin to the edge increases saturation. Once you move the pin away from the center and release the mouse button, it then only allows you to control the Saturation along a straight line. You’ll need to move it back to the center in order to control both Saturation and Hue again with the pin. The slider below each hue wheel can be used to adjust the Luminance value.
The Blending slider at the bottom can be used to control the amount of bleed between the Hue, Saturation, and Luminance settings for the Shadows, Midtones, and Highlights color settings. This slider adjustment can be quite subtle, depending on the strength of the color settings applied but, as the name suggests, allows you to fine-tune the smoothness of the color blending. Finally, the Balance slider matches the behavior of the slider in the former Split Toning panel. It can be used to adjust the offset between the Shadows and Highlights color settings.
This article originally published in the April, 2021 issue of Photoshop User magazine.