Excerpted from Scot Kelby’s The Digital Photography Book, Part 5: Photo Recipes
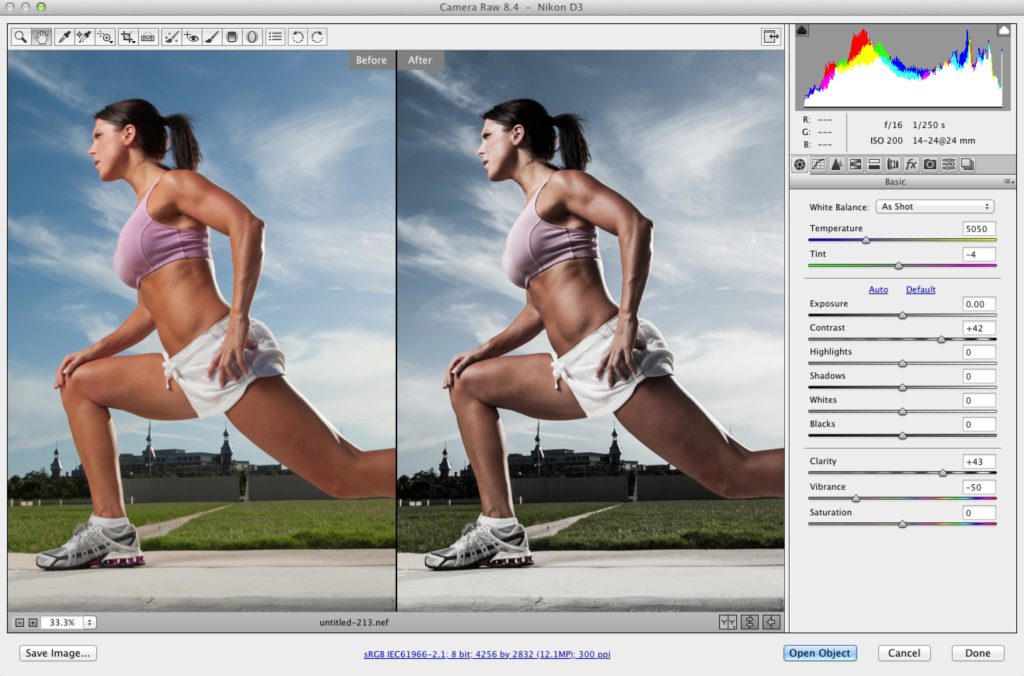
TOOLS: This can be done in either Camera Raw (part of Photoshop and Photoshop Elements) or Lightroom’s Develop module (it’s the same sliders, in the same order, that do the exact same things).
TECHNIQUE: You only need to move three sliders to get this look:
(1)
We desaturate the entire image by dragging the Vibrance slider to the left. I don’t have an amount I drag it to every time, it just depends on the image. So, just look at the screen while you drag and, when it looks good to you, stop dragging.
(2)
Increase the amount of Clarity. Technically, this adds midtone contrast, but what you’ll see is that it brings out texture and detail and makes things shinier (like the highlights on her skin, here). You do have to be careful, though, about adding clarity to women’s skin because it can make them look bruised and rough. If that happens, just use the Adjustment Brush instead: set all the other sliders to zero and raise the Clarity amount, then just paint over everything but her skin. Problem solved.
(3)
Drag the Contrast slider to the right to add more contrast and give it more of that bleach bypass look (it helps darken the sky up a little bit, too!).
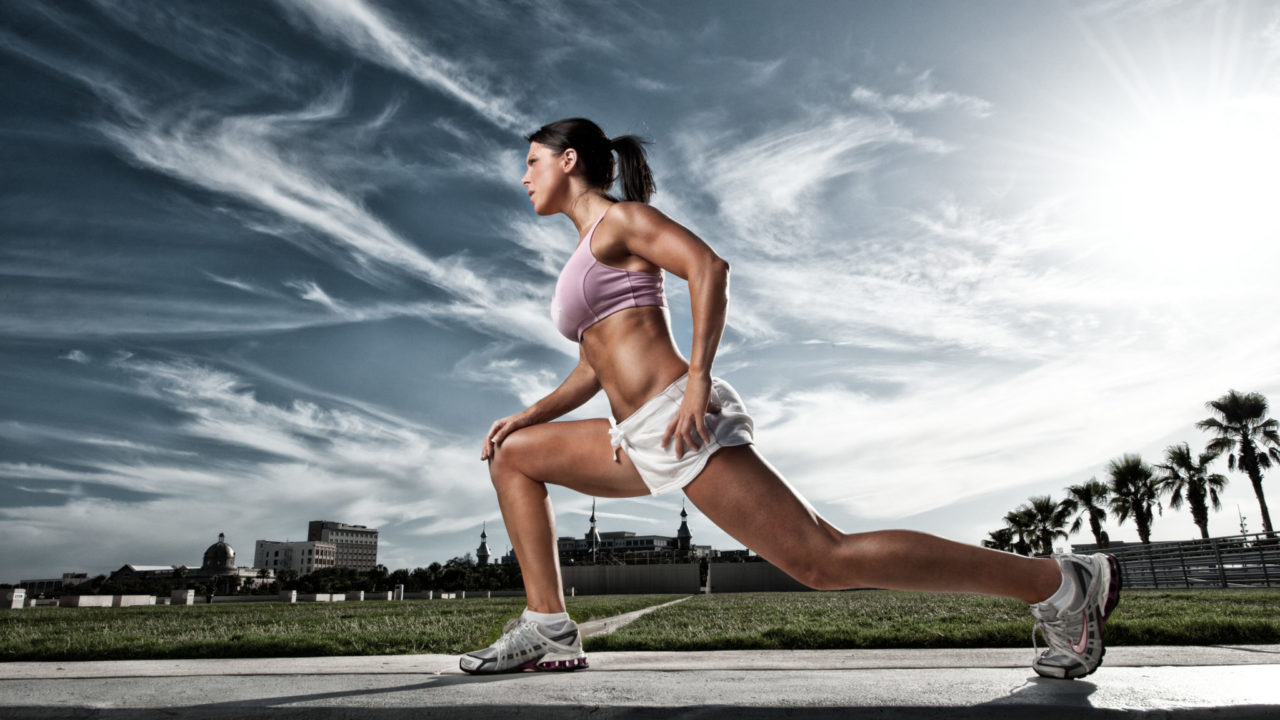
THE LOOK: This kind of replicates the bleach bypass look that was created in traditional photographic darkrooms and, although the darkroom is gone, this look still lives on and looks great on images where you see a lot of sky, like this one.