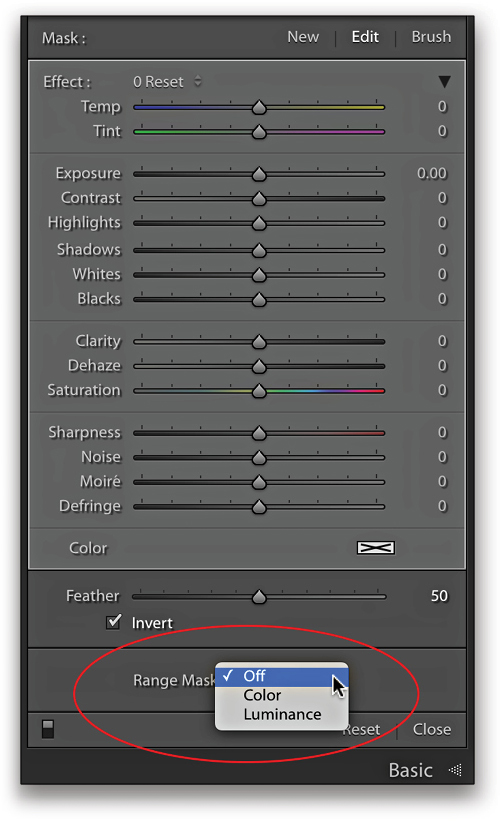
Range Mask is a new addition to the local adjustment tools (Adjustment Brush, Graduated Filter, and Radial Filter) in Lightroom Classic (and Camera Raw 10.x), which provides a way to fine-tune the area being adjusted by color or luminance values within the photo. This means that you’ll only see the Range Mask option after you’ve applied one of the three local adjustments, and then scrolled to the bottom of the local adjustment panel.
Note that your photo must also be set to Process Version 4 (in the Camera Calibration panel) to use Range Mask. All newly imported photos into Lr Classic will be Version 4 by default, and any older photos from an updated catalog will automatically upgrade to Version 4 as soon as you make a new adjustment in Develop (except photos where Auto Mask was used previously, which have to be manually updated). That said, check out this post I wrote on LightroomKillerTips.com about a situation you might encounter, and how to resolve it.
Range Mask: Luminance
So far, the most common way I’ve found myself using Range Mask is based on luminance values. Let’s go through some examples to see how this can be useful in your workflow.
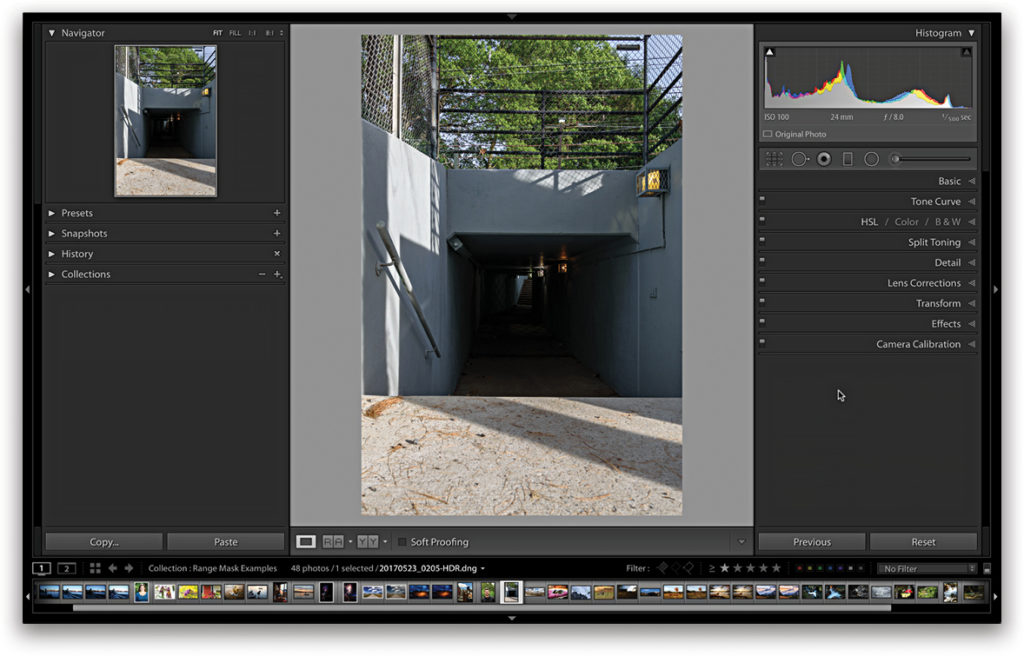
Step One: To start, I have a photo of a pedestrian tunnel, and although there are lights in the tunnel, it’s still pretty dark in there. I want to brighten things up, but
I want to avoid blowing out the lights along the ceiling and the entrance on the other side. A Radial Filter with a luminance mask makes the job much easier.
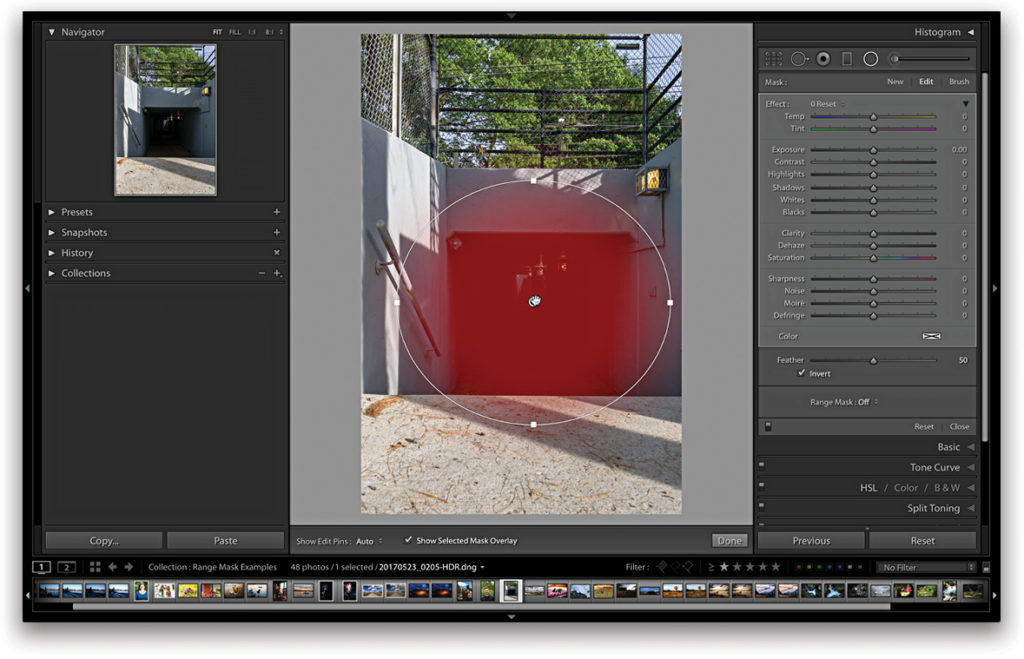
Step Two: I drew the Radial Filter (Shift-M) large enough to completely cover the interior of the tunnel (I’m only concerned about covering the darkest area). Enabling the Mask Overlay by pressing the O key is helpful to see what area the mask is affecting. If a red mask isn’t good for the image you’re adjusting, press Shift-O to cycle through green, black, and white overlays for a better match.
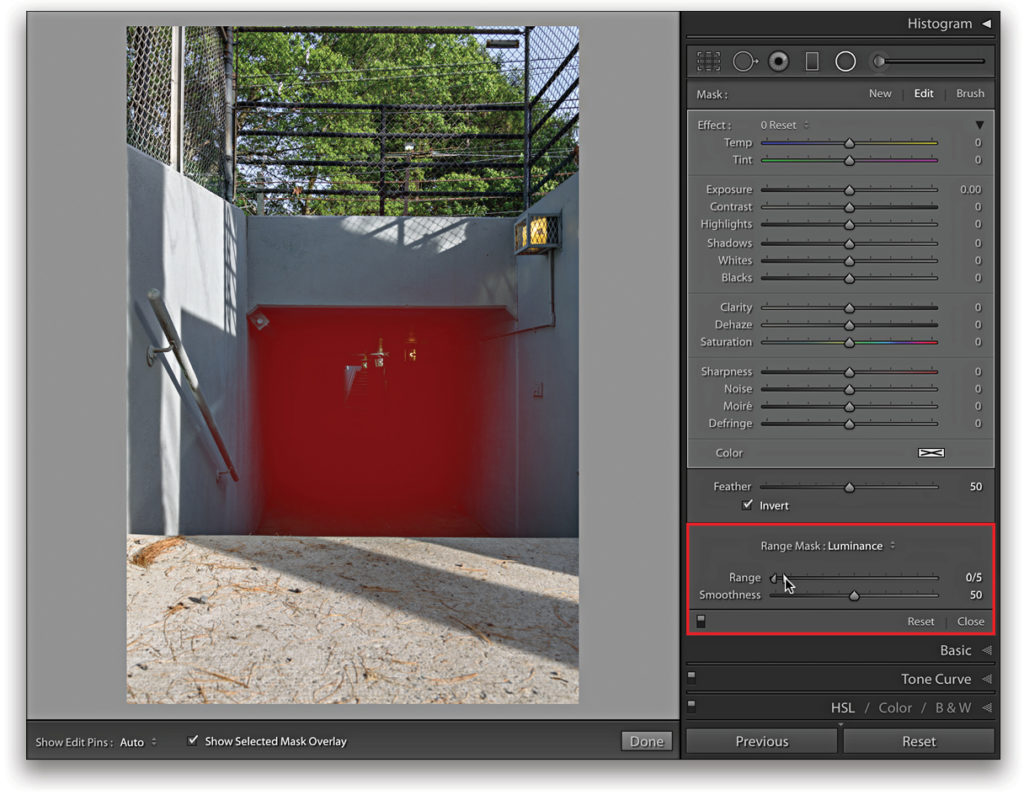
Step Three: I’ll use the Range Mask set to Luminance to fine-tune the mask to affect only the darkest tones. To do this, set the Range Mask drop-down menu to Luminance, which activates the Luminance controls. By default, the entire range of tones is included in the mask. Looking at the Range slider, there’s a knob on the left side, which represents the dark tones, and a knob on the right side, which represents light tones.
If you want to limit the range of tones to just the darkest tones, drag the right-hand knob all the way to the left. If you want to limit the range of tones to the lightest tones, drag the left-hand knob all the way to the right. If you want only the midtones, drag both handles toward the center. By leaving the red Mask Overlay enabled, as you drag the right-hand knob to the left as far as it can go, the red Mask Overlay covers only the darkest tones within the area of your Radial Filter.
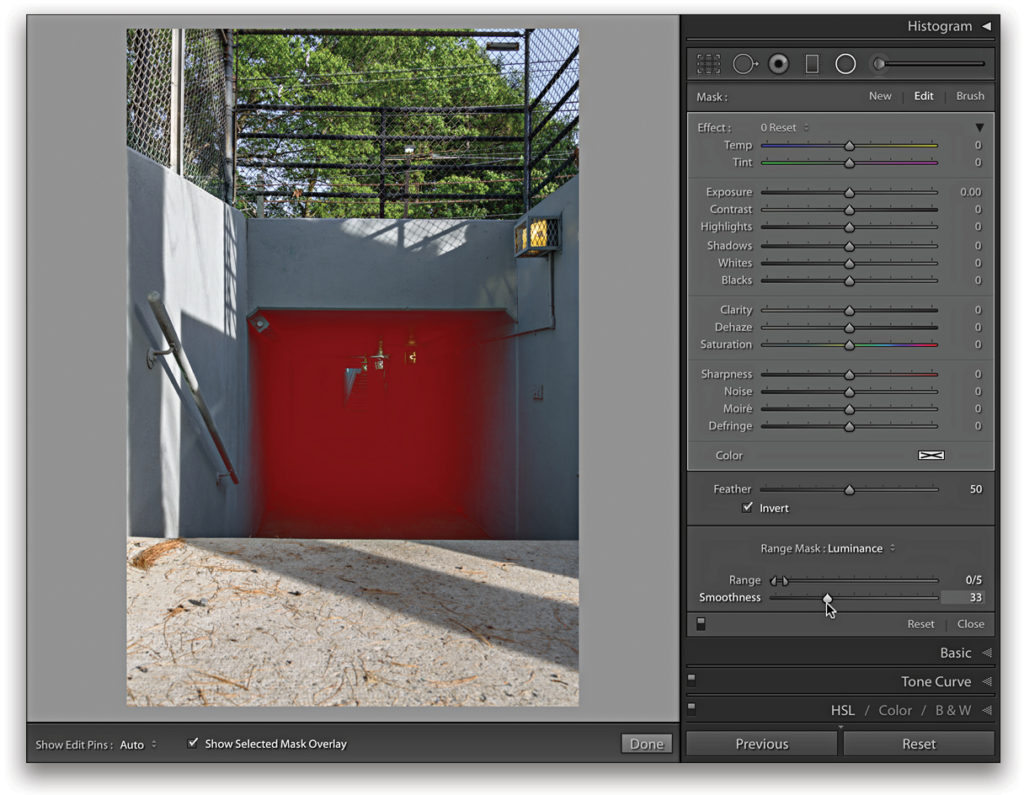
Step Four: You can fine-tune this even further with the Smoothness slider, which controls how the affected area blends or falls off into the unaffected area. By default, Smoothness is set to 50. Increasing Smoothness extends the affected area further out into the photo. Decreasing Smoothness contracts the fall-off area. Some smoothness is needed to avoid abrupt transitions, so I only slightly decreased the value to 33.
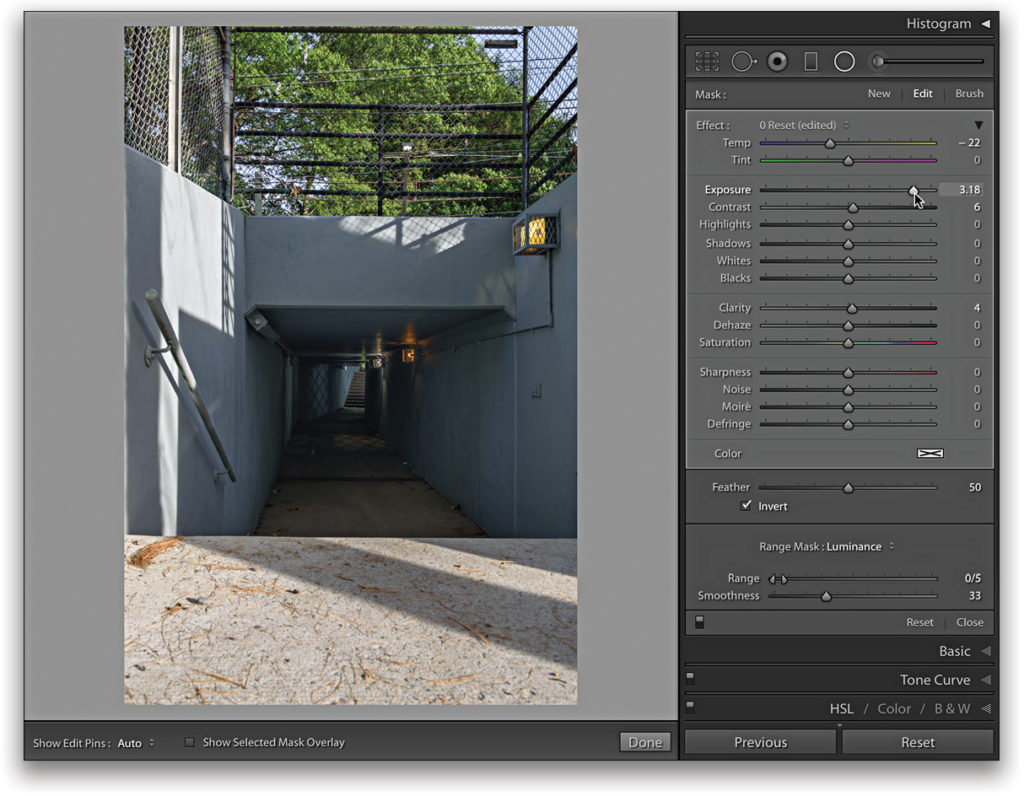
Step Five: With the range of my Radial Filter limited by the bounds of the filter and by the Luminance Range Mask, I can turn off the Mask Overlay and set about adjusting the tunnel’s interior. I ended up increasing Exposure over 3 stops, which would have completely blown out the lights if I hadn’t been able to exclude them from the Radial Filter.
Range Mask: Color
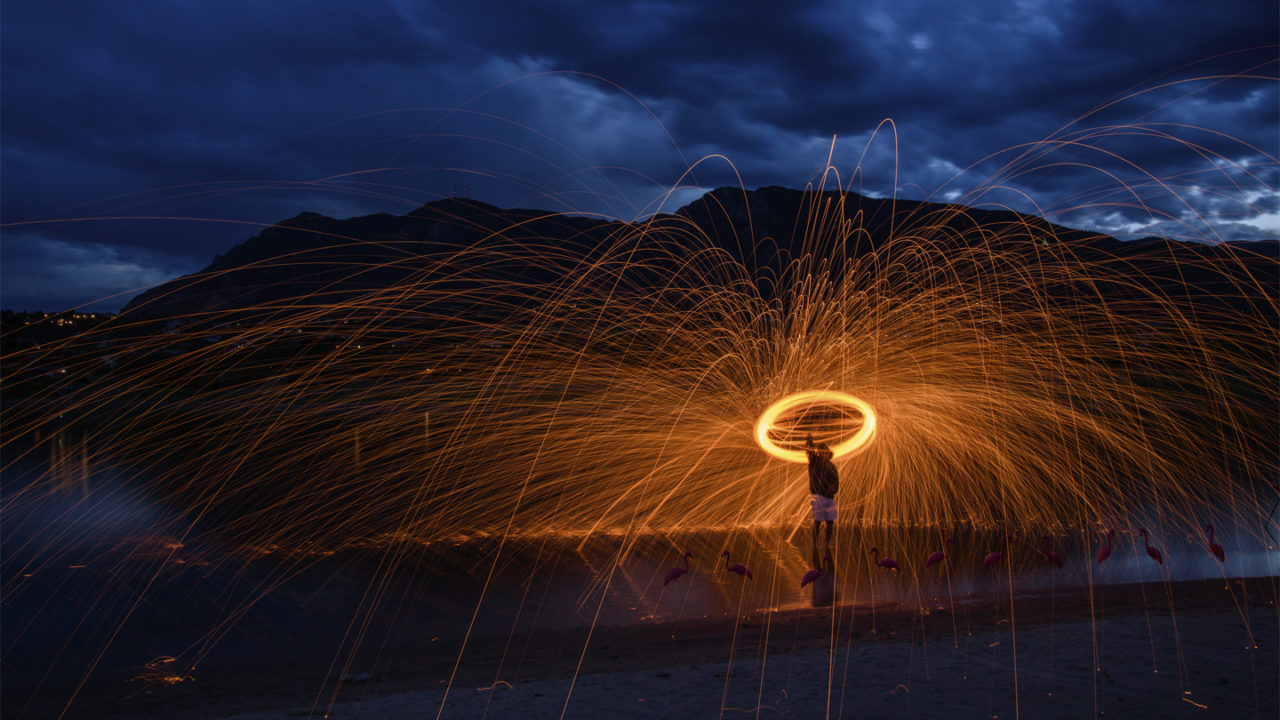
For this next photo, I used a Graduated Filter with Range Mask set to Color to adjust only the orange sparks from the burning steel wool.
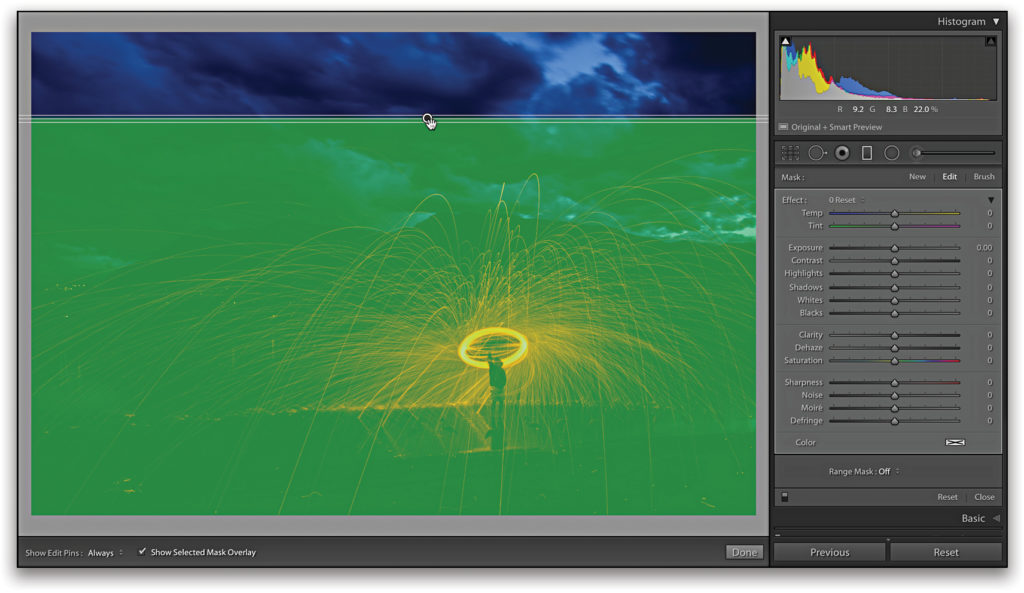
Step One: To start, I dragged out the Graduated Filter (M) to affect the bottom two-thirds of the photo. I don’t need to concern myself with the actual graduated part of the filter (the area between the two outer lines), as I’ll use the Range Mask to affect only the sparks. I also switched to the green Mask Overlay to see it better.
Step Two: With the Graduated Filter in place, set the Range Mask drop-down menu to Color to access its controls. The Color Range Selector (eyedropper) is used to click on the color you want to limit the mask to affect. Like with the White Balance Selector, you first click on the eyedropper to activate the tool, and then you click on the desired color within the area you’ve defined with the local adjustment.
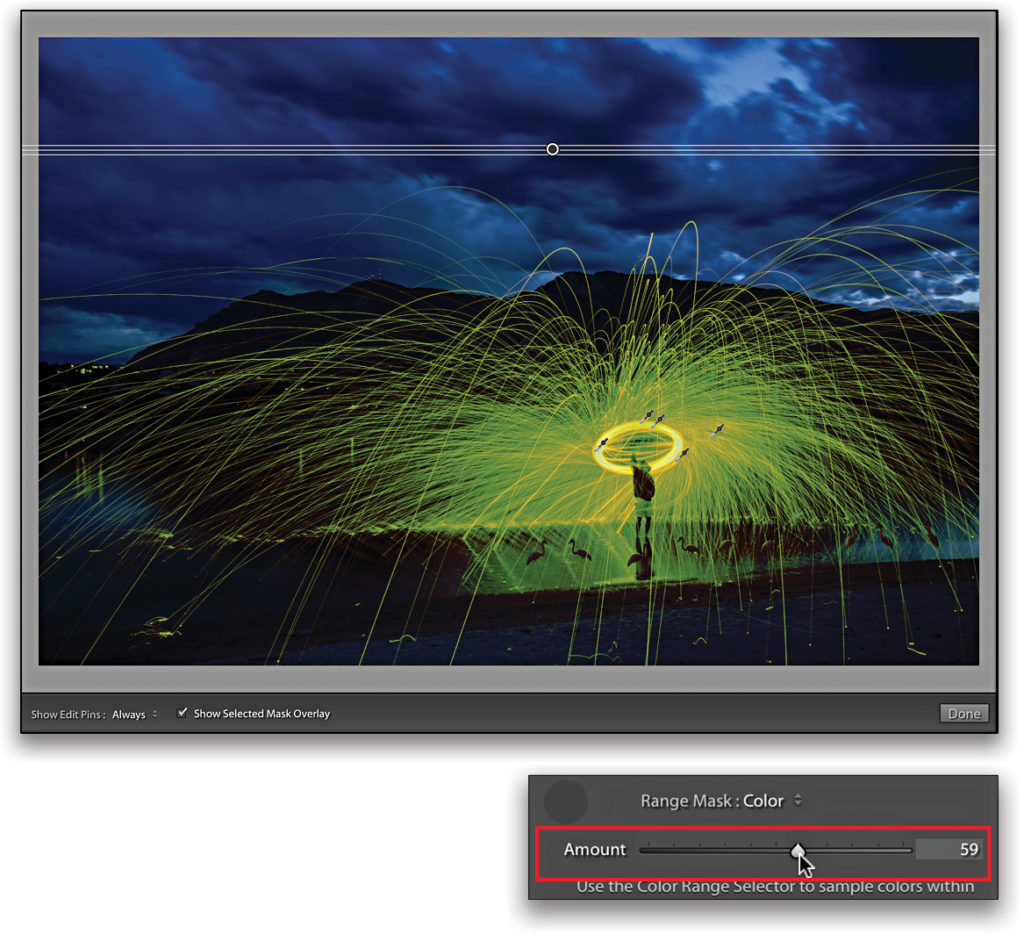
To increase accuracy (especially in color gradients like the sky), you can click-and-drag over an area of color to increase the range of hues included in the mask. Alternatively,
The H key hides local adjustment pins and the pins created with the Range Mask, so if you’re not seeing anything as you click, press the H key to show the pins. You can further refine your mask using the Amount slider. Decreasing the Amount contracts the mask, and increasing the Amount extends the mask. I increased the Amount slider a small amount for this photo.
Step Three: My goal here was to increase the contrast and intensity of the sparks against the background, so I used a combination of positive Temp, Highlights, and Clarity. When I use a combination of adjustments on a local adjustment tool, I usually click the (hard-to-see) disclosure triangle to the far right of the Effect drop-down menu, which collapses all of the adjustments into a single Amount slider. Then I dial that amount up and down to get the effect I’m looking for.

Adjustment Brush
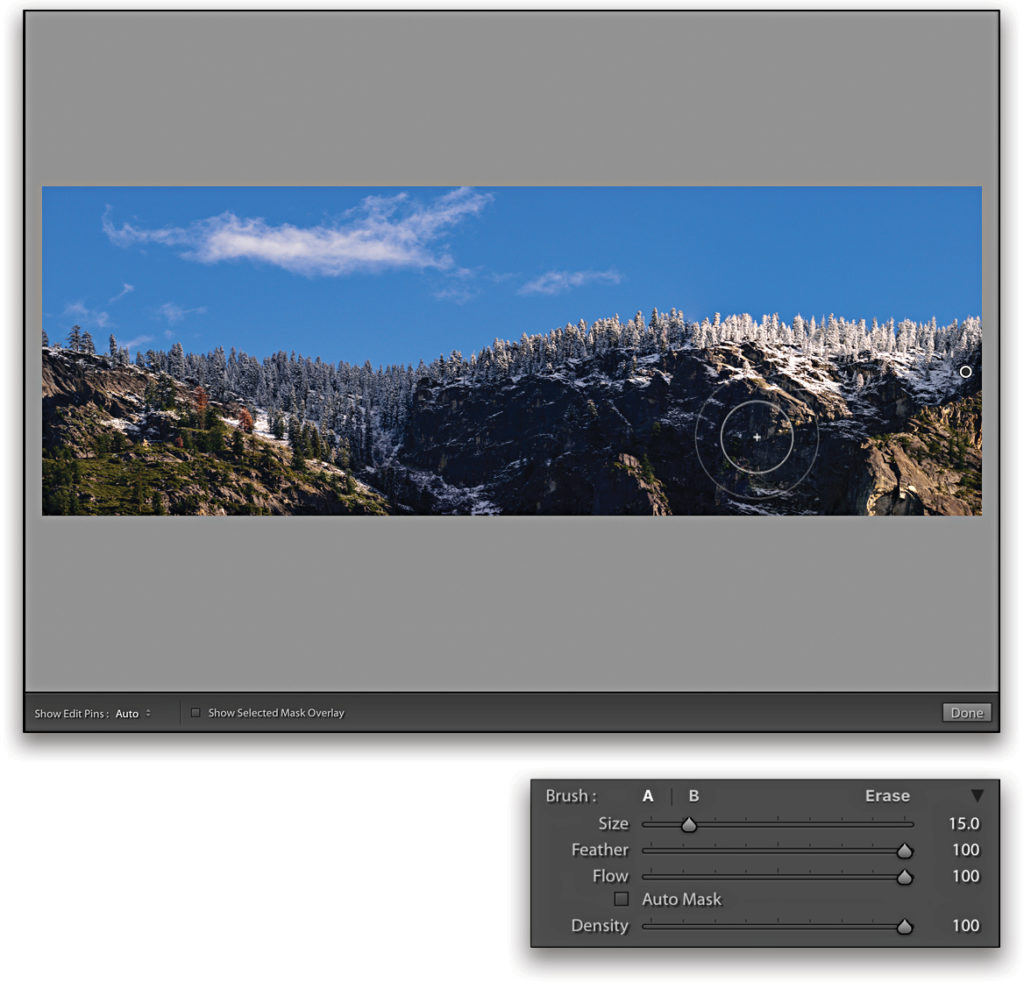
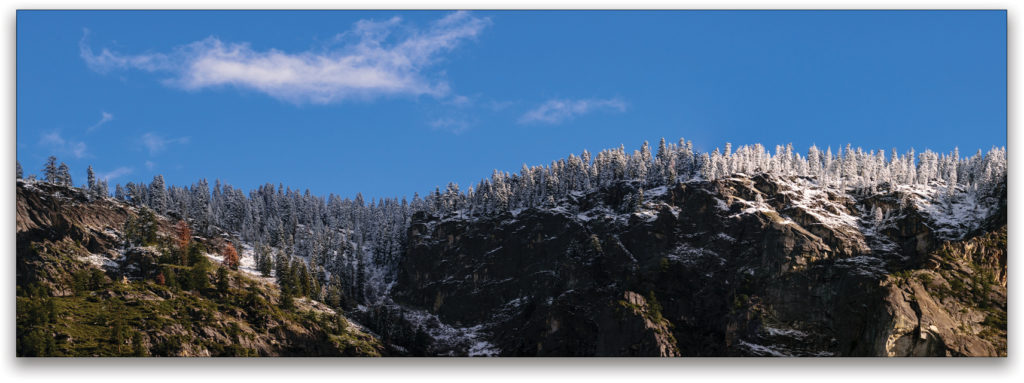
You can also include a Range Mask with a mask created by the Adjustment Brush (K). In this example, I wanted to decrease the blue cast in the shadow areas of this panorama. I left the Mask Overlay off, as I want to show you another way to visualize your Range Mask, but I only brushed over the lower part of the photo.
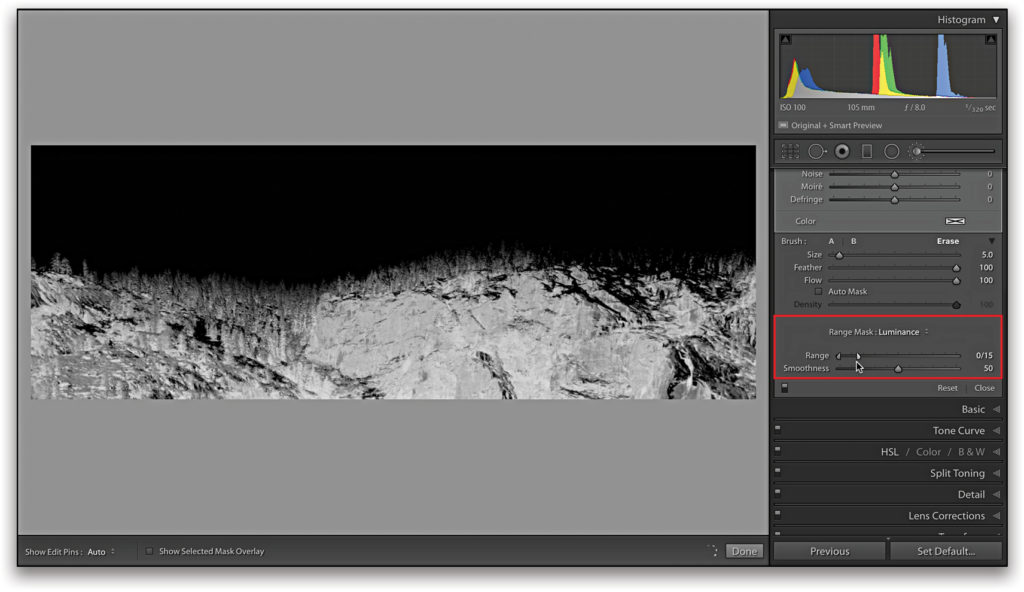
Step One: I’m only concerned with what’s happening in the shadows, so I chose to use the Luminance option. If you hold the Option (PC: Alt) key while you drag either knob on the Range slider, you’ll see a grayscale mask appear on the photo. Areas in black are being excluded from the adjustment, and areas in white get the full adjustment. Sometimes this is an easier way to see what’s happening.
Step Two: As with the previous example, you can fine-tune the results with the Smoothness slider, and the Option (PC: Alt) key trick works with that slider, as well as with the Amount slider in a Color Range Mask.
Step Three: With my mask set, I then set about warming and darkening the shadows in the photo. After making my adjustments, I went back and tweaked the Range and Smoothness sliders a little more to get the results I wanted.
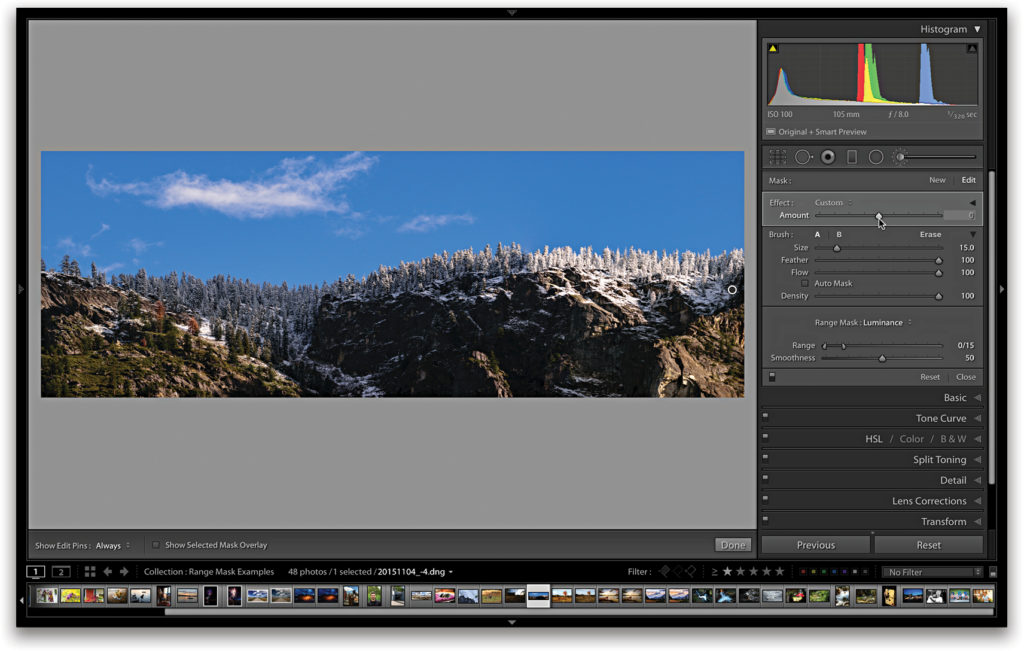
I personally prefer to use a local adjustment with no settings applied first, adjust the mask, then dial in the settings, but you can certainly start with settings (or a preset) dialed into your local adjustment tool of choice. The final result is all that matters. Range Mask is a powerful addition to your workflow. I look forward to learning new ways to use it.
This article originally published in Issue 36 of Lightroom Magazine.


