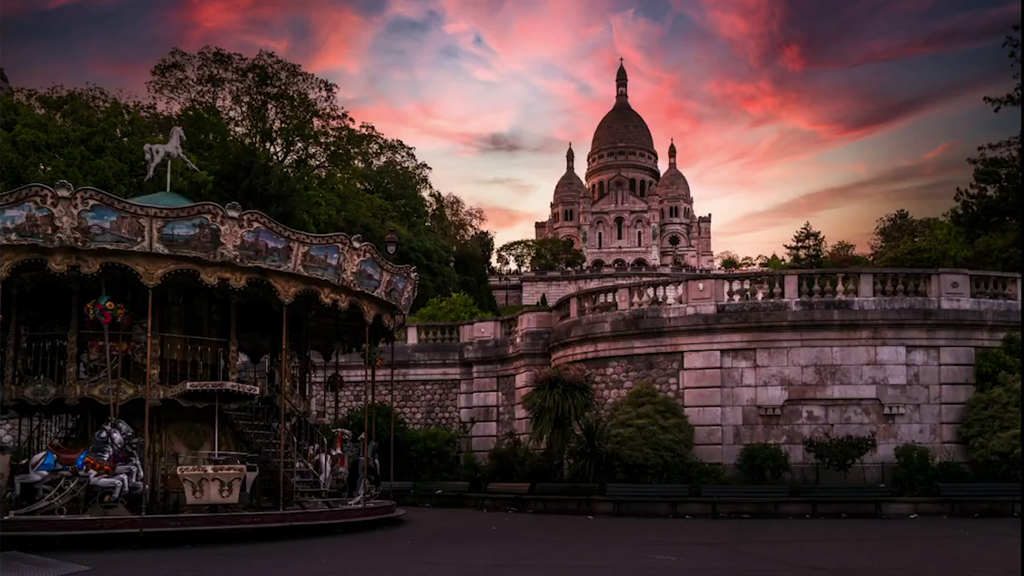
Join Lightroom expert Serge Ramelli in this engaging clip from his class “5 Steps to Make Your Cityscape Pop” from Photoshop World 2023. In this tutorial, Serge demonstrates how to bring a dull sunset photo to life with powerful Lightroom adjustments. Watch as he finely tunes the image (popping over to Photoshop for a sky replacement) to create a captivating look. Click below to watch the entire clip, or follow along in this post.
Bonjour, mesdames et messieurs! I use this “Natural Drama Formula” for all my cityscape processing and I’ll show you how it works to make images really pop! W.loe’ll transform a slightly dull sunset photo of Paris into a stunning, dynamic masterpiece in this step-by-step tutorial. When editing cityscape photos, it’s all about adding that extra drama that brings the scene to life. Let’s go crazy on this image!
Exposure Adjustments in Lightroom
The first thing I do on every image is exposure. You need to see what’s going on before you can do anything else like white balance or cropping. I tend to slightly underexpose my photos to retain the most detail. Then open them up wide to see everything I’ve captured.
1. Open the Shadows: Let’s start by opening up those shadows all the way to 100 to reveal more details in the dark areas.
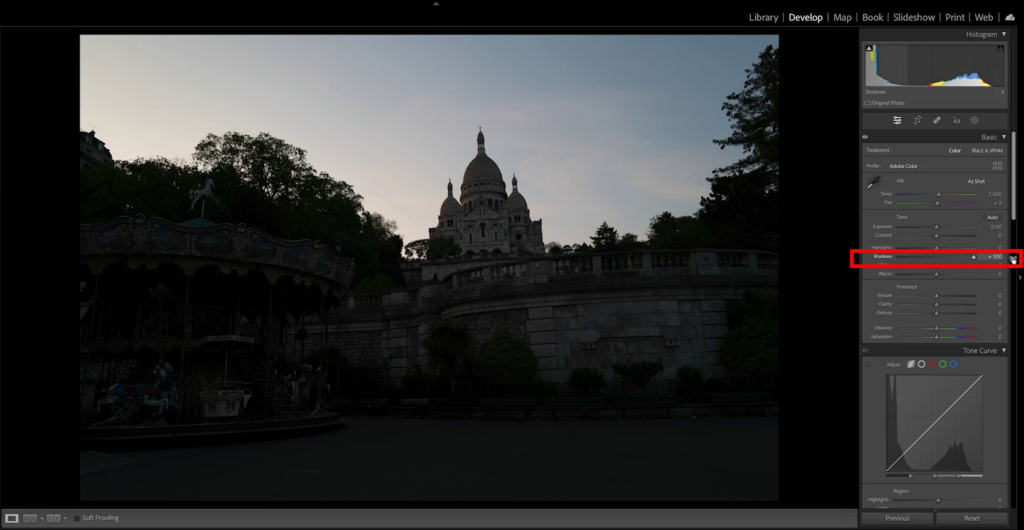
2. Adjust the Highlights: Drag the highlights all the way down to bring back any blown-out details in the bright areas. We’re kind of over-correcting here so it gets a bit of a weird feeling here, but we’ll fix that. We’ll fix that.

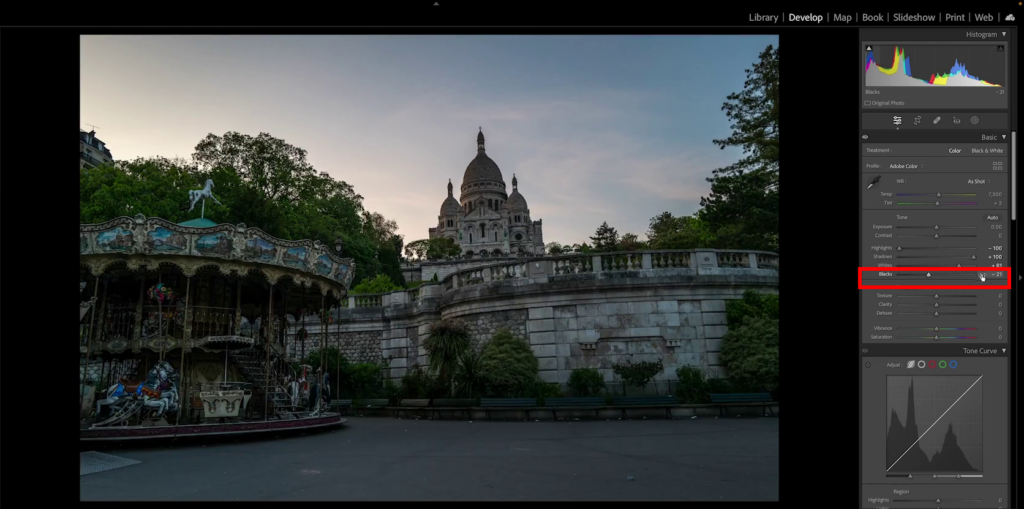
3. Boost the Whites: Increase the whites for more contrast and brightness. Here I’ve raised them all the way to 61. This really reveals your image.

4. Set the Blacks: Hold down the Option key (Alt on Windows) and slide the blacks until you achieve good depth in the shadows while avoiding too many solid black areas and loss of detail. Holding down the Option key shows you color (green, yellow, red) on white—those pixels are 100% black, there is no more information, you want to correct for that. Here I’ve dragged the slider to -21.
Straighten Image
1. Straighten the image: This image needs some optical correction, so let’s go down to the Transform panel and click Auto to straighten it. Now everything’s not leaning so much.

White Balance and Color Adjustment
1. Adjust White Balance: Back in the Basic panel, adjust the temp and tint to suit the scene, time of day, and your liking. I want to make it a lot warmer (shifting temp away from blue) to reflect the sunset glow. Add I shift the tint more toward magenta to enhance the warm hues.

2. Increase Saturation: In the HSL panel, be certain you’ve clicked on Saturation. Slightly bump up the sliders of the warm colors (red, orange, yellow) to the right to make them pop.

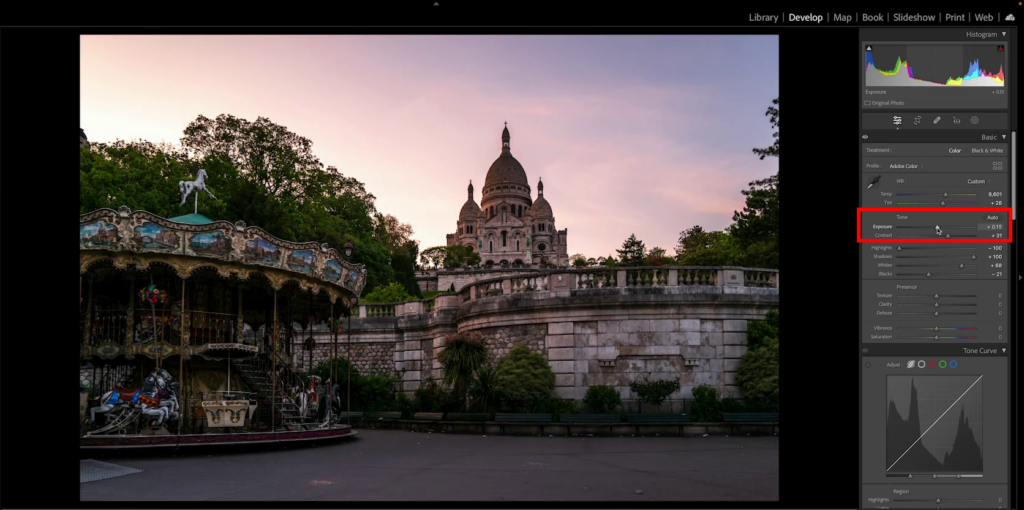
3. Darken the image slightly: This image now could stand to be a little darker, so let’s return to the Basic panel and pull down the Exposure a bit.
Sky Replacement in Photoshop
The color palette here is quite boring since it was a sunset that didn’t quite hit the mark. So, we’re going to cheat a bit and do a sky replacement.
1. Open in Photoshop: Click Photo > Edit In > Edit in Photoshop (or right-click on your image for these options as seen here).

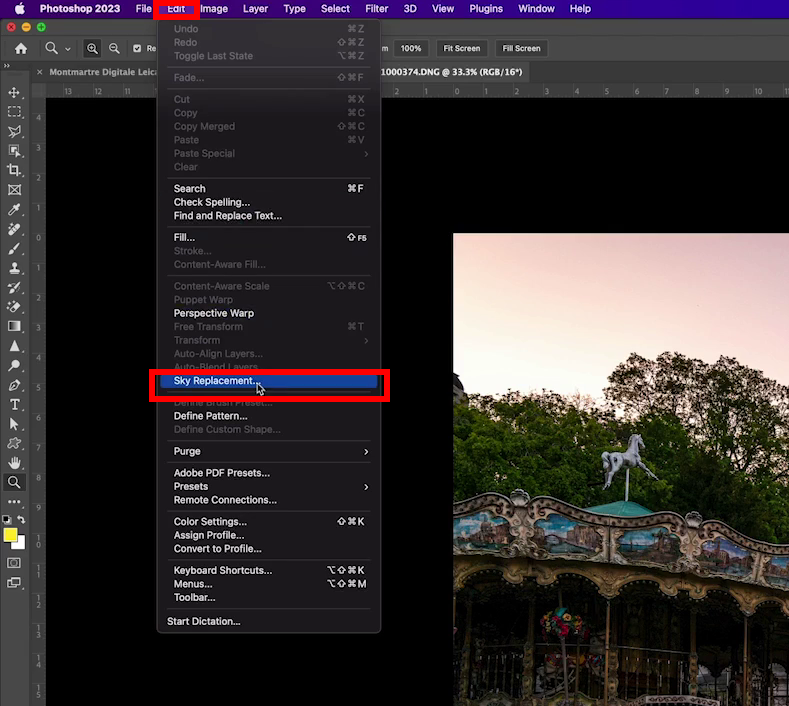
2. Sky Replacement: Go to Edit > Sky Replacement.
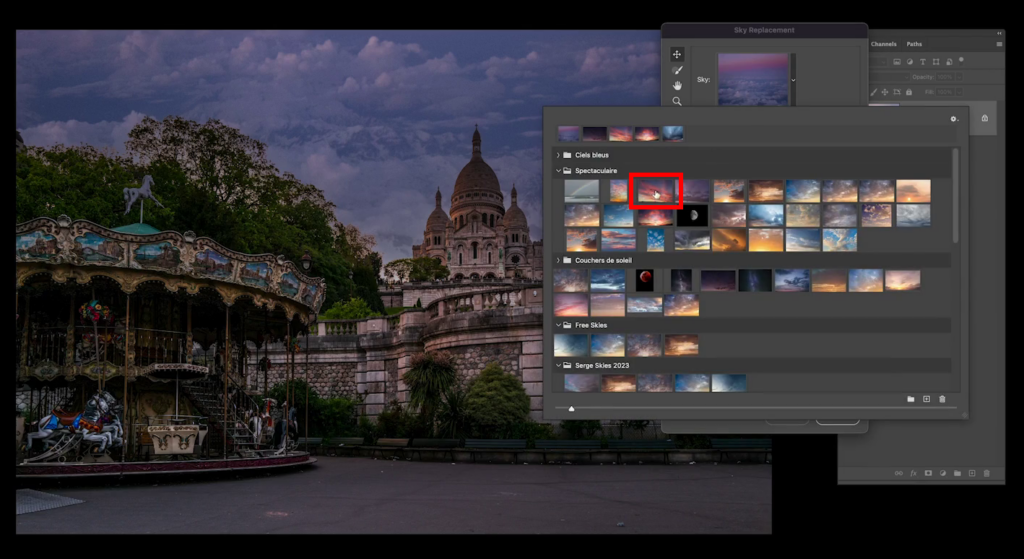
3. Choose a dramatic blue hour sky: I’m opting for a crazy, dynamic sky that brings the scene to life. The one I’m using is under “Spectacular Skies.” [Note: Photoshop will bring in the last used sky by default.]
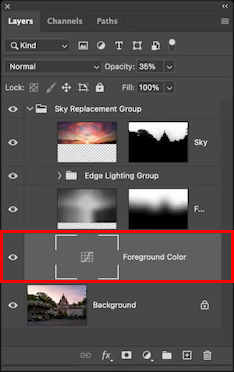
4. Adjust foreground color: When you do sky replacement in Photoshop, it returns several layers for you to adjust as needed. One is a Curves adjustment layer called Foreground. Double-click on that layer to open the the Curves Properties.
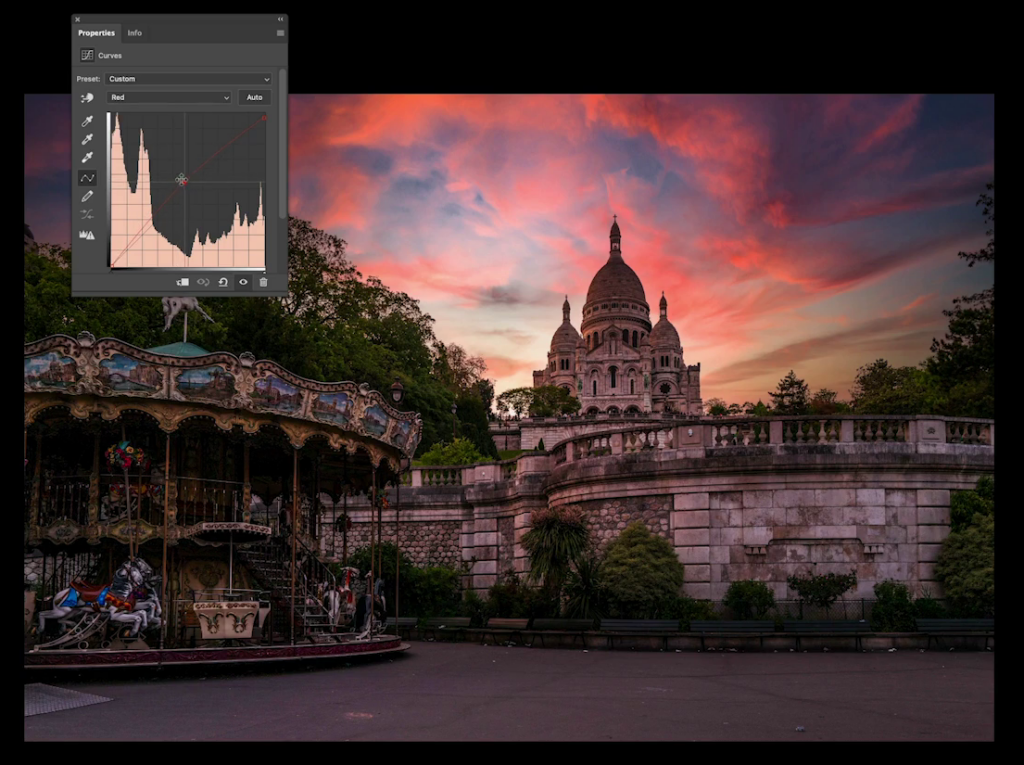
5. Adjust the Red Curves: Go to the red channel from the drop down menu. Make adjustments by dragging the curve up and down until the lighting of the foreground matches better with the new sky.
Fine Tune Image Back in Lightroom
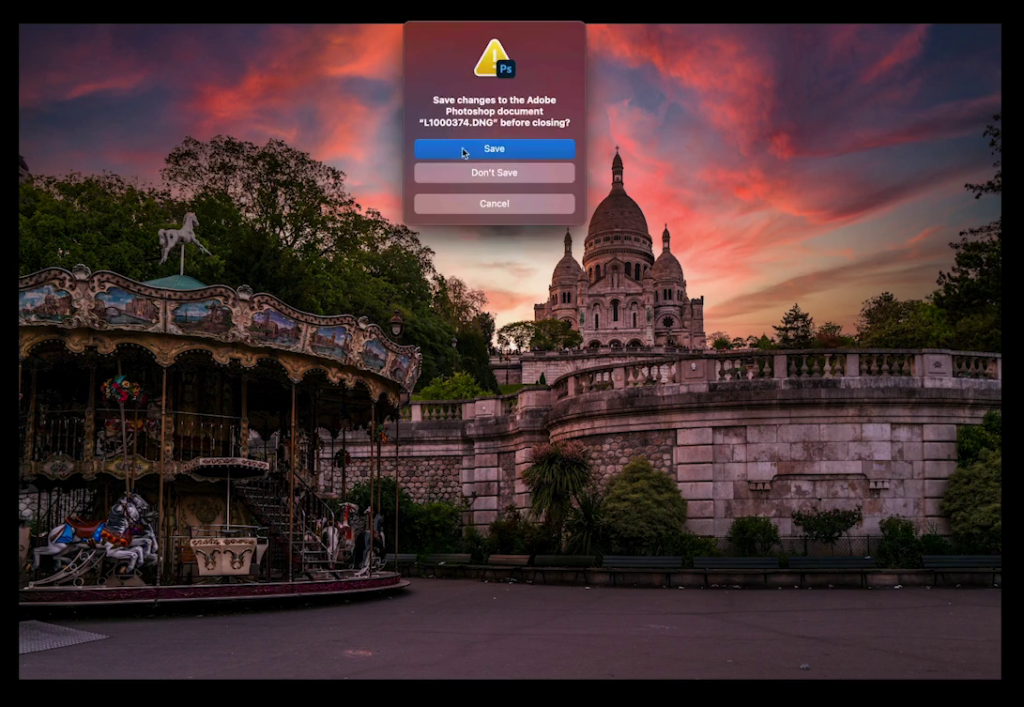
1. Save and return to Lightroom: Go to Edit > Save and close out of the image to bring it back into Lightroom.
Double Development
This next few steps help to sell the idea that the sky was original to the photo. It mimics natural light changes that could have occurred. Remember, the key thing when doing sky replacements is to choose a sky that looks like it could realistically belong to the scene based on the time of day and weather conditions.
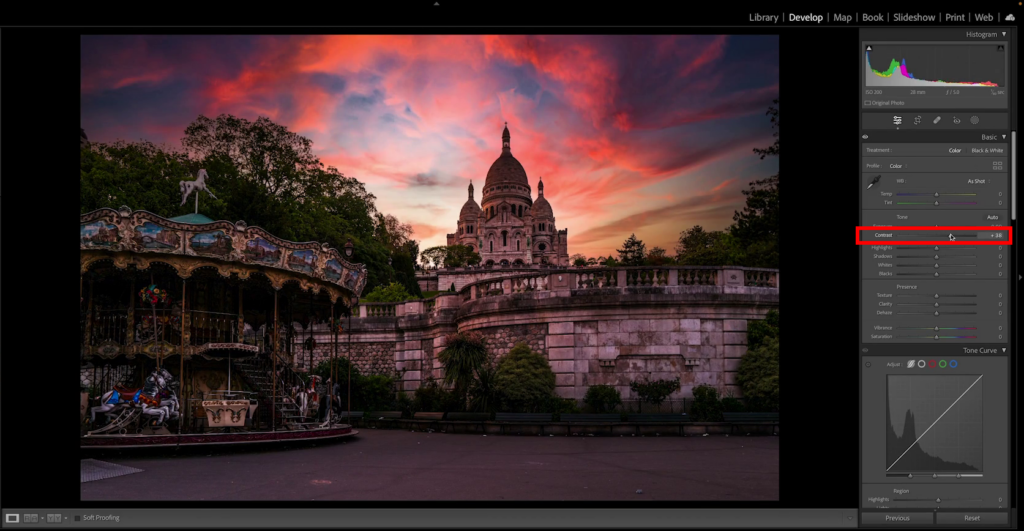
1. Raise the Contrast: Increase overall contrast in the Basic panel.
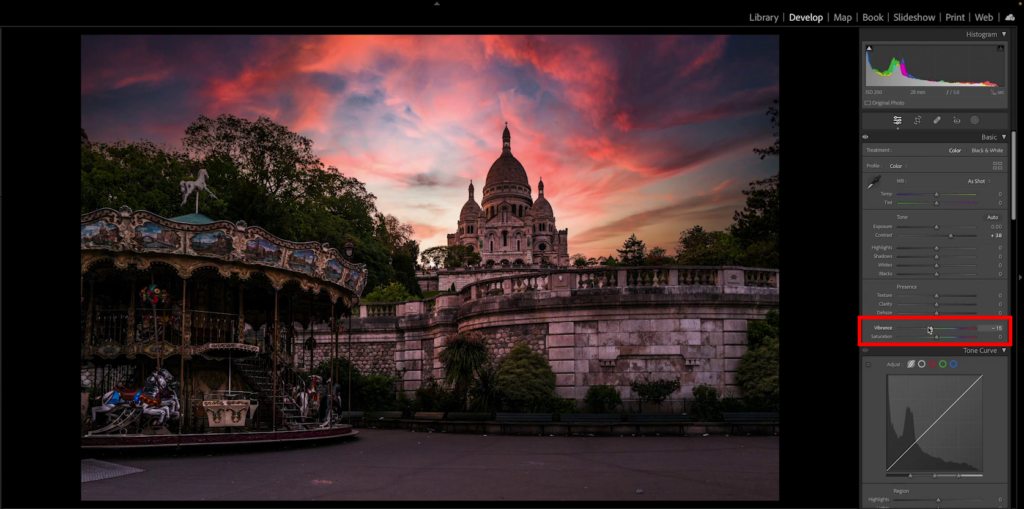
2. Adjust Vibrance/Saturation: This image is now a bit too saturated so I’ve reduced the vibrance a little bit.
3. Apply Linear Gradient: Click on the masking icon and Linear Gradient, and draw up from the bottom to darken the base of the photo (by lowering the Exposure after you’ve drawn out your gradient mask). This will help draw the eye up towards our subject.

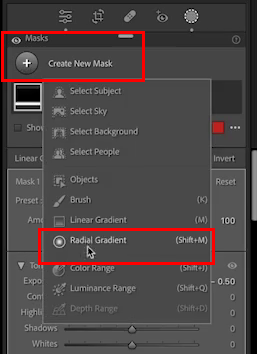
4. Apply Radial Gradient(s): Add one or more radial gradients to further blend the image with the lighting of the new sky. Here I am raising the Exposure and drawing a radial gradient out where the light would wrap around the building.

Final Touches and Comparison
Let’s take a final look. Here’s the before and after comparison:

Before: A flat, uninspiring shot of a sunset in Paris.

After: A vibrant, dramatic cityscape with a dynamic sky and balanced lighting. Isn’t that transformation just crazy?
I hope you enjoyed this look back at last year’s Photoshop World class! I hope you’ll attend this year’s Photoshop World. Schedule coming soon! You can always join me on my website, photoserge.com.
Join us at Photoshop World 2024 and immerse yourself in an event packed with innovative sessions and inspiring content. Experience top-quality sessions that will push your limits, provide fresh insights, and elevate your photography and design skills.


