
A great trick you can perform with the Transform command is to add a simple image reflection. Though this technique takes a few steps, it’s well worth the effort. Besides adding depth to an otherwise flat photo, a reflection can make an object look as if it were shot on another surface, like a table (handy for making product shots without a proper studio setup).
Step One: Open a photo, activate the photo layer, and then duplicate it by pressing Command-J (PC: Ctrl-J). If your image is comprised of several layers, as in this example, create a stamped copy instead. Think of stamping as a safer version of merging because it combines the active layers into a new layer, leaving the original layers intact. This command is great when you need to edit multiple layers with tools that affect only one layer at a time (like filters and layer styles). To do it, Shift or Command-click (PC: Ctrl-click) to activate the layers you want to combine, and then press Shift-Option-Command-E (PC: Shift-Alt-Ctrl-E). Alternatively, you can also press-and-hold Option (PC: Alt) as you choose Merge Visible from the Layers panel’s flyout menu at the top right. Either way, double-click the layer name of the duplicate or stamped copy and rename it “Reflection.”
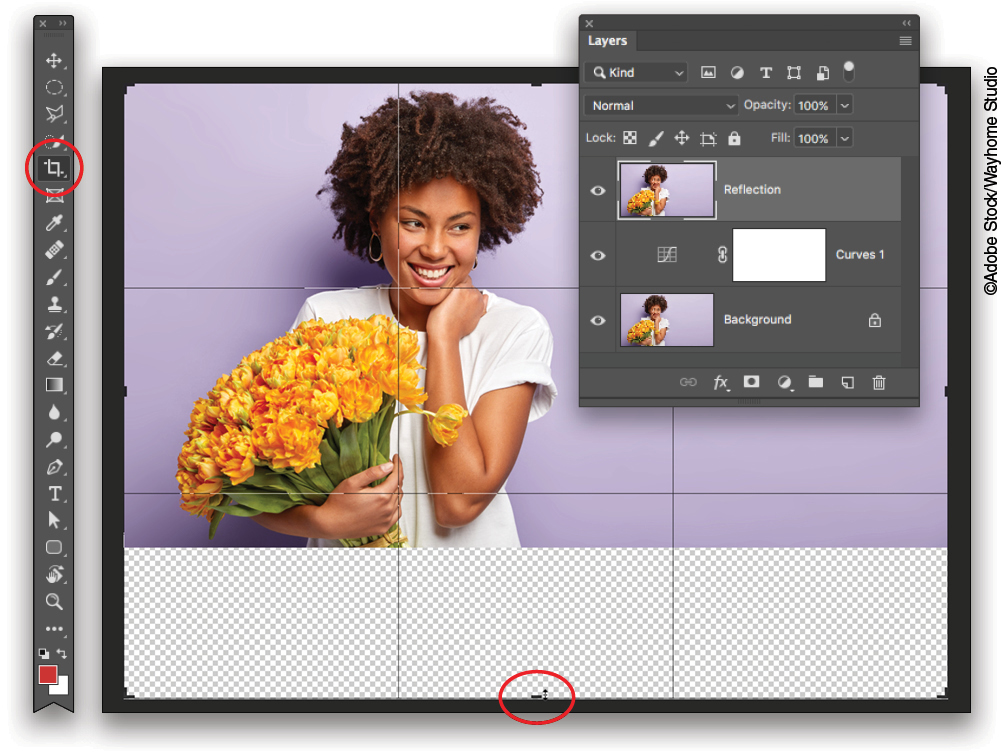
Step Two: Before you move on, you need turn your locked Background layer to a regular layer, so click the lock icon to the right of its name in the Layers panel. Now you can add some canvas space at the bottom of the document so you have room to add the reflection. To do that, press C to grab the Crop tool and then drag the bottom-middle handle (circled here) down a few inches. Press Enter to accept the crop.

Step Three: With the Reflection layer active, press Command-T (PC: Ctrl-T) to summon Free Transform or choose Edit>Free Transform. Next, Right-click inside the bounding box that appears and, from the resulting menu, choose Flip Vertical.
When the layer is upside-down, press Enter or double-click inside the bounding box to accept the transformation.
Step Four: With the Reflection layer still active, press V to grab the Move tool (circled) and then hold down the Shift key while you drag the reflection toward the bottom of the document. Then, press the Down Arrow key on your keyboard to nudge the two layers slightly apart (they should almost touch, as shown here). Holding down the Shift key while you move a layer constrains the layer so that it can only move in a straight line horizontally or vertically. In this example, holding the Shift key ensures that the reflection lines up perfectly with the original photo.
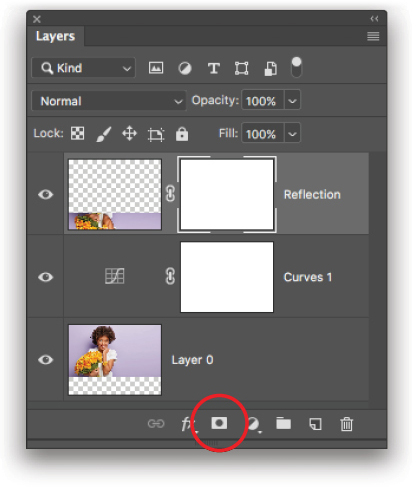
Step Five: At the bottom of the Layers panel, click the circle-within-a-square icon to add a layer mask to the Reflection layer.
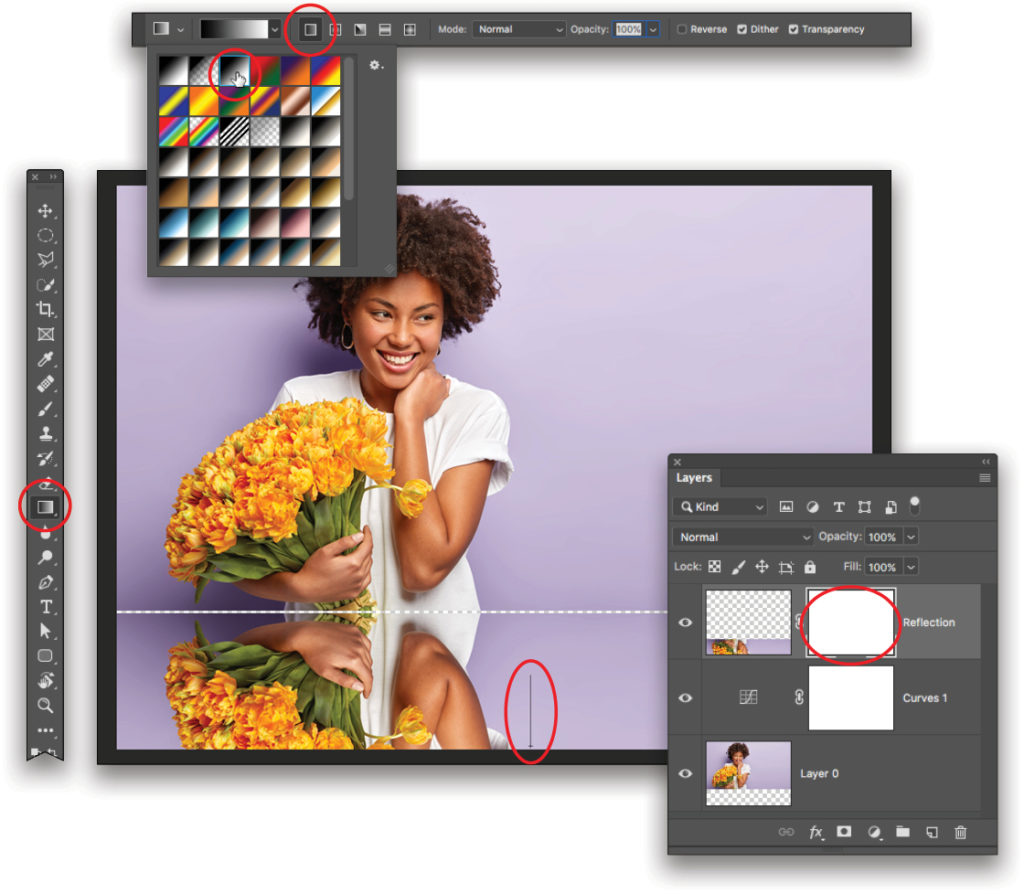
Step Six: Press G to activate the Gradient tool (circled). In the Options Bar, next to the gradient preview, click the tiny downward-pointing triangle to open the Gradient Picker. Click the Black, White thumbnail in the Picker (top row, third from the left; circled here), and then choose Linear as the gradient type (also circled). In the realm of the layer mask, black conceals and white reveals.
Step Seven: With the layer mask on the Reflection layer active (circled), mouse over to the image and press-and-hold the Shift key as you drag from the very bottom of the image (the reflection part) upward to roughly the height you’d like the reflection to be. (Holding down the Shift key locks the gradient vertically so it doesn’t move from side to side.) You’ll see a vertical line before you let go of your mouse (also circled). If you’re not happy with your first gradient-dragging attempt, give it another go; Photoshop will update the gradient—and thus the layer mask—each time you drag.
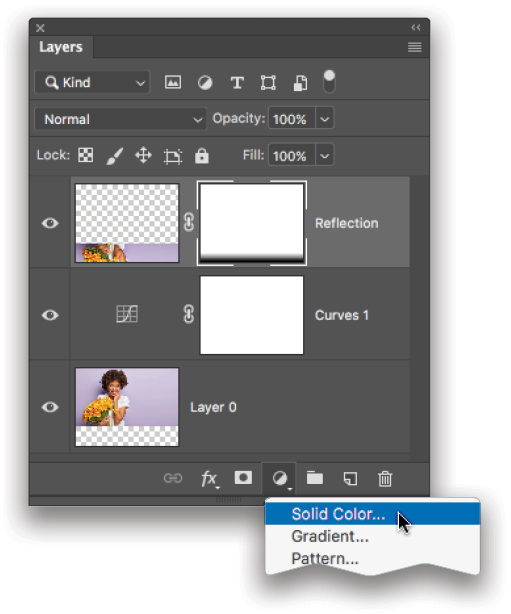
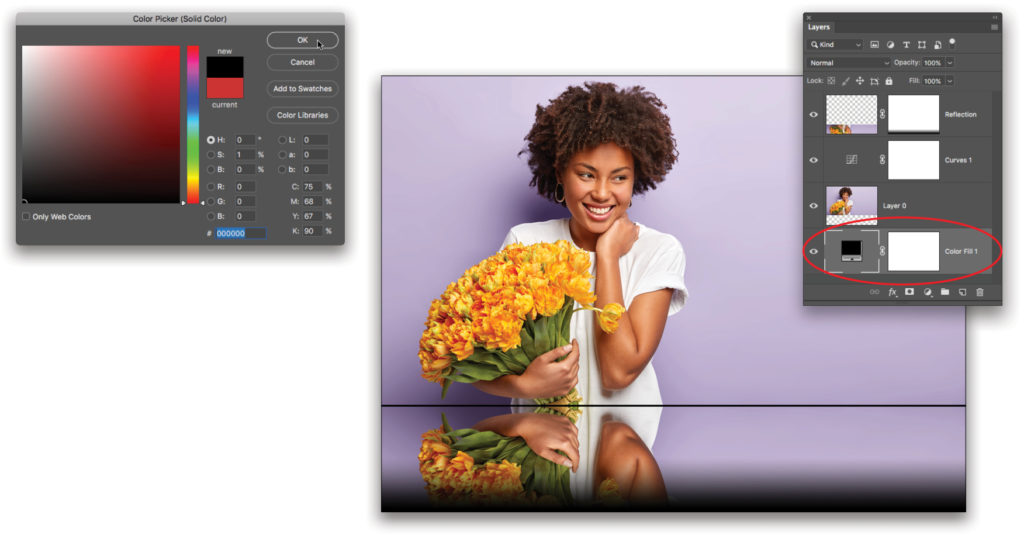
Step Eight: Now we’ll add a Solid Color fill adjustment layer to serve as a new background for the newly transparent area. At the bottom of the Layers panel, click the half-black/half-white circle and choose Solid Color.
Step Nine: In the resulting Color Picker, choose black and then click OK. Next, drag the new Color Fill layer to the bottom of the layer stack (circled). By using a Solid Color fill layer (rather than an image layer filled with color), you can experiment with the background color to see what looks best by double-clicking the adjustment layer’s thumbnail in the Layers panel to reopen the Color Picker. While this example uses black, you can pick any color you want.
Step 10: Finally, click to activate the Reflection layer in the Layers panel, and in the Opacity field at the top of the Layers panel, enter 50% to soften the reflection. This final step is really about personal preference: If you want the reflection to be faint, 50% works well; if you want the original image to look like it’s hovering above a mirror, go with an Opacity of 75% or higher.
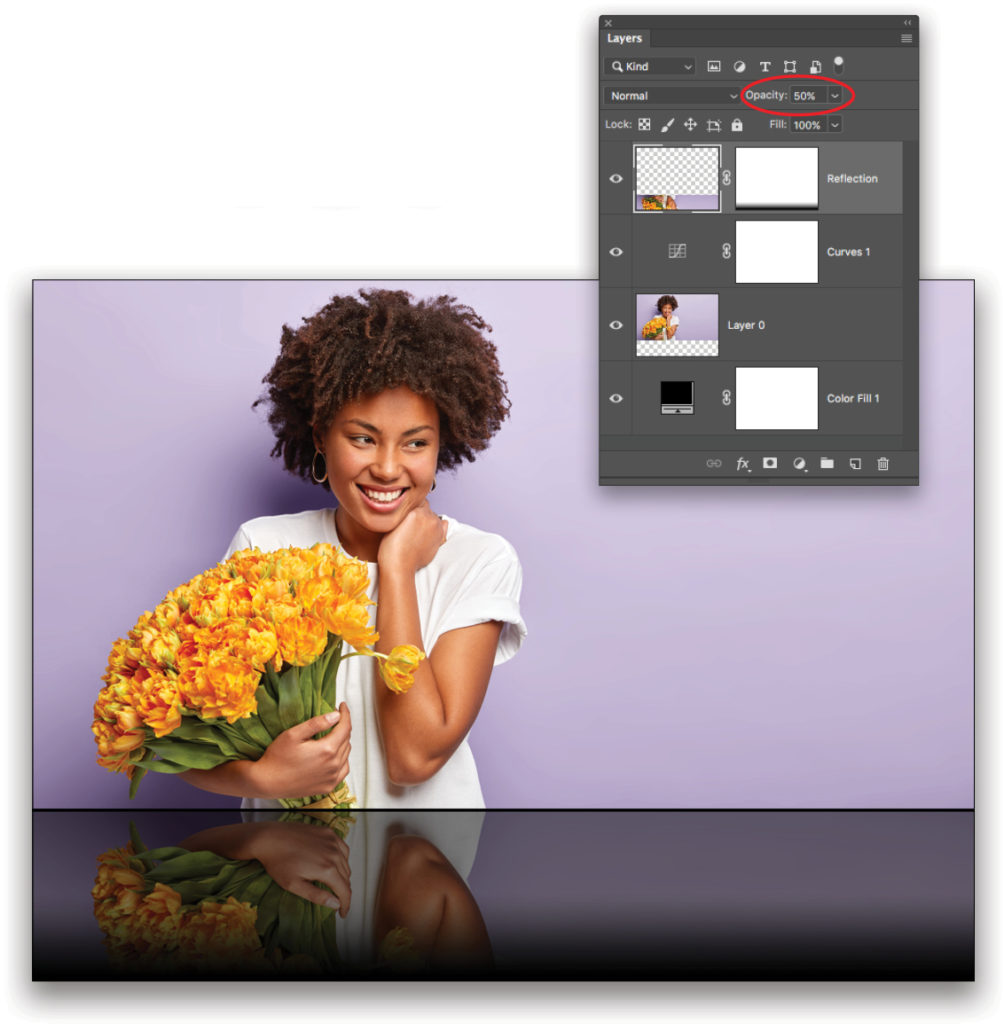
As you can see, the reflection adds a nice bit of visual interest and creates a professional-looking reflected image without all the hassle of setting up a reflective table. That’s called working smarter, not harder. Until next time, may the creative force be with you all!
This article originally published in the March, 2019 issue of Photoshop User magazine.


