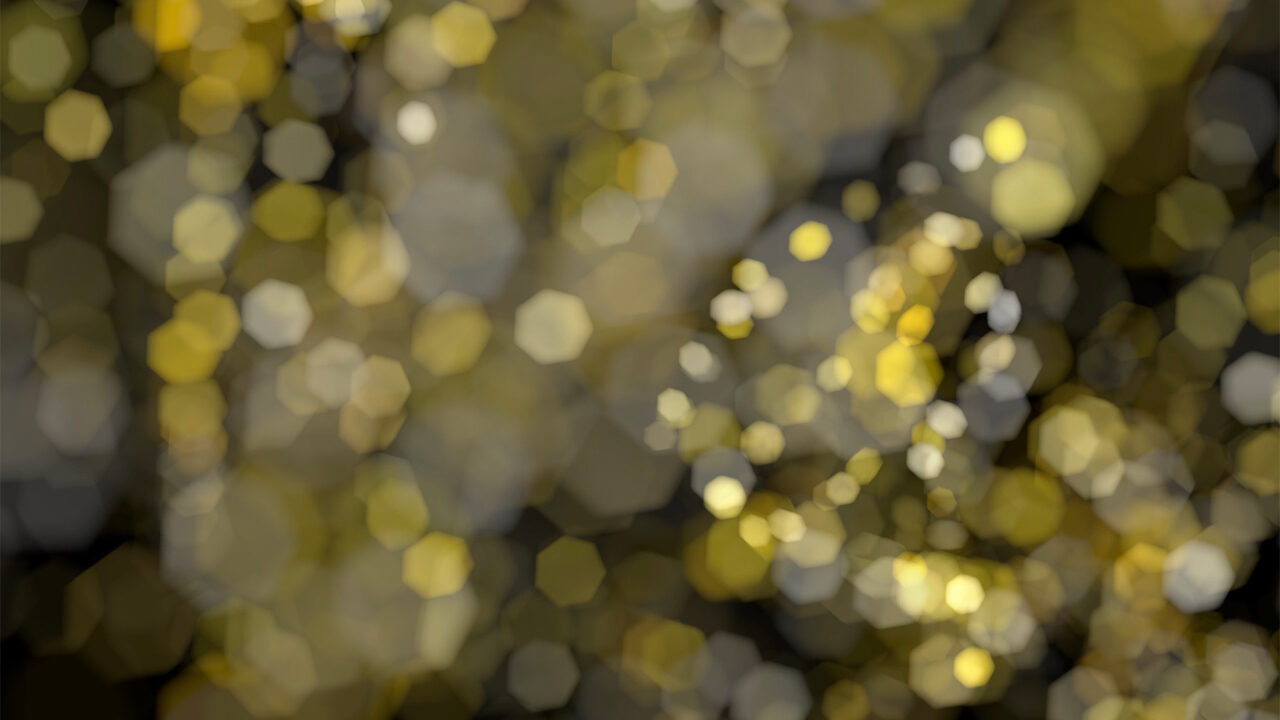
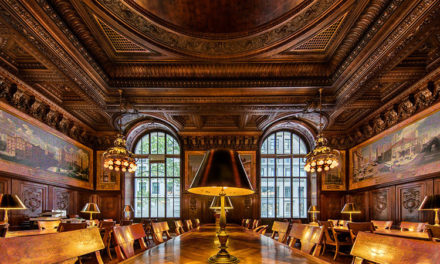
Bokeh is a somewhat loaded term that can start arguments in any place where two or more photographers have gathered. In general, it refers to the quality of out-of-focus areas of an image and, in particular, how specular highlights and tiny light sources are represented. The most common discussions center on the shape and quality of those highlight effects: a kind of shaped blur that’s not easy to reproduce, and isn’t the same as the typical Gaussian Blur with which we’re all familiar. If you’ve used the Lens Blur filter, you’re familiar with how it affects these areas of your image. But what if you want these effects in an image that doesn’t have specular highlights?
It turns out we don’t need an image at all! We can extract the bokeh effect directly from the Lens Blur filter, and use the results, much like we would with the Lens Flare filter, by rendering them to their own layer.
Below, I’m using a test document that’s 8-bit RGB with a black background and a blank layer above that. Lens Blur doesn’t work with smart objects, which means if we want variations, we’re going to need to make copies on which to work (we’ll cover that in a moment). Here, I’ve applied roughly similar levels of blur using Gaussian Blur and Lens Blur to illustrate the difference.

Note that the Gaussian Blur result is smooth and uniform, while the Lens Blur isn’t as soft, and there’s a very slight variation or pattern present. The pattern is a direct result of using the Triangle shape aperture in the Lens Blur filter.
The next example demonstrates how the Lens Blur filter treats different sizes and shapes of marks. Again, real-world scenes include specular highlights and bright areas of different shapes and sizes. The following screenshot compares the Lens Blur result with its original mark to the lower right.
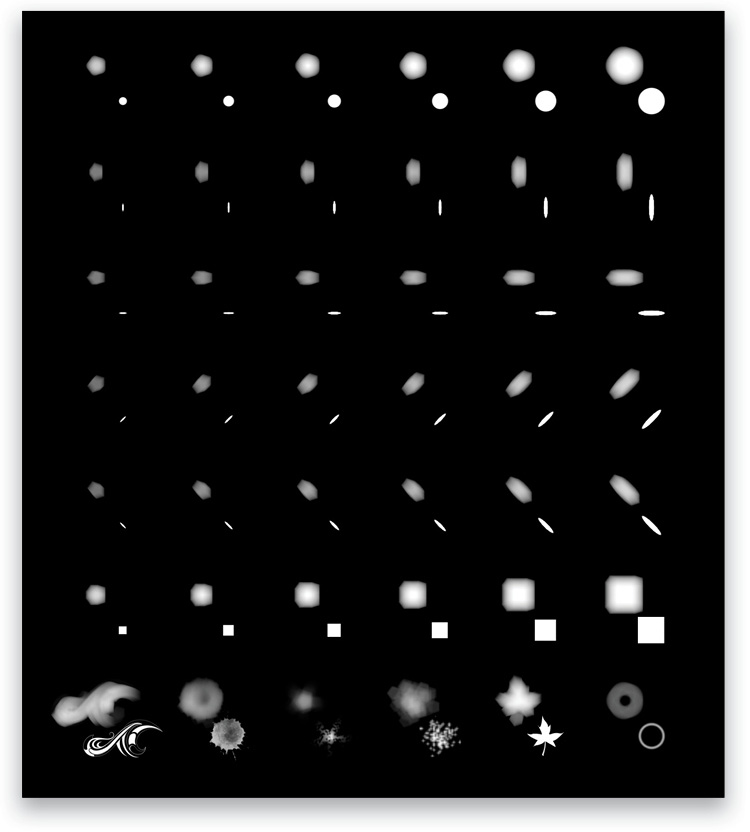
Important: The bokeh effect is highly dependent on the relationship of the brush size to the canvas size! This test file was created at 2000×2000 px. Larger photos will require larger brush sizes, and larger Radius settings in the Lens Blur filter.
Look carefully at the variations. Every mark was treated to the same settings: Pentagon-shaped aperture with Radius set to 20, with Blade Curvature and Rotation set to zero. Except for the last row, the marks progress in size from 15–50 px and vary in shape and orientation. The last row is meant to show the effect on some random shapes.
There are two things to notice right away. First, as the object gets larger, the result tends to get brighter and shows less influence of the shape of the aperture. Second, the orientation of the object distorts the resulting blur rather than simply rotating it. Gaussian Blur doesn’t care about rotation, but there’s an inherent directionality to the Lens Blur bokeh.
Now let’s look at progressively smaller dots, simulating those pinprick size specular highlights that can come from stars or tiny string lights.

The bokeh blur doesn’t really get much smaller as the dot gets smaller, but it does become more transparent and the edges get sharper. In the real world, lights aren’t going to be uniformly bright, or the same size, or all shaped the same. Hopefully, these examples have made the case for using Lens Blur instead of Gaussian Blur for simulating bokeh!
Painting in Bokeh
Now that we have this insight, how do we apply it to our images? Previously, I pointed out that Lens Blur doesn’t work with smart objects. Another issue is that applying Lens Blur to a transparent layer with painted dots usually results in a faint, faded effect. We want maximum brightness and flexibility. Fortunately, the answer is relatively simple.
Step One: With a photo open in a new document, first add a Solid Color fill layer (Layer>New Fill Layer>Solid Color) above your image layer and set it to black, then turn off the Color Fill layer’s visibility by clicking its Eye icon in the Layers panel.
Step Two: Add a blank layer on top of the layer stack, double-click its name, and rename it “Dots.” Before we go painting in our lights, I want to set up a custom brush that will show off the technique.
Step Three: Grab the Brush tool (B), and in the Brush Tip Shape section of the Brush Settings panel (Window>Brush Settings), start with a round, basic brush set to 100% Hardness. Increase the Spacing to about 350%. This first photo is about 7000×4700, so the starting brush size is 50 px. Set the following options:
Shape Dynamics
- Size Jitter: 100%
- Minimum Diameter: 25%
- Angle Jitter: 100%
- Roundness Jitter: 100%
- Minimum Roundness: 1%
Scattering
- Scatter: 800%
Color Dynamics
- Apply Per Tip
- Hue Jitter: 100%
- Saturation Jitter: 50%
- Brightness Jitter: 50%
- Purity: 0%
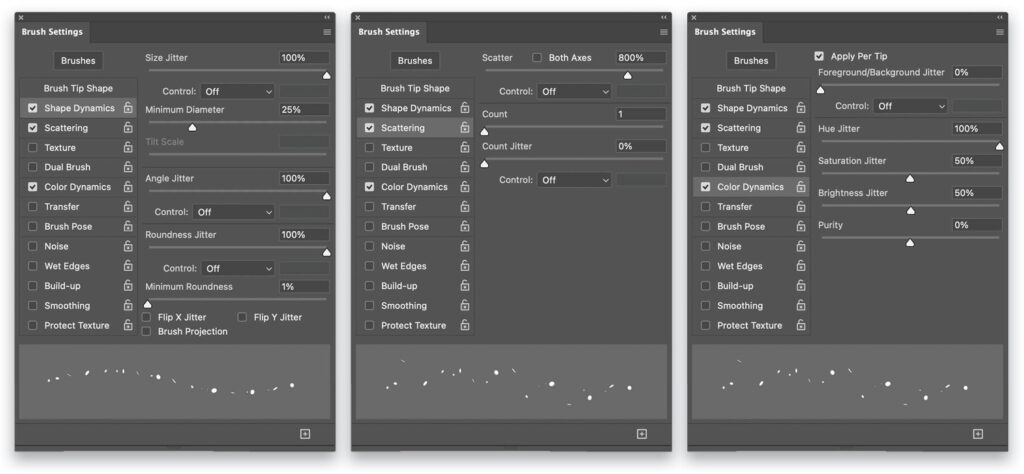
Note: If you want to produce only strings of lights, turn off Scattering and reduce or turn off the Shape Dynamics settings.
This brush will produce a lot of variation such as you might get from a city scene. You could also use single dabs from spatter brushes, or just create tiny speckles; whatever suits your scene and creative goal.
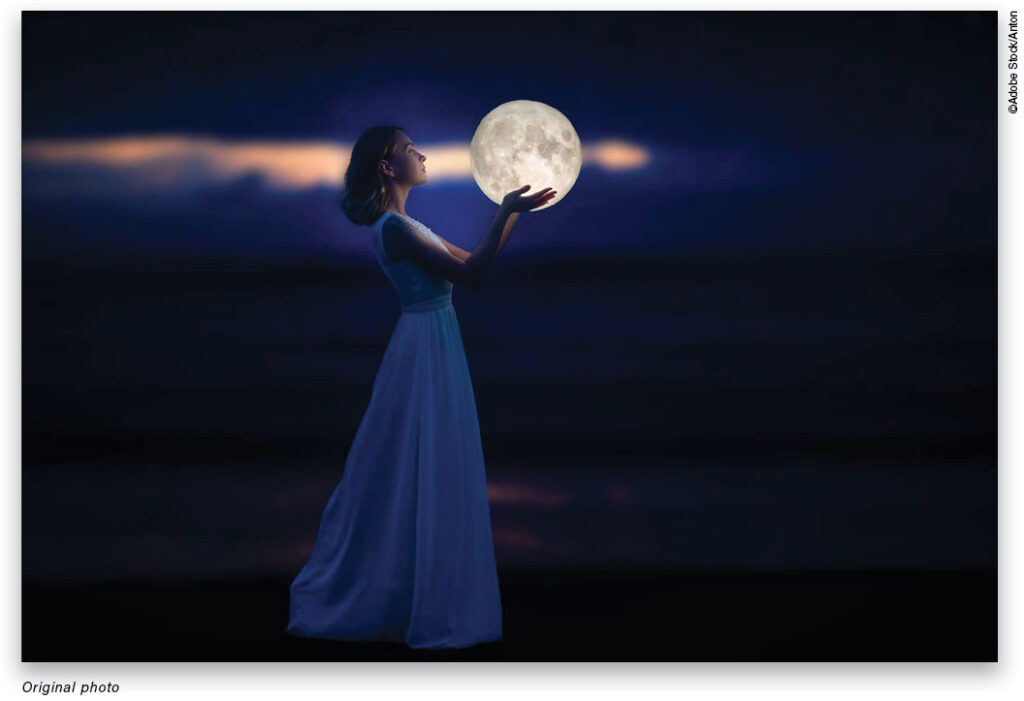
Step Four: Click on the Foreground color swatch near the bottom of the Toolbar, select any bright color, and click OK to close the Color Picker. Start brushing on the Dots layer with 100% Flow and Opacity in the Options Bar. Be reserved and try not to get too dense at first. Once you have a few areas covered, turn on the Color Fill layer’s visibility.
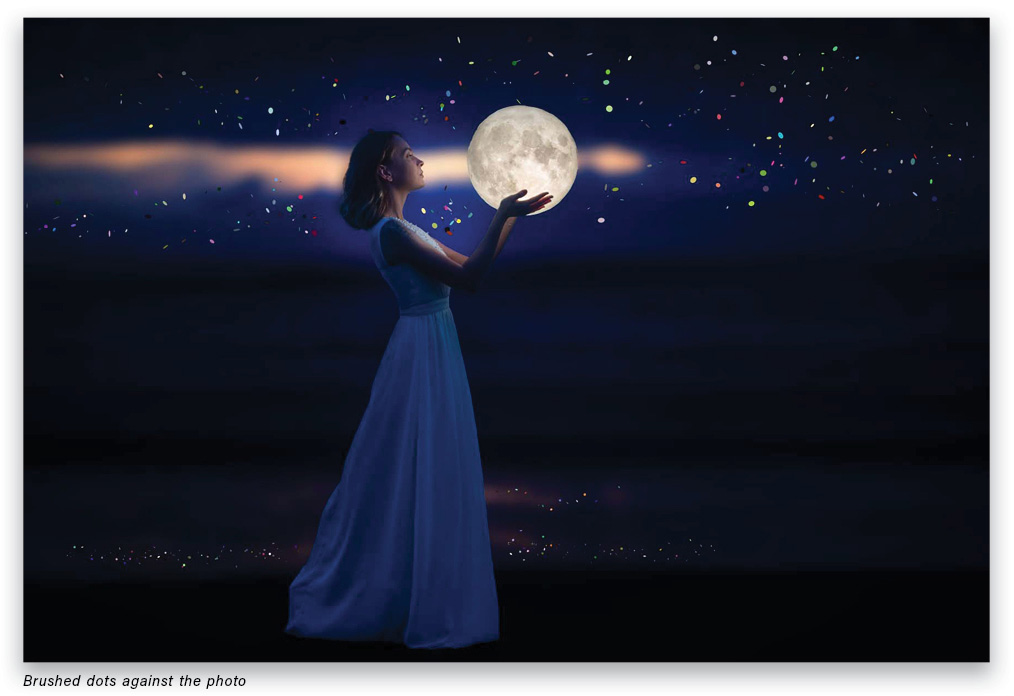
Step Five: Now it’s time for my favorite keyboard shortcut: “The Claw.” With the blank layer selected, press Shift-Command-Option-E (PC: Shift-Ctrl-Alt-E) to create a stamped copy of what’s currently visible on the canvas. For organization, name this stamped layer “Bokeh 1” and then go to Filter>Blur>Lens Blur.
The Depth Map area in the Lens Blur filter is really interesting, since it lets you change the apparent depth of field and focal point. You’ll need to apply a mask to your stamped Bokeh layer (see Step Five) and then, once in the Lens Blur dialog, you can choose Layer Mask from the Source drop-down menu to work with it. Try a simple gradient mask to see how it works!
Step Six: For this image, I’ve used the Pentagon shape set to Radius: 80, Blade Curvature: 0, and Rotation: 20.
In the Specular Highlights section, set Brightness to 100 and Threshold to 0. Click OK to render the effect back to your layer stack.
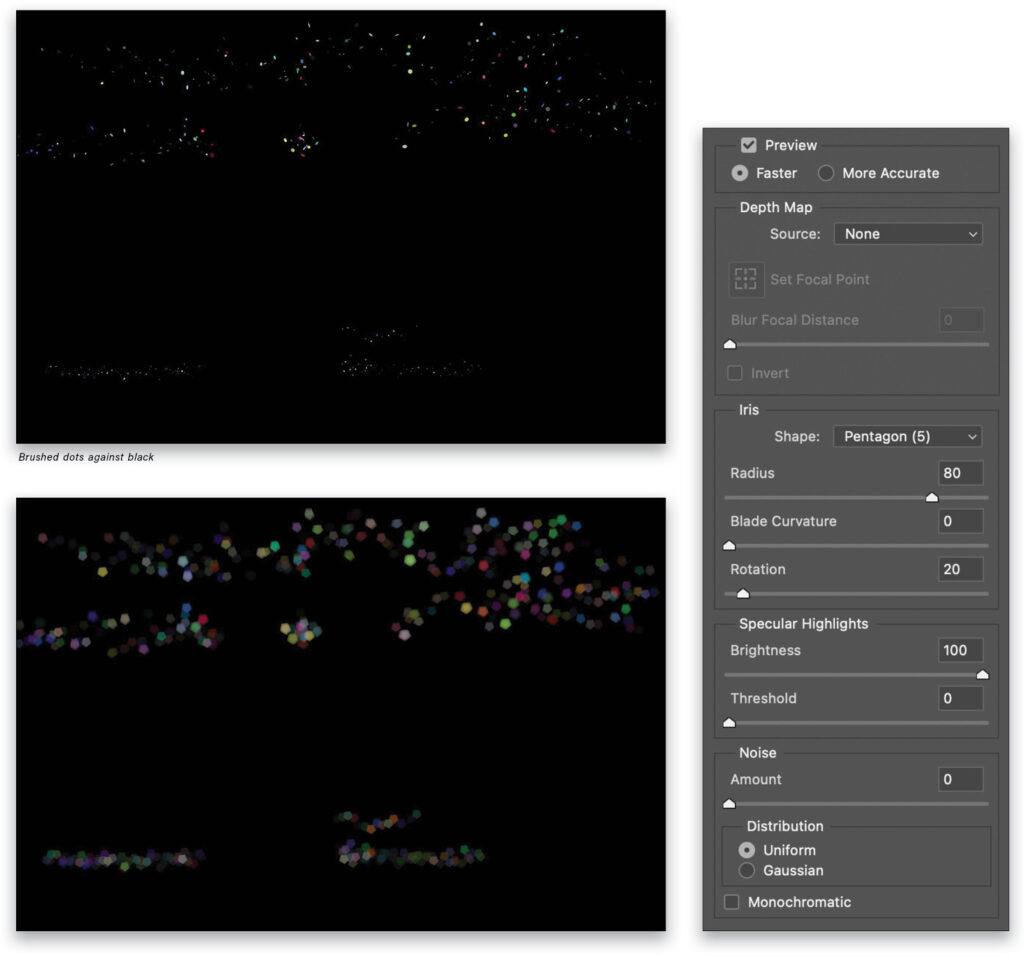
Step Seven: Back in your regular workspace, turn off the Color Fill and Dots layers, then set the Bokeh 1 layer blending mode to Linear Dodge (Add). This mode ignores black like Screen does, but it’s also a member of the “Special 8” blending modes that respond differently to the Fill slider than the Opacity slider. Colors retain more saturation, as well.
If necessary, lower the Fill value in the Layers panel on the Bokeh 1 layer for a more natural look.
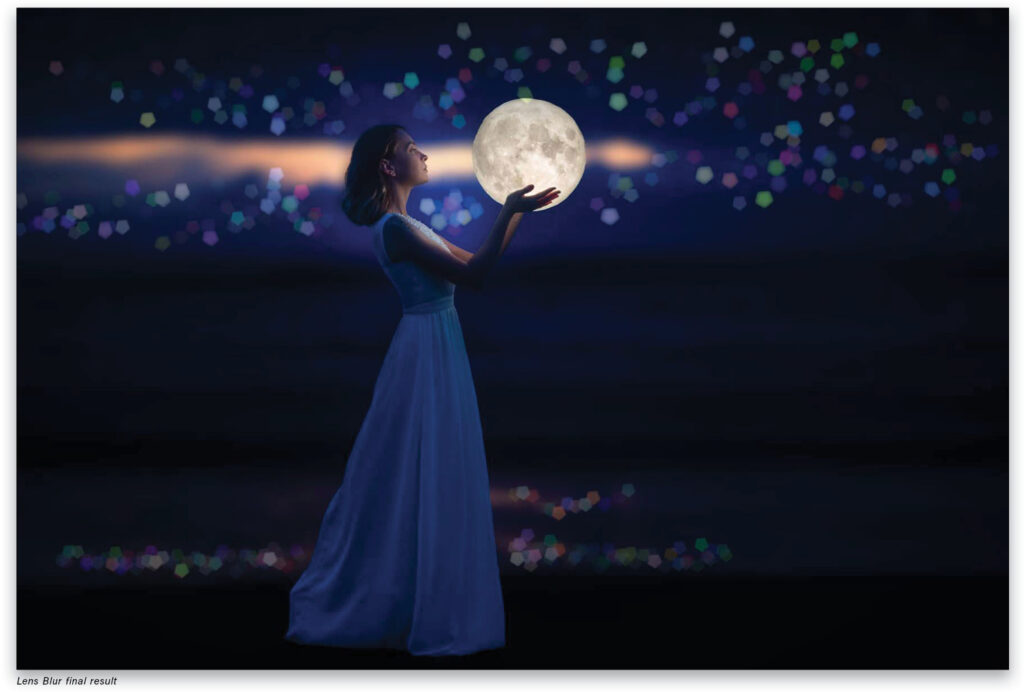
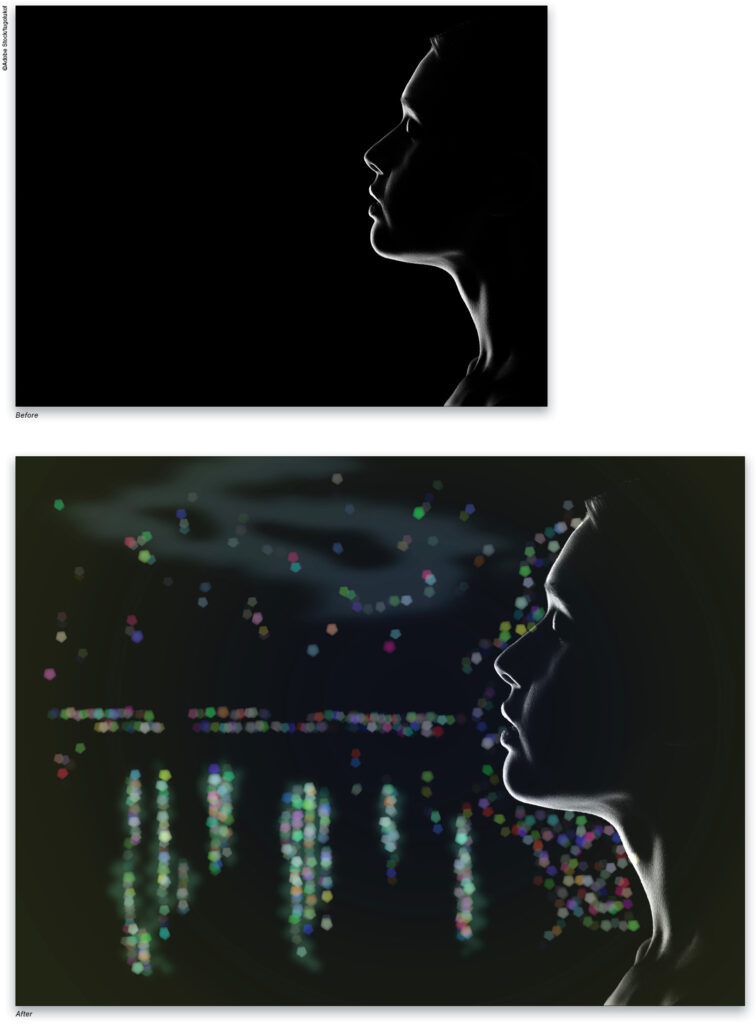
It’s really easy to add more bokeh with slightly different values or painted in different areas: Simply paint on a new blank layer, and repeat the process. When you go to make the stamped layer, make sure only the new painted layer and Color Fill layer are visible. After you apply Lens Blur to the new Bokeh layer, using Linear Dodge (Add) will allow all the individual bokeh layers to interact with each other, and you can control the look however you like. On the next page is another example using the same techniques.
This technique isn’t limited to photographs either! You can use the exact same method to add lights to composite fantasy images, illustrations, or any place you want a little razzle-dazzle.
This article originally published in the July, 2021 issue of Photoshop User magazine.
About Photoshop User and KelbyOne
Photoshop User magazine comes out digitally 12 times a year and is part of KelbyOne, the leading educational resource for Photoshop, Lightroom, and photography. Pro members have access to more than 900 video courses and 100 back issues of Photoshop User. To learn more about KelbyOne, click here.
