As photographers, our love affair with symmetry goes back to the very first photographs. Even then, before we knew or understood any of the rules for photographic composition, we understood balance within a photo. Look back to some of the very first group portraits ever taken and you’ll see people of various heights arranged in a distinct way. All the tall people aren’t stacked on one side of the photo with all the shorter people lined up on the other side. The taller folks are placed in the middle or the outer corners, creating a type of symmetry and balance that’s universally appreciated. In this article, we’re going to create symmetry using the background of a photo.
Step One: Choose Your Photo Carefully
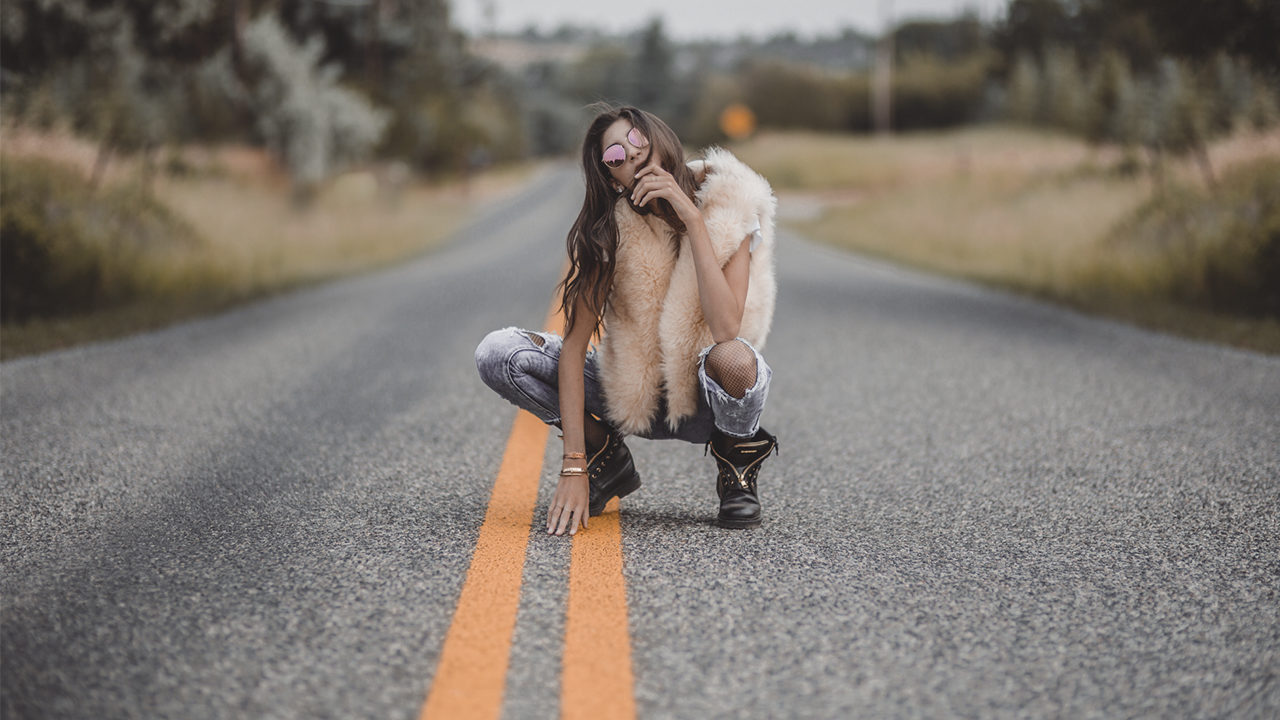
The first thing you’ll want to do is find a photo with which this technique will work well. The main thing you’ll look for is lighting; if the lighting is obviously directional, flipping one side of the photo is going to create an odd effect, because we can see where the light is obviously coming from, and our brains know when it doesn’t add up. Even if it’s not noticeable right away, people will know something is off. Therefore, creating symmetry in Photoshop is best done with softer, flatter lighting, or when the effect has no bearing on the subject whatsoever. In this case, we’re working with a photo that has even lighting, shot outdoors on a cloudy day.
Step Two: Edit Your Photo to Preference
Here, the shadows and color toning were adjusted to give the image a grittier, grungier look. Technically, you could apply these following symmetry steps to your RAW photo, but it’s recommended to wait until all edits have been made for a couple reasons: First, the entire point is for both sides to match, and if you wait to flip one side until after all edits have been made, you can guarantee the sides will be perfect reflections of each other; and second, if you need to clean up the background, you’ll only have to do it to one side of the photo. Who wouldn’t like to quite literally cut their work in half?
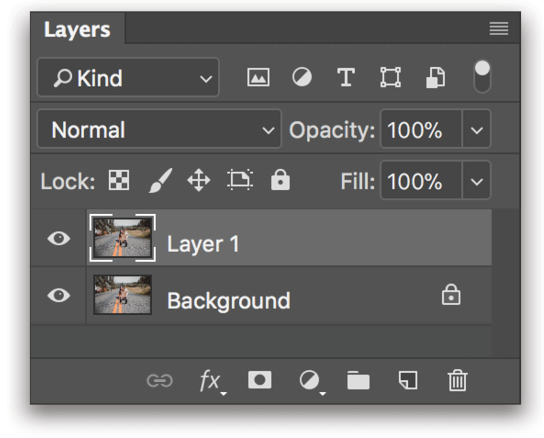
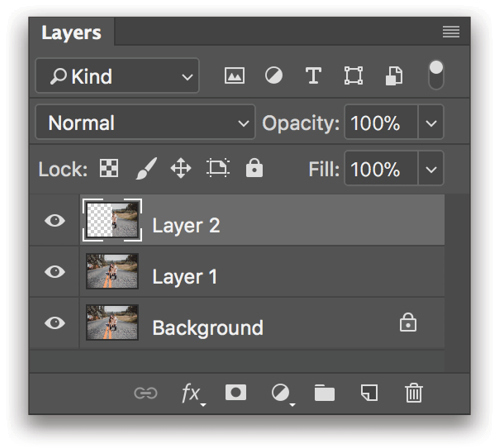
Step Three: Duplicate Your Background Layer
Once you have your photo edited and color toned to your liking, the next step is to duplicate the Background layer by pressing Command-J (PC: Ctrl-J). We could easily work from our base layer, but as a general rule, it’s important to leave that first layer untouched.
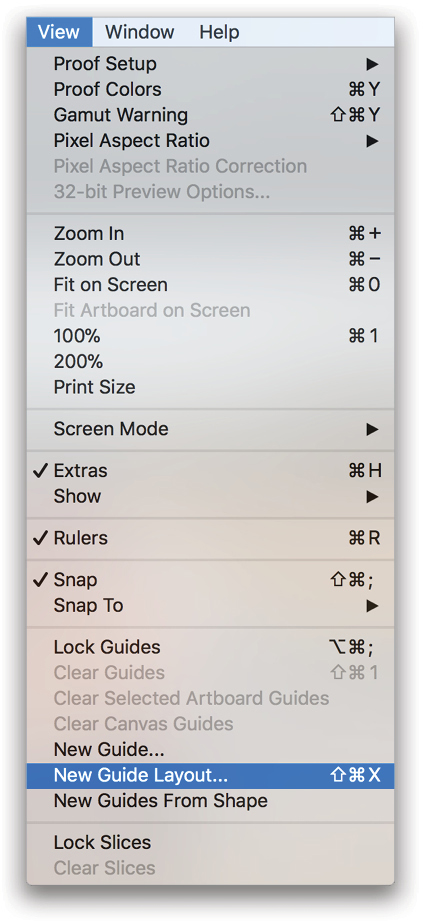
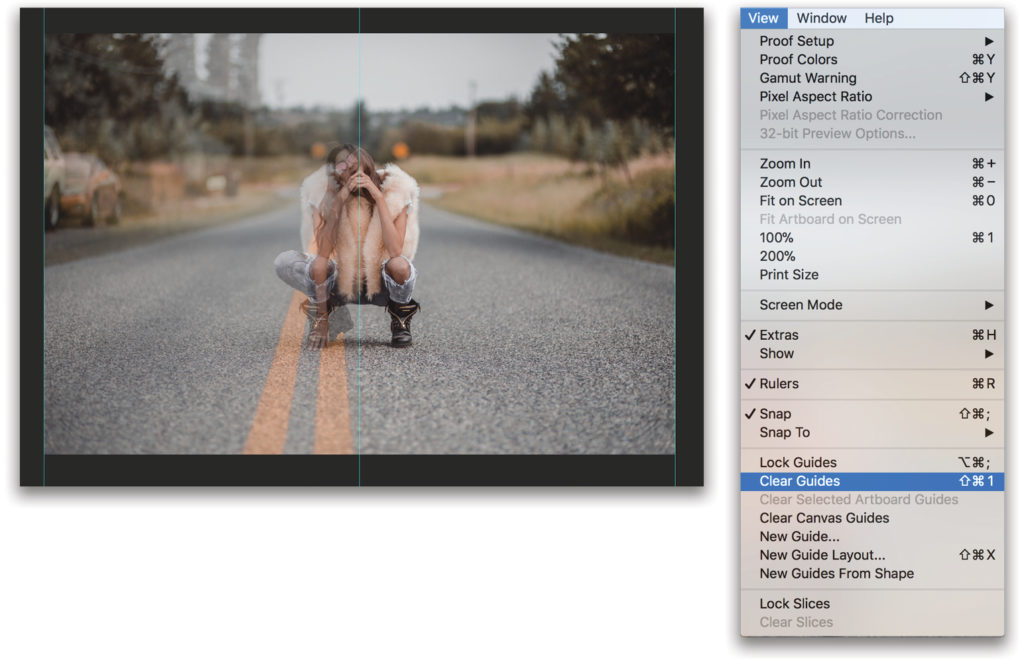
Step Four: Set Your Guides
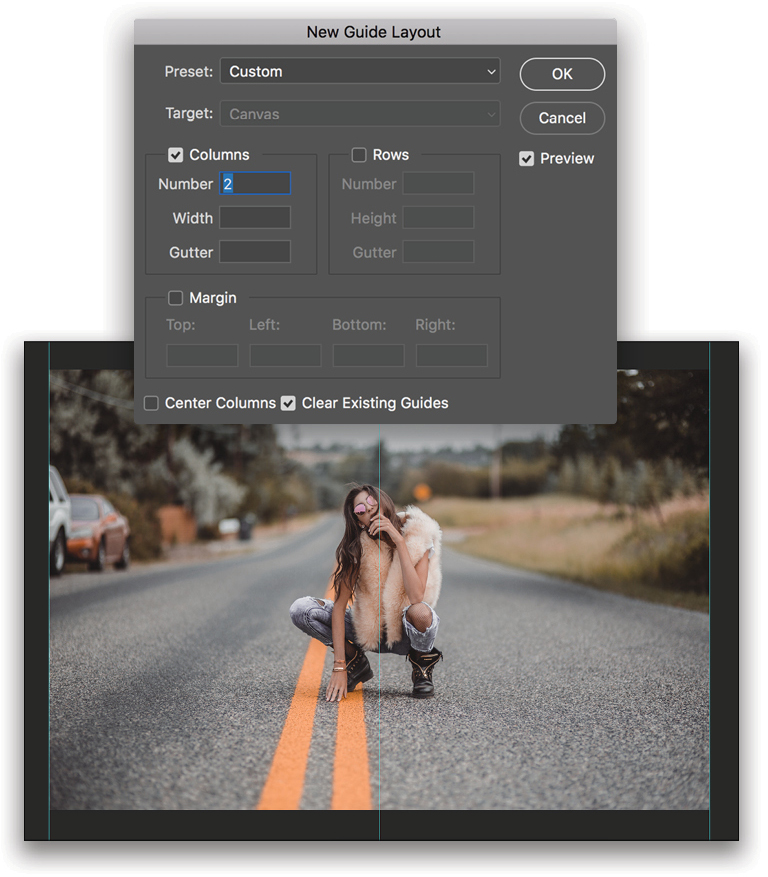
Next, we want to pull up a new guide layout. This can be done by choosing View in the application menu at the top of your screen and selecting New Guide Layout. A dialog will appear that allows you to choose your guide options. In this case, all we want is to check Columns and enter 2 in the Number field. If you have anything in the Width, Gutter, or Margins fields, make sure to delete it, and keep the Rows and the Margin options unchecked.
This will give you a guide right down the middle of your photo, which will give your background layer something to snap to when you duplicate it. Press Enter and move to Step Five.
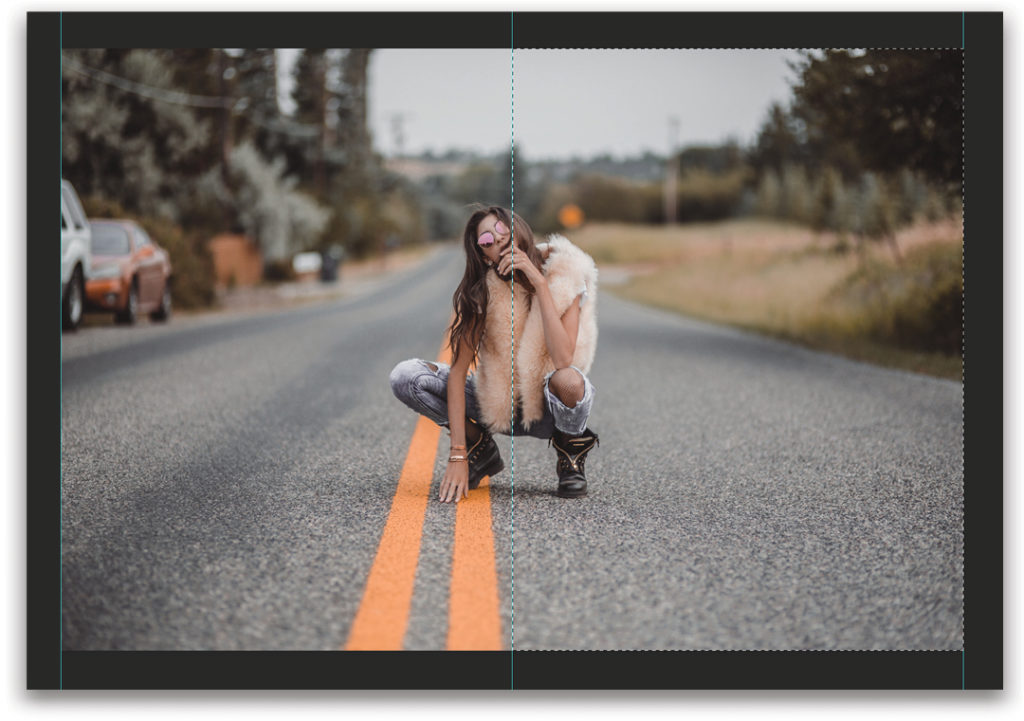
Step Five: Select Your Chosen Half
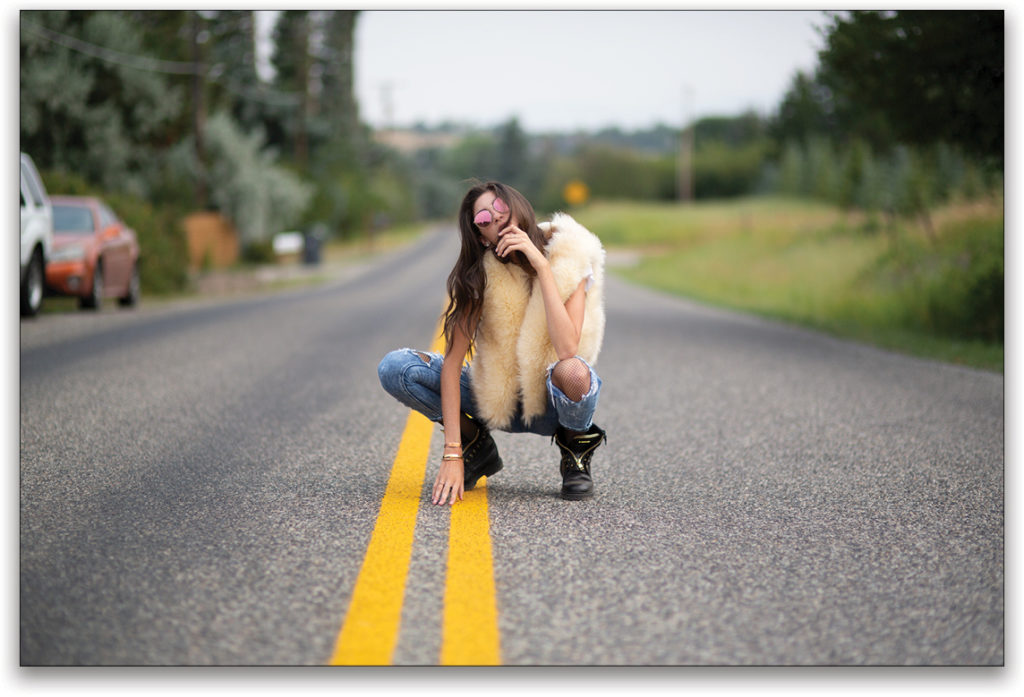
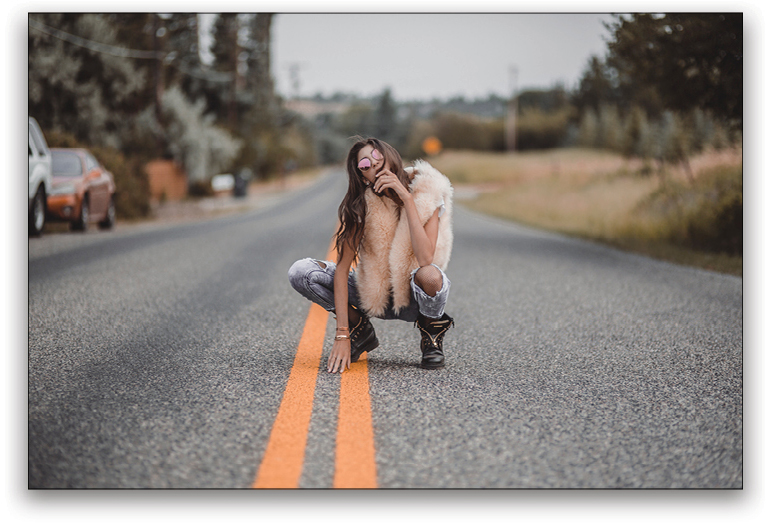
Here, we’ll use the Rectangular Marquee tool (M) to draw a rectangular selection around the side of the photo we want to duplicate. With the guides in position, it’s easy to draw the rectangle exactly around half of the photo. After you drag out your selection, you’ll see the dotted lines surrounding the selected part of the photograph. In this shot, we’re highlighting the “clean” side of the road in order to replace the side with the cars.
Step Six: Duplicate the Selected Area
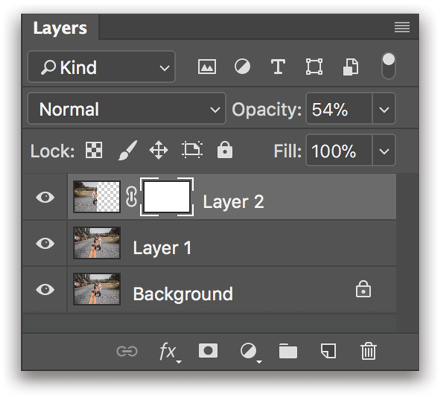
Press Command-J (PC: Ctrl-J) to duplicate the selected portion of the photo. You’ll notice this duplicated half shows up as its own layer in the Layers panel, above the previous layers.
Step Seven: Open Free Transform
While that layer is still active (the dotted lines will be gone, but as long as the layer is highlighted in your Layers panel, you’re good), press Command-T (PC: Ctrl-T) to launch Free Transform.
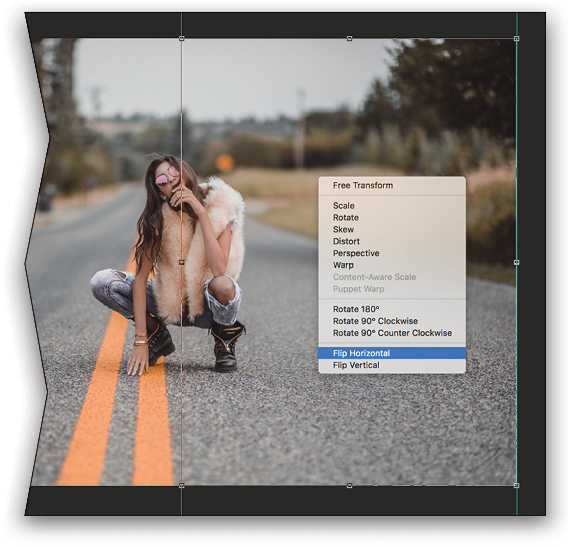
Step Eight: Flip Horizontal
Free Transform offers multiple options, but the one we’re mostly concerned with is the Flip Horizontal command. Hover anywhere inside the bounding box and Right-click with your mouse. Select Flip Horizontal near the bottom of the resulting menu. This will give you a horizontally reflected version of the half you copied.
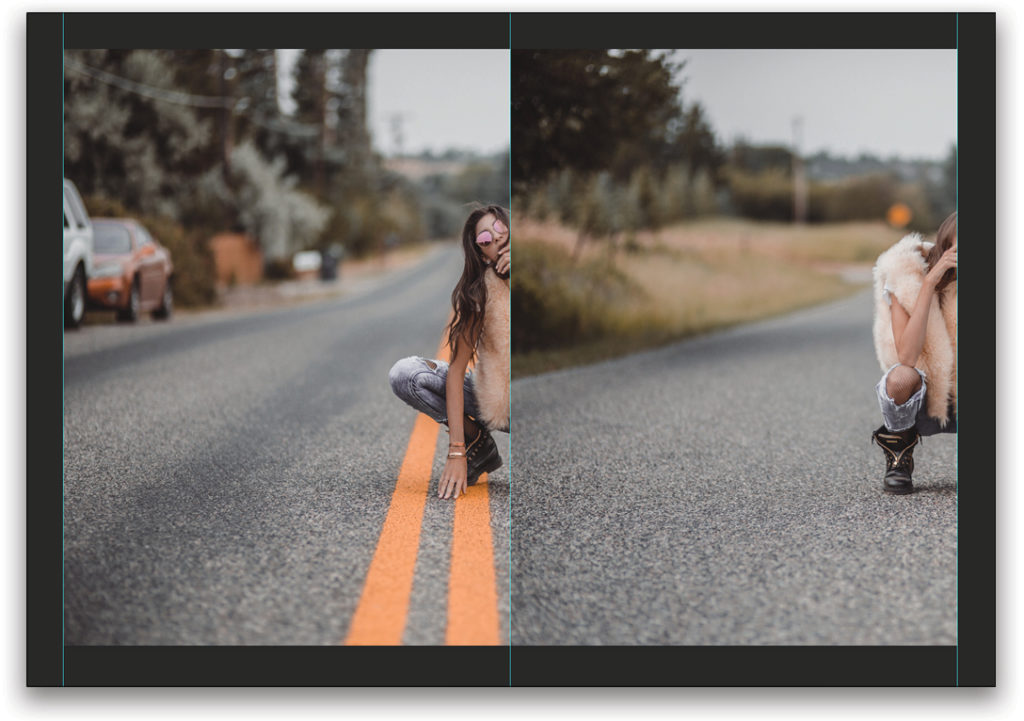
Step Nine: Reposition the Flipped Half
While pressing the Shift key, slide your now-flipped layer directly to the other side of the photo. Holding the Shift key ensures the photo will move completely parallel to the vertical edges of the photo, perfectly aligning it on the opposite side. You’ll be able to see its new placement in the Layers panel as well. Press Enter to commit the transformation.
Step 10: Lower the Opacity
With your duplicated and moved layer still active in the Layers panel, lower the Opacity in the upper-right-hand corner of the Layers panel until you can see the underlying background. This will allow you to more perfectly line up your new layer. Sometimes the subject isn’t directly in the middle, in which case this layer can be further adjusted.
After you’re satisfied with your layer placement, you can remove your guides at any time by selecting View in the application menu and choosing Clear Guides.
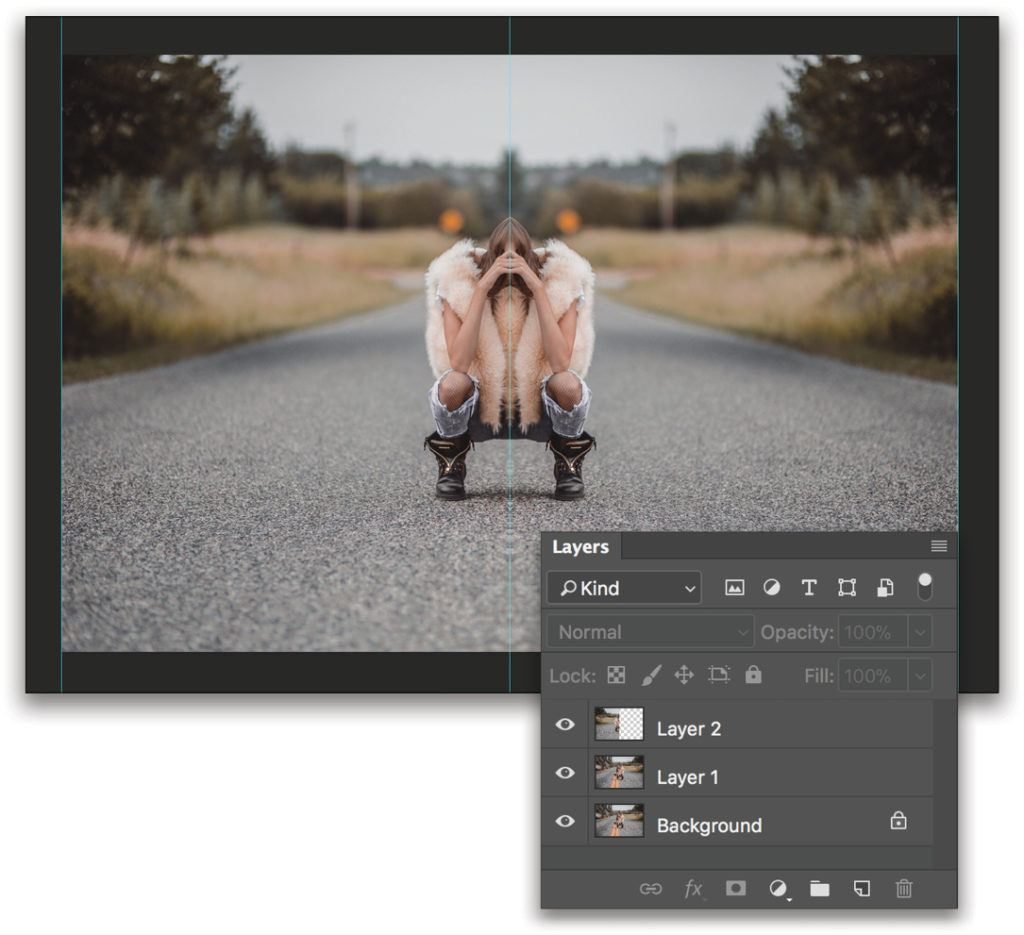
Step 11: Add a Layer Mask
Adding a layer mask will allow you to paint away any part of the flipped layer you don’t wish to be seen. Do this by clicking the Add Layer Mask icon (circle in a square) at the bottom of the Layers panel while your top layer is active.
Step 12: Paint Away the Extra
With your mask highlighted in the Layers panel, select the Brush tool (B), and choose an appropriate-sized brush with the Hardness level set to 0%. With your Foreground color set to black (press D then X), you can begin clearing away any part of the area you don’t wish to see; for example, anything that covers your subject needs to go. If you erase too much, just tap X on your keyboard to switch your brush to white and you can paint on whatever you just accidentally removed to bring it back. Adjust the Opacity of the layer as needed while you’re painting on the mask. And raise it back to 100% when you’re done.
As an alternative, you could first invert your mask to black by pressing Command-I (PC: Ctrl-I). This will hide everything on the layer. Now you can paint with a white brush to reveal any sections you wish to be seen on that layer. This works well for small sections you wish to mirror instead of the entire photo itself.

Step 13: Check the Finished Look
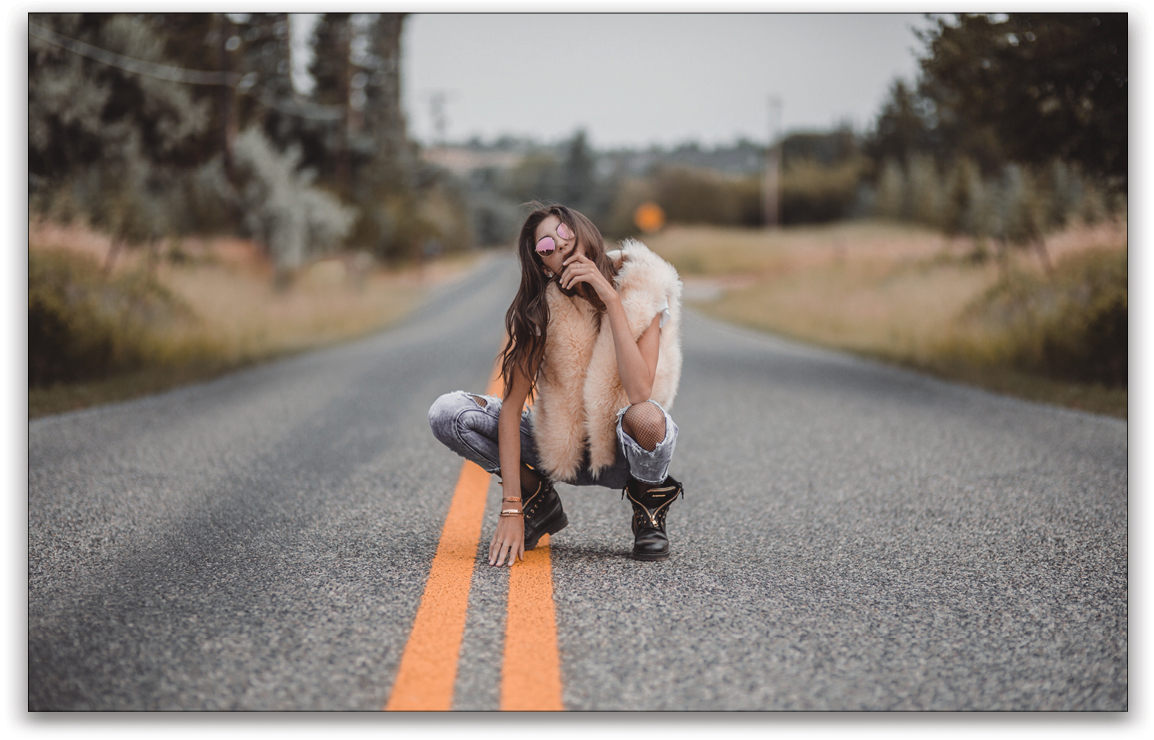
In the first example shown above, we chose to uncover only our subject, leaving the background with as much symmetry as possible. In the second example at the top of the next page, we chose to uncover everything except the cars, giving our photo a sense of realism combined with a pleasing aura of symmetry. The choice is all yours! When you’re done, save your image as a PSD file, then you can flatten it and save as a JPEG as needed.
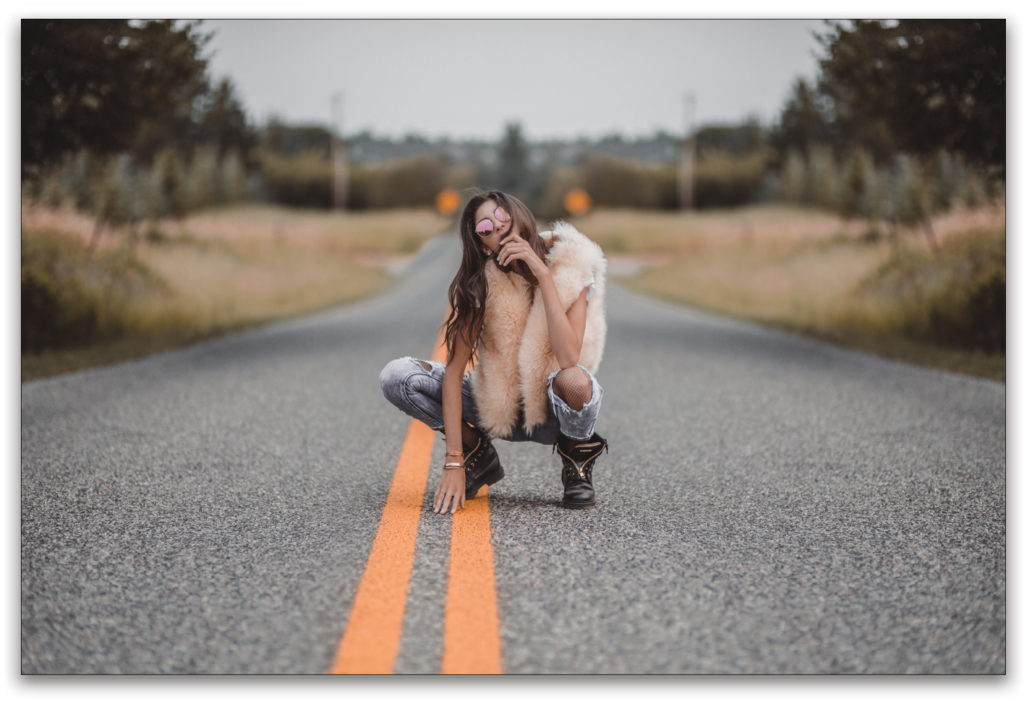
This technique works well with various types of photos. In our main example, it was done to make our background as minimal as possible while creating a pleasing, balanced photo that draws all the focus to the subject. In other instances, it can serve to make photos more geometric and interesting, using the concept of leading lines to direct viewers to the center of the frame, or just to perfectly balance your work. Feel free to experiment—you might be surprised which of your photos could be brought to another level with just a touch of added symmetry!
This article previously published in the May, 2018 issue of Photoshop User magazine.


