The subject featured in this month’s article is Englishman River Falls, located just outside Parksville, Vancouver Island, B.C. According to local legend, it’s named as such after local First Nations people discovered the skeleton of a white European male not far from the waterfall pictured in this photo. He was assumed to have drowned while attempting to cross the river. Hence, the river got named after this unfortunate, unknown Brit.
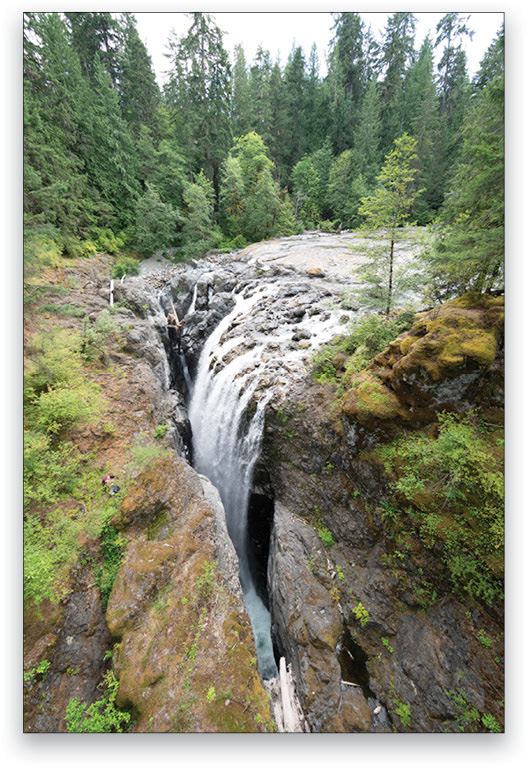
The Englishman River Falls Provincial Park has a circular hiking trail which starts off with this impressive view of the first of the two main waterfalls. I took this photo from the suspension footbridge that spans the valley below. To capture the image, I used a Sony A7R II camera with a Canon 14mm wide-angle lens, plus a Metabones Canon-to-Sony lens adapter. I wanted to capture this photo at an optimum lens aperture of f/8, which meant mounting the camera on a tripod, as it required a time exposure of 1/80. Now, the suspension bridge was fairly stable, except for when other hikers were walking on it. So, I had to wait patiently for a gap in the foot traffic for the best time to shoot.
One thing I was aware of when using a wide-angle lens is how, when you tilt the camera downward (as I did here), you tend to see noticeable stretching at the bottom of the frame. Now, such lens-distortion effects can sometimes be desirable; but if you wish to avoid this, then the aim should be to keep the camera position as near vertical as possible. For example, I sometimes like to use a wide-angle lens to shoot portraits, because a moderate wide-angle view can give your portraits a more intimate look. To avoid any noticeable foreshortening, I keep the camera as vertical as possible. Going back to the waterfall scene discussed here, one option would have been to find a lower viewpoint so that I didn’t have to tilt the camera down so much.
Given that this would have entailed me dangling off the end of a rope(!), and that I’m not particularly good with heights, Option B was to fix this problem in Lightroom. As I show in the following steps, I was able to use the Manual transform sliders to apply a perspective correction adjustment that effectively straightened-up the shooting angle of the camera. The result is a wide-angle view of the waterfall that’s as wide as the untransformed original, yet doesn’t look too noticeably like it’s a wide-angle photograph. [KelbyOne members can click here to download a downsized DNG version of this image to follow along.]
The Steps
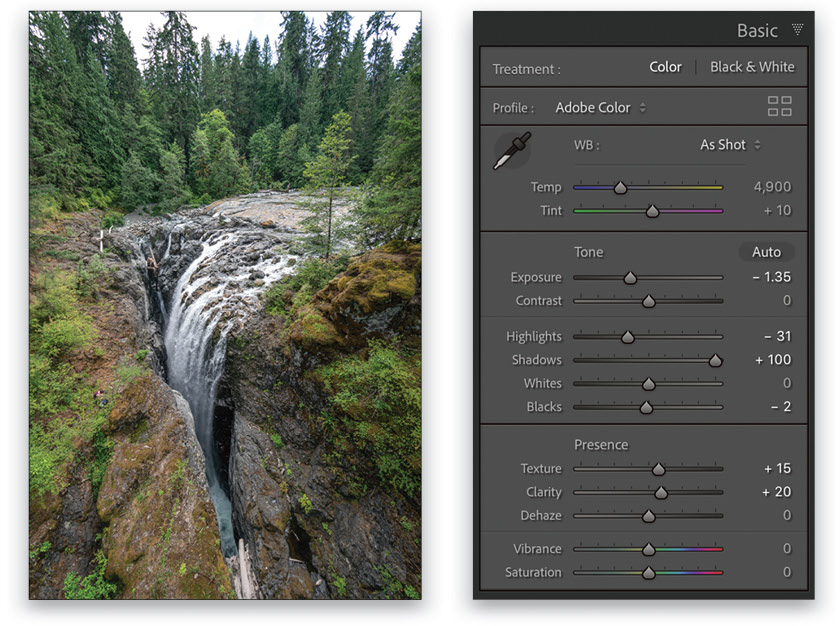
Step One: To start with, I went to the Basic panel where I made a few Tone adjustments. I applied a negative Exposure adjustment to reduce the brightness, and also adjusted the Highlights and Shadows sliders to bring out more detail in the waterfall and the shaded rocks below. In the Presence section below, I added a small amount of Texture and Clarity to emphasize the detail in the midtones.
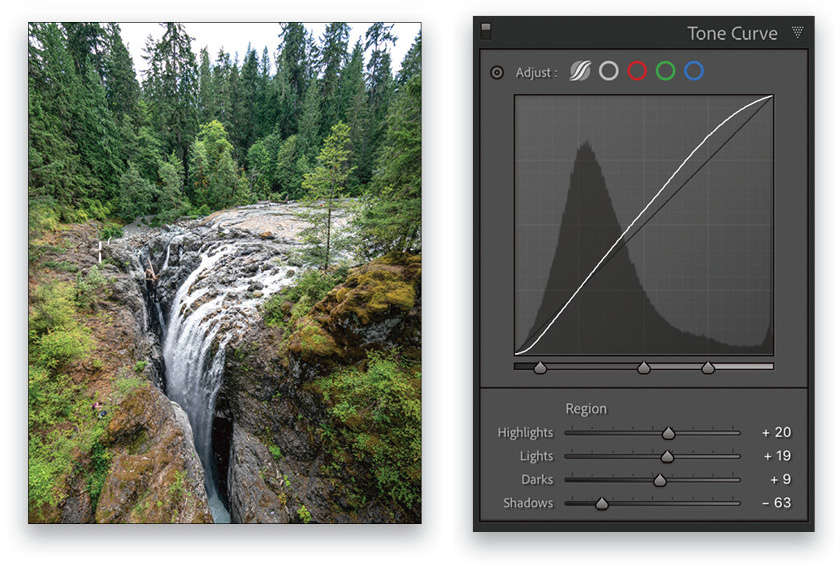
Step Two: Next, I went to the Tone Curve panel, where I applied the composite channel tone curve adjustment shown here (first icon next to Adjust). Notice how I dragged the shadow tone range split point slider (the slider on the left below the histogram) as far to the left as it would go. This allowed me to then apply a strongly negative Shadows slider adjustment that was restricted to the darkest shadow tones only. This tone curve shape essentially applied a heavy contrast kick to the shadows, but without affecting the midtone-to-shadow tone regions.
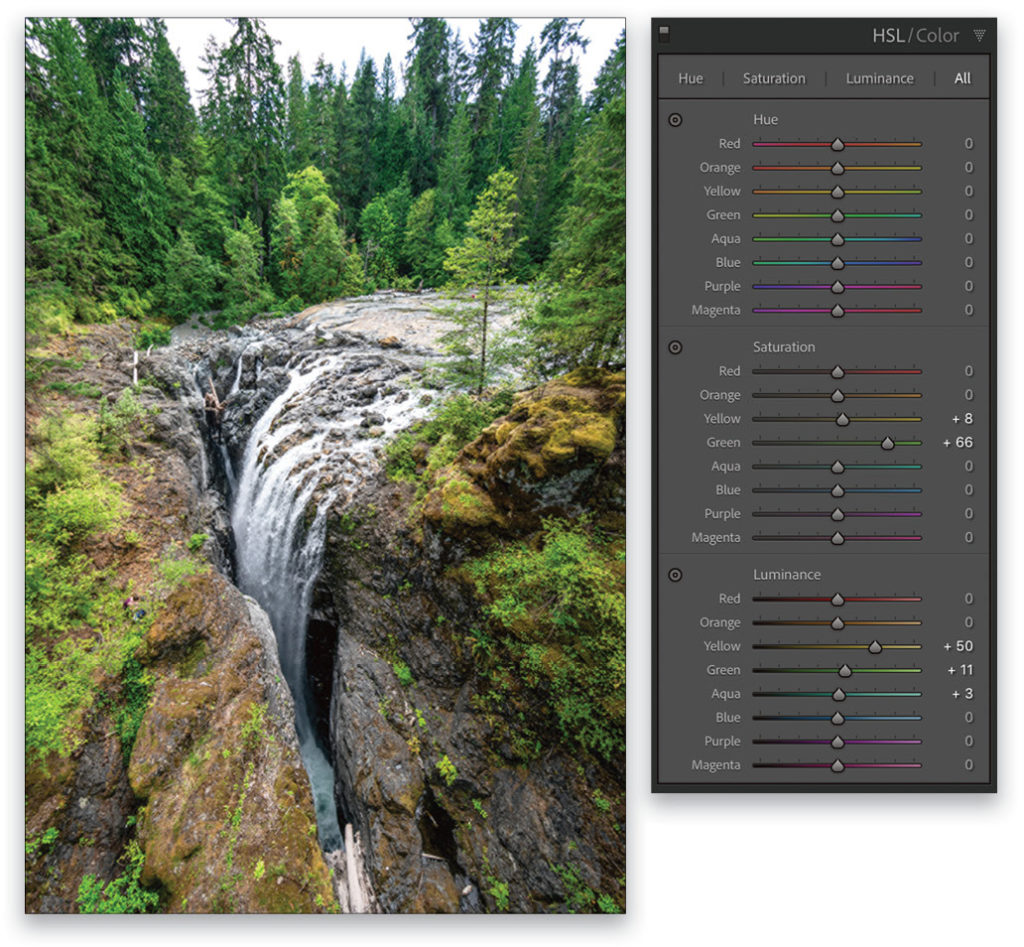
Step Three: In this step I expanded the HSL controls and applied targeted Saturation and Luminance color adjustments. In particular, I wanted to boost the saturation and luminance of the yellows and greens, targeting the foliage colors in this scene.
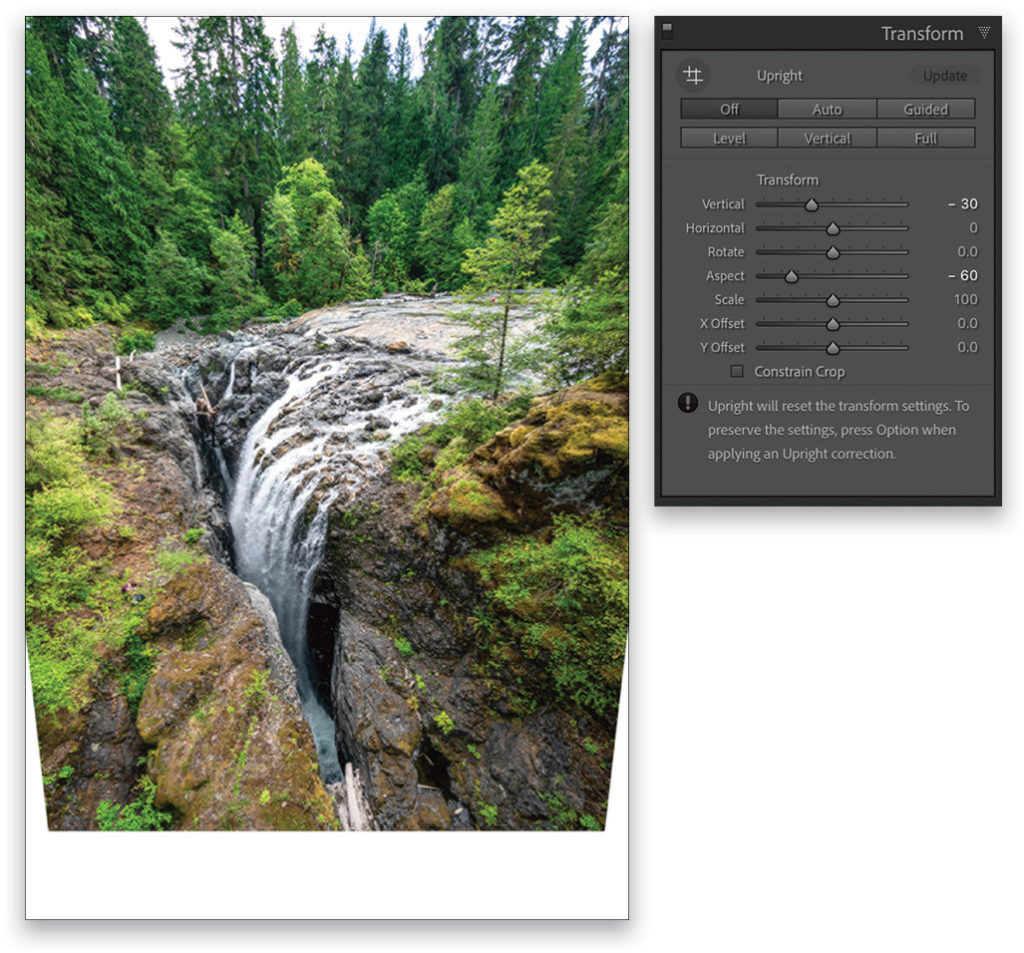
Step Four: I now wanted to alter the perspective view in this scene. The simplest way for me to do this was to go to the Transform panel and apply a negative Vertical manual transform. This adjustment squeezed the bottom edge, while stretching the upper edge, but still left the image looking somewhat squashed. So, I also applied a –60 Aspect adjustment to evenly stretch the image horizontally.
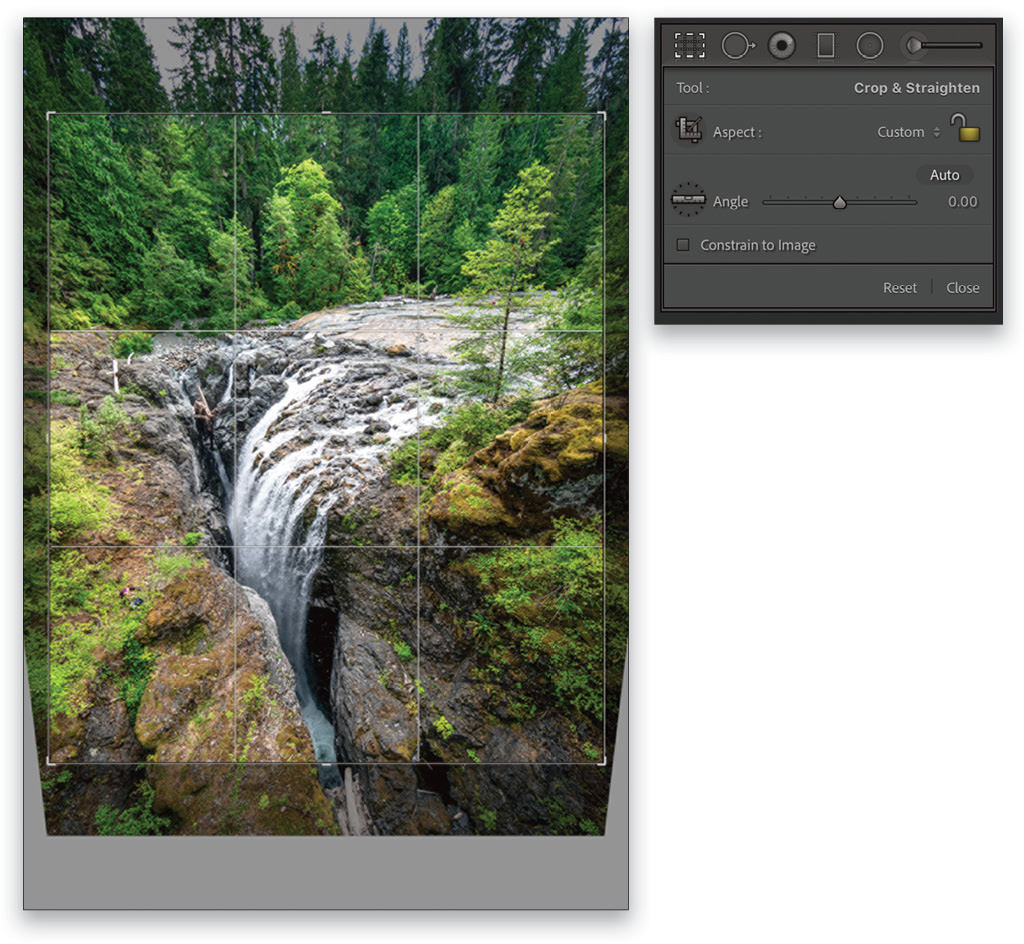
Step Five: Having transformed the photo, I next selected the Crop Overlay tool (R) and dragged the crop bounding box handles to apply a tighter crop that excluded the outer transparent areas. Then I pressed Enter to commit the crop.
Step Six: Looking closely at the photo, I could see there was another photographer just visible in the scene, who had climbed down onto the rocks below to get a closer shot of the waterfall. To remove him from the image, I selected the Spot Removal tool (Q), set the Brush to Heal, and clicked and dragged to paint over the photographer. I released the mouse and Lightroom automatically calculated the best point from which to clone to remove the photographer from the shot.
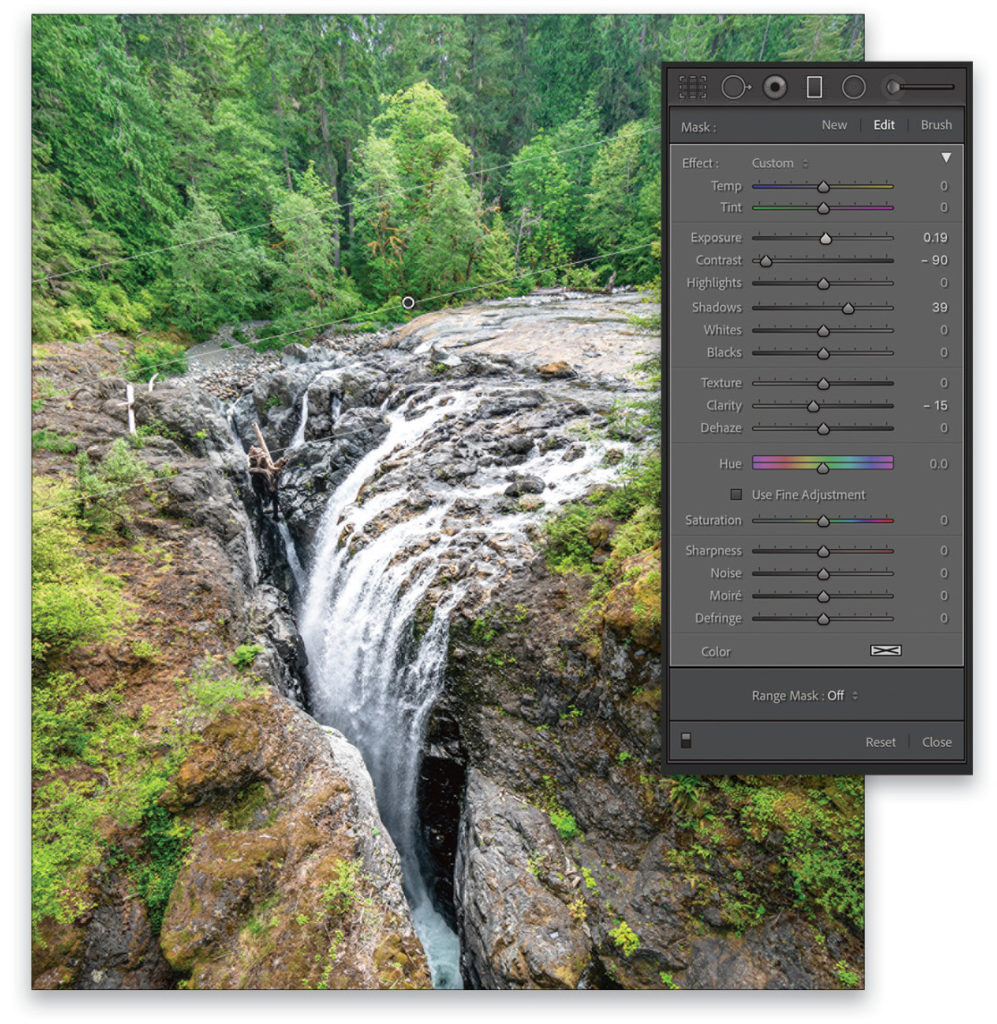
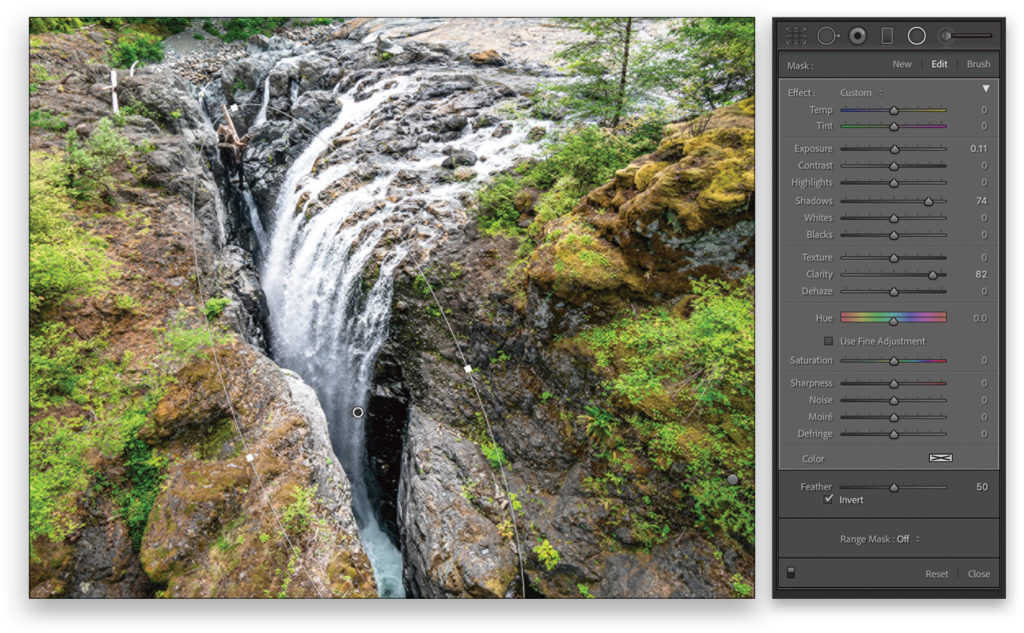
Step Seven: All I needed to do now was to apply a few localized tone adjustments. In this step I selected the Radial Filter (Shift-M) and added an elliptical-shaped adjustment to the waterfall. With Invert checked on, I then adjusted the Exposure to lighten it slightly and adjusted the Shadows to bring out more detail in the rocks. I also added an extra amount of Clarity to add more midtone contrast.
Step Eight: In this step, I added a Graduated Filter adjustment (M) to the top of the image. Here, I lightened the Exposure and the Shadows, but I also reduced the Contrast and Clarity slider settings. This combination of adjustments both lightened and softened the texture of the trees in the distance.
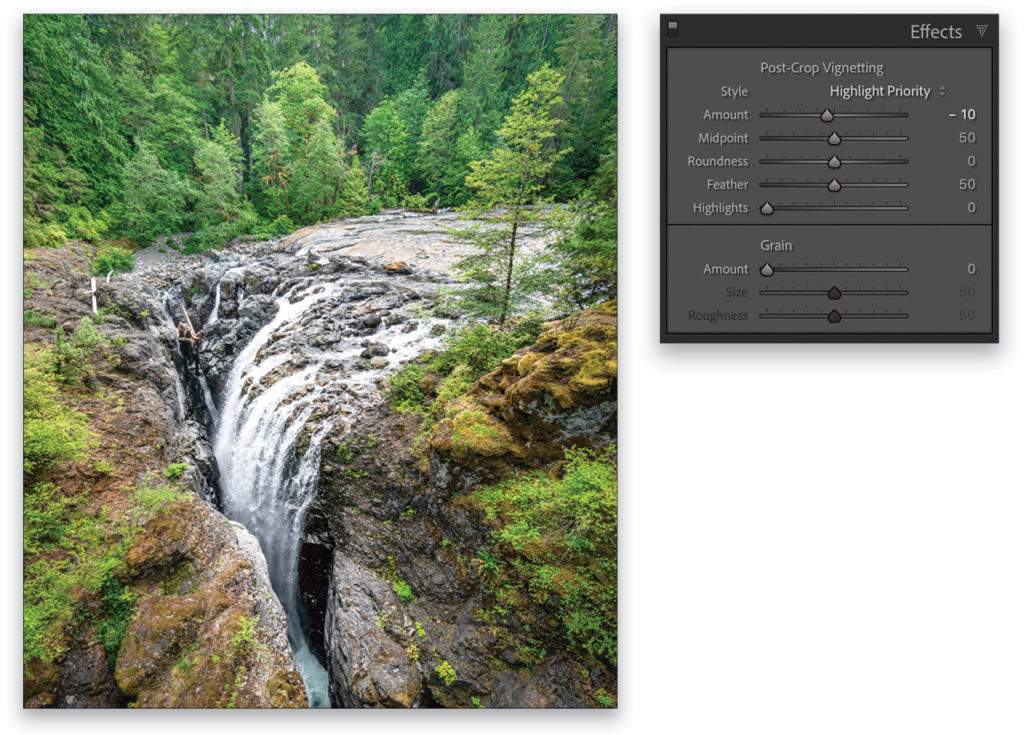
Step Nine: Finally, I went to the Effects panel, where I added a negative post-crop vignette adjustment to darken the corners of the image. This helps to draw the eye to the waterfall at the center of the photograph.
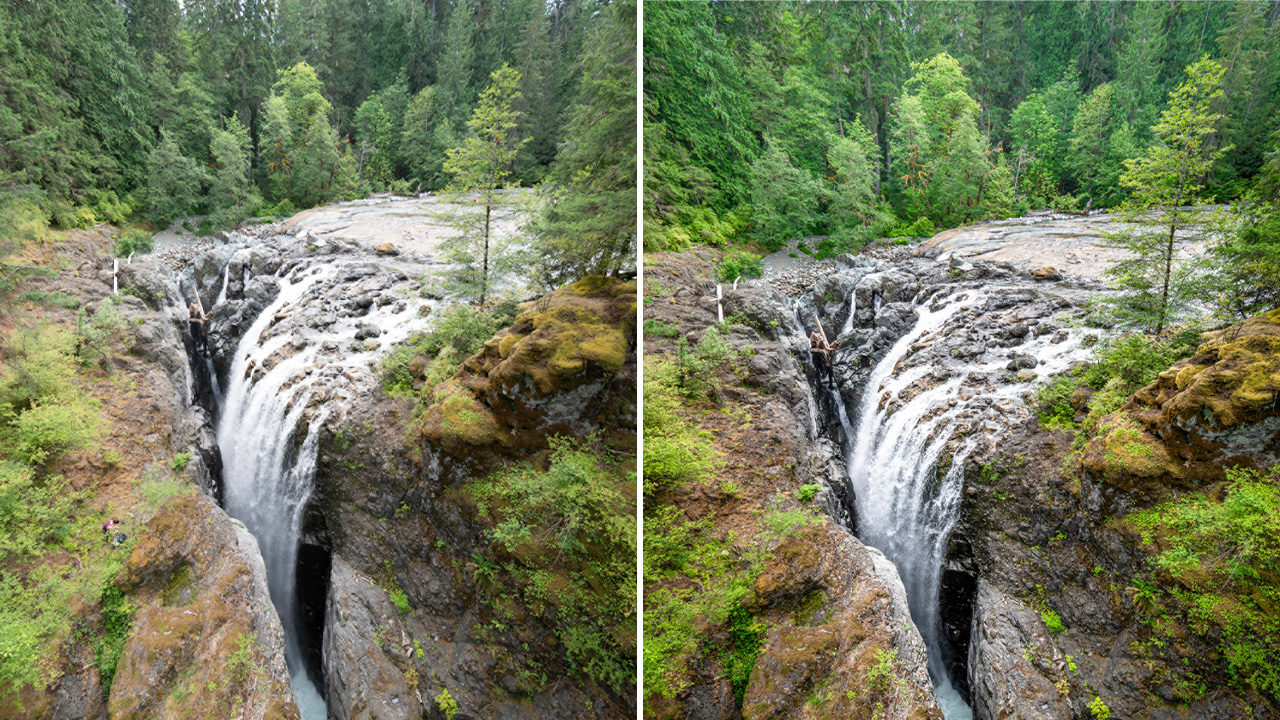
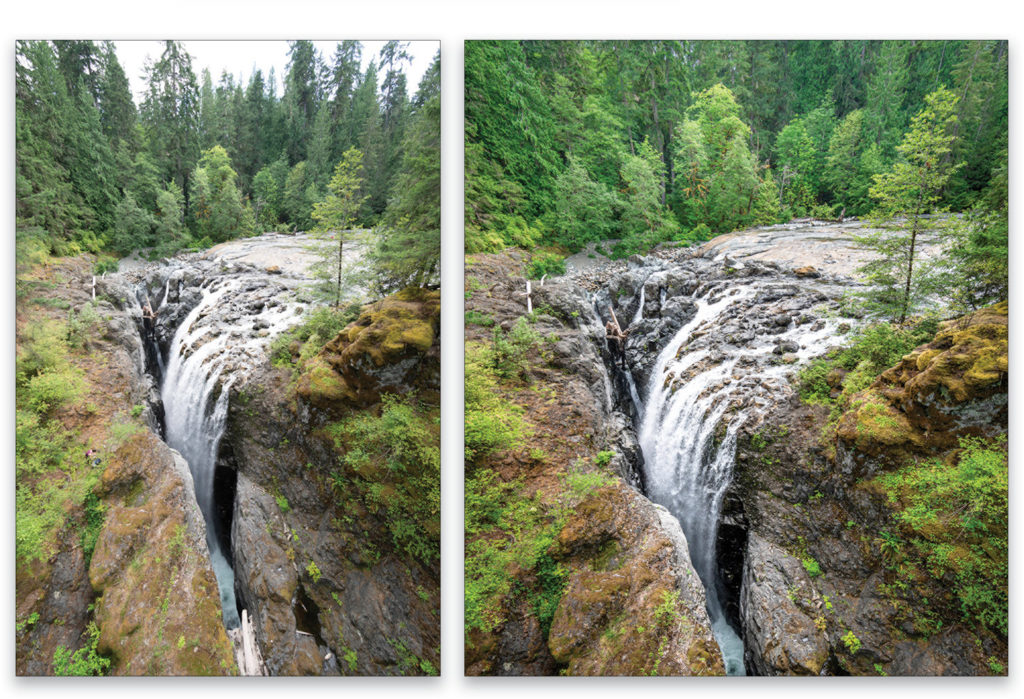
Here is the before and after:
Manual Transforms
Traditional plate cameras allow photographers to maintain a straight, vertical angle for the camera back and, once locked into position, independently adjust the height and angle of the lens relative to the back plate to adjust the positioning of the subject within the frame. This can be quite a tricky procedure and usually requires a fair amount of fine-tuning to achieve the best combination of camera plate movements. You can also use tilt-shift lenses designed for digital SLR or mirrorless cameras to achieve similar results. Without such cameras or specialist lenses, you’ll need to find the optimum angle from which to shoot to avoid distortion, such as that caused by converging verticals, or you can rely on the Transform tools in Camera Raw and Lightroom.
For architectural subjects, I always recommend selecting one of the Upright adjustments to apply an instant auto transform correction. And if that doesn’t provide the degree of precision required, then select the Guided Upright option and manually add constraints to define the edges you wish to straighten.
With landscape images, like the waterfall example shown in this article, Upright adjustments may still have some effect, but if there are no obvious straight edges in the scene for an Upright adjustment to refer to, such adjustments may not always be meaningful. Therefore, basic manual Transform adjustments may be the simplest and most effective solution.
The Vertical slider can be used to correct for keystone distortion such as when you’re photographing looking up at a tall building, or looking down on a box. The Horizontal slider can be used to correct for lateral distortion, where the shooting angle perhaps appears to be too side-on. In the example shown here, you can see how I applied a negative manual Horizontal Transform adjustment to correct for the image stretching on the right-hand side of the frame.
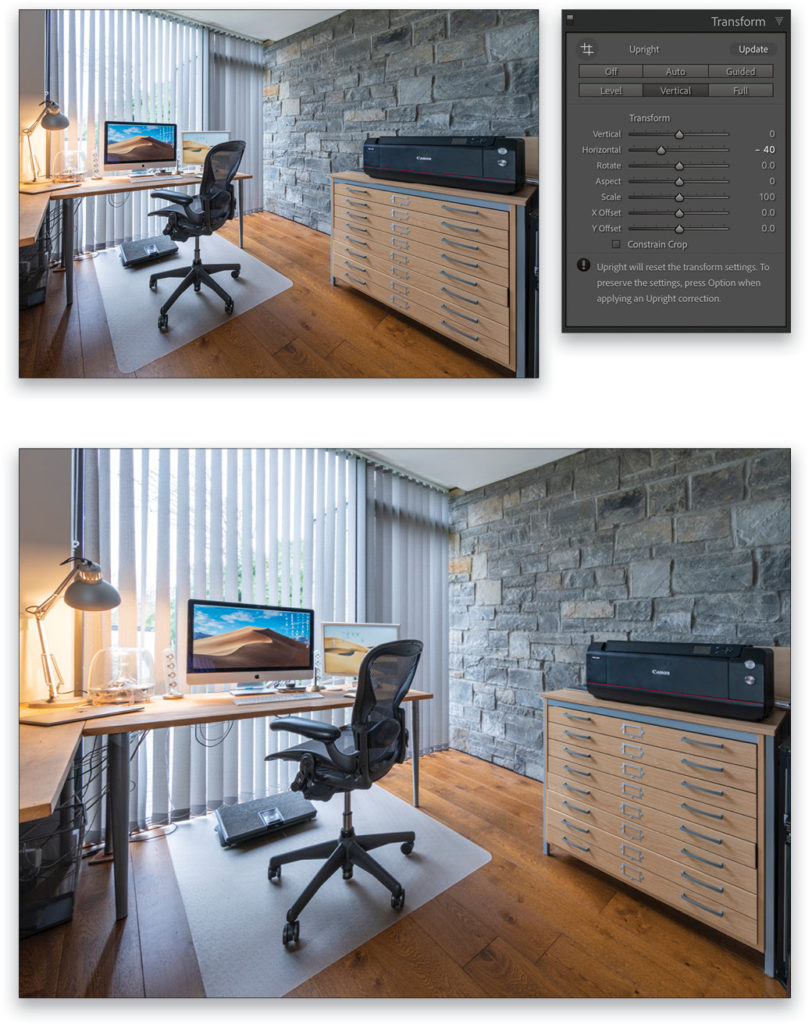
In the As Shot version, the Canon printer in my office looks a lot wider than a Desktop A2 printer! Likewise, the plans chest below appears much wider than it really is. Of course, in the corrected version, the iMac screen now appears stretched. It’s essentially a balancing act to find the optimum setting, but to my mind, the transformed version appears to be more truthful to how my office room looks in real life.
This article originally published in the January, 2021 issue of Photoshop User magazine.


