Some of the most popular Photoshop tutorials involve selections and masking. There are entire books dedicated to this topic, some written by your favorite authors. (I got my start with masking by watching Katrin Eismann teach at Photoshop World.) Most of these books focus on photographic masking, and go from manual, painted selections to using image information with a few tweaks from adjustments and filters, which is incredibly powerful. Let’s look at how to isolate your mask for robust, detailed editing. In the end, you’ll have a seriously flexible way to work with complex masks using nearly everything Photoshop has to offer.
Put the Mask on Its Own Layer
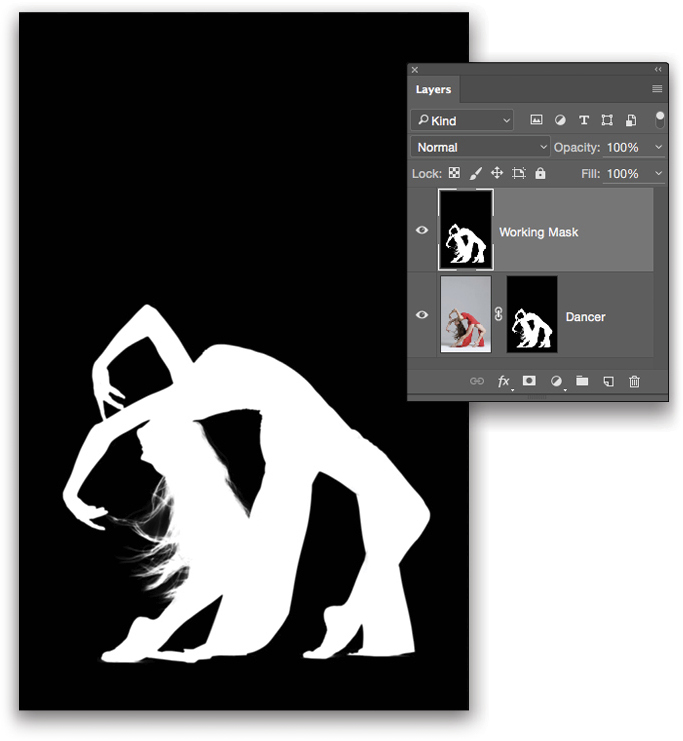
You’re no doubt familiar with many selection techniques, but no single one is complete and perfect for every situation. When you find that you need extra oomph and can’t get Refine Edge to cooperate, or you can’t paint the changes you want directly, it might be time to put your mask on its own layer for detailed work. To get your mask onto its own layer, simply hold Option (PC: Alt) and click on the layer mask you want to edit—that shows your mask on the canvas as a grayscale image. Press Command-A (PC: Ctrl-A) to select all and Command-C (PC: Ctrl-C) to copy the mask. Create a blank layer, then paste into that layer with Command-V (PC: Ctrl-V). Double-click the new layer’s name and rename it “Working Mask.”
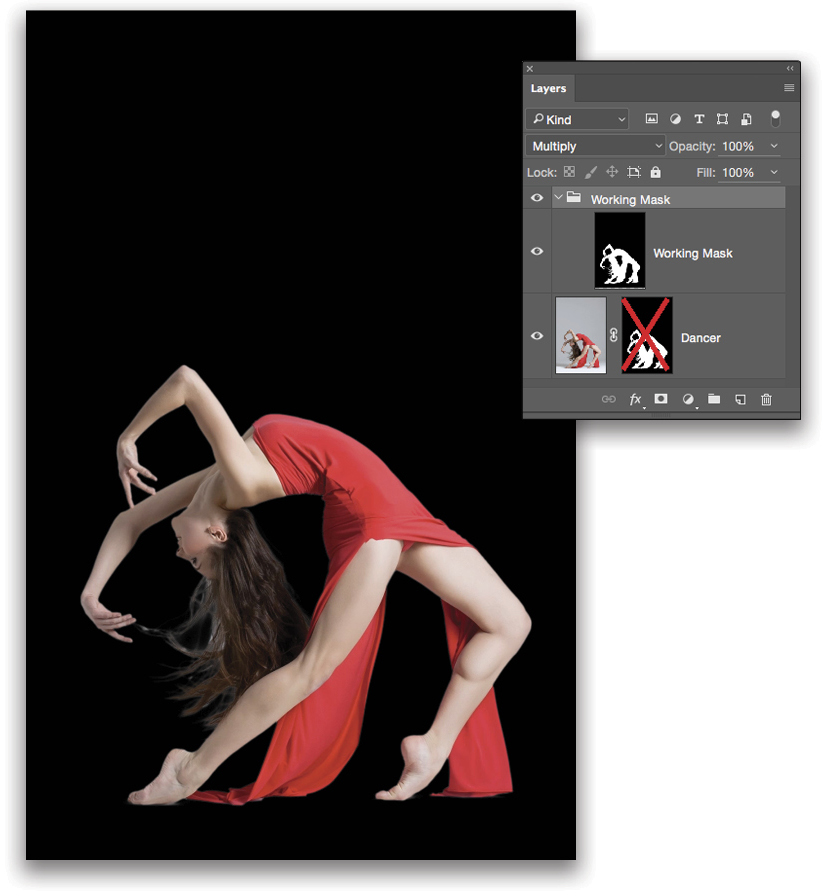
Now, a mask isn’t very useful if you can’t see the image you’re working with, so here’s the secret sauce: Put the new Working Mask into a layer group (drag the Working Mask layer down to the Folder icon at the bottom of the Layers panel) and then Shift-click the original layer mask to turn it off. Change the name of the group to Working Mask as well. Finally, change the blend mode of the group itself to Multiply. This causes anything white to become effectively transparent, and everything else is just black so you can see your subject in isolation. Turn off everything else except the Working Mask group and your single-image layer so you can work on it in isolation. You can now add adjustment layers, convert the Working Mask layer to a smart object, and add other filters as you like within that group.
Note: This specific approach is best for masking objects to be composited with other image elements, for example replacing a background. All other layers in your document should be turned off to avoid confusion or distraction.
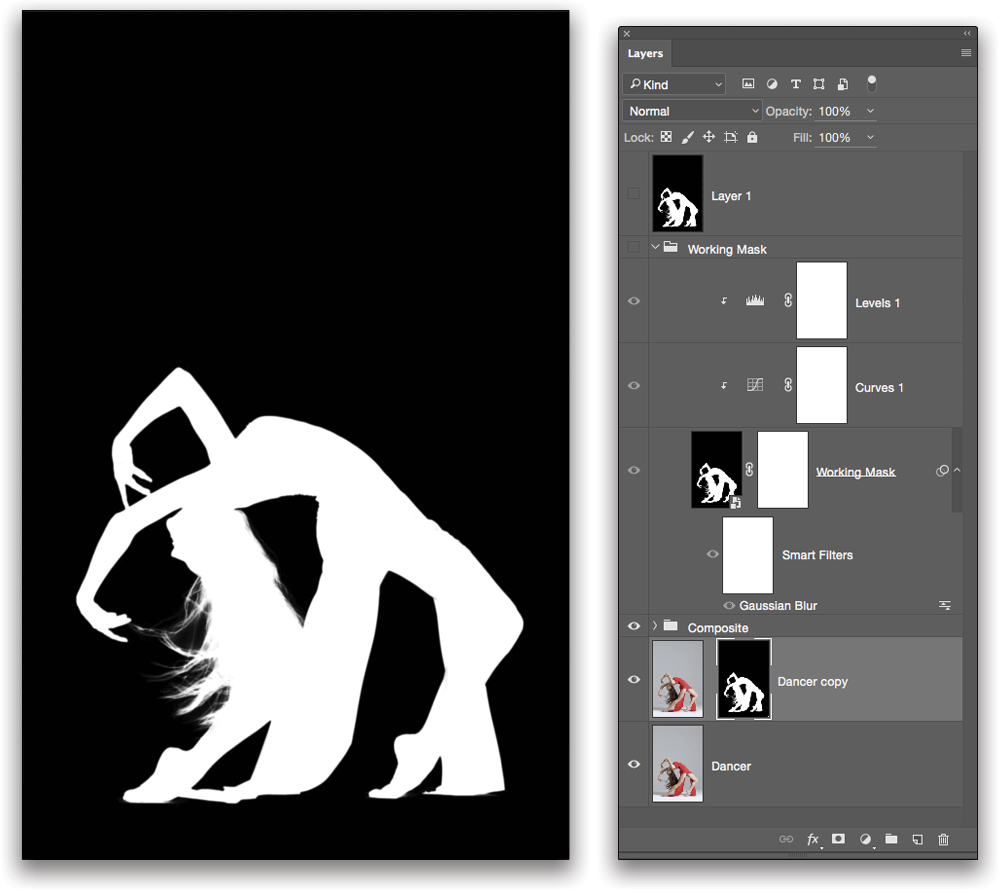
When you’re done editing your mask, set the group blend mode back to Pass Through, then create a blank layer above the Working Mask group. With the blank layer selected, press Command-Option-Shift-E (PC: Ctrl-Alt-Shift-E) to Stamp/Merge a flat copy of the mask to the blank layer, and finish by copying-and-pasting the new flattened mask back to your image layer’s mask (you’ll have to Option-click [PC: Alt-click] the mask thumbnail as you did before to show the image layer mask before pasting; Option-click [PC: Alt-click] to reveal the image again). Turn off the Working Mask group and the flat merged mask layer, and you’re done!
Is this a lot of work? You better believe it. Is it worth the effort? Oh, my, yes! There’ll be a point when you just can’t seem to get the results you want by working on a mask traditionally, or you need to be able to see the mask while you’re working on it. And sometimes you’ll need to make multiple versions of your mask with slight variations. If you do a lot of illustrations or special effects, it can really help to work with your potential mask directly rather than guessing at what’s happening by applying adjustments and filters directly to a layer mask.
By promoting your mask to a real layer, you can use virtually every tool Photoshop has: filters, adjustments, blend modes, plug-ins, whatever. And the results don’t have to be just for traditional photography uses. Let’s try out a couple of basic adjustments so you can get a feel for how this actually works.
Critter Experiment
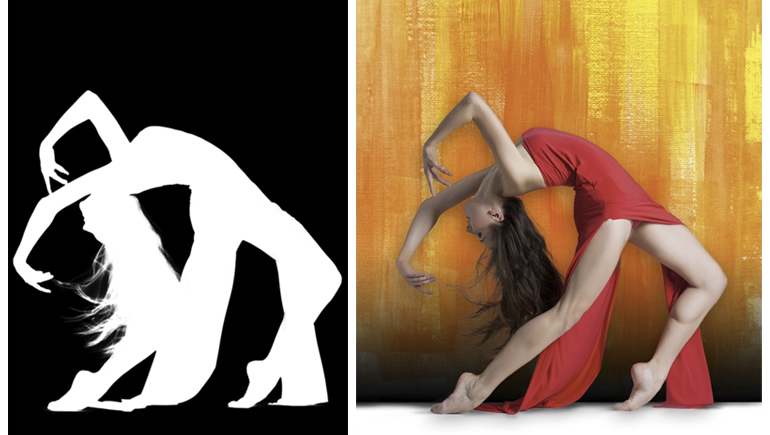
Remember that my goal for you is to build solid foundations by tearing away context and bias so you can see what’s happening in the details. In this case, that means splitting off “selections” from the topic and focusing only on manipulating masks. To that end, I have built a little creature outline that will let us see what’s going on with various mask operations without worrying to see the effect on an image.
[KelbyOne members may download the file used in this tutorial here. All files are for personal use only.]
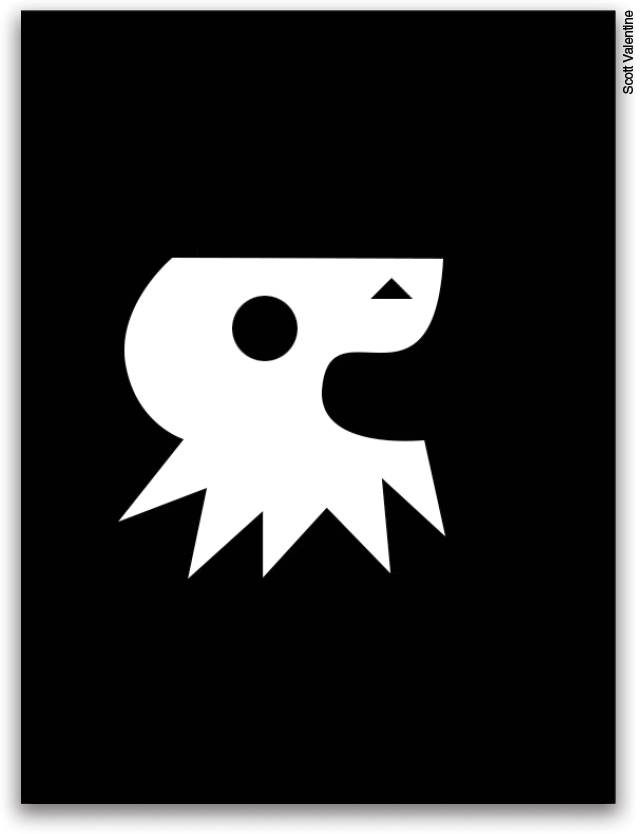
Open the file sjv_Critter_Mask.psd, then expand the Model group in the Layers panel. You’ll see I’ve set you up with the Critter basic shape in a smart object, which has all the basic features we want to look at: inside and outside curves, sharp points, and straight lines. There’s also a 10-px Gaussian Blur set as a smart filter on the Critter that should be turned off for the moment.
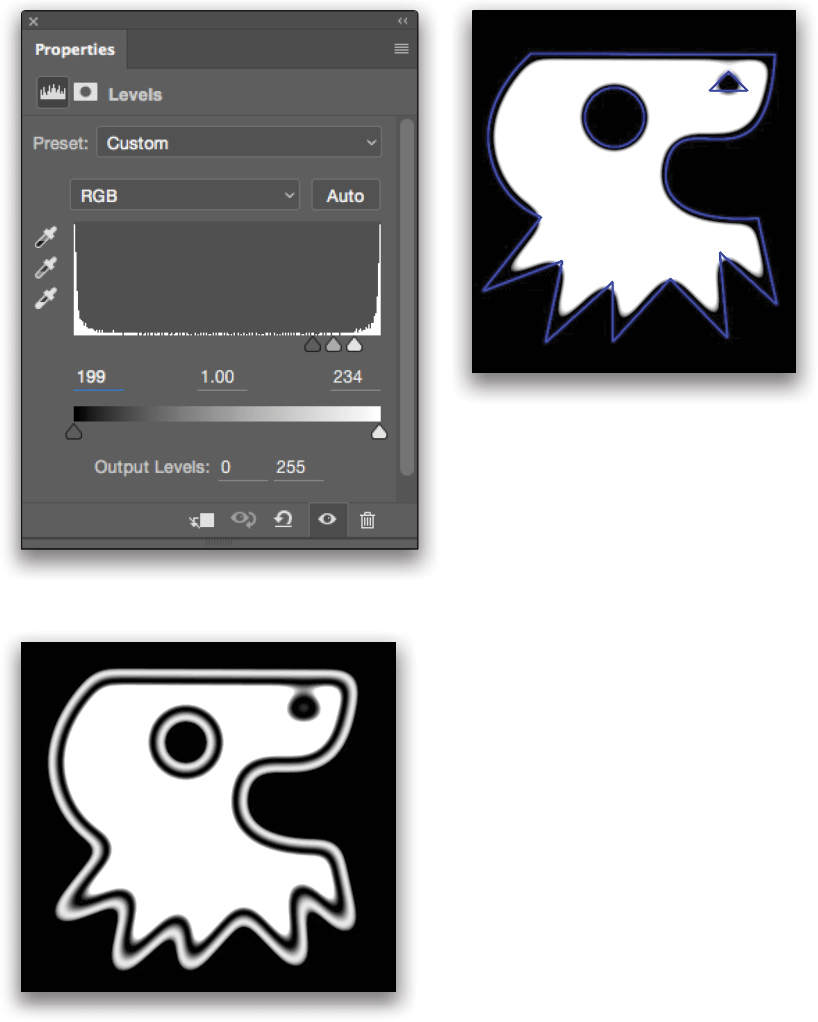
Turn on the Gaussian Blur filter by clicking to the left of the name so its Eye icon appears. The Critter is unsurprisingly blurred. Turn on the Curves adjustment layer. Notice the blur is slightly less? Finally, turn on the Levels adjustment layer. Boom! We’re back to a smooth edge! But wait—what’s different?
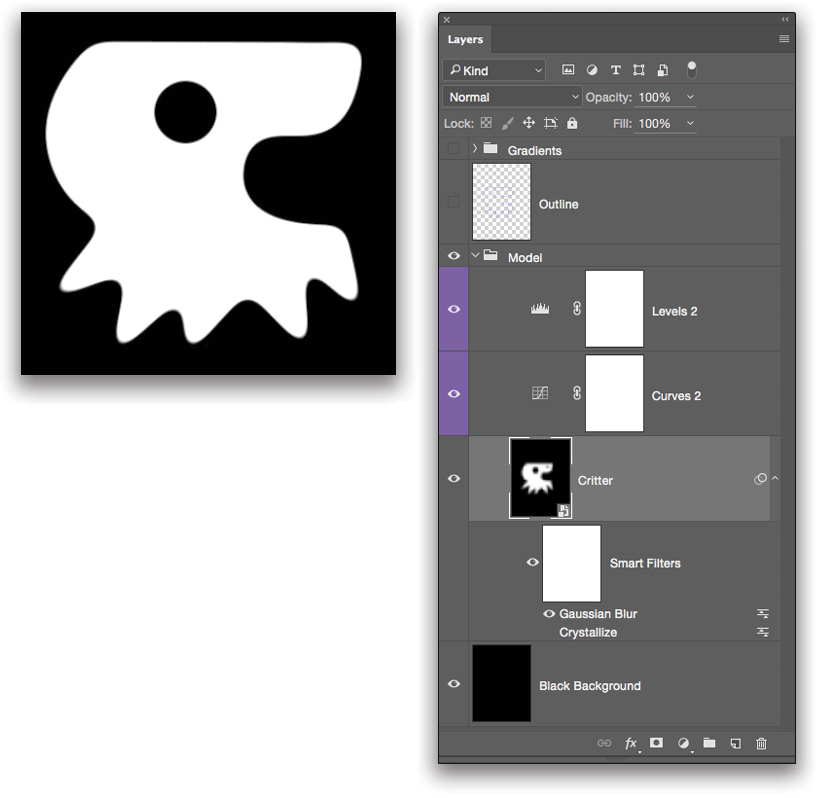
Notice all the sharp corners are softer, and the little triangle “nose” is gone completely. Now turn off the Gaussian Blur smart filter and the original edges are back. We’ve taken advantage of the fact that Levels and Curves ignore pure black and white, except where there’s a transition. By giving the Critter a little blur, Levels and Curves have something to work with. If you have a mask that’s slightly rough, you can apply a blur then smooth things out with Levels and Curves. You can even change the size of the mask itself along with the overall amount of smoothing by using more or less blur and tweaking the adjustments. Turn the Gaussian Blur filter back on.
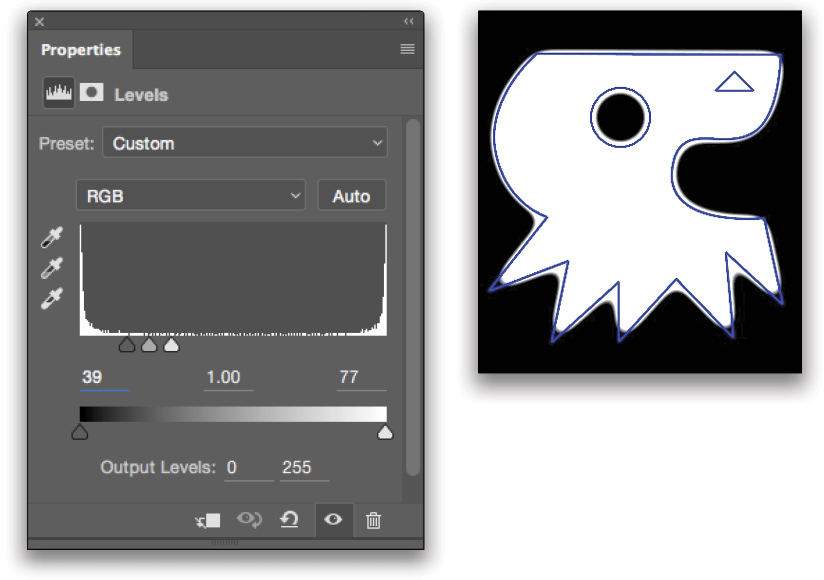
Double-click on the Levels adjustment layer thumbnail to make it active and to show the Properties panel. Notice the three triangle sliders are grouped in the middle below the histogram. Move all of them to the left (one at a time, keeping the basic relationship between them) and the mask gets bigger. Moving them to the right makes the mask smaller. Tip: Toggle the Outline layer on and off in the practice file to compare your changes with the original shape’s outline.
Click on the Curves adjustment to see the small S-shaped curve. Try moving those points around; what happens when you invert the curve? What if you really bend the curve and invert it?
Everything Goes
As you tinker, turn off the various pieces—smart filter, Levels, or Curves—and check the results. This will let you see how they interact. More importantly, it will give you a feel for the tradeoffs when making your own masks. Smoothing too much may lose important details, so you’ll have to work on a selection of your mask rather than all of it at once. You can do this by adding more adjustment layers and using their masks to target specific elements. And you can combine multiple masks together using the Stamp/Merge technique above.
Of course you can use any of Photoshop’s tools that don’t directly use color to work on your mask. Some filters, such as Add Noise or Render Clouds, don’t work as smart filters, so you’ll have to either forego the conversion to a smart object, or open the smart object to use those filters. To keep your original, just make a copy of the original layer and do your work on the duplicate. That way you can use destructive techniques and still have a place to which to get back.
Don’t forget that you can also use classic tools such as Dodge and Burn (O) for cleaning up edges, the Smudge tool (nested under the Blur tool in the Toolbox) for pushing little bits around, the Blur or Sharpen tool for specific edges, etc.
By now it should be clear that you can treat your masks like grayscale images by putting them into regular layers. The possibilities really are endless here, so get to masking!
This article originally published in the July/August issue of Photoshop User magazine.


