Adding faux lights is a great way to increase visual interest in a solid color or dark background. In this column, you’ll learn how to create simple shapes that you distort, blur, and fade into realistic-looking lighting effects that can be placed behind or beside your subject. Read on for some seriously creative fun!
Step One:
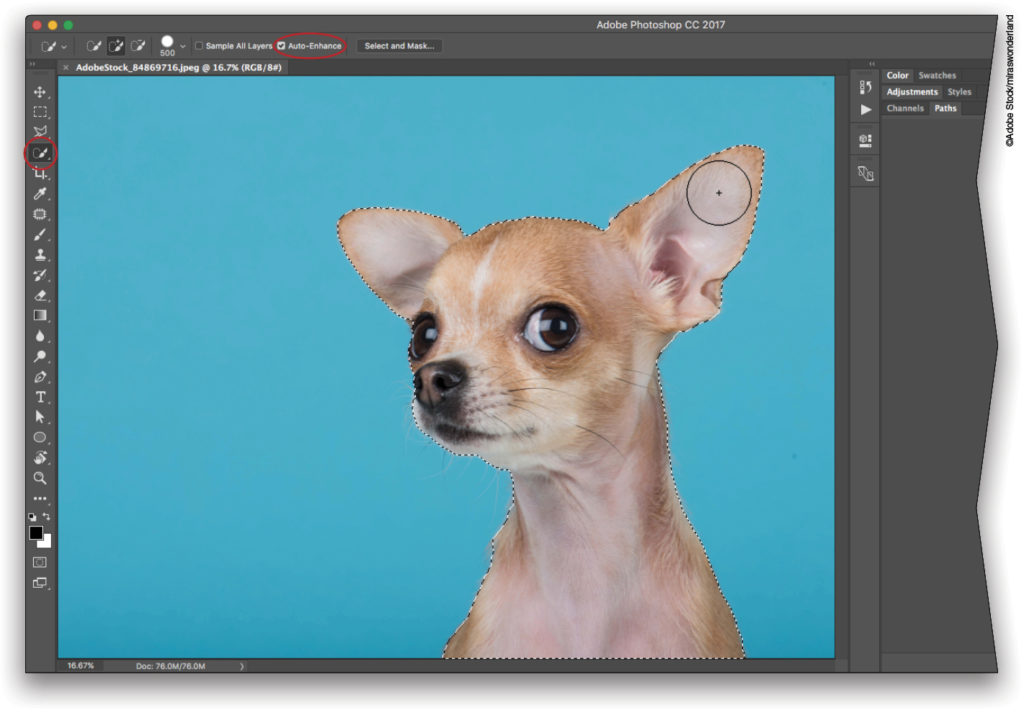
In Photoshop, choose File>Open and navigate to the dog photo shown here. If you’re starting in Lightroom, select the photo and then choose Photo>Edit In>Adobe Photoshop CC. Grab the Quick Selection tool (W) from the Toolbox (circled), and in the Brush Picker (in the Options Bar), set the brush Size to around 500 pixels and increase the Hardness. Turn on Auto-Enhance (also circled), and then brush across the dog to select it.
To obtain the stock images used in this exercise so you can follow along, download the watermarked previews from Adobe Stock, or add them directly to your Libraries panel (Window>Libraries) by clicking on the link for each image below. When the Adobe Stock webpage opens, make sure you’re logged in to your Adobe account, then to the right of each image, you’ll see the option to Save Preview to My Library (you can click on My Library to select a different library or download option). Clickon the cloud-with-an-arrow icon, and the preview image will automatically be downloaded to your Libraries panel in Photoshop.
Chihuahua on a blue background
Tip: The size of the area Photoshop selects with this tool is directly proportionate to the size of your brush cursor. So when you’re trying this technique on your own photos, use a small brush to select small areas. You can adjust brush size by tapping the Left Bracket ([) key to decrease size or the Right Bracket (]) key to increase it.
Step Two:
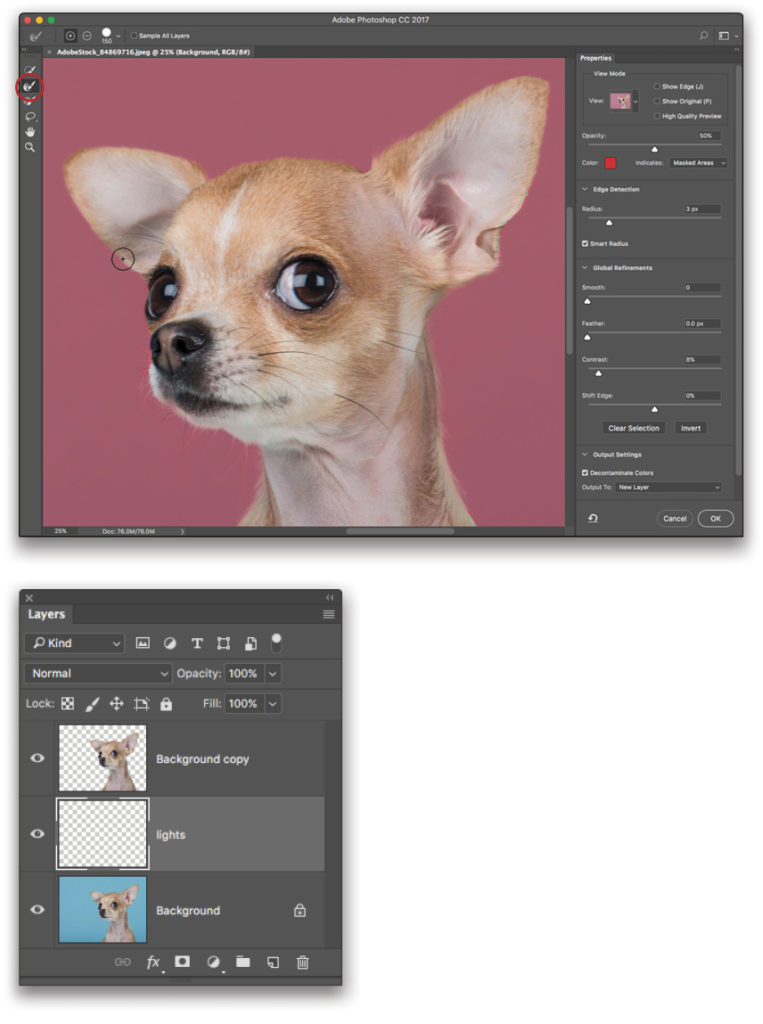
In the Options Bar, click the Select and Mask button. In the workspace that opens, from the View pop-up menu (near the top of the Properties panel), choose Overlay (V) and set the Opacity slider to around 50%. In the Edge Detection section, turn on Smart Radius (since the subject has a combination of hard and soft edges), and then drag the Radius slider to the right to around 3 pixels. In the Global Refinements section, set the Contrast to about 8%. Click the Refine Edge Brush tool (R; circled) in the toolbar and use the Bracket keys on your keyboard to set your brush Size to around 150 pixels. Brush around the edges of the dog, so Photoshop rethinks the selection in the areas that need it and includes partially transparent pixels around the fur. Don’t worry too much about the whiskers. In the Output Settings section, turn on Decontaminate Colors, choose New Layer from the Output To pop-up menu, and click OK. Photoshop isolates the dog on a new layer.
Step Three:
In the Layers panel, turn on the visibility eye of the Background layer. Add a new layer beneath the active layer by Command-clicking (PC: Ctrl-clicking) on the Create a New Layer icon at the bottom of the panel, then double-click on the new layer’s name, enter “lights” and press Return (PC: Enter).
Step Four:
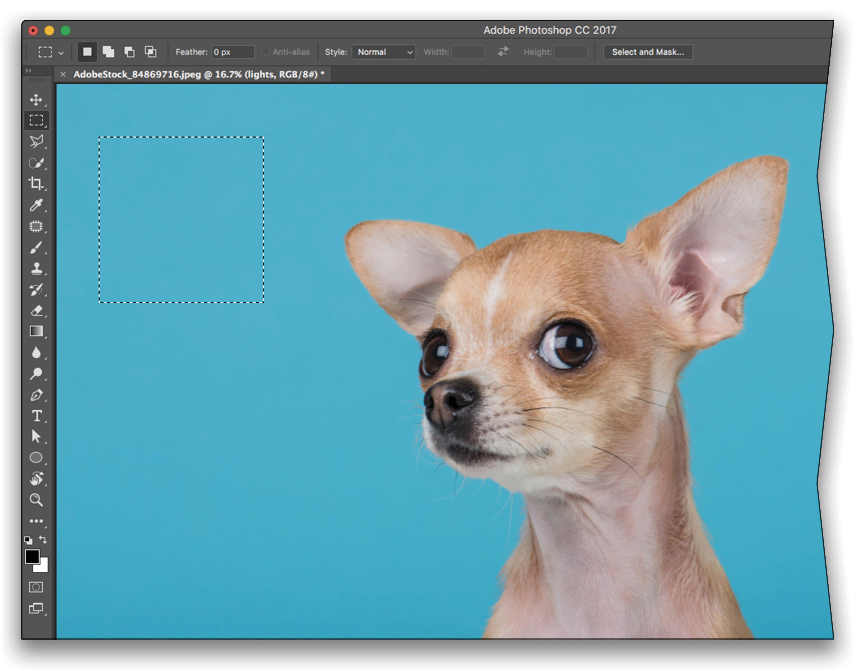
Press M to grab the Rectangular Marquee tool (circled), and in the Options Bar, set the Feather to 0. Mouse over to your document and click-and-drag to draw a square.
Step Five:
Choose Edit>Fill, and in the resulting dialog, pick White from the Contents pop-up menu and click OK. Don’t get rid of the selection yet!
Step Six:
Press V to grab the Move tool (circled), and then Option-Shift-drag (PC: Alt-Shift-drag) the selected square to the right to duplicate it. Release your mouse button, and then keep dragging the selected square to create two rows of three square shapes that areequally spaced (only press Option when creating the first duplicate in the second row; the Shift key keeps the duplicates aligned horizontally).
Step Seven:
Choose Select>Deselect, and then choose Edit>Transform>Distort. Click-and-drag the top-left corner point upward, slightly beyond the document edge, and then click-and-drag the bottom-left corner point upward and beyond the document edge, as well. Then, click on the middle-right point and drag the side in toward the left. Press Return (PC: Enter) when you’re finished.

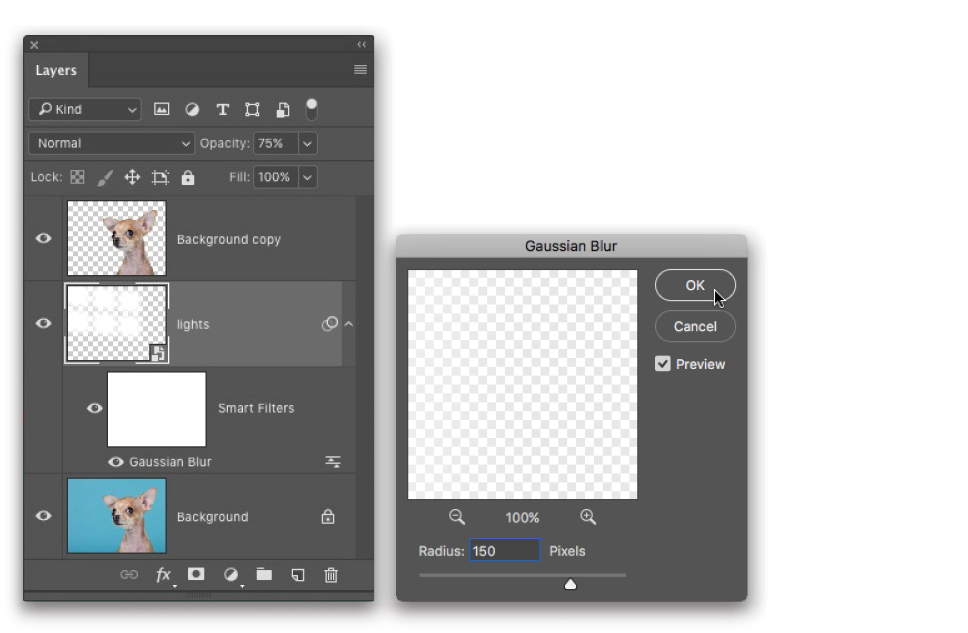
Step Eight:
Choose Filter>Convert for Smart Filters, and then choose Filter>Blur>Gaussian Blur. In the dialog that opens, enter around 150 pixels for the Radius. Click OK.
Tip: If you decide to blur the lights more, double-click on the filter’s name in the Layers panel to reopen its dialog and change the Radius.
Step Nine:
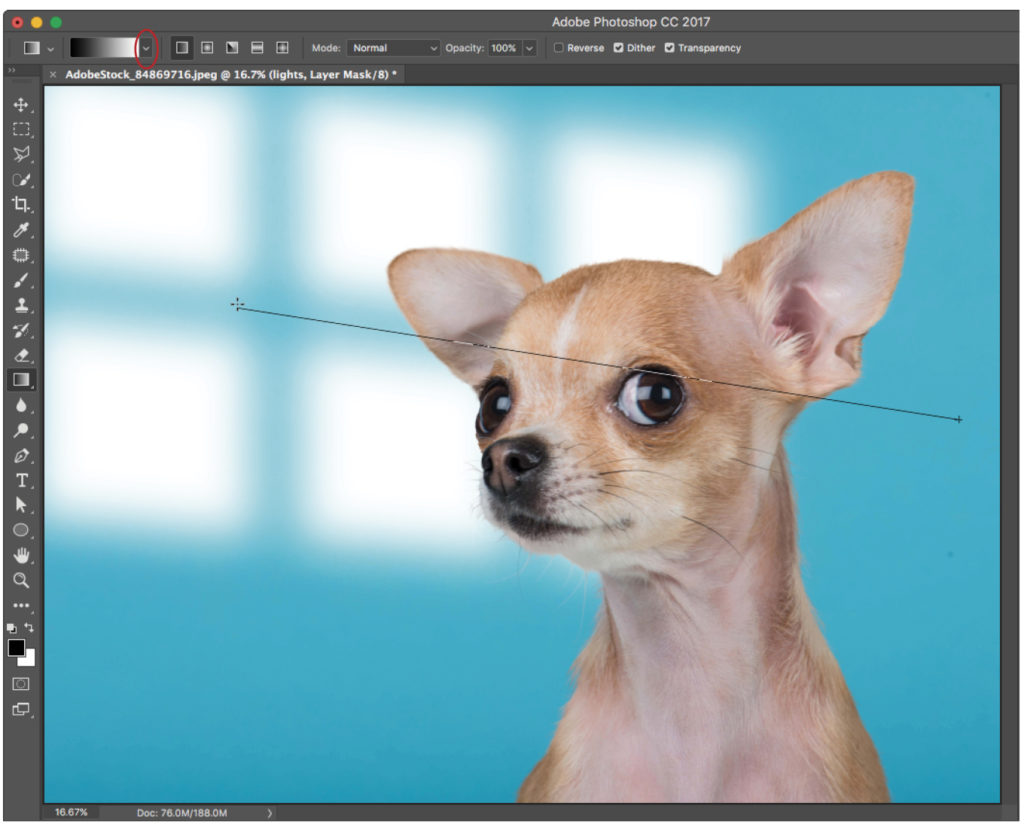
To fade the lights on one side or the other, add a layer mask to the lights layer by clicking the Add Layer Mask icon (the circle-within-a-square) at the bottom of the Layers panel (circled).

Step 10:
Press G to grab the Gradient tool (circled). In the Options Bar, click on the down-facing triangle to the right of the gradient thumbnail (also circled), and in the Gra-dient Picker, click on the third preset in the top row for a Black, White gradient. Set the Mode to Normal and the Opacity to 100%, then click on the Linear Gradient icon (the first icon to the right of the thumbnail). Click-and-hold down near the right edge of the document and drag toward the upper left, releasing your mouse button near the right edge of the left-hand panes.
Tip: Keep dragging until you’re happy with the results; Photoshop updates the mask as you go.
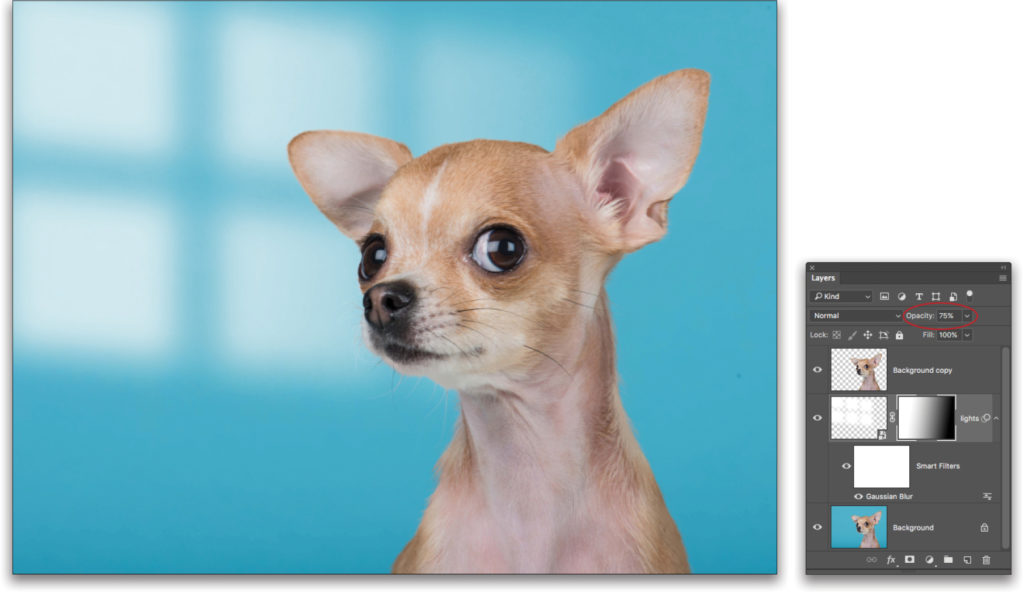
Step 11:
Adjust the Opacity setting, near the top of the Layers panel (circled), to around 75%. Here’s the final result.
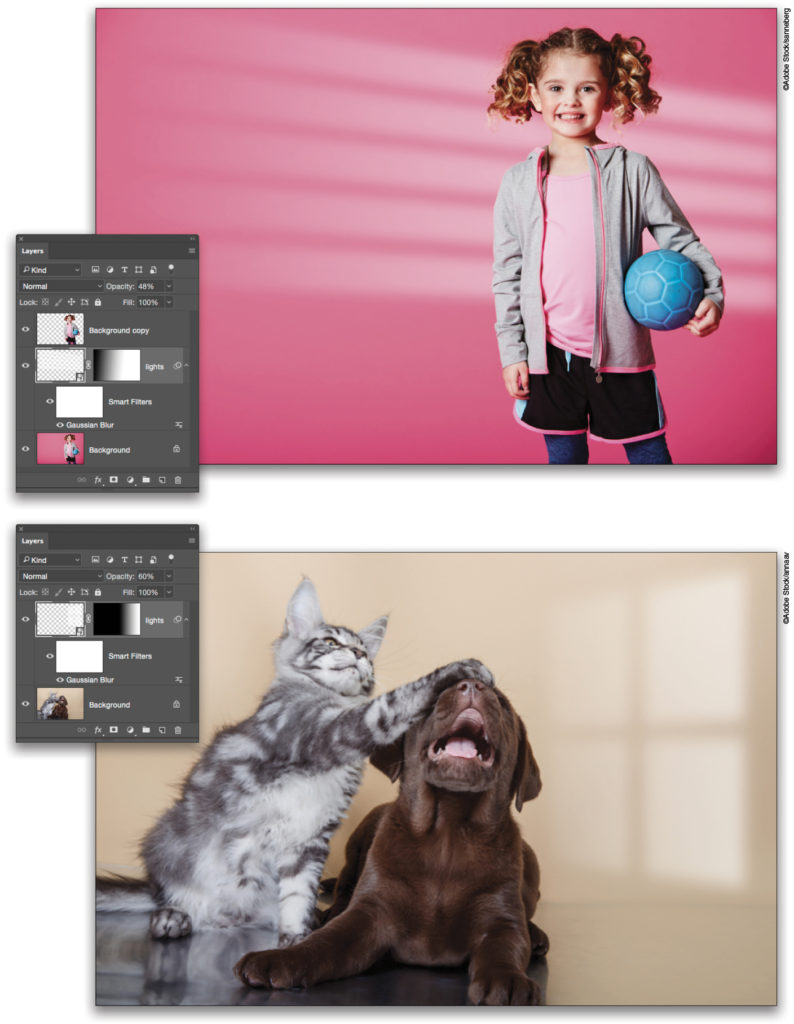
Happily, there’s no hard and fast rule regarding the shape or number of lights you can add behind or even beside your subject. Here are two more examples, complete with Layers panels.
Big thanks to Corey Barker for originally teaching me this technique. Until next time, may the creative force be with you all!
This article originally published in the April/May, 2017 issue of Photoshop User magazine.


