
This one is kinda hidden because you wouldn’t see it unless you opened multiple photos in Camera Raw, so do that first (open the frames that make up a pano). Select all the images in the Filmstrip along the left side of the window, and press Command-M (PC: Ctrl-M), or go up to the upper-right corner of the Filmstrip where you’ll see a little icon for a pop-out menu. Click on that and choose Merge to Panorama (as shown here). This brings up the Panorama Merge Preview window where you can apply the awesome Boundary Warp feature to fill in the gaps (make sure Auto Crop is turned off), and then click the Merge button. It will ask you to save the resulting file (which will be a DNG file if you started with RAW images), and then it will add this merged pano to the bottom of your Filmstrip, ready for you to start editing. 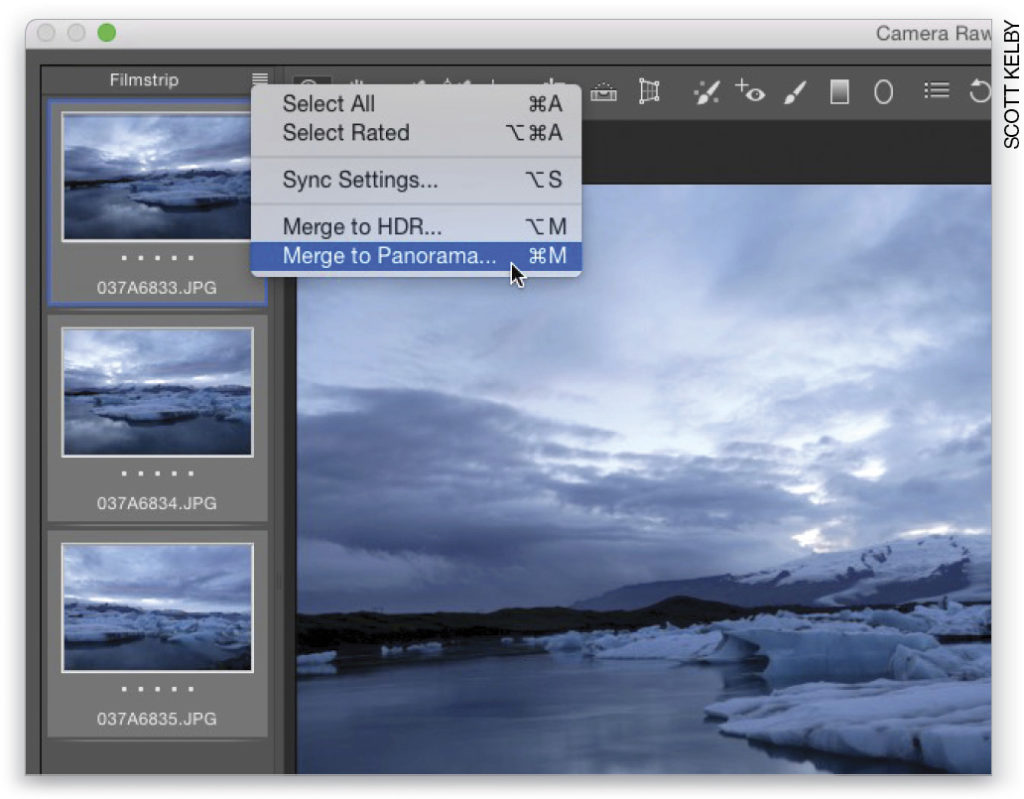
Excerpted from the October, 2016 Hot Tips issue of Photoshop User magazine.


