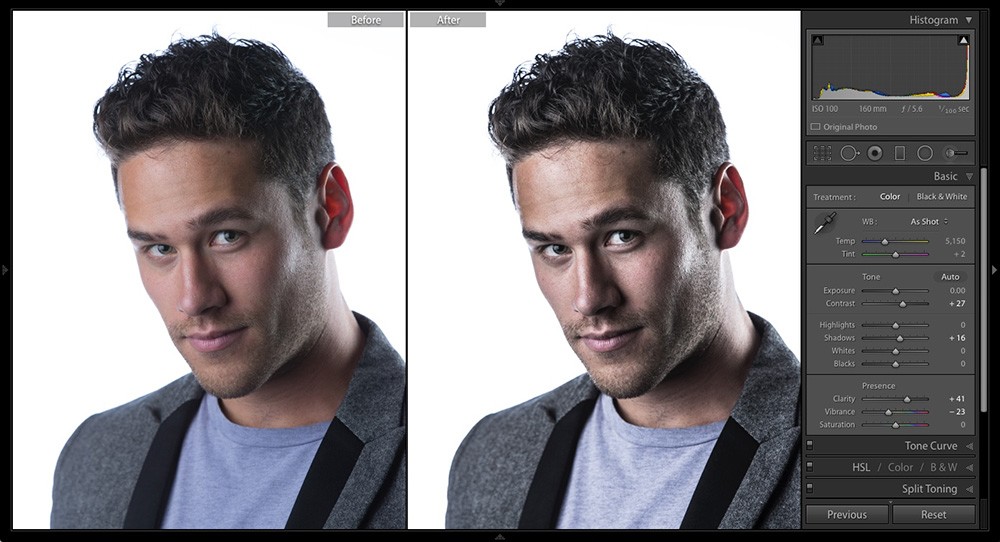
Here’s a quick and easy recipe for creating the trendy high-contrast portrait look in Lightroom. Go to the Develop module and start by increasing the Contrast (here, I increased it to +27), and then open up the Shadows a bit (here, I increased the Shadows to +16). But, the big things are the next two: (1) increase the Clarity quite a bit (it helps bring out the texture in the image; here, I dragged it over to +41), and then (2) drag the Vibrance slider to the left (I dragged it over to –23) to desaturate the image a bit (as seen below, in the After on the right). The settings shown here are for this particular image, but even if the numbers change a little bit for your image, the sliders are the same—add contrast, shadows, clarity, and desaturate a bit. Quick and easy!