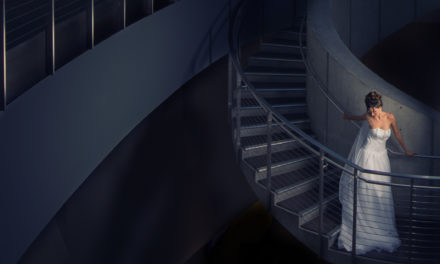
As you probably already know, shooting at the correct time of day is key in photography. But what if you were there at the perfect time, but you still couldn’t get the shot you wanted? What now? Well, let me show you a few steps to take your photo from boring to amazing. This is a formula you can use for any time of day, but it’s specially dedicated to the golden-hour mood. For this, I’ll bring you to Paris with me with a photo of the Arc de Triomphe du Carrousel, less famous than the Arc de Triomphe, but a beautiful monument in Paris, nonetheless.
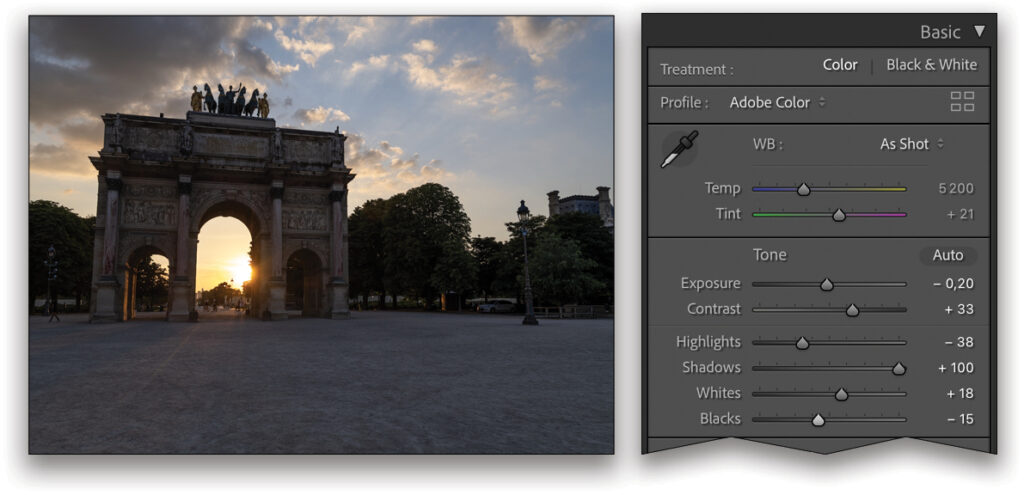
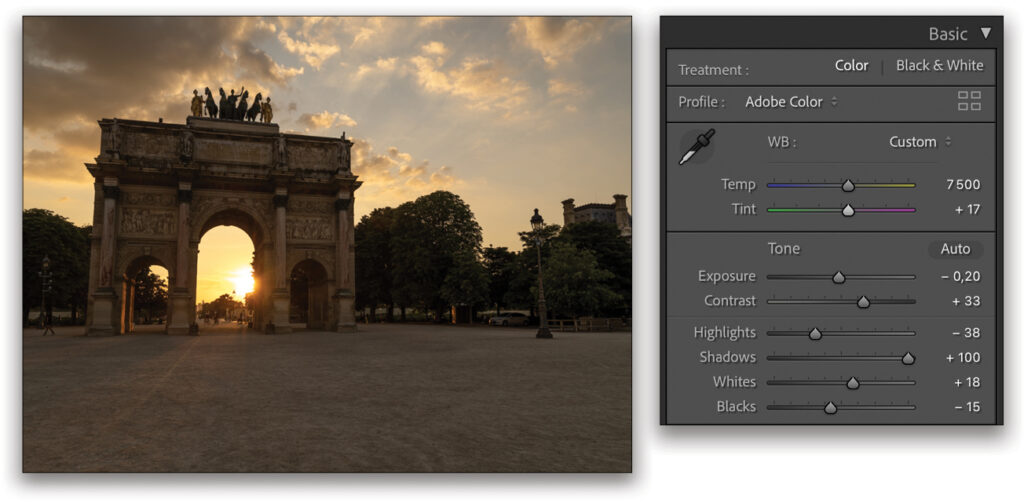
STEP ONE: First, in the Basic panel, we’ll start with the Exposure at –0.20. Next, I always set the Blacks (–15) and Whites (+18) sliders. Then we’ll open the Shadows (+100) and partially bring down the Highlights (–38), because the sun is included in the photo. If you bring it down too much, the sun will become too harsh. To finish with the Tone section, add a bit of Contrast (+33).
STEP TWO: Now we’ll use White Balance to give a very warm feeling to the photo. For that, we’ll choose Shade in the WB drop-down menu and add a bit more magenta by setting the Tint to +17.
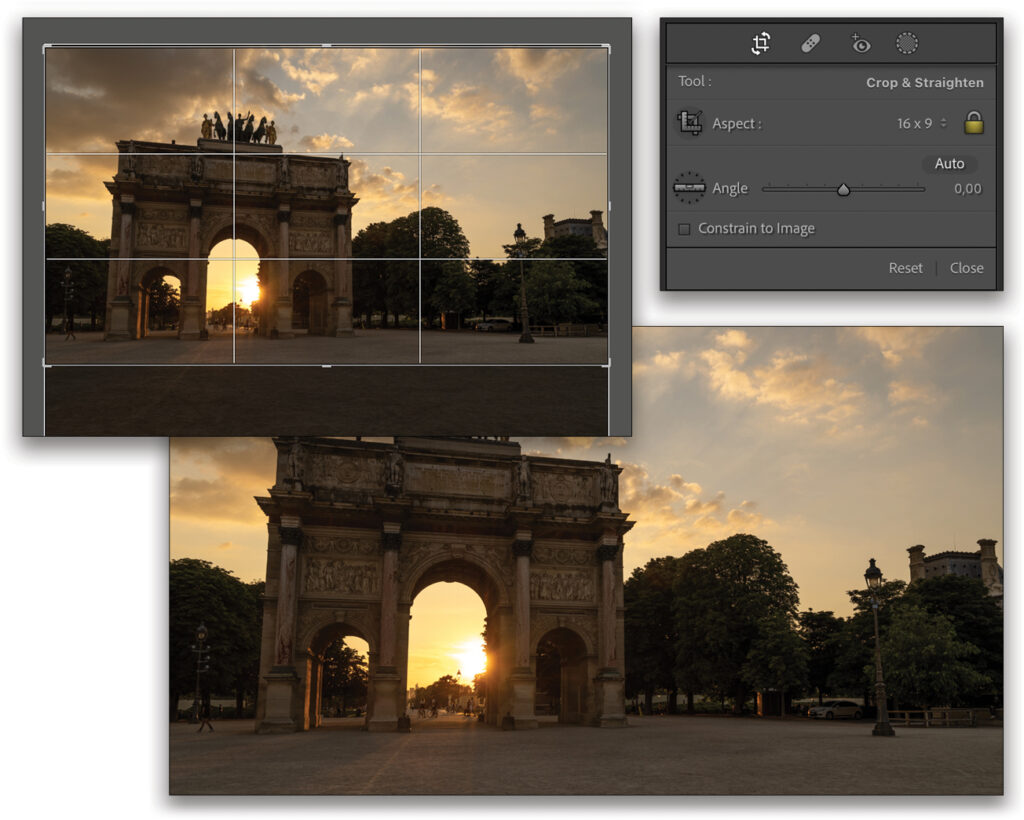
STEP THREE: Next we’ll grab the Crop Overlay tool (R), and set the Aspect ratio to 16×9, which will give it a more movie-like quality. We want to crop out a lot of the foreground, so we’ll drag the top of the image to align with the top of the cropping boundary. Press Enter to commit the crop.
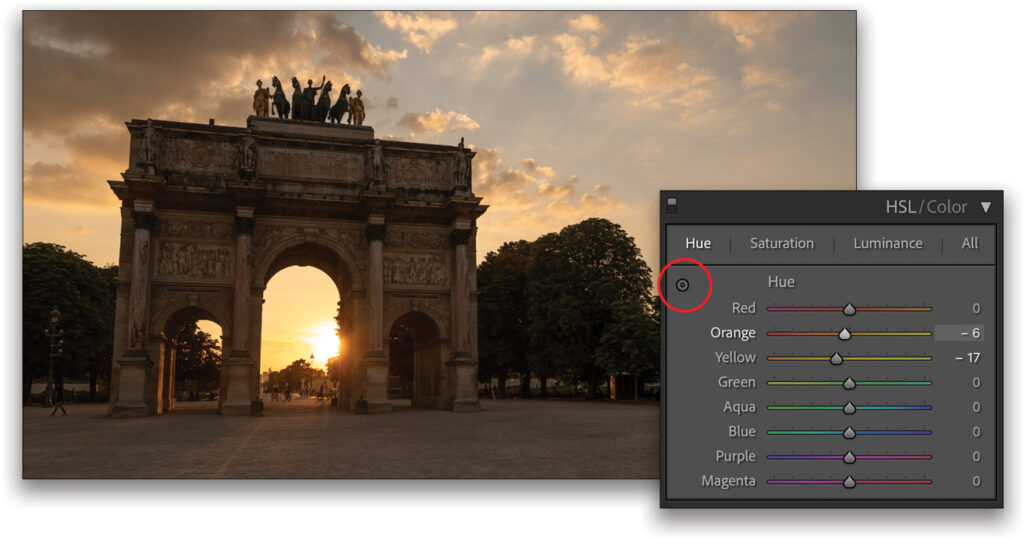
STEP FOUR: Let’s get into refining the colors in the HSL/Color panel. To make the sky a little more orange, we’ll click on the Hue tab, and select the Targeted Adjustment tool (the little circle at the top left of the Hue tab). By clicking-and-dragging downward near the sun, we can deepen those colors (Orange to –6 and Yellow to –17).
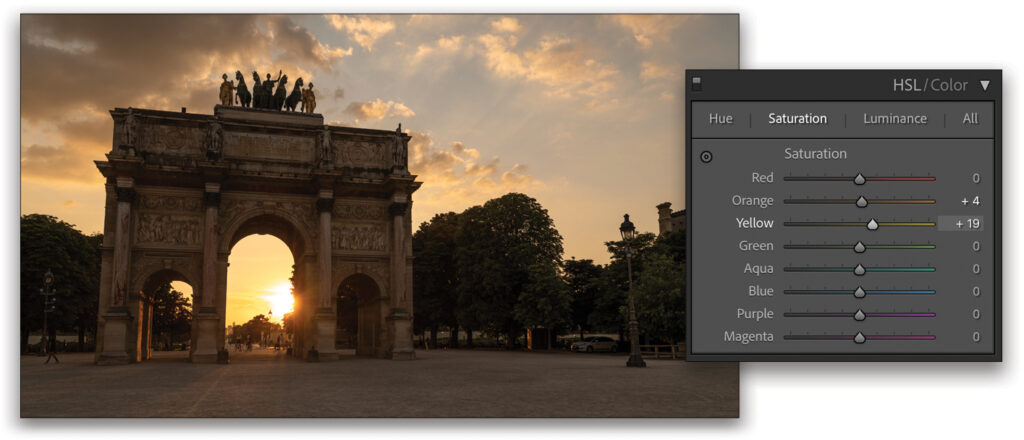
STEP FIVE: Then we’ll click on the Saturation tab in the HSL panel and, using the Targeted Adjustment tool again, click-and-drag around the sun upward to add a little more saturation in the sky (Orange +4 and Yellow +19).
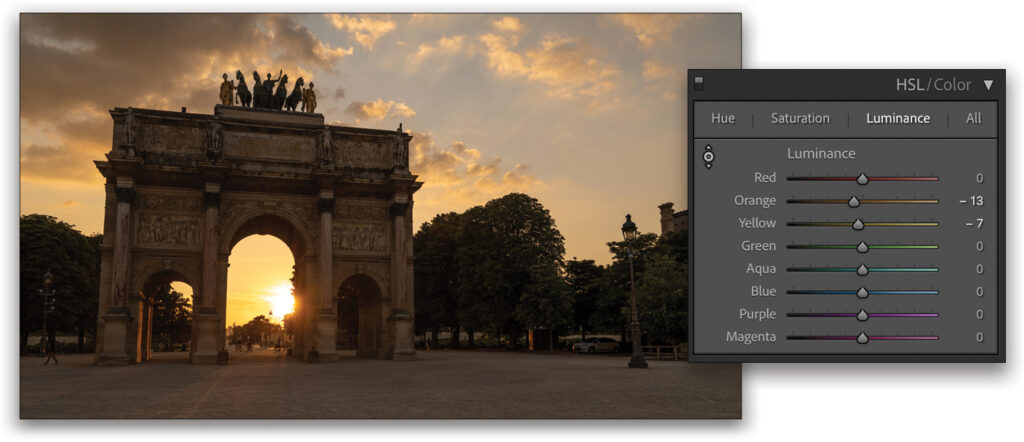
STEP SIX: Next, in the Luminance tab, we’ll click on the lighter part of one of the clouds in the sky with the Targeted Adjustment tool, and drag the mouse downward to darken the clouds and sky even more (Orange –13 and Yellow –7).
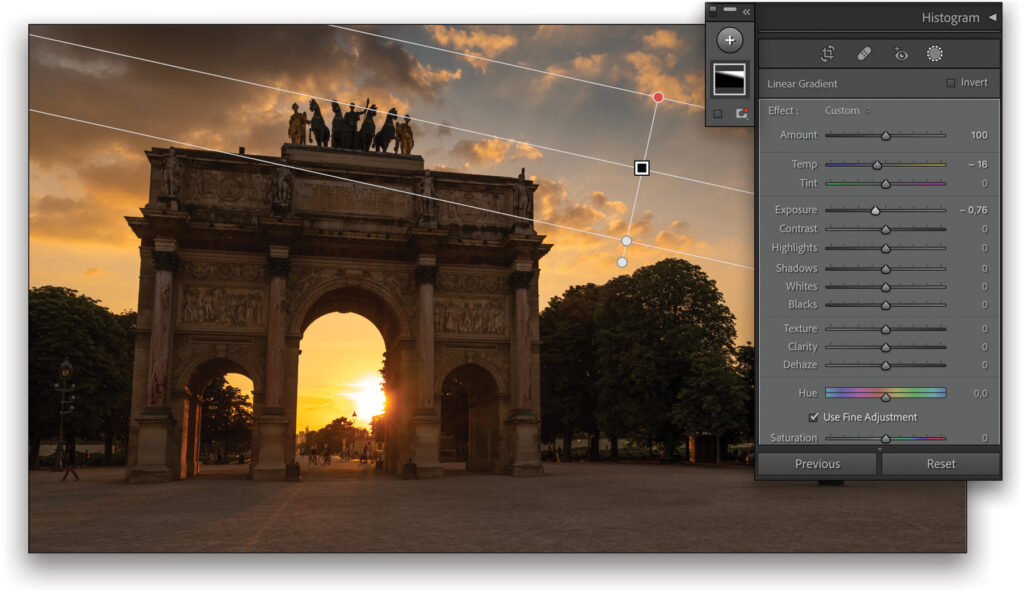
STEP SEVEN: Moving onto the next step, we’re going to do some dodging and burning. I usually darken the very top of the sky with a Linear Gradient (Exposure –0.76) to close the photo. We added some blue as well (Temp –16). To add a Graduated Filter, click on the Masking icon (gray circle with dotted outline), select Linear Gradient, and click-and-drag in your image.
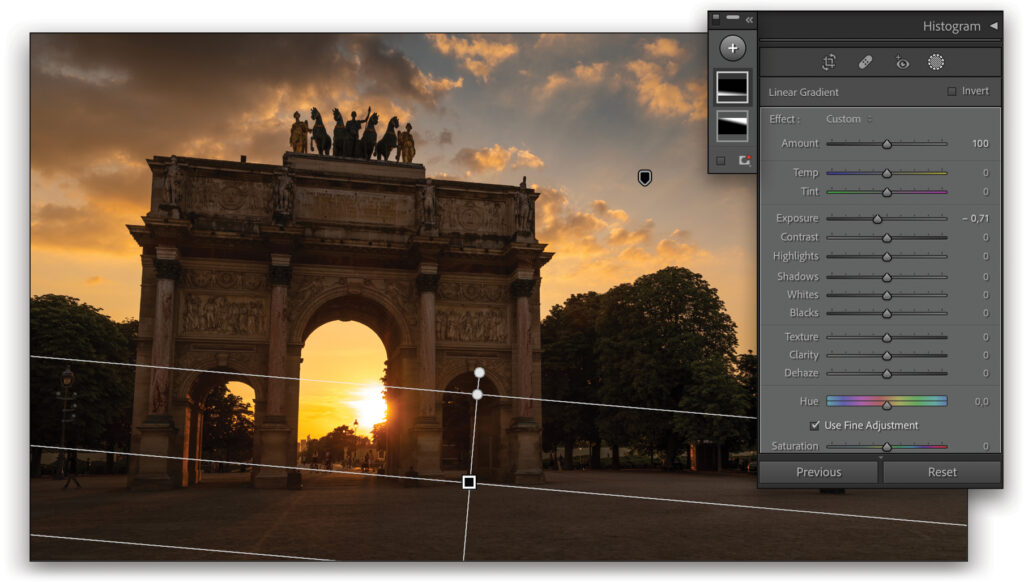
STEP EIGHT: At the top of the Masks panel, we clicked Create New Mask icon (+) and selected another Linear Gradient. We added this Linear Gradient at the bottom of the photo to darken it (Exposure –0.71). The two Linear Gradients help focus the viewer’s eyes inside the photo.
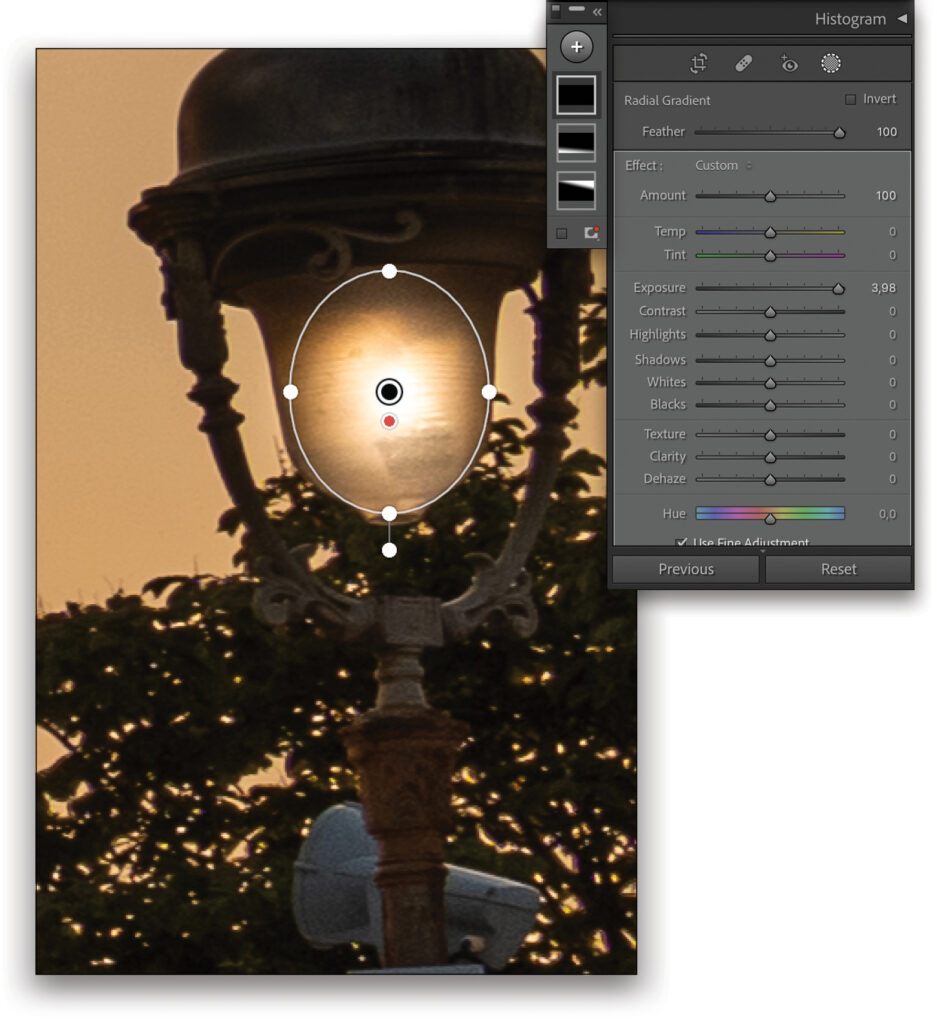
STEP NINE: We clicked the Add New Mask icon at the top of the Masks panel again but, this time, selected Radial Gradient. We set the Feather amount to 100, drew a gradient around the area of the lightbulb on the lamppost on the right side of the image, and added a very strong Exposure value (3.98) to turn on the lamp.
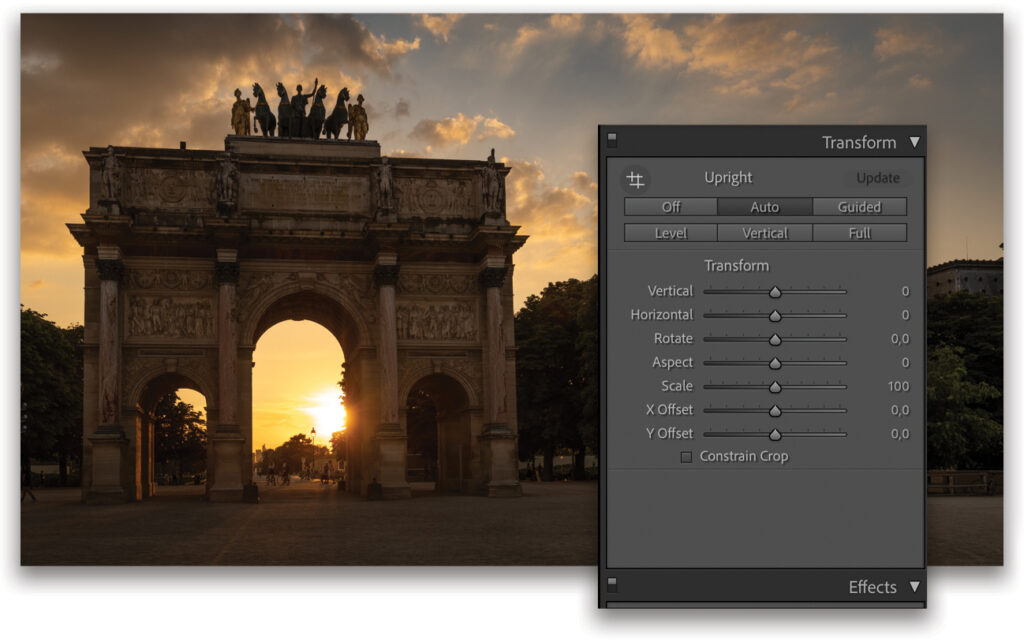
STEP 10: To finish, let’s do a couple final touches. First, we went to the Transform panel and clicked on Auto to level the horizontal line.
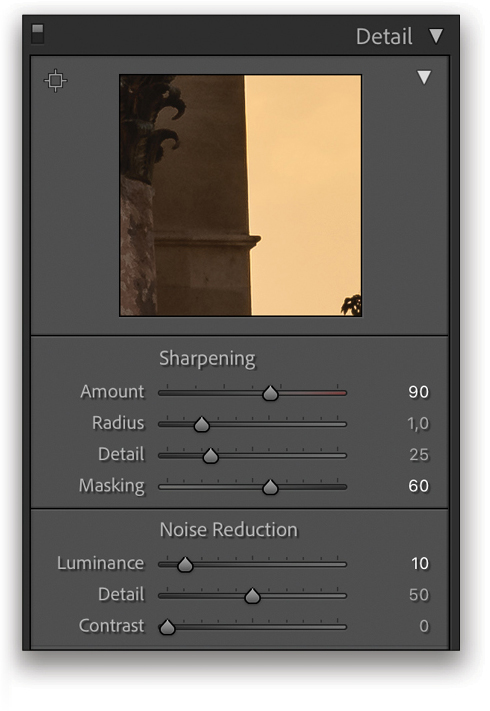
STEP 11: Finally, in the Detail panel, let’s sharpen the photo, which was taken at ISO 100. I personally sharpen images using this formula: the Amount of Sharpening plus the Luminance Noise Reduction should add up to 100. So here, let’s put the Amount of Sharpening at 90 and Luminance Noise Reduction at 10. Setting the Masking to 60 will limit the area of sharpening to the finer details in the image.
Here are the before and after images so you can see what a big difference just a few edits in Lightroom can make.
Now, you no longer have an excuse not to retouch your golden-hour photos. Using these simple tools and techniques can transform your photo from boring to amazing. Have fun shooting and retouching!
This article originally published in the November, 2022 issue of Photoshop User magazine.
About Photoshop User and KelbyOne
Photoshop User magazine comes out digitally 12 times a year and is part of KelbyOne, the leading educational resource for Photoshop, Lightroom, and photography. Pro members have access to more than 900 video courses and 100 back issues of Photoshop User. To learn more about KelbyOne, click here.