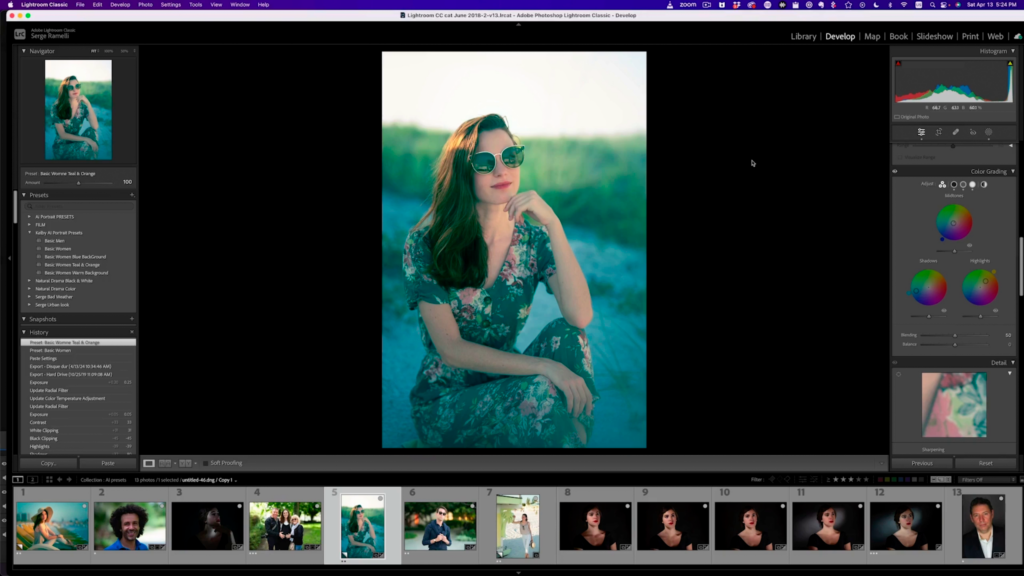
Lightroom’s AI-powered presets are a game changer. Once set up, they allow you to apply professional-grade adjustments in just one click, saving you time while ensuring consistency. In this tutorial, Lightroom expert Serge Ramelli walks us through creating a basic adaptive preset for women’s portraits, then shows how to use that as a base for a “Movie Look” AI Adaptive Preset, making portraits pop with Hollywood-inspired color grading.
Step 1: Setting Up AI-Powered Masks
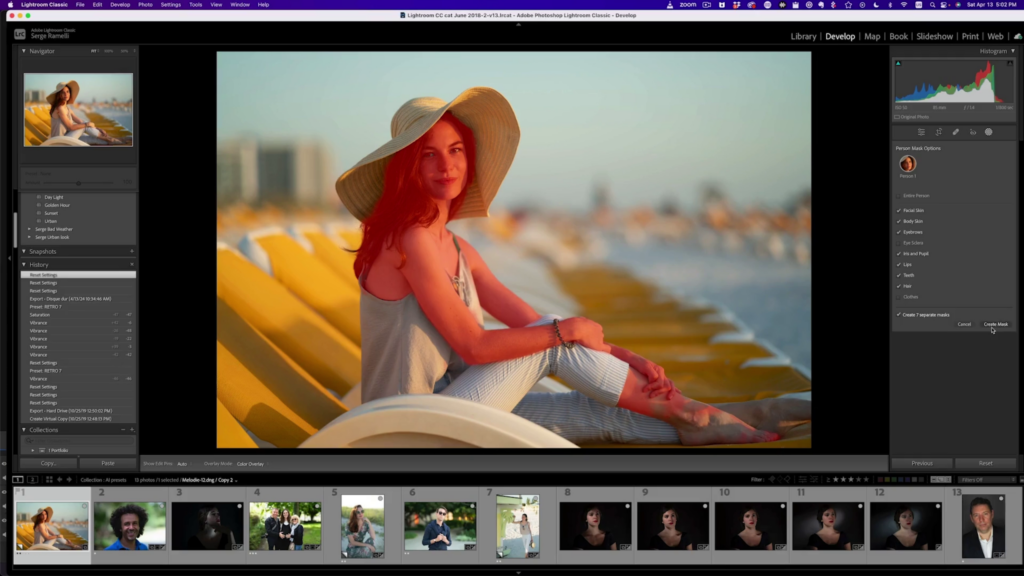
Instead of making manual adjustments, Lightroom can now detect facial features and create automatic masks. Here’s how:
- Select a portrait and go to the Masking Panel.
- Lightroom will detect the subject—click on the person to refine the selection.
- Choose specific facial features to mask:
- Facial Skin
- Body Skin
- Eyebrows
- Iris & Pupil
- Lips
- Hair
- Rename each mask (e.g., Hair, Lips, Eyes) to keep things organized.
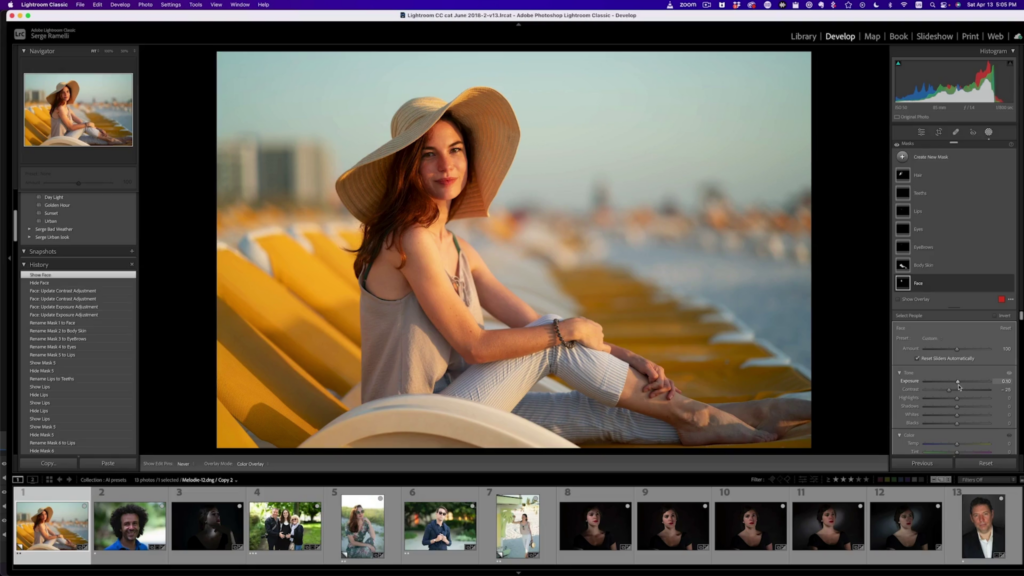
Step 2: Retouching the Portrait
Now that we have separate masks for different facial features, we can fine-tune each one for a polished look:
- Face: Increase exposure (+0.1), reduce contrast (-25), and apply slight clarity reduction for smooth skin.
- Body Skin: Similar to face adjustments, but even subtler.
- Eyebrows: Darken slightly for definition.
- Eyes: Brighten by +0.2 (careful not to overdo it!).
- Lips: Increase saturation for a natural boost.
- Hair: Add contrast for texture.
Before and after, you’ll see subtle but impactful changes—smoother skin, brighter eyes, and more defined features.

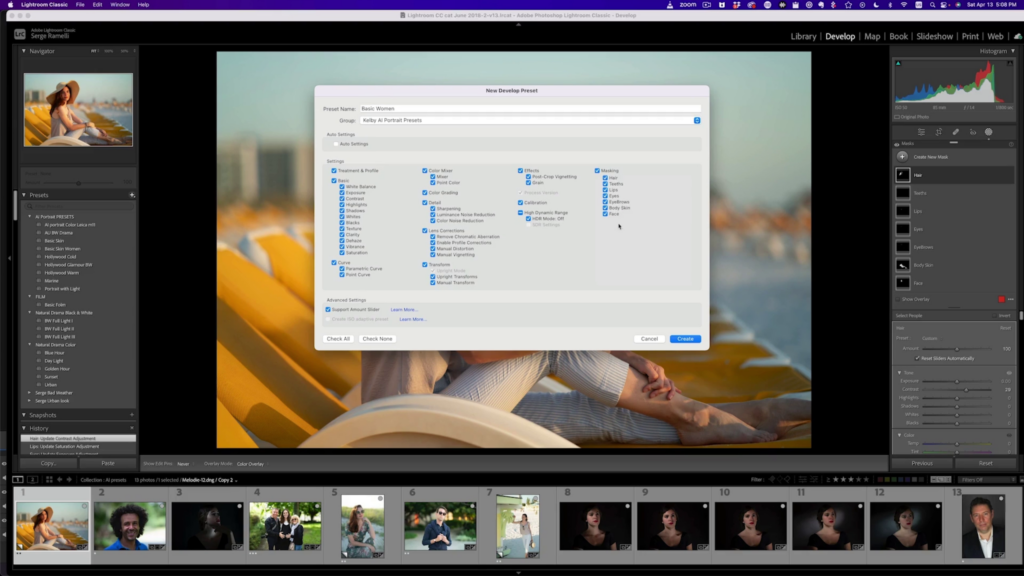
Step 3: Creating an AI Portrait Preset
Now that the portrait is looking great, let’s save these adjustments as a custom AI preset:
- In Develop Mode, go to the Presets Panel.
- Click Create Preset and select all applied masks.
- Name it something memorable (Basic Women Preset).
- Save it under a new group (Kelby AI Portrait Presets).
Now, you can apply these adjustments to any future portraits instantly!
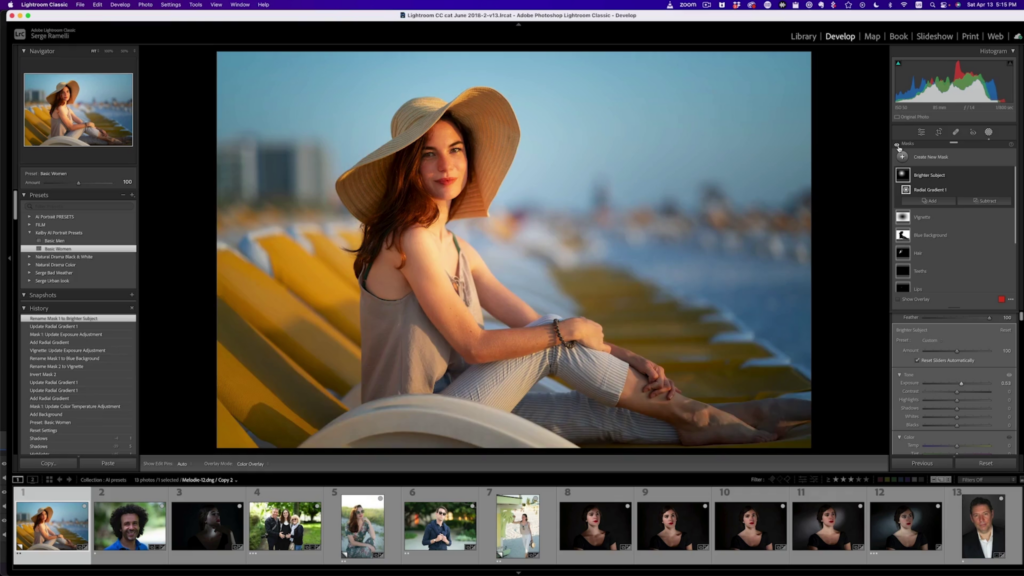
Step 4: Customizing Background, Brightening the Subject & Adding Vignettes
Want to add drama? Lightroom allows easy background adjustments:
- Create a new mask and select Background (AI detects it automatically).
- Adjust the background color:
- Cool blue for cinematic contrast.
- Warm orange for a sunset vibe.
- Add a vignette effect:
- Use a radial gradient to darken the edges while keeping the subject bright.
- Invert the mask to ensure the effect applies outside the subject.
- Brighten the subject:
- Add another radial gradient centered on the subject.
- Increase exposure slightly to make them stand out.
- Save this preset:
- Click Create Preset and name it Basic Women Blue Background.
- Ensure all local adjustments are selected so it can be applied consistently.
Now, you can apply this preset to any image for an instant dramatic look with a blue-toned background.
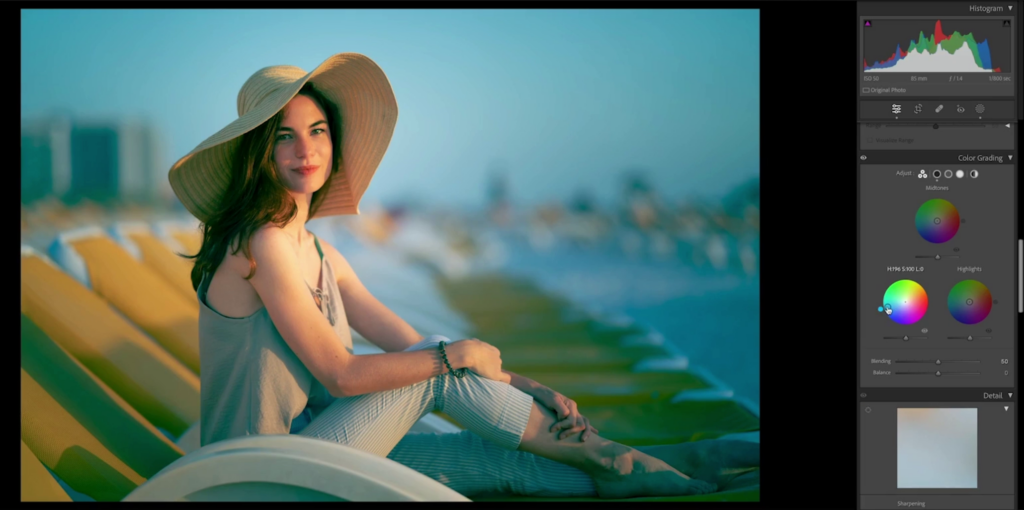
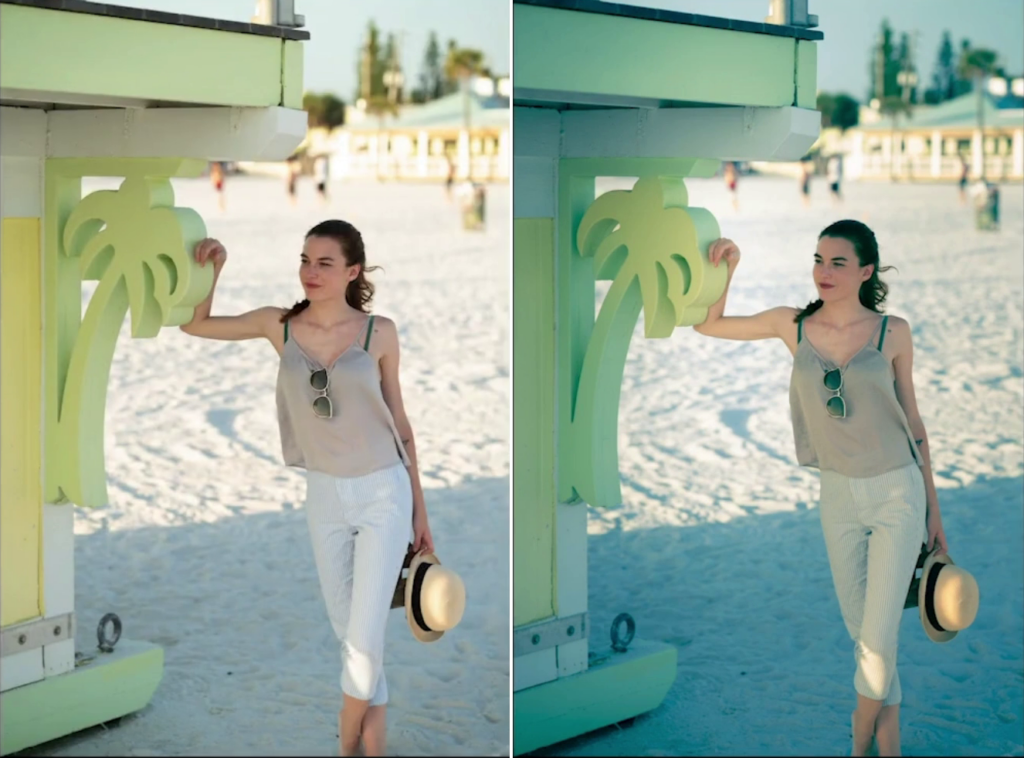
Step 5: Adding a Cinematic Teal & Orange Look
Ever noticed how Hollywood films use teal and orange tones?

This color contrast makes skin tones pop!
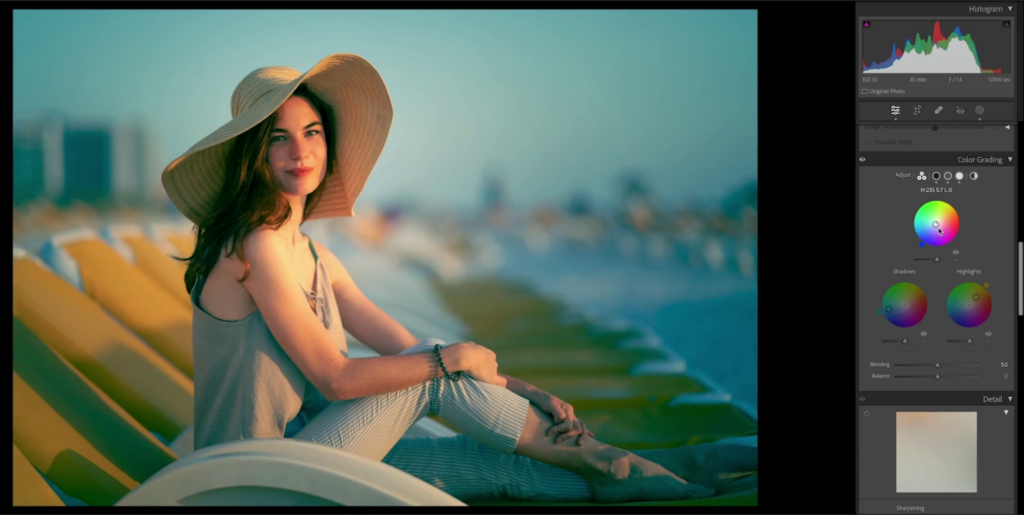
- Why Teal & Orange?
- The human skin tone naturally falls in the orange range of the color spectrum.
- Teal is the complementary color to orange, meaning it sits directly opposite on the color wheel.
- By adding teal to the shadows and orange to the highlights, subjects stand out dramatically against their backgrounds—a common technique in blockbuster films like Transformers and Mad Max.
- Open the Color Grading Panel.
- In Shadows, add a deep teal tone.
- In Highlights, add a warm orange tone.
- Keep Midtones neutral or subtly adjust as desired (slightly blue here).
This adjustment mimics the Hollywood blockbuster look and adds cinematic depth to portraits.

Step 6: Saving & Applying the Cinematic Preset
Once satisfied with the teal & orange grading, save it as a new preset:
- Click Create Preset again.
- Name it Basic Women Teal & Orange.
- Ensure all local adjustments are selected.
- Apply it instantly to other images for a consistent look.
Final Thoughts
With these AI-powered Lightroom presets, you can transform portraits effortlessly. Whether you want a natural beauty retouch or a cinematic film look, these presets speed up your workflow and deliver pro-level results in a click. Try it out and elevate your photo editing today!
Mark your calendars because the KelbyOne Lightroom Conference is back, May 13–14, 2025. Join us for two action-packed days of Lightroom learning, inspiration, and insider tips. Master the tools, tricks, and techniques that will transform your workflow and take your edits to the next level—live and online! Secure Your Spot Now!