Have you ever used the selection tools in Photoshop to create a mask, only to see that your cutout is looking a little transparent in areas with pinholes peeping through in the whites and blacks? We all hate those pinholes. To view the mask, hold down the Option (PC: Alt) key and click on the thumbnail for the mask in the Layers panel. You’ll now see your black-and-white mask in the document. If you have pinholes and/or semi-transparent areas, they’ll be visible as specks and gray areas on the mask. You can touch up the mask with the Brush tool (B) set to either black or white, which is usually a good method.
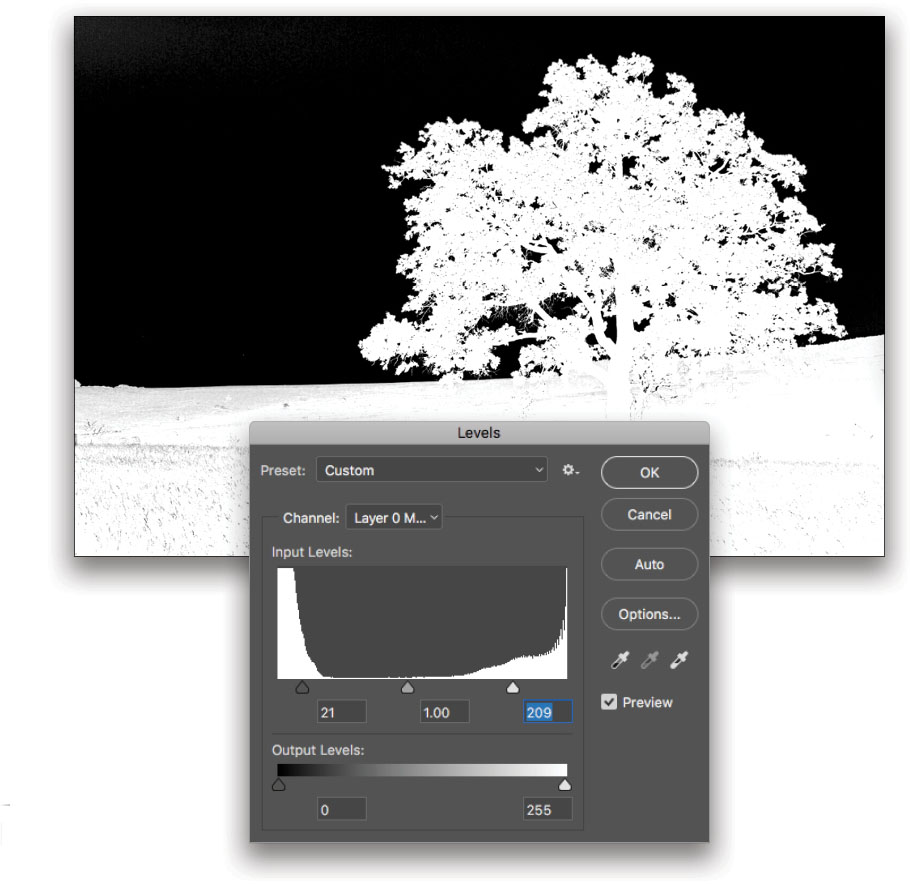
Here’s another way to easily fix them: With the mask visible in your document, press Command-L (PC: Ctrl-L) to bring up Levels. Drag the black triangle below the histogram toward the middle to clean up the blacks and drag the white triangle toward the middle to clean up the whites. This should do it; however, if your pinholes are really stubborn, double-click the mask thumbnail to open the Masks options in the Properties panel and add a tiny amount of Feather to really get things moving.
This tip originally published in the August, 2017 issue of Photoshop User, in the Photoshop Tips column by Colin Smith.