I was recently traveling through Atlanta with an extra day on my hands, so I decided to visit one my favorite shooting locations in the area, Old Car City. This is no ordinary junkyard of old cars. I’d call it the best place to photograph vintage automobiles in the U.S. Imagine more than 4,000 vintage cars and trucks nestled in a beautiful hardwood forest covering 34 acres, with six miles of trails. Incredible!
But I had a problem. As much as I like to photograph in available light, I really wanted to use multiple speedlights to light up the cars and create a unique image. Since I only had one speedlight with me, it seemed like creating an image with four to six flashes was out of the question. Or was it?
Technology to the rescue! Most flash systems have the ability to use a radio trigger, which eliminates the need of line of sight between flash and camera. This allowed me to hide my speedlight under bumpers and behind doors. And most critical, my camera has a Multiple Exposure Mode. This mode allows me to shoot multiple frames and combine them all into one perfect exposure. All I had to do was move the flash during each frame to illuminate a different area in the shot. Speedlight multiple exposures work, and can save the day when you only have one flash to use. Let’s see how this technique works.
Step One:
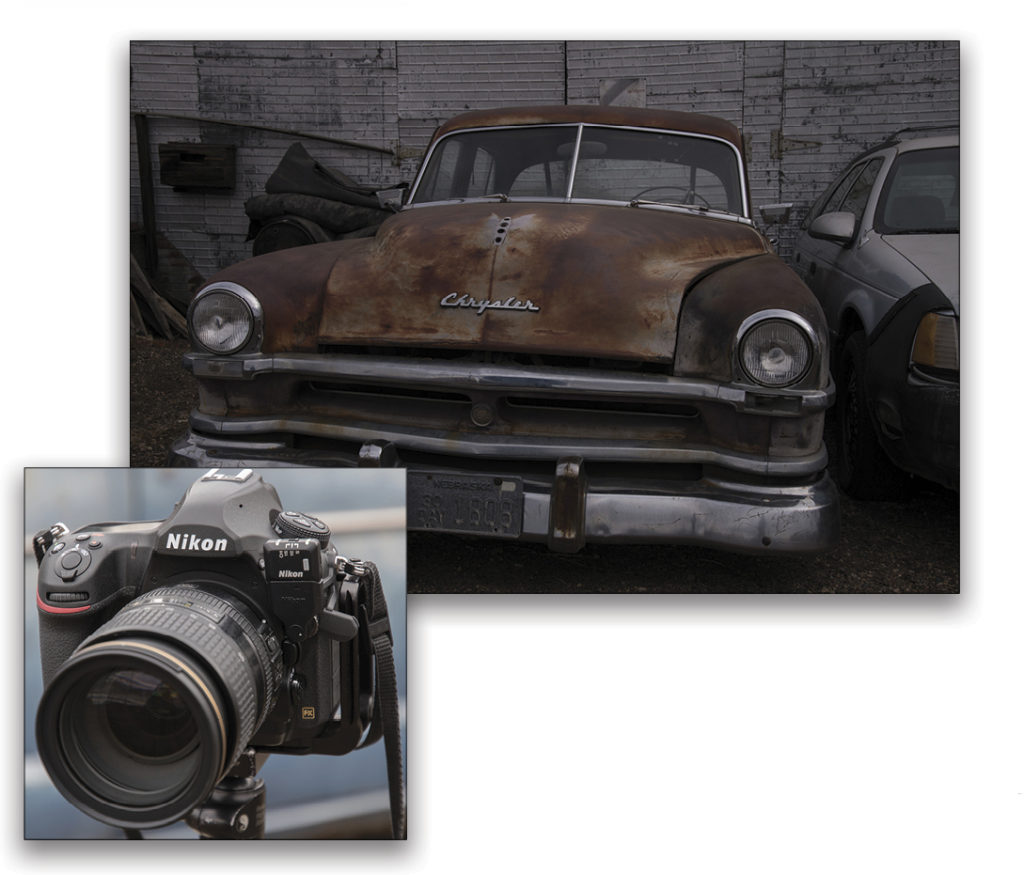
For this shoot, I photographed my favorite car in town, a vintage Chrysler. I’m not a classic car collector by any stretch, but I swear when I drive by this car, it just smiles at me. I’ve photographed this Chrysler many times, and each time I get something unique and different. Since I was only using one flash, my photo bag was light. I brought along my Nikon D850, a WR-R10 Wireless Remote Controller (radio transceiver), and some gels.

I also brought a small light stand with a speedlight mount and the small ground stand that came with my flash. Fortunately, that day was overcast. Darker conditions would reduce glare and hotspots on the chrome, and make it easier (less power) for my speedlight to overpower the ambient light. My SB-5000 was going to get a workout.
Step Two:
The first step was determining the daylight exposure. I set my camera in manual mode and determined an exposure that would be one stop underexposed. Underexposing the ambient light would make areas with flash more obvious in the frame. Next, I chose a low perspective close to the car to eliminate nearby distracting elements.
Since I was going to be moving around a lot during the exposure, I placed my camera on a tripod and established sharp focus on the car. Finally, I attached the WR-R10 Wireless Remote to my camera. This radio transmitter works without line of sight that, as I mentioned earlier, was critical for this shoot. Many of my SB-5000 placements would be behind or under the car, so an optical transmitter wouldn’t have worked.
Step Three:
Now I had to set up Multiple Exposure Mode in my camera. In the Shooting menu on my D850, I chose Multiple Exposure Mode, then I chose Average in the Overlay Mode. This mode blends the frames together evenly, and works great with flash. Next, I set the Multiple Exposure Mode to Series. This setting ensures that my camera would keep creating multiple exposure images. Use the On (Single Photo) setting when you’re only going to shoot one multiple exposure. The last choice to make in this menu is how many frames to shoot for the exposure. My D850 can shoot as many as 10 frames, but I decided to start with a four-frame multiple exposure.
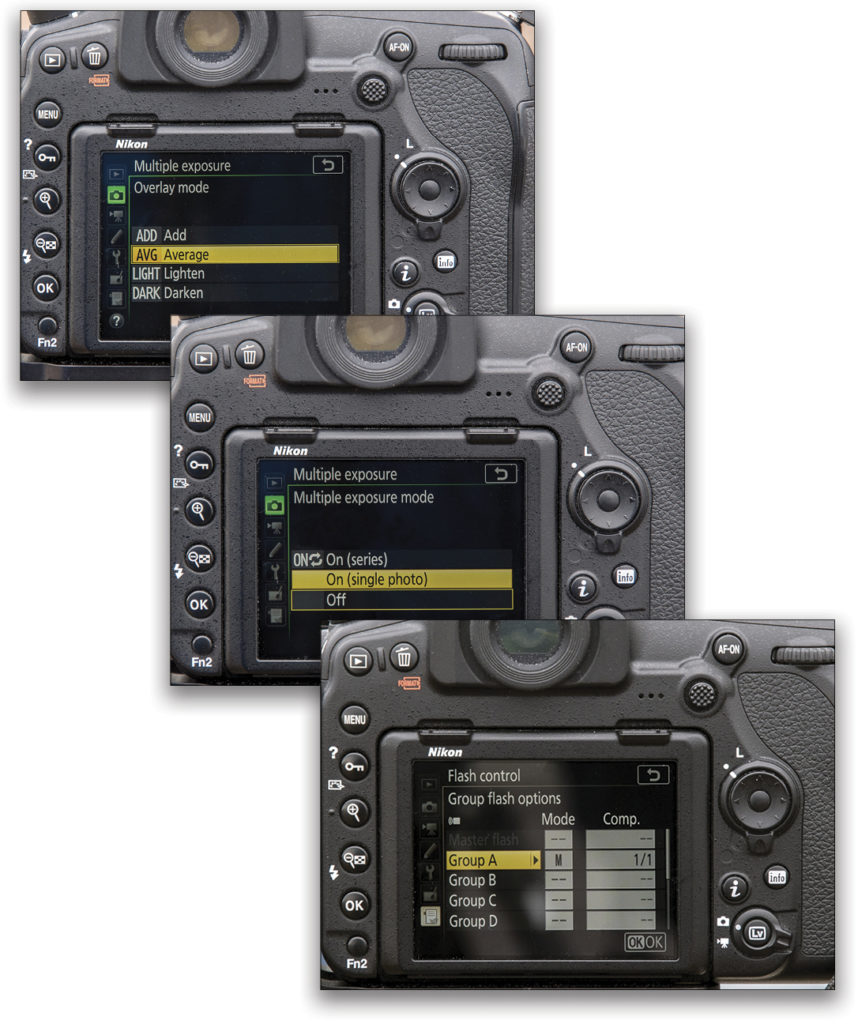
With Multiple Exposure Mode set, a small black square icon appears on the top LCD panel, which is very handy to make sure you’re still shooting in Multiple Exposure Mode. Finally, I set my SB-5000 to manual mode. I’ve found TTL flash exposure is inconsistent when you’re photographing small parts of a car, especially shiny chrome. To get things started, I set my SB-5000 to 1/2 power.
Step Four:
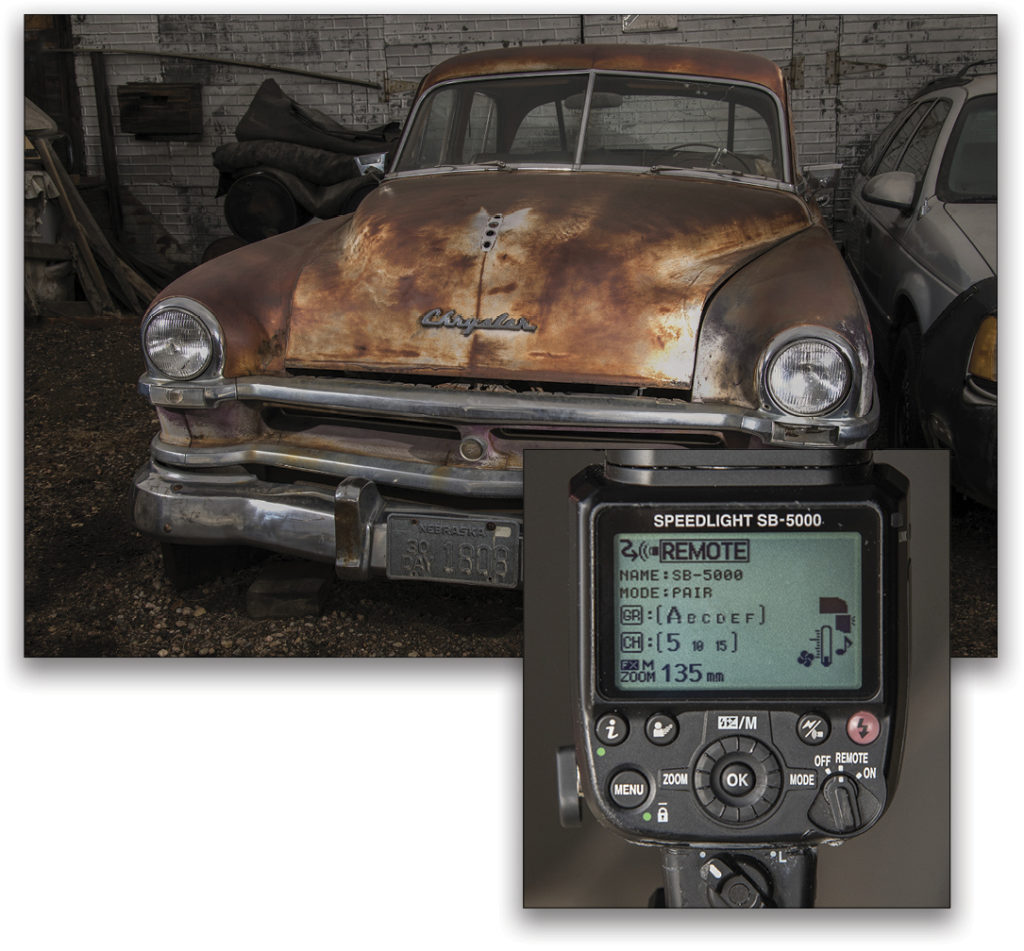
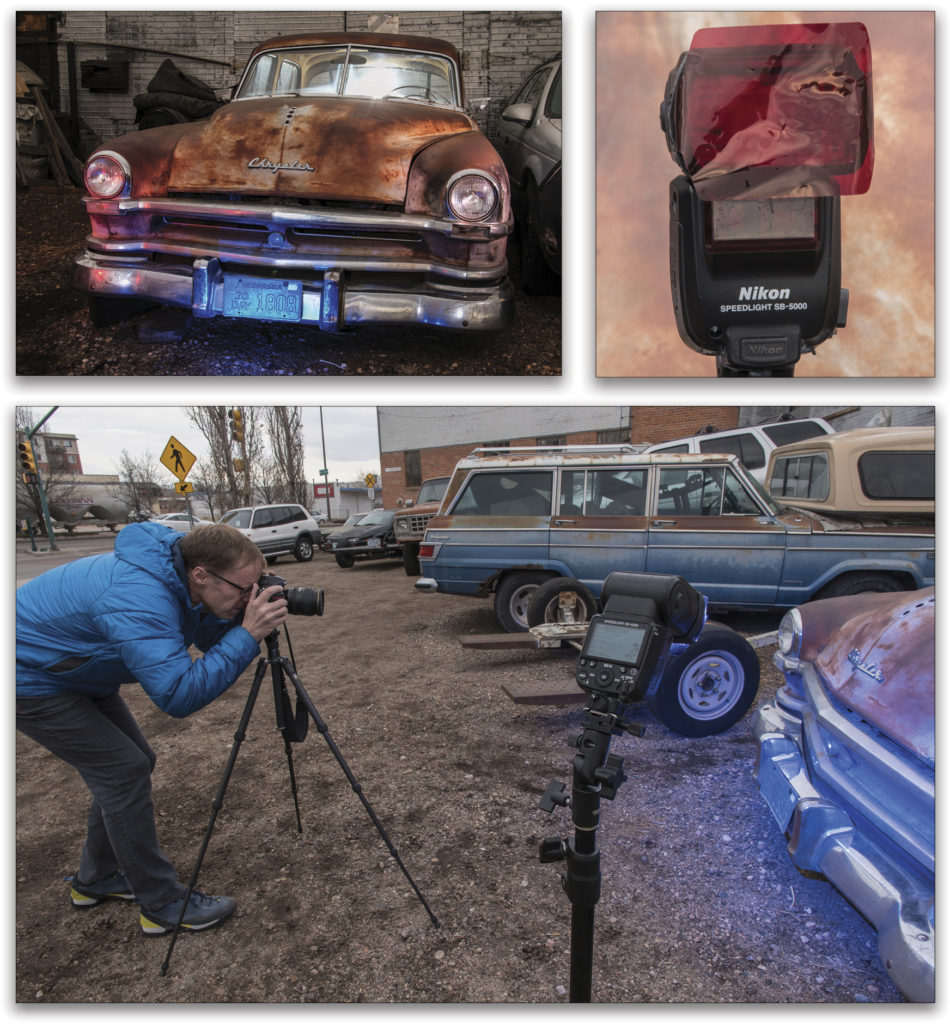
Time to photograph. I like to visualize my flash image to help guide me where to use flash during my multiple exposures. For my first image, I decided to keep it simple with a four-frame multiple exposure. I attached my SB-5000 to my light stand, set the zoom range to 135mm, and decided to illuminate the front left, front right, top, and the back window of the car.
Each time I took an image, I’d grab the light stand and move it into a new position for the next frame. For the last frame, I switched the SB-5000 from the light stand to the ground stand and placed it on the trunk aiming at the camera through the back window. After shooting the four frames, the camera blended the shots into one final image illuminated in four different areas by the speedlight. Everything was looking good. But I wanted to spice up the shot.
Step Five:
I wanted to add some color to my image, so I decided to use colored gels on the speedlight. I use Rogue gels, which are simple precut gels that I attach to my speedlight using a rubber band. Now not only would I be moving my flash each frame, but I’d also be switching gels. Multiple Exposure Mode automatically turns off in about 30 seconds, so I had to move quickly. Luckily, the D850 has a setting (C2 Standby Timer) so I could extend the time between frames and avoid sprinting between flash placements.
I added blue to the flash for the license plate, and zoomed the speedlight to 200mm to narrow the beam of light (I kept it at 135mm for the other shots). I used a red gel for the headlights, and no gel for the back window. To adjust flash power, I simply moved the flash closer or farther away from the car. Reviewing my first gelled shot, I liked the results, but noticed there were still some dead areas in the frame, especially under the front bumper.
Step Six:
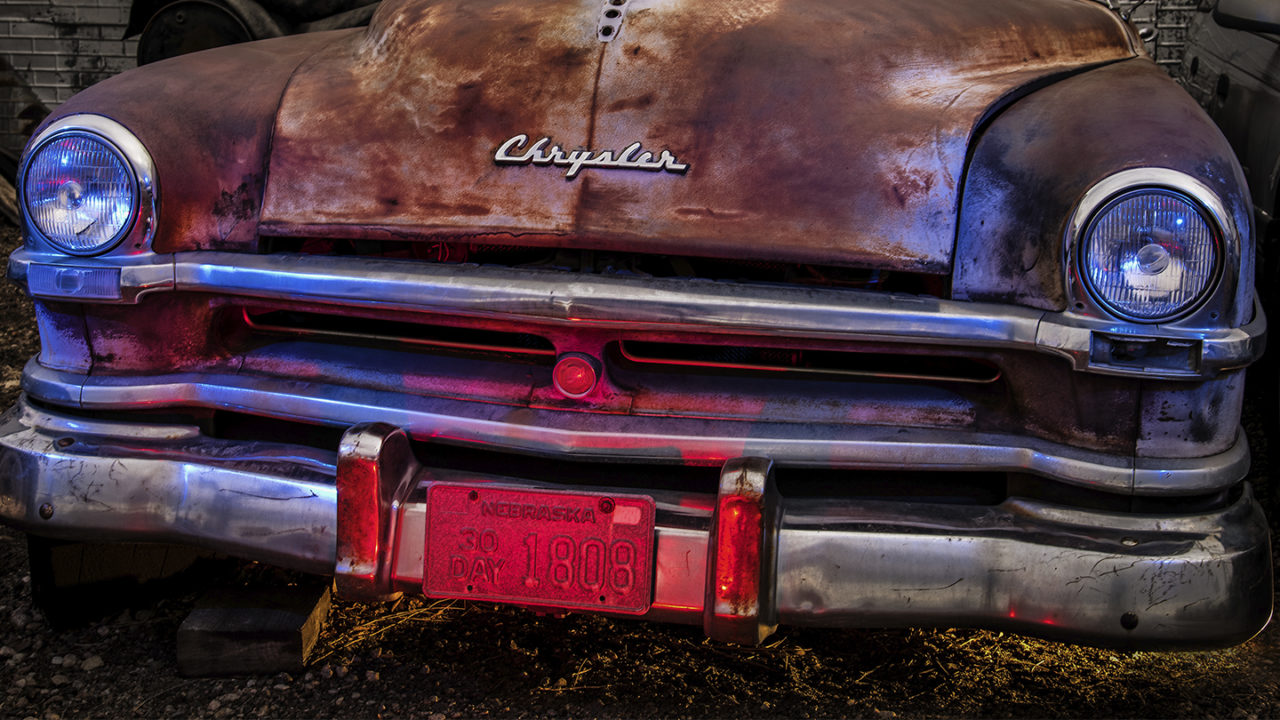
Time to really go wild. For my final shot, I did a seven-shot multiple exposure. I decided to switch some colors, and add a new color. First, I added an orange-gelled flash to fire under the front bumper to add some contrast and color. Next, I switched the gel to red, and shot with the flash set to 200mm to illuminate the front license plate. Then I moved this light to shoot the back window, and set the zoom to 24mm to better flash the car interior.
I decided to switch some colors, and add a new color. First, I added an orange-gelled flash to fire under the front bumper to add some contrast and color. Next, I switched the gel to red, and shot with the flash set to 200mm to illuminate the front license plate. Then I moved this light to shoot the back window, and set the zoom to 24mm to better flash the car interior.
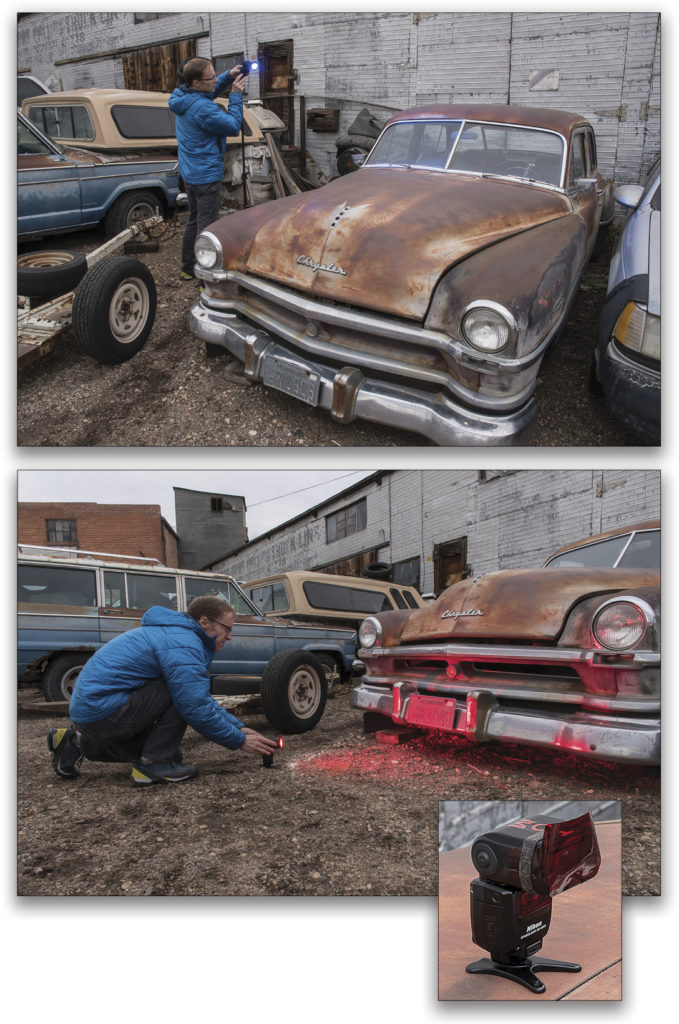
After this image, I put on a blue gel, zoomed back to 135mm, and flashed the left side headlight, the left side roof, and then the right side headlight. For the final, seventh frame, I moved the flash to the right side, took off the blue gel, and flashed the top right side of the car. Whew! My Fitbit told me I was logging hundreds of steps!
I had created an image that looked like it was lit by seven flashes, but in reality it was lit seven times by one flash and merged together as a multiple exposure. Make sure you bring extra batteries, because you’re going to need them!
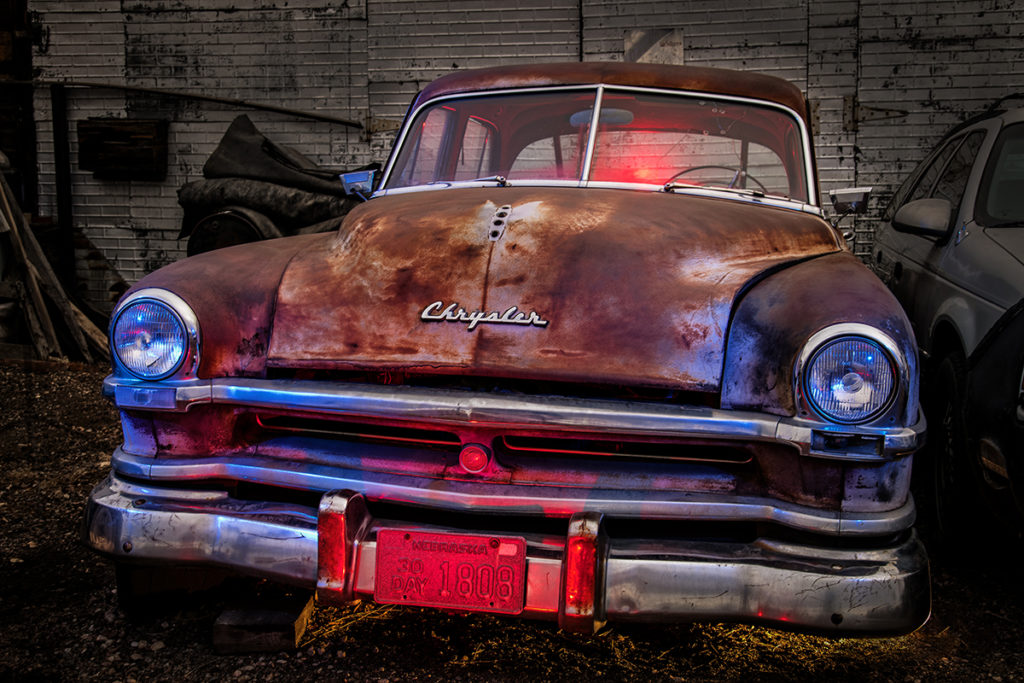
I used to think multiple exposure was more of a creative abstract effect than a useful photography tool. But seeing the results using a single speedlight to light multiple areas in one frame has opened up new possibilities in my photography. The next time you find yourself with only flash, don’t forget “speedlight multiplicity.” You can light up as many areas in your image as you have frames in your multiple exposure setting. If you want to learn more about this technique, join me on my Old Car City workshop this fall. You’ll be amazed at what you can create!


