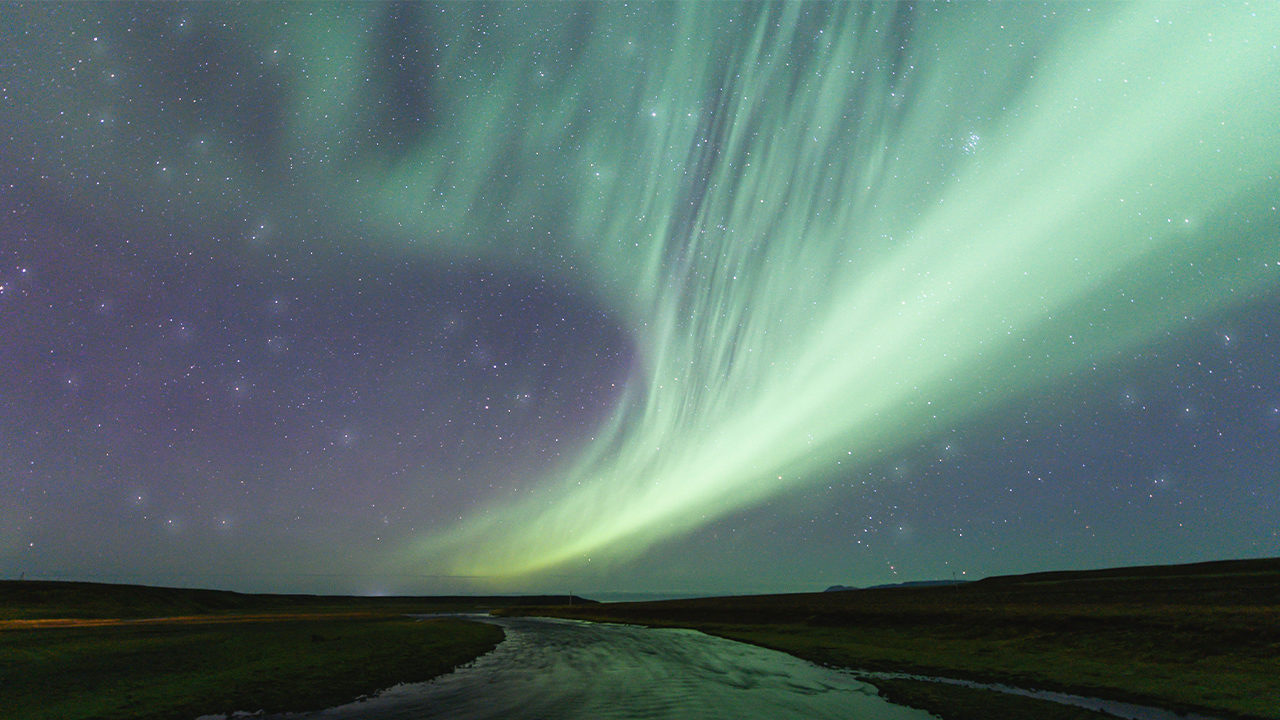
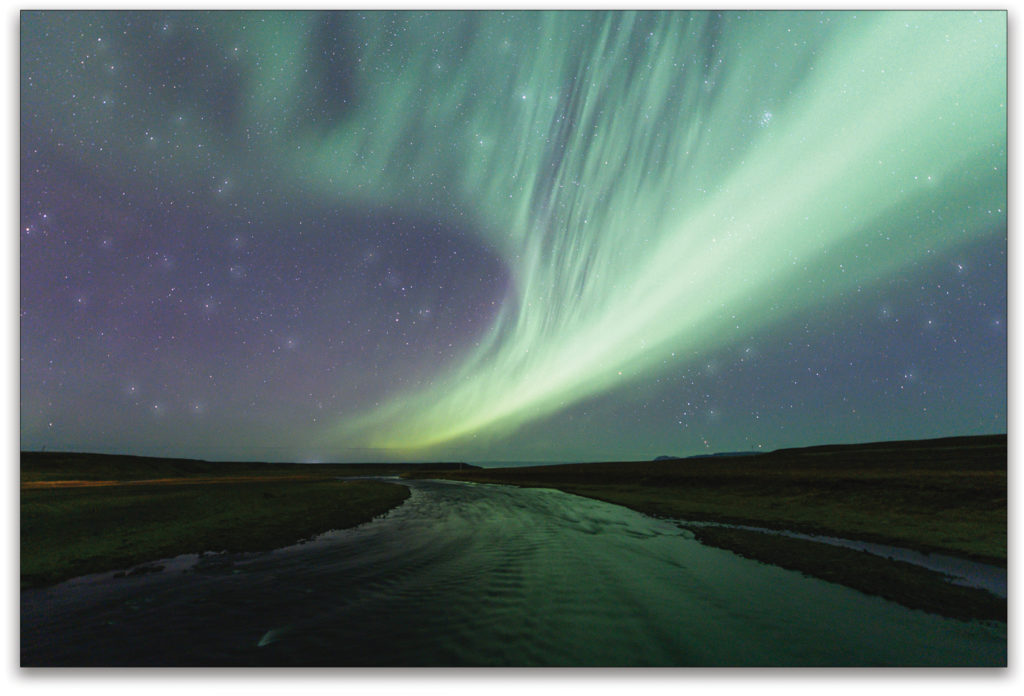
I’ll always remember Midge from the Arctic Fox Centre in Sudavik, Iceland, telling me this: “You photographers have a special way of making the aurora [borealis] look amazing.” He’s right: We do, and it’s all in the retouching. The northern lights are an incredible display of the strength and beauty of nature. As a light source themselves, caused by the colliding of plasma ejected from the sun hitting particles in our upper atmosphere, we don’t need a lot of it to get a great photo. Obviously, we could get a better display with a stronger aurora, ideally with a geomagnetic storm resulting from the snapback of charged particles caught up in the Earth’s magnetotail.
The thing about the aurora borealis is that when we shoot it, we can treat it similarly to a waterfall, in that it’s constantly moving and so we can use a relatively long exposure to smooth out the motion, or a relatively short exposure to capture the detail of the light. Before we get into the retouching, as a baseline for our camera settings, we should use a high ISO to capture the light. In the darkness that accompanies the aurora, the effects of camera noise are minimal. We usually need the widest aperture we can choose, which for me is usually f/2.8. For a fast shot, I usually use a shutter speed in the region of five seconds, and for a long shot, I usually go in the region of 20 seconds.
For this tutorial, I’ve provided one of my RAW files from Iceland, shot in September 2019, which you may use freely for educational and practice purposes. You can download it here.
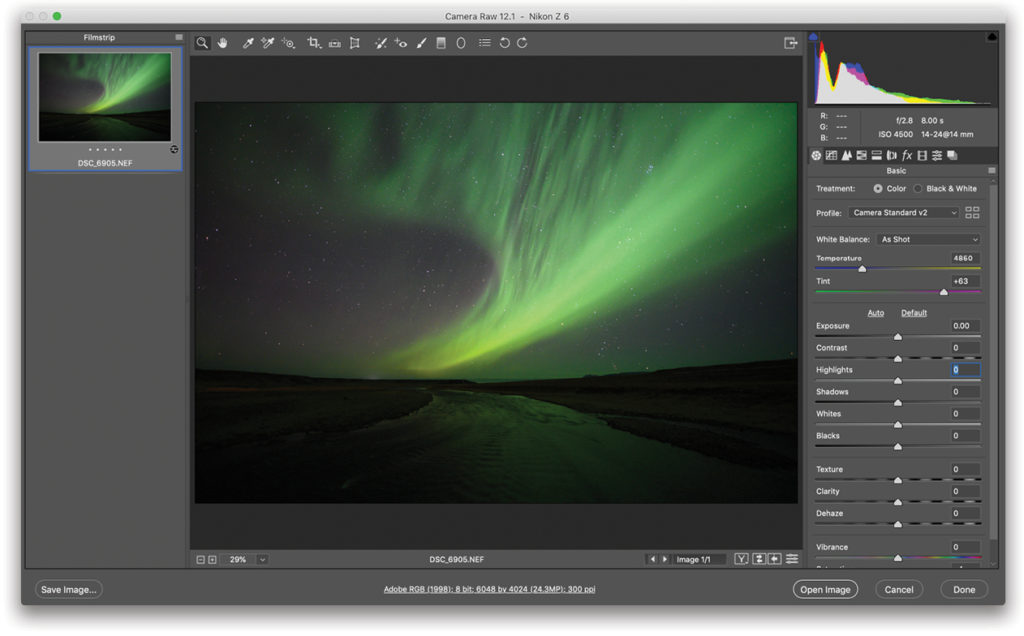
Postprocessing our aurora images can be a tricky thing because these aren’t necessarily images we’re used to seeing or retouching. This can also give us more room for creativity, in that the realism conveyed in the image is much more flexible for the same reason. First off, let’s open the image in Adobe Camera Raw. You’ll see from here that the exposure triad for this image is ISO 4500, an aperture of f/2.8, and a shutter speed of 8 seconds, which gives you an idea of the settings required for shooting the northern lights.
Start with the White Balance
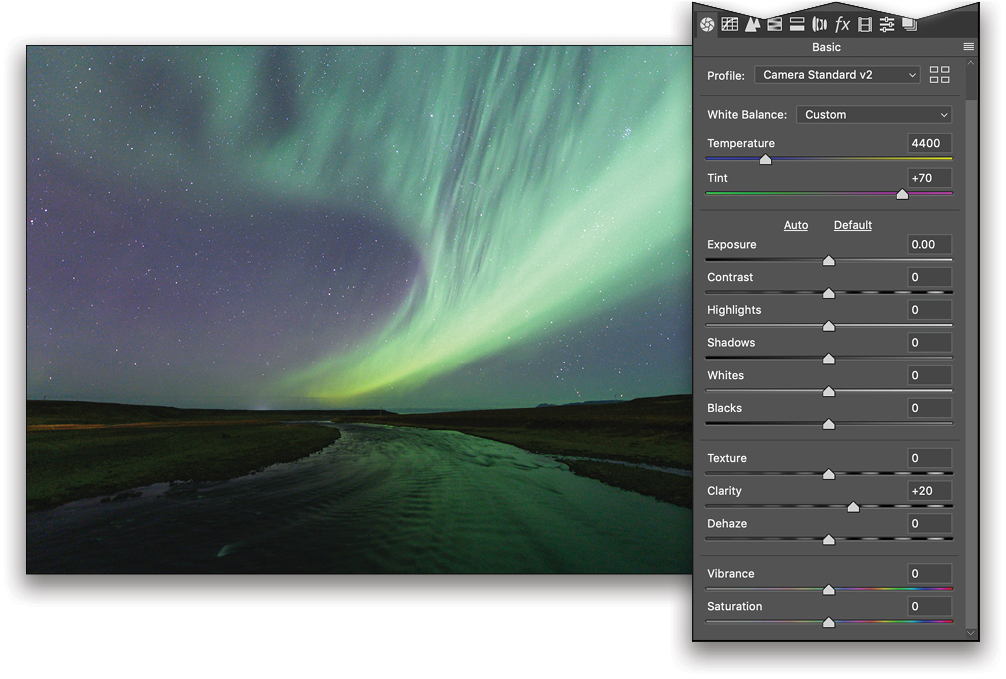
When retouching aurora images, the place to start is with the white balance, so let’s go over that. The reality of the northern lights is that the white balance we apply is determined by the resultant color of the sky and the foreground. The aurora itself can range in color from greens through reds and purples, so that element of creative control comes into play. In general, the aurora tends to be green with fringes of purple, and a color temperature of 4000K will reflect this true color quite well, while maintaining an accurate night sky. The best way to apply this first correction may seem a little counterintuitive, but stick with me!
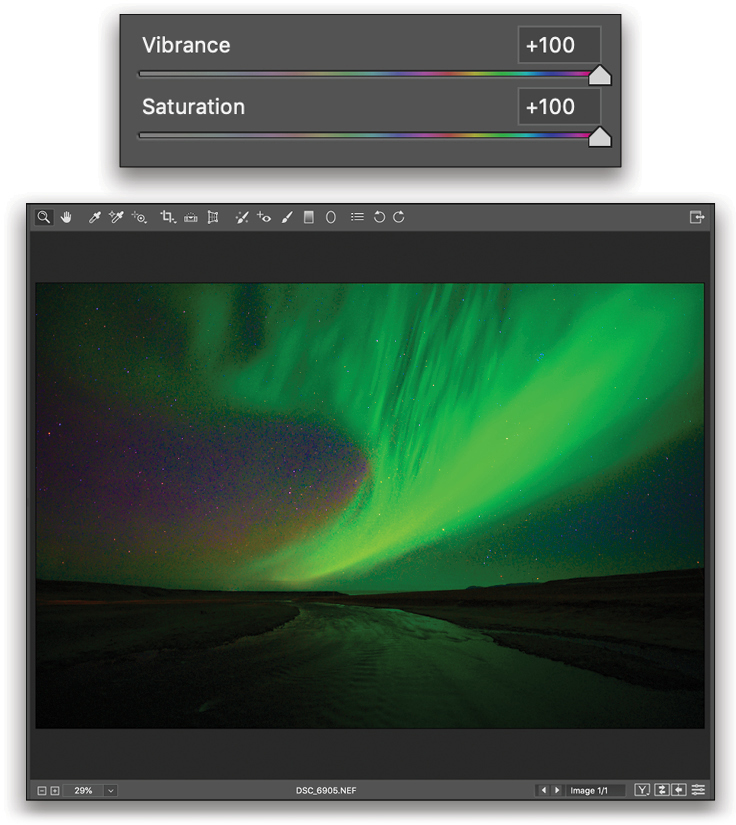
First, slide both the Vibrance and Saturation sliders all the way to 100. I’m well aware that this now looks ridiculous, as you can see here, but what we’re doing is giving the maximum global enhancement to the actual colors present in the aurora so that we can see the difference.
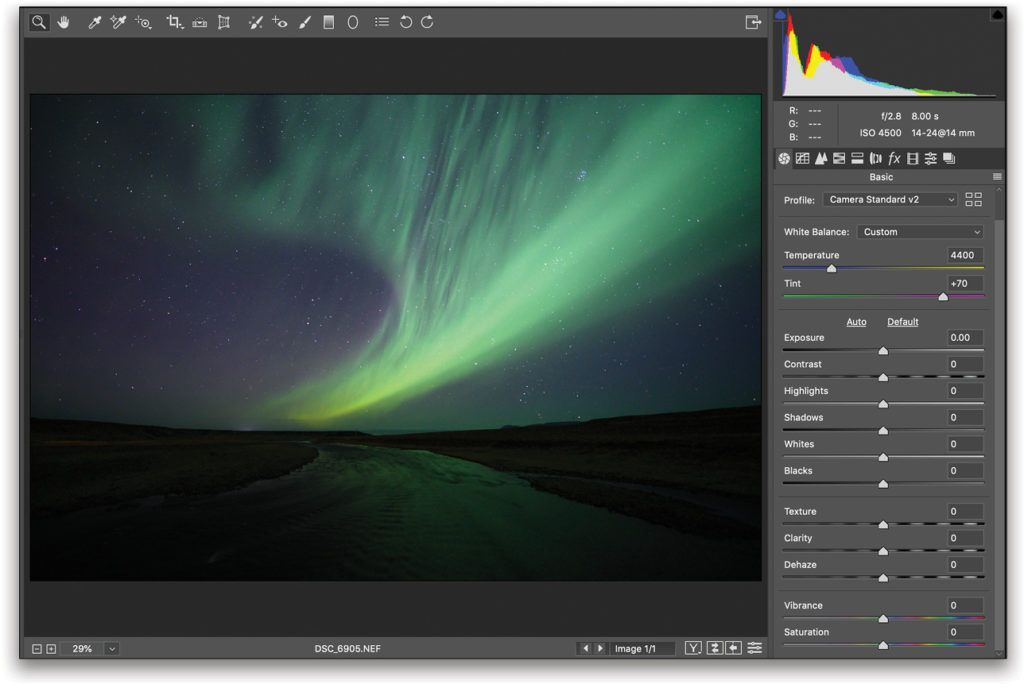
With these settings applied, and knowing that we can see all the colors present to assist us in our decisions, let’s go ahead and adjust the white balance. Using the Temperature and Tint sliders, we can make the adjustments to the aurora, ensuring the accuracy of the color and tone. We can create a deep green aurora, or something with a feel of mint, so long as we keep within the limitations of realism, while maintaining a foreground and night sky that are convincing. Once this is done, we can bring the Vibrance and Saturation sliders back to 0 and double-check our adjustments at this more realistic level.
Adjust the Brightness
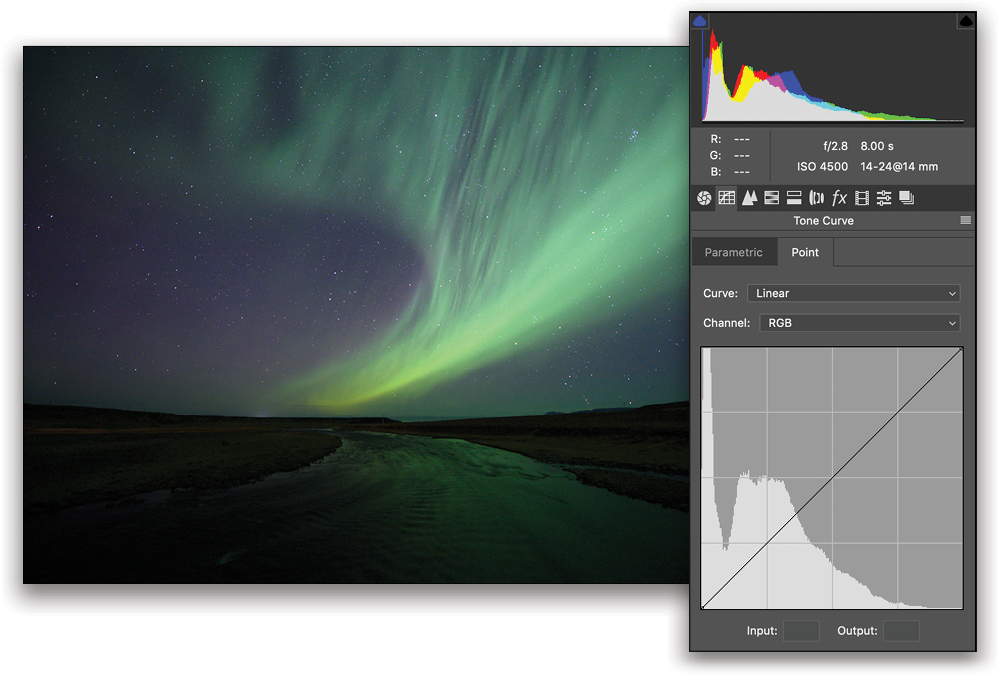
Now that we have the color we want, it’s time to make some adjustments to the brightness, but rather than using the Basic panel sliders, we’ll use a Curves adjustment. In the Tone Curve panel, we’ll make our adjustments on the Point tab. The graph we see for an aurora image will generally show that there are peaks in the shadows, dropping off toward the midtones and fading away altogether in the highlights. What we want to achieve is to raise what’s sitting toward the right end of the graph, targeting those midtones and highlights.
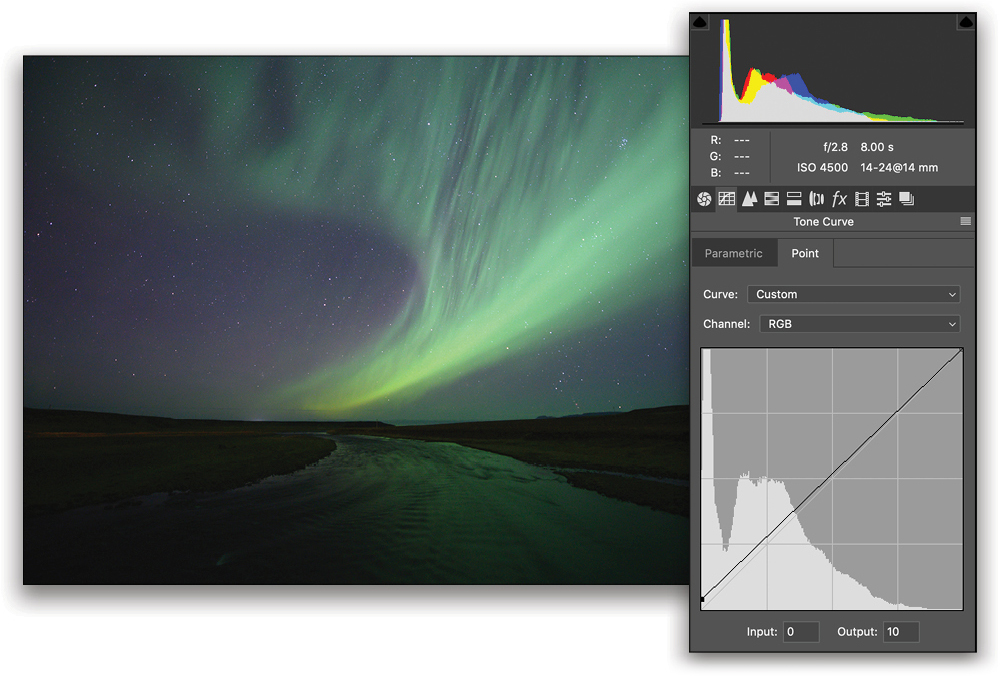
As a matter of preference, I like to start by raising the black point slightly to give a slightly “lifted-black” look. To do this, we need to grab the bottom-left point of the curve and drag it up very slightly, resulting in an Input value of 0 and an Output value of 10 (displayed below the chart). What’s actually happening is that we’re shifting the value of the black from a true black to something a little duller, which means there will be no true black in our image and a little less contrast at the darker end of the spectrum as a result.
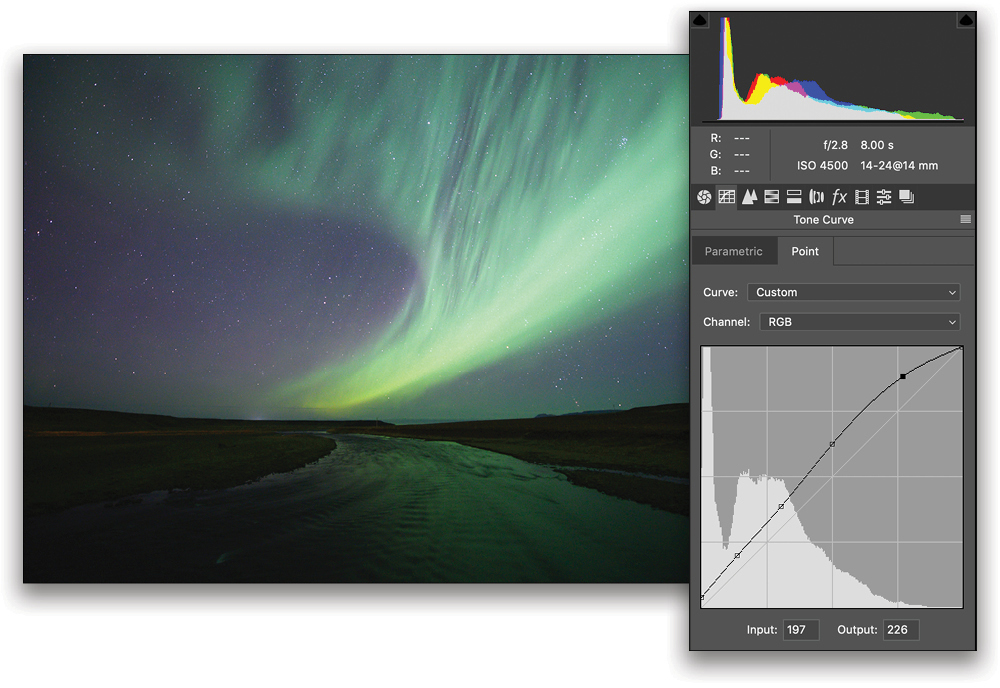
Next up, let’s go across the rest of the curve adjustment and give a little more power to the light within the scene. Looking at where the chart peaks—so we know where the light actually is within the scene, as represented on a graph—we can select areas where we wish to raise the highlights by simply clicking-and-dragging on our linear curve. It’s worth noting that we’ll apply these adjustments across the spectrum of the image, but we can choose to target the tonality of specific colors within RGB by making the appropriate selection in the Channel menu. The adjustments made here bring a slight elevation to the curve. You’ll see that where there’s little information at the highlights end of the graph, we can get away with making harsher adjustments because we’re only affecting a small portion of the image.
Address Any Noise or Sharpness Issues
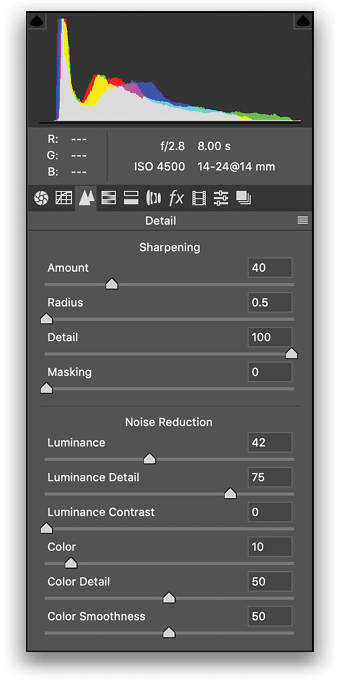
Next on the agenda as we process our northern lights image is to address any noise issues as a result of shooting at a high ISO, and any sharpness issues caused by finding focus in the dark. If we simply grab the Sharpening Amount slider, we’ll lose some quality (and this is a bit too much to elaborate on in a short tutorial), but one trick I use to maintain the quality while enhancing the sharpness is to apply an adjustment that restores some of the sharpness we inherently lose when shooting in RAW format. First, concentrating on the Sharpening section in the Detail panel, drag the Radius slider all the way to the left to its lowest value of 0.5, and drag the Detail slider all the way to the right to its maximum value of 100. Next, move down to the Noise Reduction section and, using the Luminance slider, we can reduce the noise caused by the high ISO by sliding it to the right and essentially smoothing out the pixels slightly in the image.
Address Any Imperfections
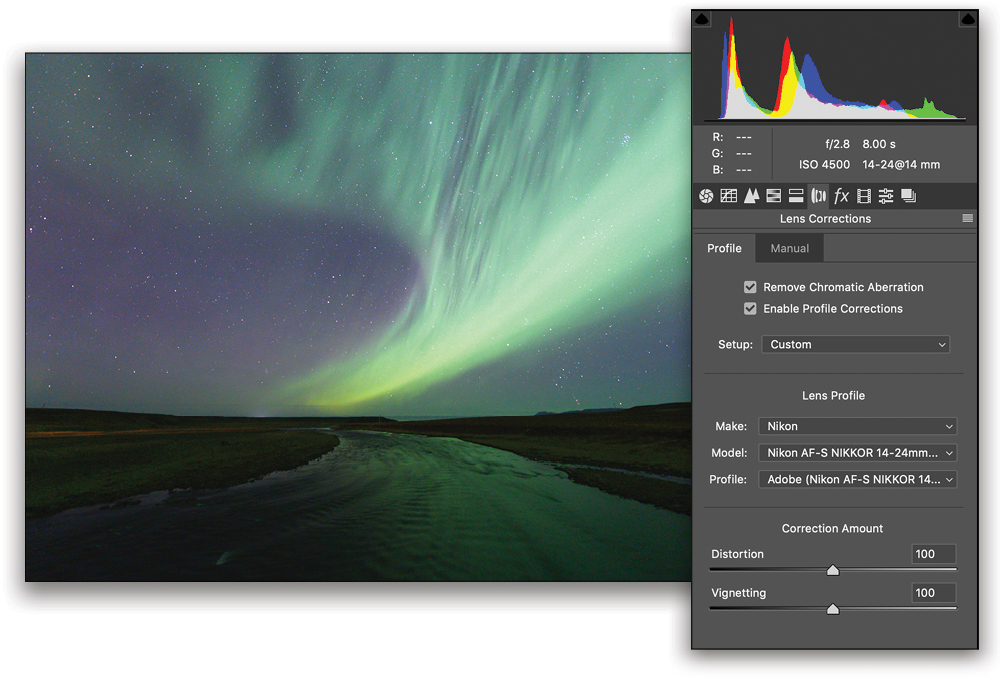
The next thing on the list when retouching the aurora is to address any imperfections caused by the lens. The reason this is especially important with the aurora is that where these imperfections appear, they’re exaggerated, or they can stand out a little more. A simple way to address these universally and at the same time is to deal with the darker corners and any halos that have formed around stars. To do this, we need to go into the Lens Corrections panel and check two boxes: Remove Chromatic Aberration and Enable Profile Corrections. When we check the latter box, the correct lens profile is selected further down the tab.
Now, we’re going to do a very simple retouch to enhance the night sky, and the stars in particular. In the Basic panel, we can use the Clarity slider to add a little extra definition to the stars by shifting the slider to the right (in this case to +20). This is a good idea with the majority of nighttime photography, but especially in this image, it will enhance not only the stars, but also the definition and structure of the aurora itself.
One Last Trick
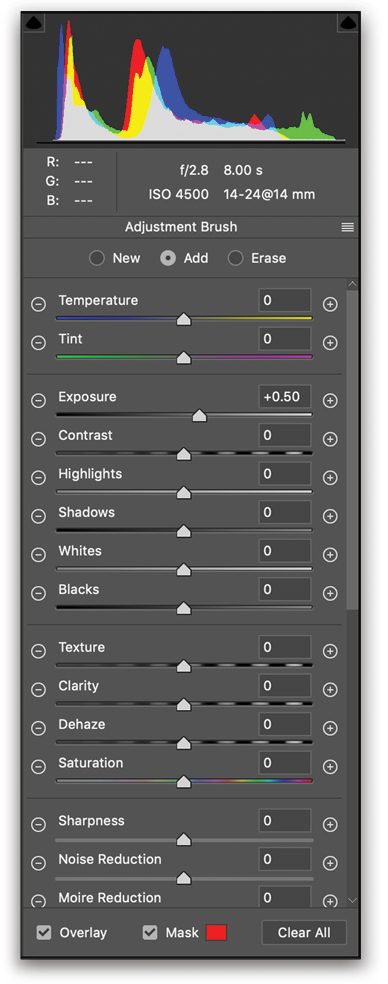
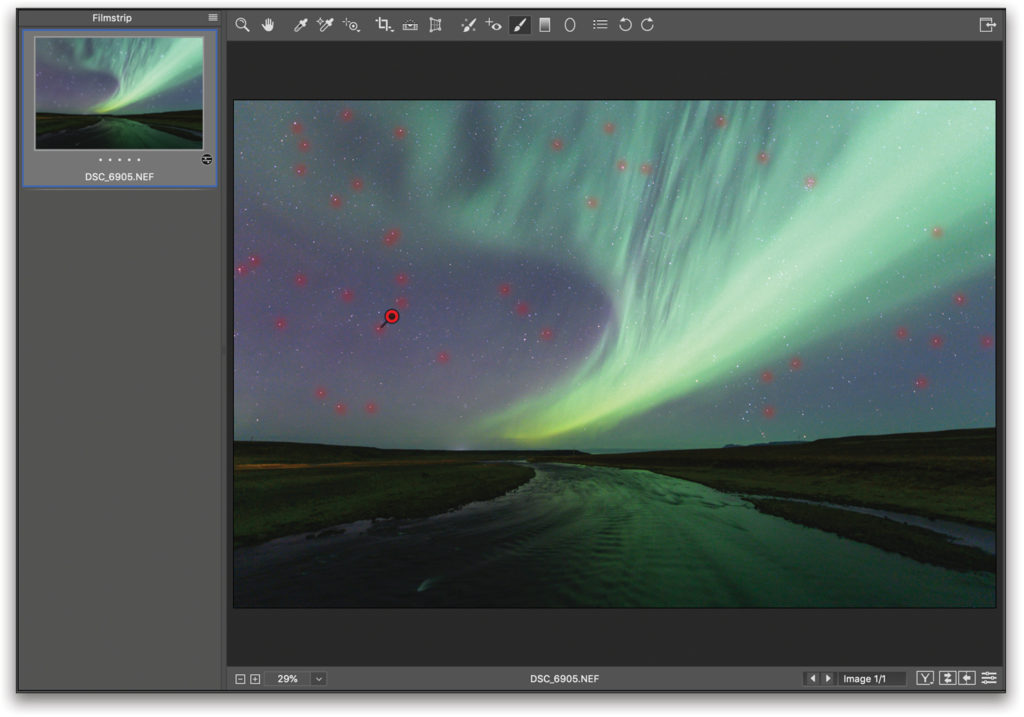
Our northern lights photo has really transformed since we began, and the scene has become more alive and vibrant. We can use one last trick, which also applies to any nighttime scene, if we want to add an element of fantasy. Using the Adjustment Brush (K), click the + (plus sign) beside the Exposure slider to reset all the other sliders to zero and set the Exposure slider to +0.50. With the Adjustment Brush set to its smallest size—the Left Bracket ([) key decreases the Brush’s size)—simply click on some stars to give them somewhat of an ethereal glow. It’s not necessary to click on all the stars, just go over the entire image and select the stars that add the most to the scene. After clicking on the stars, we can adjust the Exposure slider if the difference is too bright or too dim.
Add Finishing Touches
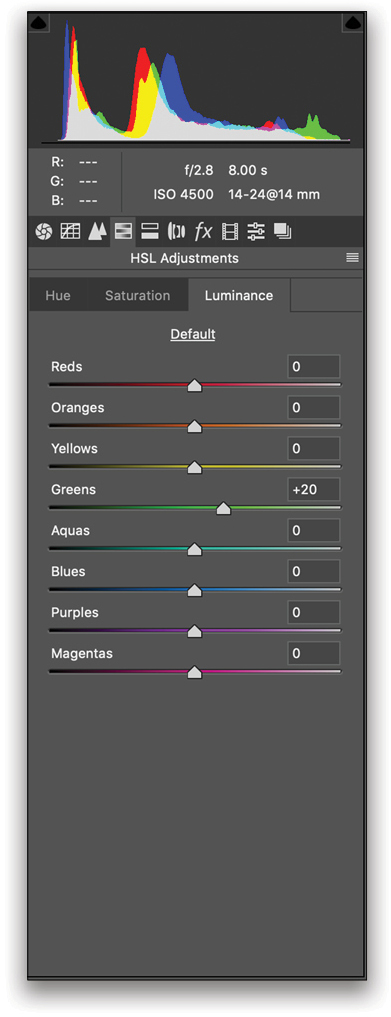
Now that we’re done with the adjustments that are specifically useful to northern lights images, we can apply some final global adjustments to add the finishing touches. We’ve already applied a little contrast with the Curves adjustment, but we can tweak the Contrast slider in the Basic panel if it helps the image. Something else that’s worth consideration, particularly when there’s a strong green color as in our northern lights, is to use the HSL Adjustments panel. Using the Greens sliders, add some Luminance and decrease Saturation to make it a little more realistic. In this image we set the Luminance to +20 and the Saturation to –20.
Seeing and shooting the northern lights is high up on many bucket lists, and I hope this tutorial has been great fun. It’s a change from regular landscape and nighttime retouching, and shows some skills that can be applied to aurora photography and may be transferred to other images you take.
This article originally published in the February, 2020 issue of Photoshop User magazine.


