It never gets old staring up at the night sky. The mind wanders, the imagination runs wild, and the shifting stellar canopy that never seems to change feels like an old friend joining you through life’s journey. Constellations were the first calendar tracking of the seasons, as well as a latitude indicator for travelers navigating north and south on our planet. For every outdoor photographer comes a challenge to capture this often awe-inspiring event that occurs with every turn of our globe.
The continued advancement of image sensors has taken nighttime photography to a whole new level, diminishing digital noise and upping light sensitivity, while vastly improving the dynamic range: the stops of light a digital image sensor can cover, from the brightest highlights to the deepest shadows. These innovations have given stargazing image-makers extra latitude to create some wild scenes of the dark expanse.
This article focuses on creating stunning nightscapes with the goal of realism for the final image file. This not only comes from your experience of how these scenes appear through a pair of human eyes, but also how contrast, exposure, light, and detail manifest during these hours of darkness. We’ll discuss how knowledge of the night sky can give you a solid starting point, some of the challenges you may face documenting a extremely low-lit scene, and how to process your image file to maximize the detail and tones captured.
Step One:
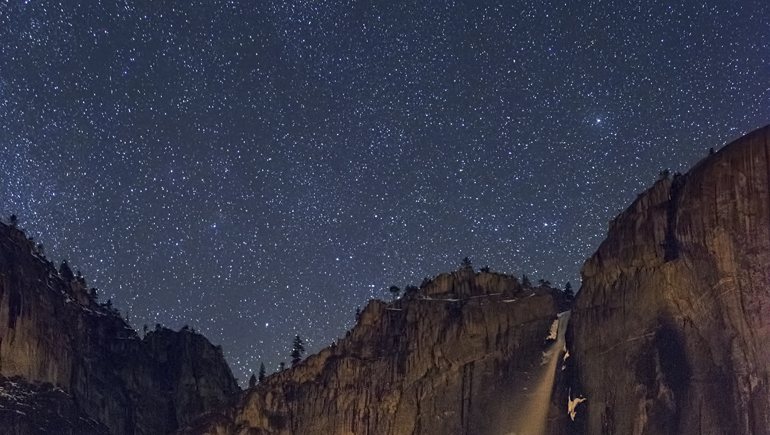
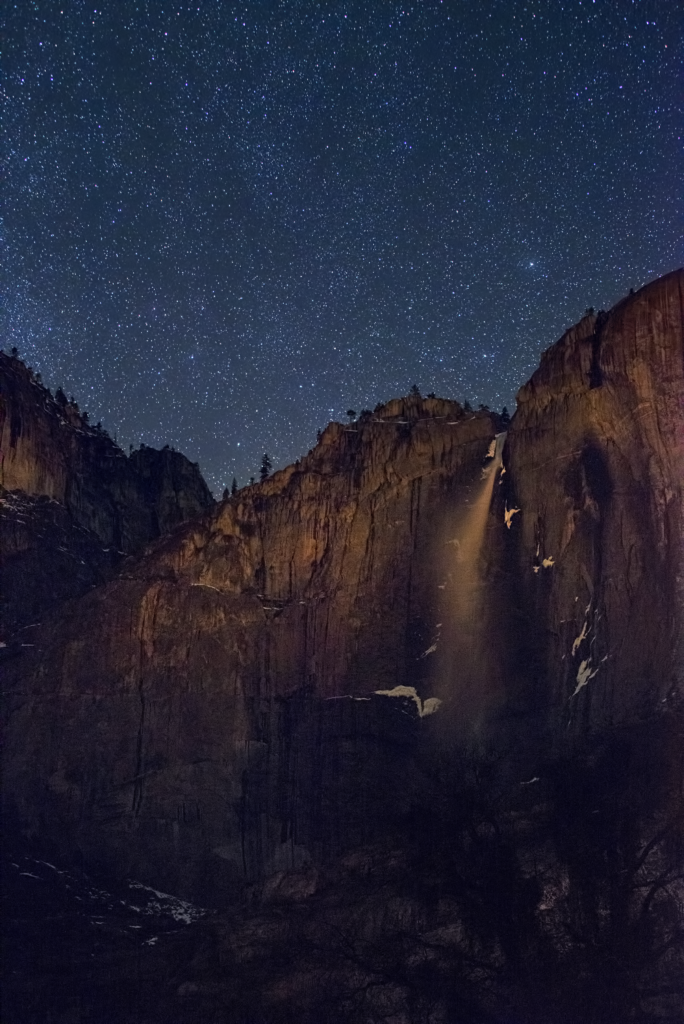
Before you become a photographic night owl, planning your outing can give you a good head start. Travel to an area far away from any major city, often referred to as a green zone. Artificial city light can flood skies, casting an orange glow of light pollution, diminishing the visibility of starlight and Milky Way detail. A moonless night is another option to consider for better star detail, as seen in this 13-second exposure of Yosemite Falls.
If you prefer to add detail and color, moonlight can illuminate your landscapes; however, as a light source, it can also potentially obstruct stars. Clear skies are another option, although some clouds can add a dynamic touch depending on the scene. Finally, understanding where the Milky Way is located and which way the stars move depending on the direction you face—north, east, south, or west—can also assist your nocturnal compositions. From Dark Skies to The Photographer’s Ephemeris, there are sites and apps to assist with all of these decisions, helping you determine optimal shoot dates and locations.
Step One
Step Two:
Documenting scenes of nature can be tough, but fumbling around in the dark to catch a night scene in all its glory is yet another challenge. Make sure to include a headlamp for hands-free camera operating, and an extra flashlight as a backup or to paint the landscape with a touch of artificial light for additional detail. Also essential are a remote shutter release and tripod, a sturdy easy-to-use model to keep your camera locked in position for long exposures.
Creating a pleasing composition is another hurdle to overcome, so previsualizing your final scene can give you an idea of what lens you choose, direction to face, and what you may or may not wish to include in the shot. Reviewing your scenes on your LCD screen after the capture can help you straighten horizons or force you to recompose to include important elements.
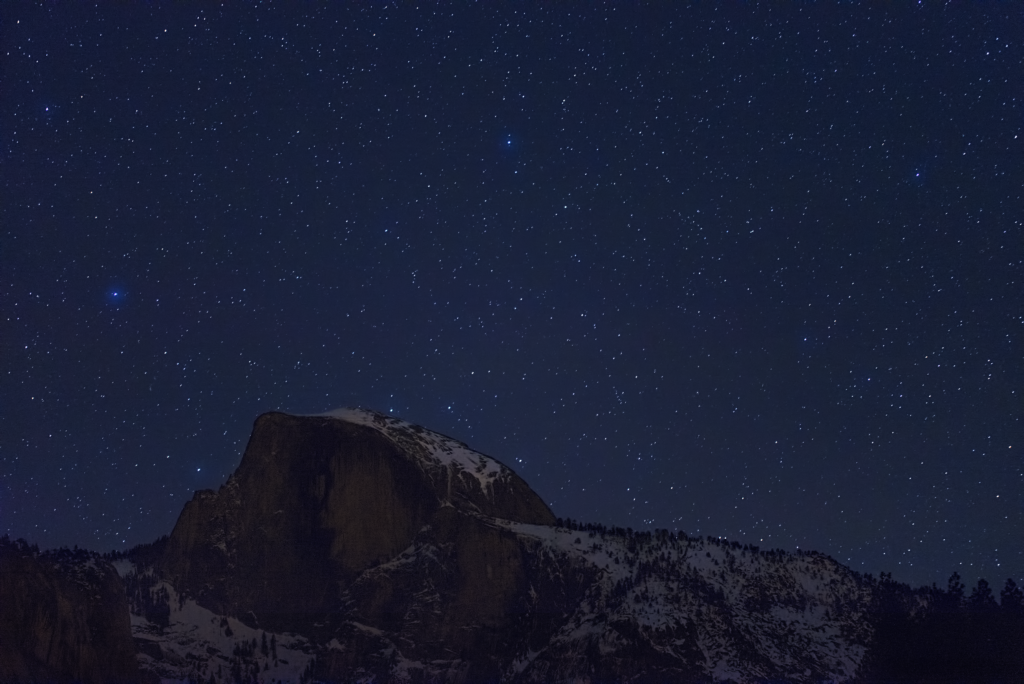
Focusing is yet another issue to tackle since the accuracy of the infinity mark on most lenses is off just enough to blur stars, and autofocus fails in such low-light levels. Let your eyes adjust to the darkness for a few minutes, enable manual focus, use the infinity mark on your lens as a starting point, then look through your viewfinder to fine-tune focus. The LCD can then come into play to determine how accurate you are with sharpness by reviewing the image and zooming into specific star clusters. Live View may also help here, digitally zooming into a few stars for tack sharpness through manual focus, avoiding any bokeh effect. A tripod, remote, and LCD preview for sharpness were all used for this image of Half Dome on a moonless night, captured with a 70mm lens, f/2.8 for 8 seconds using ISO 6400.
Step Two
Step Three:
When operating in extreme low-light situations such as star-filled skies, meters begin to fail; therefore, critical exposure settings and camera functions must be considered to capture the detail needed for postprocessing. Shooting in RAW should be a given because of the amount of detail and latitude the format offers. Using a solid DSLR or mirrorless camera system with manual controls is another good tool to have. The better your image sensor is with ISO, the less noise and more detail captured.
Exposure charts combined with past trial-and-error experience can give you the proper settings needed since some shutter speeds may take as little as 8 seconds, or run for hours in bulb mode. A larger aperture setting, low f-stop number, is preferred since the amount of light is so low; exposures can lengthen greatly if you attempt to capture more depth-of-field through a smaller aperture.
ISO, the measurement of your image sensor’s sensitivity to light, for the most part should be set above 1000 but below 6400 since noise build-up can create a nightmare with star detail. Higher ISOs also keep stars from becoming trails, due to the rotation of the earth, by ensuring shorter exposures.
One general guideline to avoid star blur is known as “the 500 rule.” Simply divide 500 by the focal length of your lens, and that equals the longest exposure, in seconds, you can use before the stars start to trail in your shot. For example, using a 20mm lens on a full-frame camera, divide 500 by 20, giving you 25 seconds, the longest time you can expose before the stars appear to move.
If you plan to capture star trails through a long exposure, a lower ISO gives you much less noise, and the light absorbed by the lengthy time exposure can capture the detail needed. Wide-angle lenses work best to cover larger portions of the sky, but any lens can be used; just recognize that the longer the lens, the more opportunity for camera shake, as well as a smaller aperture that’s tougher to see through, requiring careful focus and a higher ISO setting. Faster lenses, ones with larger maximum apertures, are also a benefit since the wider openings make it easier to see through the viewfinder, allow more light to hit your sensor, and give you the option to use lower ISOs for less noise.
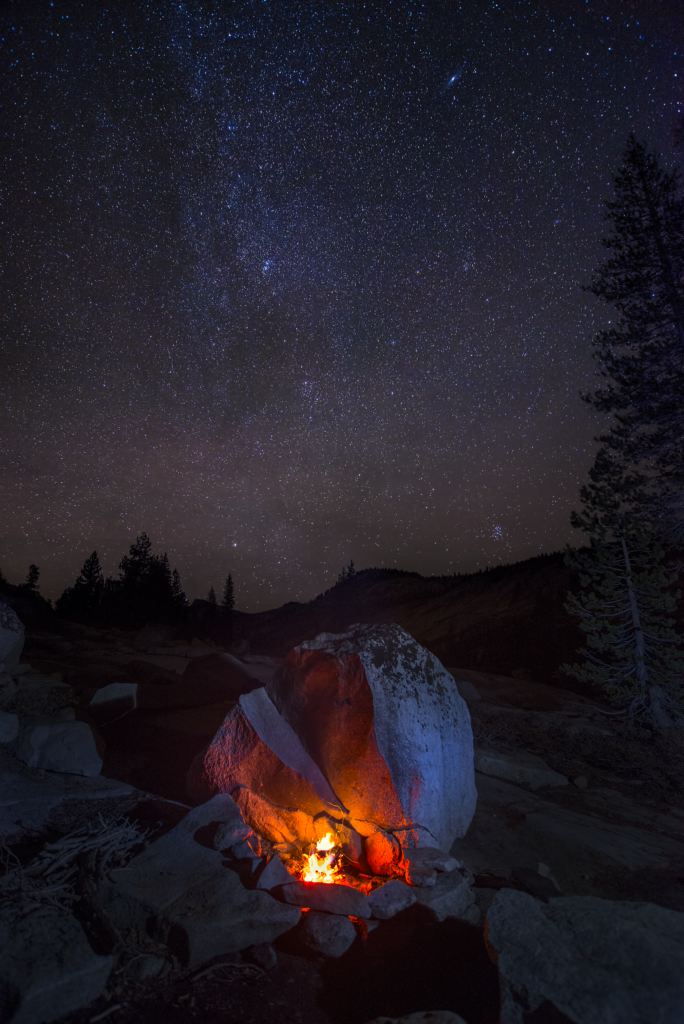
To balance artificial light with ambient starlight, the artificial light you provide, or that’s provided through another source, must match closely to the extremely dim ambient light level of the stars. Go outside that limited range and your exposure is lost due to the difference between an extremely bright artificial light and low-level starlight combined, hence an unrealistic final scene or a ton of post work to recover the image. Waiting for the campfire to lower to a flicker was the key to this image, while artificial light from a headlamp was used to add a touch of detail to the glacial erratic sitting below a star-filled sky. The RAW file was exposed at f/4 for 15 seconds using ISO 1600 with an 18mm lens.
Step Three
Step Four:
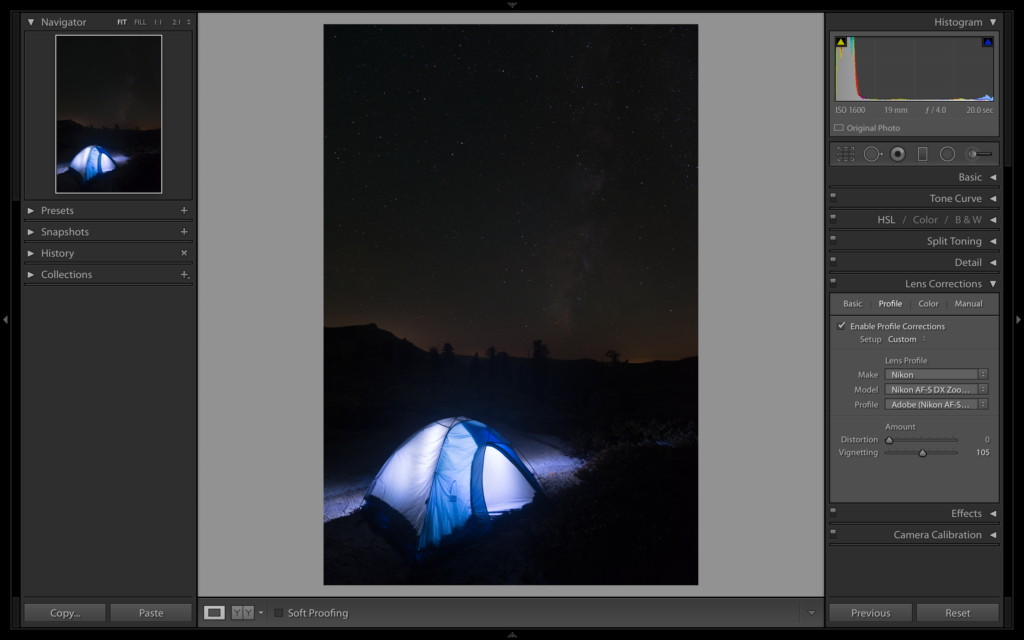
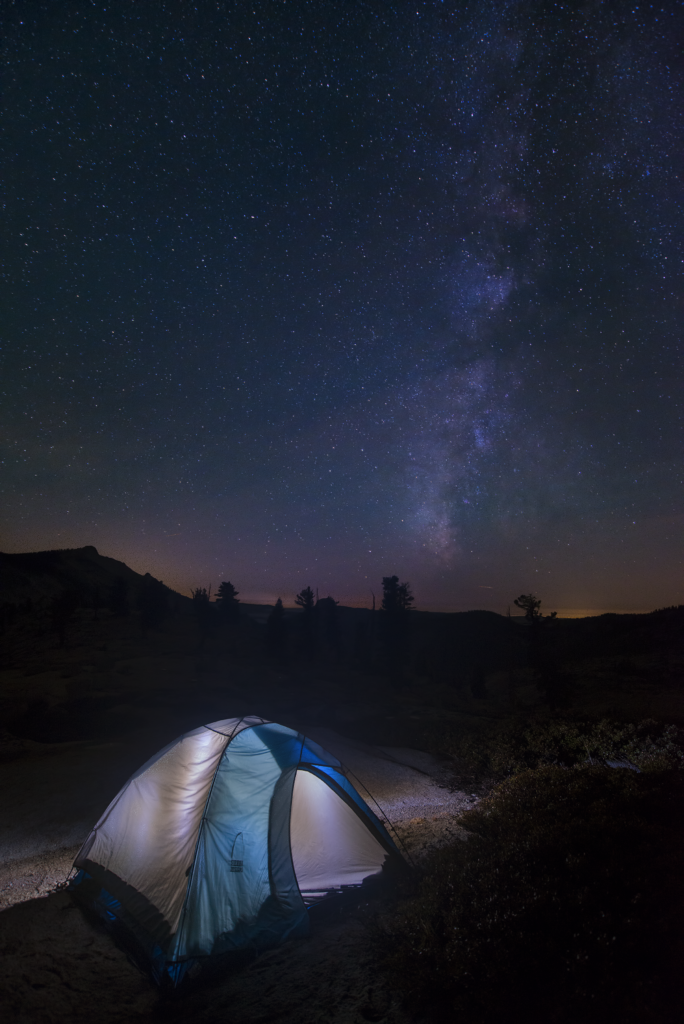
Once you have a solid RAW file to work with, various postprocessing techniques in Lightroom CC can help you stretch the capabilities of your image sensor, pulling out extra detail while correcting other imperfections. Using presets to fix night scenes may not be the best option, as every situation and exposure requires specific recovery and adjustments. Take this Yosemite image of a tent below the Milky Way. The balance of the tent glow and the nighttime sky are a bit high in contrast, but not enough to lose detail in either area. Initial adjustments are done in the Lens Corrections panel of the Develop module: turn on Enable Profile Corrections to correct for lens vignetting or distortion, and Remove Chromatic Aberration, which is often seen in the stars in the corners of the composition.
Step Four
Step Five:
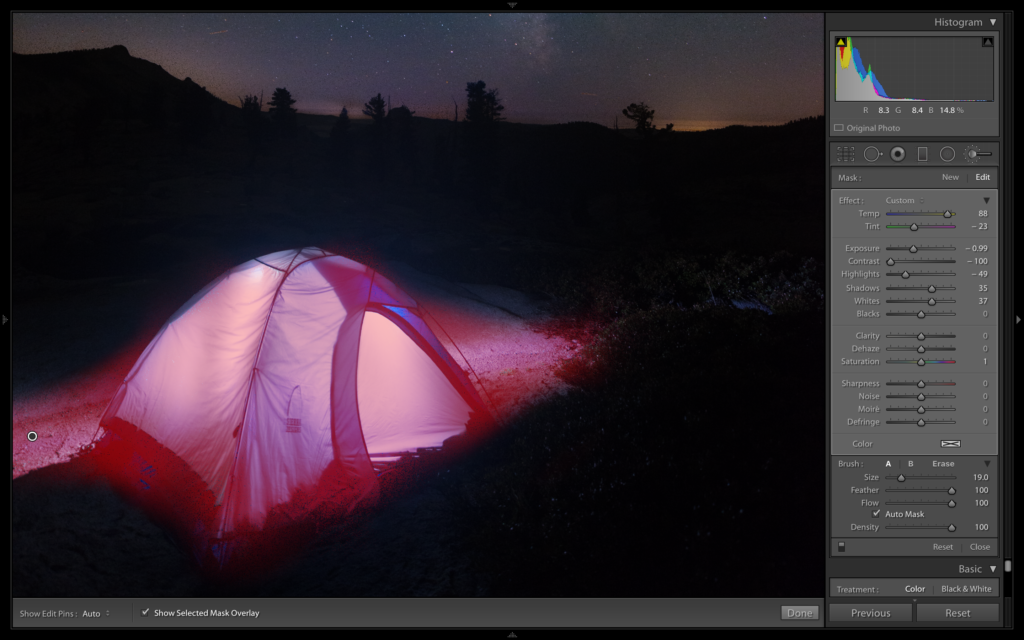
Next, use the sliders in the Basic panel of the Develop module to recover highlights and open shadow detail. For this specific image, an extra step is taken by creating a Mask Overlay using the Adjustment Brush (K) to recover highlight detail and correct white balance in the tent, while not affecting the pinpoints of light in the sky. In this example, I’ve turned on Show Selected Mask Overlay so you can see where I’ve painted with the Adjustment Brush. The letter O will turn the overlay on and off.
Step Five
Step Six:
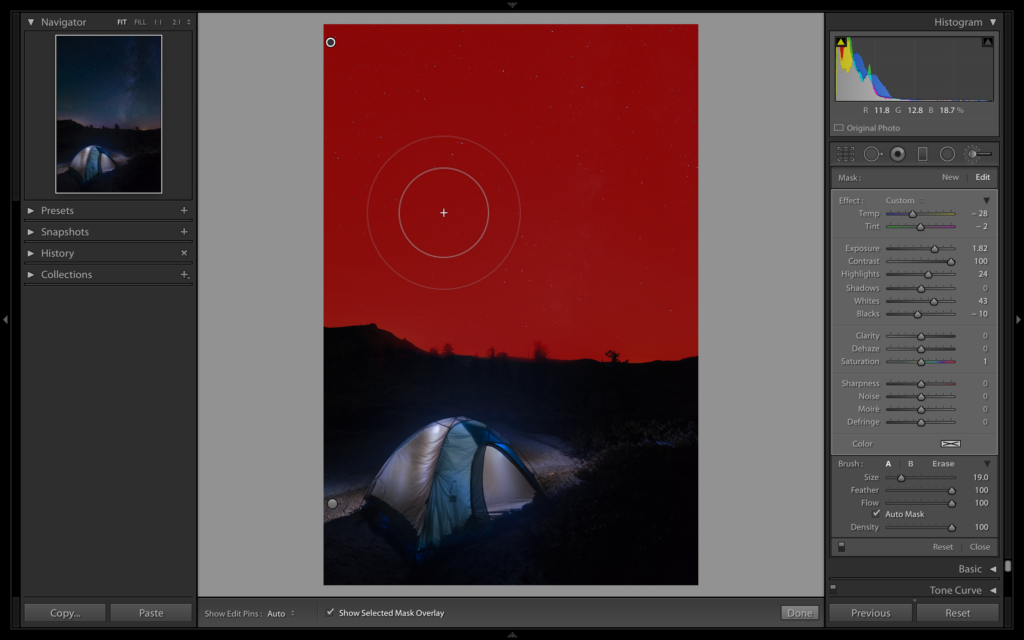
The second Mask Overlay using the Adjustment Brush (K) covers the upper part of the scene to color-correct the sky. Click the word “New” at the top of the Adjustment Brush panel to add a new pin to your image. That way you won’t affect the Adjustment Brush settings that you just applied to the tent. If your image only contains a silhouetted landscape with the stars above, this step isn’t necessary. A Fluorescent white balance is often a good place to start, neutralizing greenish skies while offering a cooler sky tone. You can also adjust the white balance manually in the sky using the Temp and Tint sliders in the Basic panel. Skies are rarely green (not including the northern lights) and, if you’re a good distance from any metropolitan area, shouldn’t appear as any other hue besides a deep blue, falling off to a slight orange near the horizon. It’s how we see most night skies, outside of a stark black tone. Therefore, balancing your sky to match this tone helps assist the lifelike aspect for the final scene.
Step Six
Step Seven:
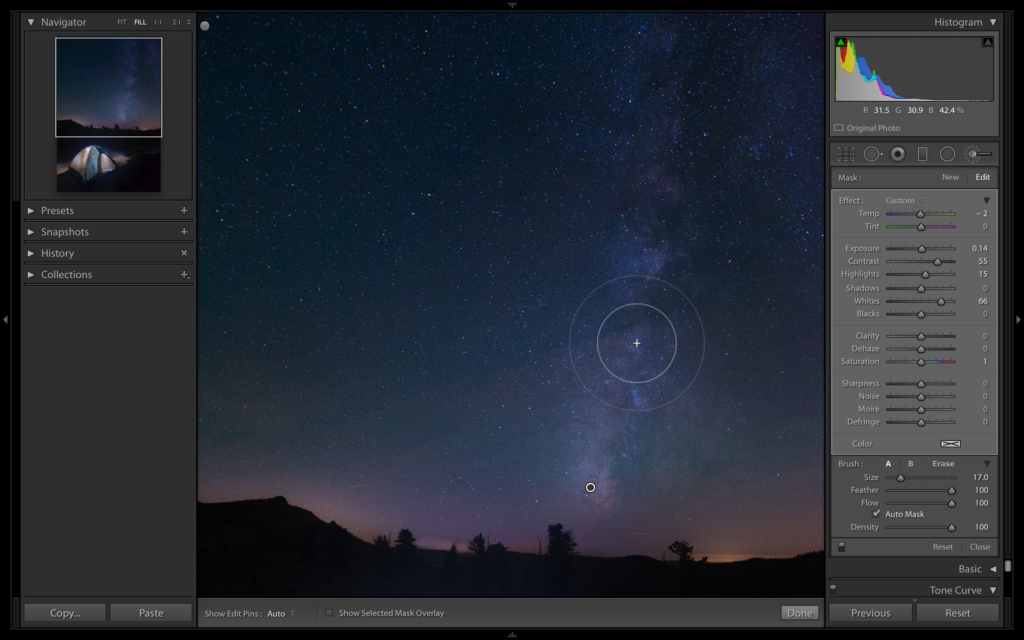
To maintain realism, there should be a balance between what we can see with the naked eye and what an image sensor can record; however, at night when the sensor can retain so much more detail, collecting the light over a longer exposure, some artistic license can be taken to enhance certain areas. The goal is to bring out important detail while maintaining a strong sense of a nighttime feel through dark tones, solid contrast, and a proper exposure. Adding contrast to the night sky brings out the detail in the disk-shaped glowing band of the Milky Way. You can either use the Lights slider in the Tone Curve panel of the Develop module, or make adjustments by adding another Mask Overlay with the Adjustment Brush using the Exposure, Contrast, Highlights, and Whites sliders in the Adjustment Brush panel.
Step Seven
Step Eight:
In any night scene, you should maintain a deep black area, what we use to call D-max in film and print processing. The Histogram can be a good tool to check this. Just recognize that you’ll have quite a bit of clipping, loss of detail in the shadow areas, and this is okay. We’re working with a night scene and if you attempt to show all detail in all areas, this can result in a bizarre unrealistic-looking starscape. Knowing when and where to enhance and brighten detail is a critical step toward this realistic approach.
Step Nine:
Once you’ve made all your major adjustments, use Lightroom CC’s new-and-improved Noise Reduction sliders in the Detail panel of the Develop module. Reducing digital noise created from higher ISOs removes the gritty look of the final scene, but use these sliders cautiously so you don’t remove many of the stars in the sky. Zoom in to 1:1 or 2:1 in the Navigator panel at the top left, adjust the sliders, then turn the Detail settings on and off with the toggle switch at the top left of the panel to compare the before and after.
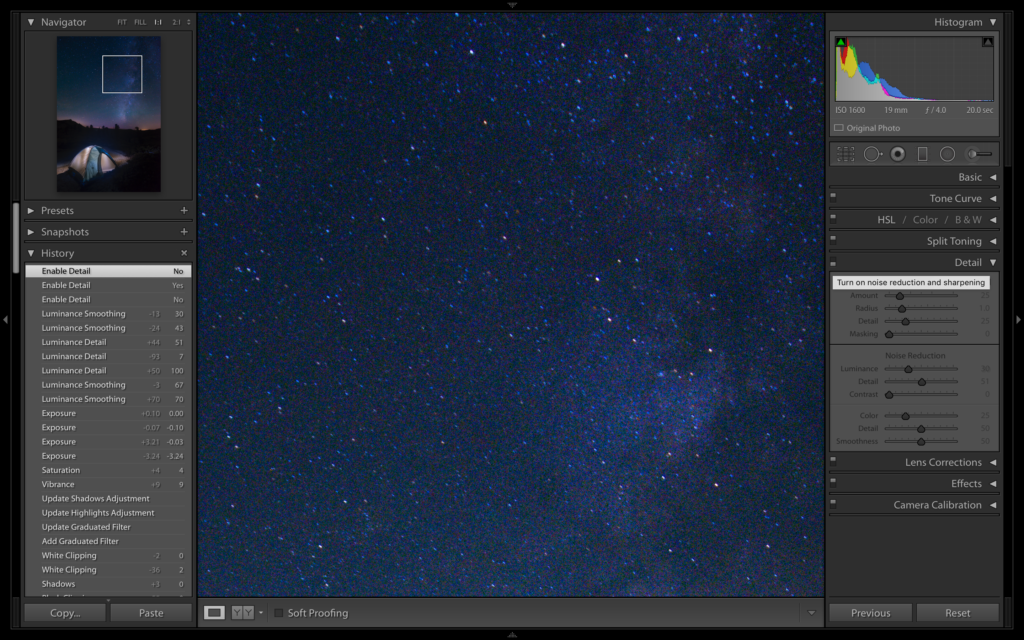
Step Nine
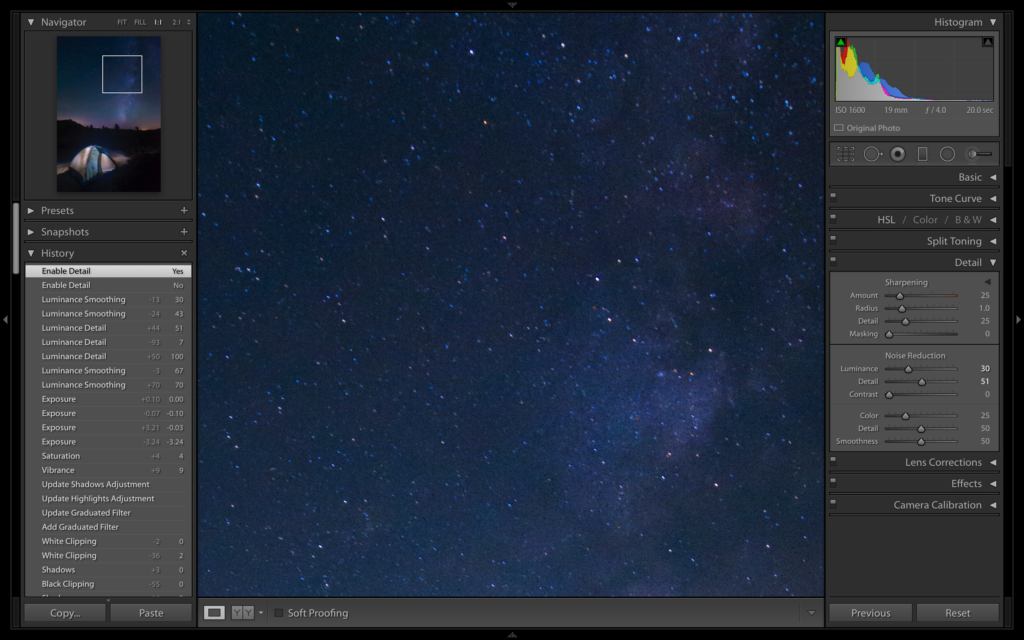
Step 9
Step Ten:
Once your image has the look and feel you desire, move into Photoshop (Command-E [PC: Ctrl-E]) to make any final touch-ups and save a PSD or TIFF version of the final master file. Be subtle in your approach and remember, photography, as an art, can be creative and subjective, but when the aim is for a natural feel, nonfiction is better than fantasy.
Step Ten
This article originally appeared in Lightroom Magazine, Issue 18.


