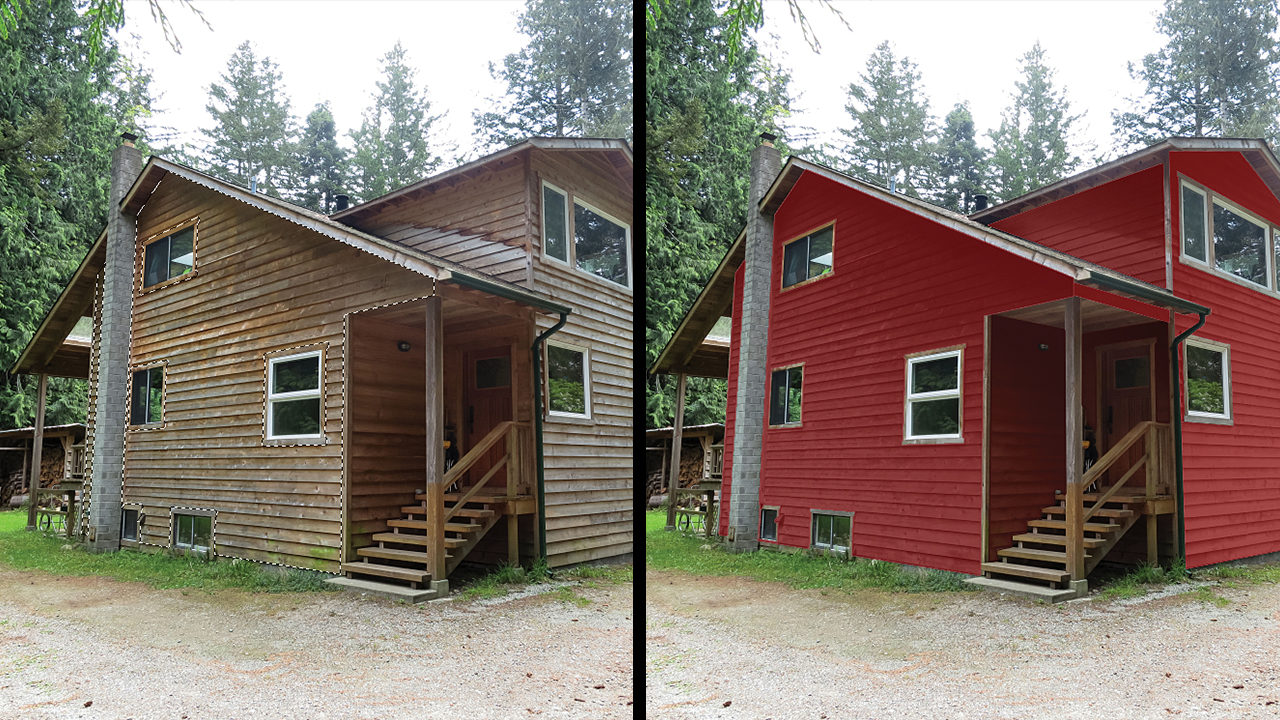
Step One:
Open House.jpg and select the Polygonal Lasso tool (nested under the Lasso tool [L] in the Toolbox). Press the Caps Lock key to use the precise cursor. Click points around the perimeter of the left face of the building and try to select the siding only without the trim. Don’t worry about the windows or chimney yet. Click on your starting point to create the selection.
[KelbyOne members may download the file used in this tutorial here. All files are for personal use only.]
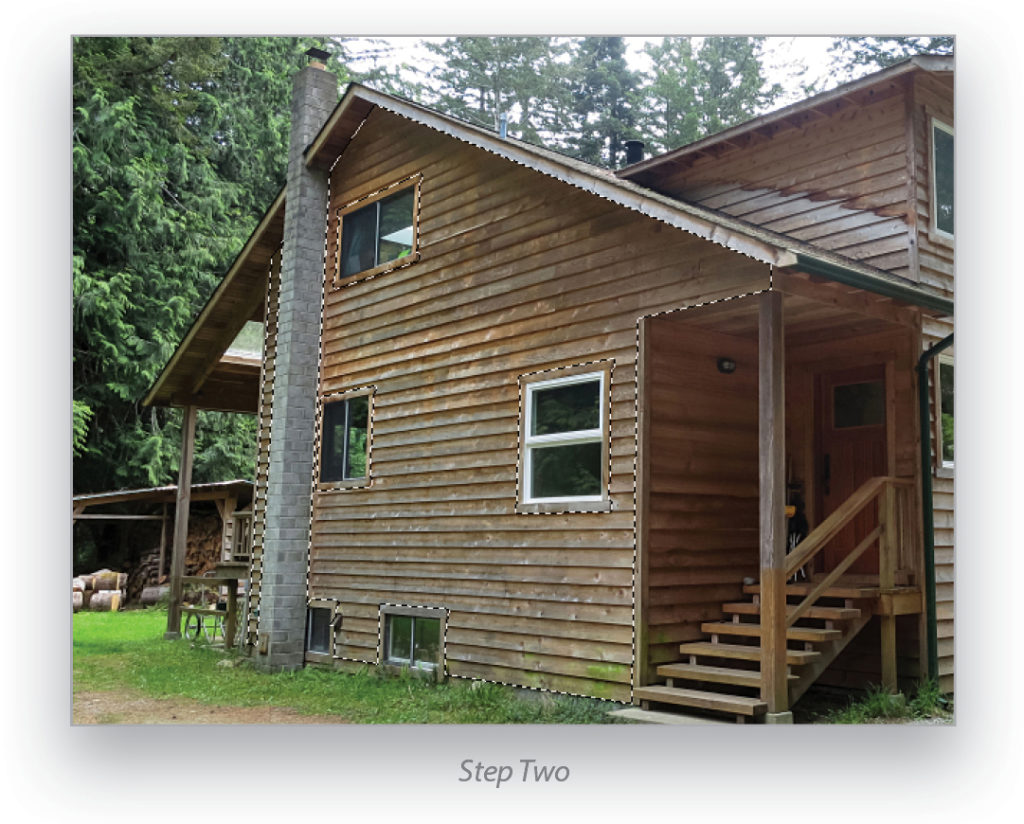
Step Two:
Click the Subtract from Selection icon (darker square overlapping lighter square) in the Options Bar and click points around the chimney and the five windows on this side of the structure, taking care to subtract the window trim as well. This is analogous to the masking work you’d have to do on a scaffold in preparation for painting. So that the edge of the paint mask is softened, choose Select>Modify>Expand, enter 2 pixels, and click OK. Choose Select>Modify>Feather, enter 1 pixel, and click OK.
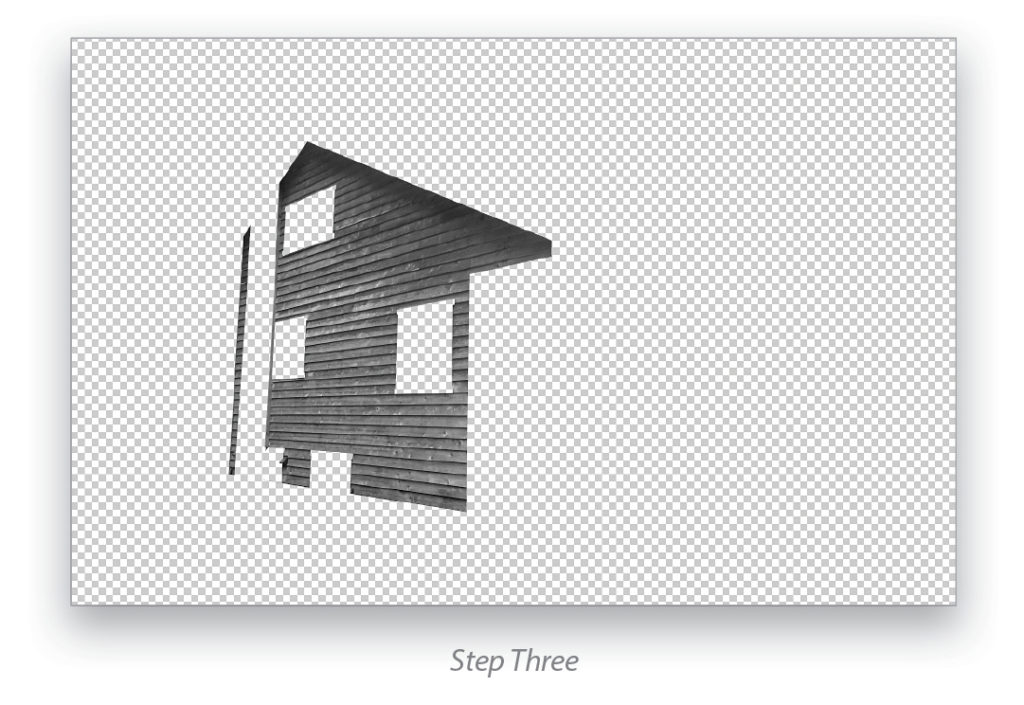
Step Three:
Double-click the Background layer in the Layers panel to unlock it. Accept the default name Layer 0 and click OK. Choose Layer>New>Layer Via Cut to transfer the selection to Layer 1. Toggle off Layer 0 by clicking its Eye icon, and choose Image>Adjustments>Desaturate. We’re stripping color information out of the texture so we can paint or stain it ourselves, and get rid of the moss growing in the lower-right corner as part of the bargain.
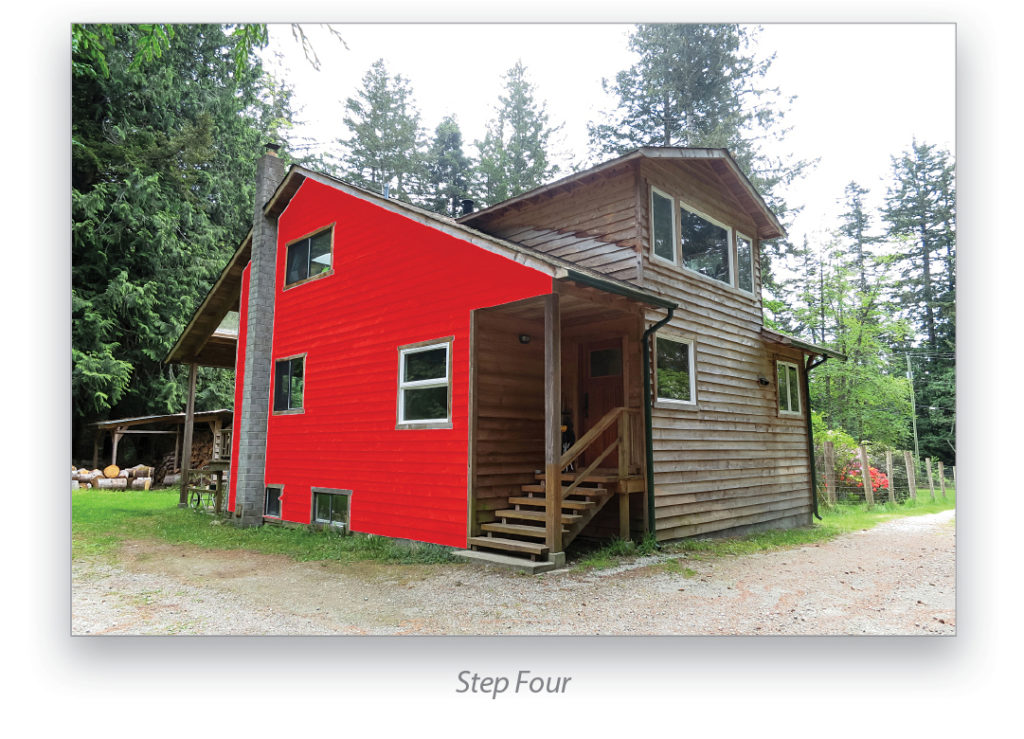
Step Four:
Toggle Layer 0 back on and double-click Layer 1 just to the right of its name—this is a shortcut that opens the Layer Style dialog. Click the words Color Overlay in the list of Styles on the left to toggle this effect on and simultaneously go to its property page. Decrease Opacity to 75% so that the shadows from the horizontal siding start to become visible through the solid color. (Note: The default color in my Color Overlay style is fire-engine red; your default color may be different.)
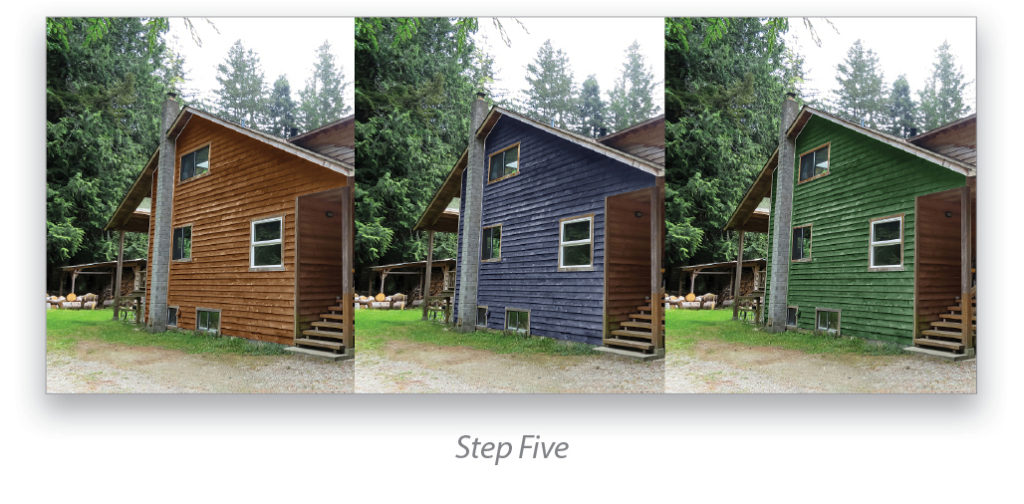
Step Five:
Fire-engine red isn’t my first choice, so while the Layer Style dialog is still open, click the color swatch and vary the color in the Color Picker. To make the application of color look more like wood stain rather than paint, try changing the Blend Mode to Overlay in the Layer Style dialog. Experiment with color, Blend Mode, and Opacity of the Color Overlay until you’re satisfied.
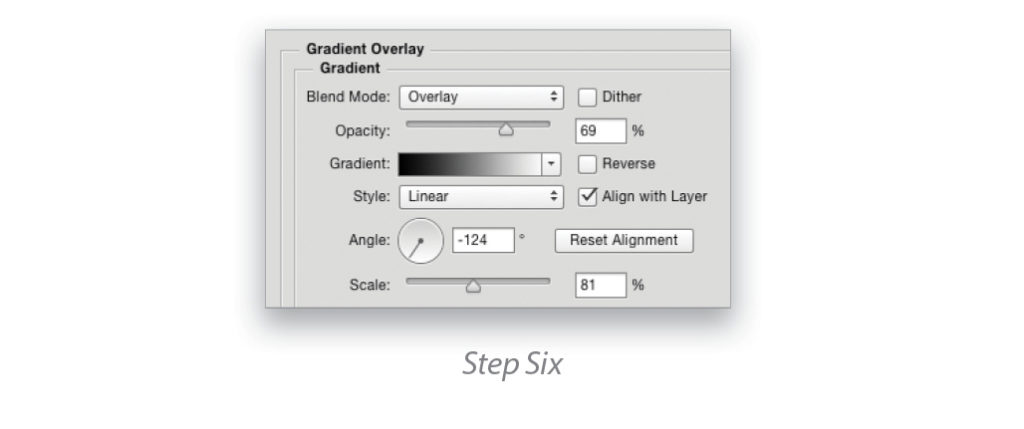
Step Six:
If you decided on more of an opaque paint rather than a stain by selecting the Normal Blend Mode in Color Overlay, the shading is too flat because the paint is obscuring the natural shadows. To compensate, apply a Gradient Overlay in the Layer Style dialog. Click the Gradient thumbnail preview and select the Black, White preset in the Gradient Editor, and click OK to close the Gradient Editor. Set the Angle down to the left to simulate a shadow under the eaves. Change the Blend Mode to Overlay, Opacity to 69%, Scale at 81%, and drag the gradient onscreen to suit your preference. (Note: If you can’t drag the Gradient Overlay onscreen, try clicking the Reset Alignment button first.) The Gradient Overlay helps break up flat surfaces with tonal variation.
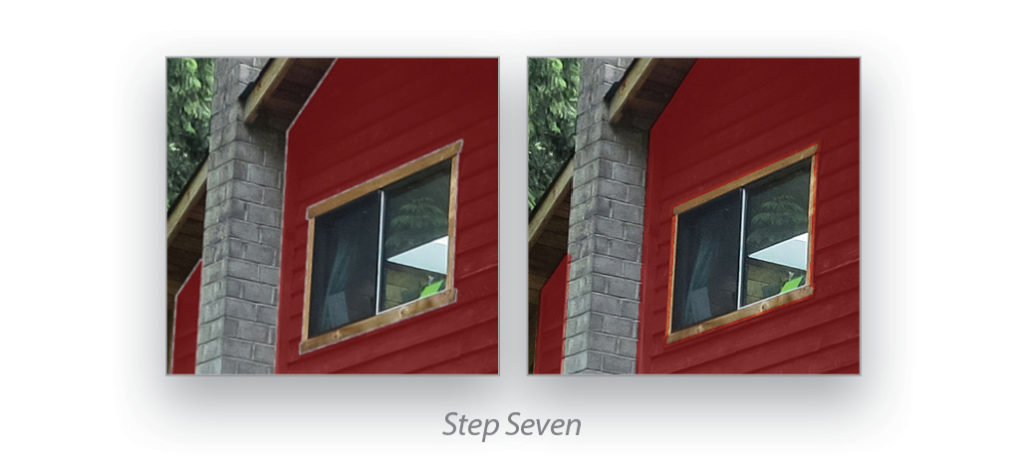
Step Seven:
To remove the bright halo around the paint, click Stroke in the Layer Style dialog. Click the color swatch and then click on the colorized wall to sample one of its hues. Click OK to close the Color Picker. Set the Position drop-down menu to Outside and the Blend Mode to Overlay. Click in the Size field and press the Up and Down Arrow keys to vary the amount. Watch onscreen as you change the size to find what looks best. I settled on a 2-px stroke.
Step Eight:
The water staining halfway up the dormer’s side surface comes from rain splashing off the roof onto the wall. Fortunately, we don’t have to get up on the roof with a pressure washer when Content-Aware Fill will do the job virtually for us. Select Layer 0 and the (regular) Lasso tool, and draw a selection around the water staining. Choose Edit>Fill and select Content-Aware from the Contents drop-down menu. Click OK and press Command-D (PC: Ctrl-D) to deselect.
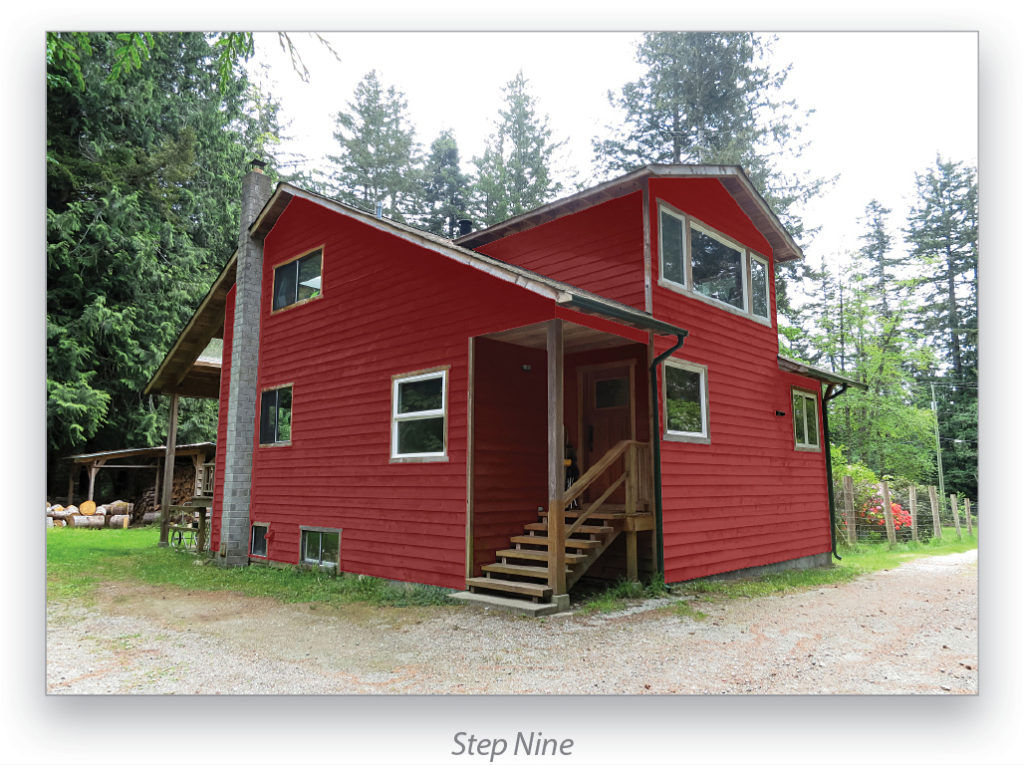
Step Nine:
Repeat Steps One through Seven on this surface and then again on the right surface and entryway of the house. To save time, Option-drag (PC: Alt-drag) the layer effects from one layer to another and all your configurations in the Layer Style dialog will be copied. Then you can double-click the layer styles in the Layers panel to open the Layer Style dialog and customize the properties on each individual surface from the point where you left off the previous surface.
In the end you’ll have answered the question, “What would the house look like if we painted it?” Many such impressions are possible and it takes far less time and money to explore these questions in Photoshop than actually painting the house—or your bike, car, or apartment’s interior—a color you’re not going to enjoy in the long run.
This article originally published in the September, 2015 issue of Photoshop User magazine.


Thank you very much for this – I am going to give this a go on a table I photographed for a client who has asked that I change the colours of the cover caps.
Regards
Rick McEvoy – https://rickmcevoyphotography.com/