In this “Down & Dirty” tutorial, we’re going to revisit a couple of different techniques I’ve done in the past and combine them to create an interesting illustrated look. The final result will appear to be aged with various spatter effects to give it a really vintage look.
Step One:
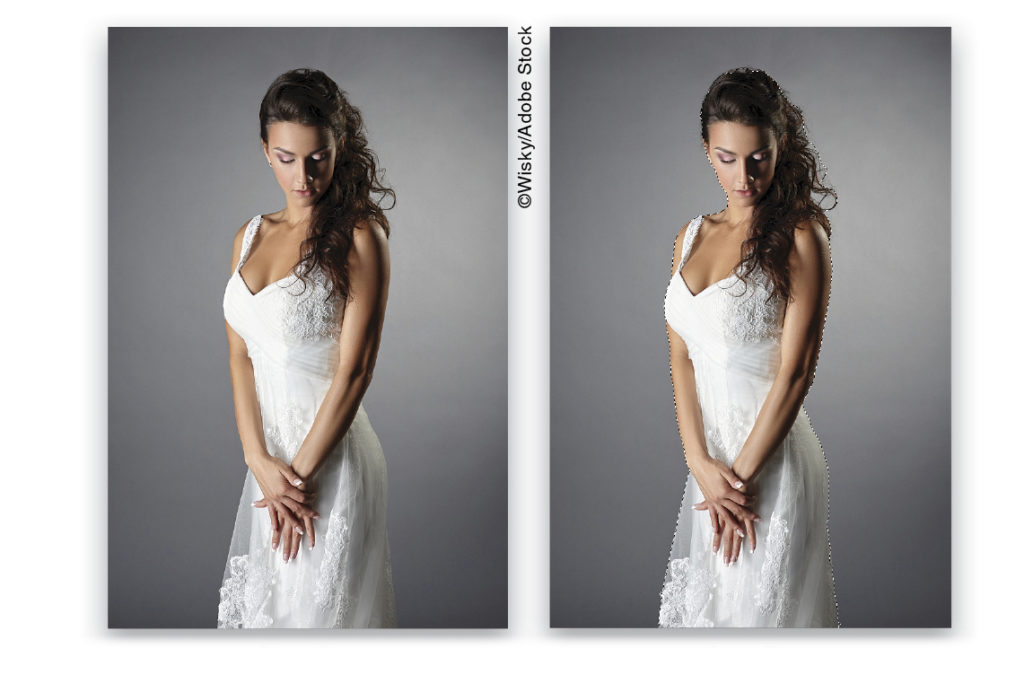
Open the photo of the model, which is part of the file downloads for this exercise available to KelbyOne members at www.kelbyone.com. As usual, we need to extract the subject from the background.
Step Two:
Start by making a selection of the subject using the Quick Selection tool (W). This should be easy with the simple flat background in this example. Once the selection is made, click on the Refine Edge button in the Options Bar, and set the View drop-down menu to On Layers (L).
Step Three:
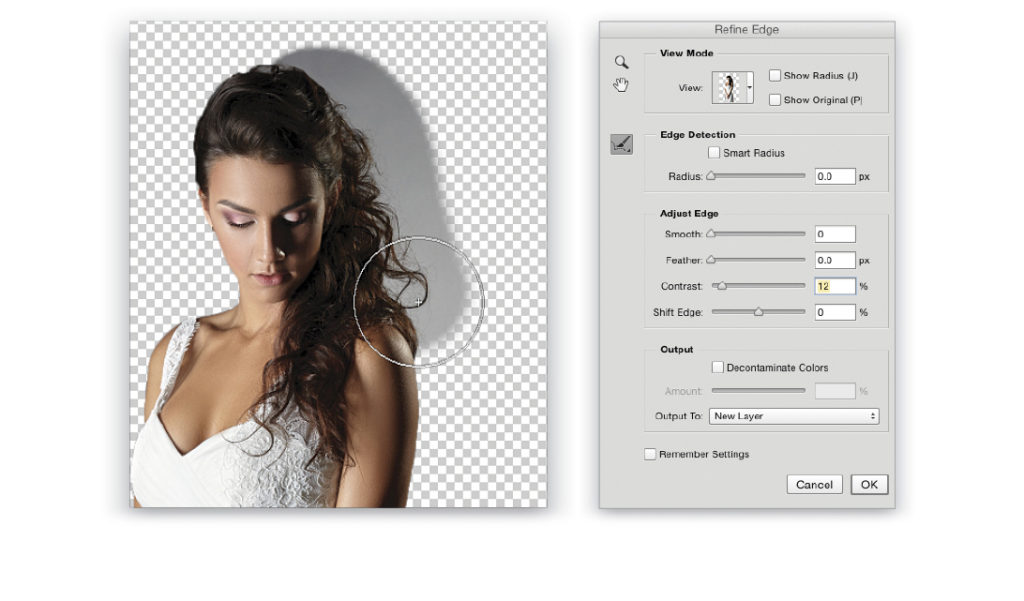
Grab the Refine Radius tool (E) in the Refine Edge dialog and paint around the edge of the hair to fine-tune the selection. Also, paint over the edges of the dress in the lower area to make some of those areas semitransparent just like the dress. Back in the Refine Edge dialog, bump up the Contrast a little. Here we have it set to 12%. Set the Output To drop-down menu to New Layer and click OK.
Step Four:
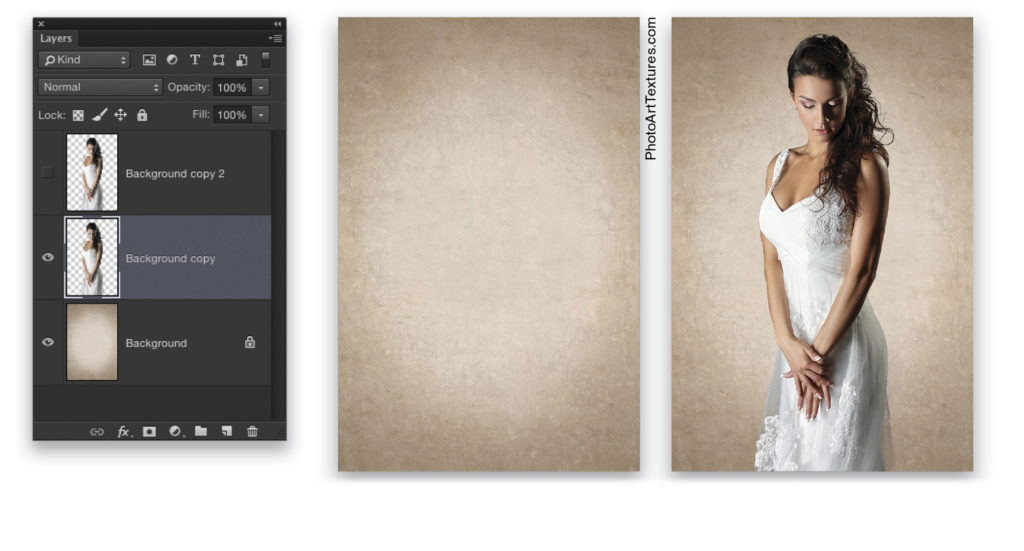
Now open the background texture file that’s part of the exercise download. Use the Move tool (V) to drag-and-drop the extracted subject to this texture. Center the subject on the canvas, and make a duplicate of the subject layer by pressing Command-J (PC: Ctrl-J). In the Layers panel, click on the Eye icon of the duplicate layer to turn it off for the moment, and click on the original subject layer to make it active.
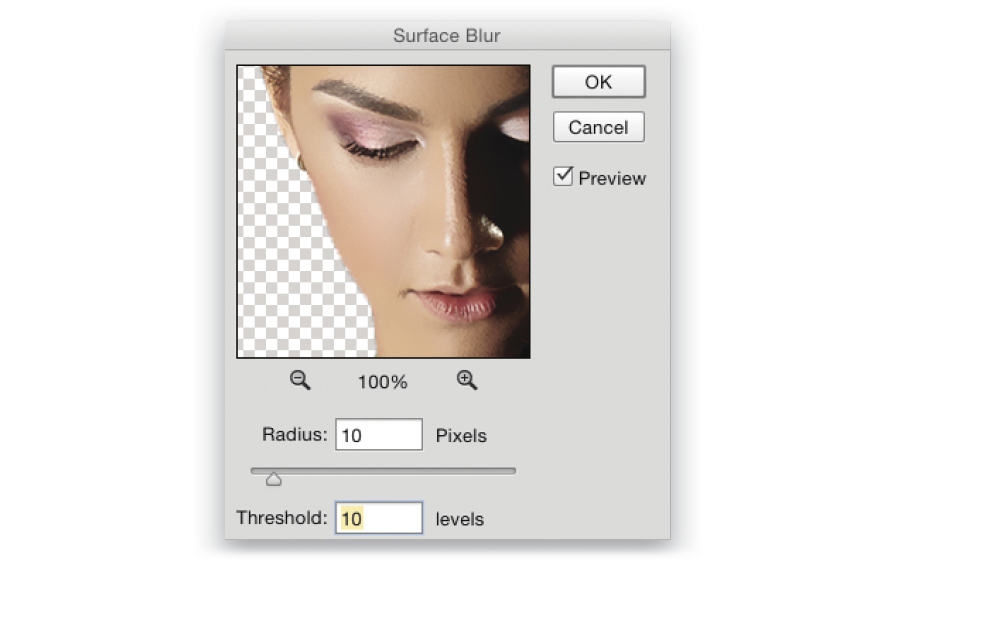
Step Five:
Go to Filter>Blur>Surface Blur. Set the Radius to 10 Pixels and the Threshold to 10 Levels and click OK. This will smooth out the detail of the subject while keeping the edges sharp.
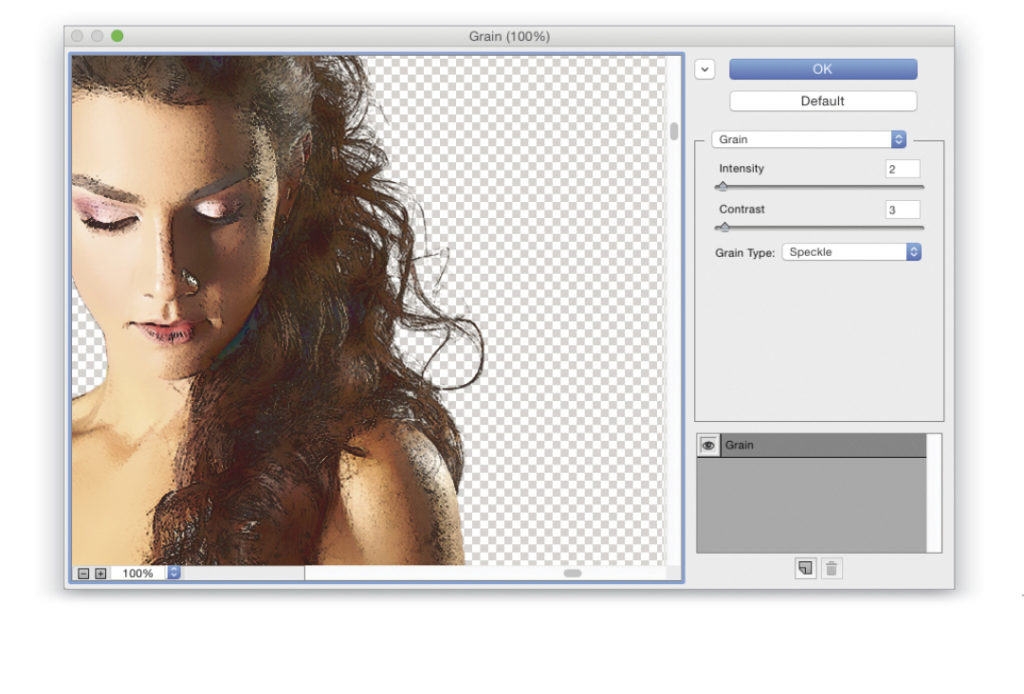
Step Six:
Go under the Filter menu again and choose Texture>Grain. (Note: If you don’t see the Texture option in your Filter menu, go to Photoshop CC [PC: Edit]>Preferences>Plug-Ins, and turn on the checkbox for Show All Filter Gallery Groups and Names.) In the Grain Type drop-down menu, choose Speckle. Set the Intensity to 2 and the Contrast to 3. Click OK. This will give the photo an illustrated look.
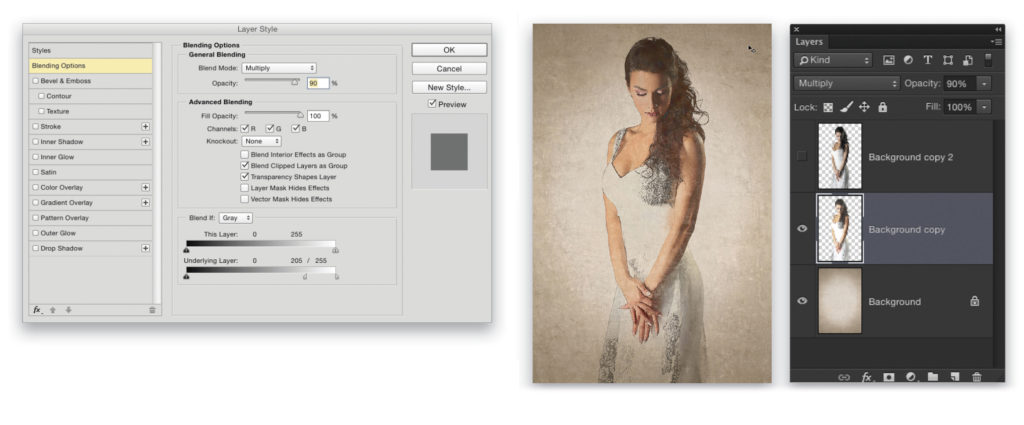
Step Seven:
In the Layers panel, change the layer blend mode to Multiply and lower the layer Opacity to 90%. Double-click the layer thumbnail of the subject to open the Blending Options, which are part of the Layer Style dialog. In the Blend If section at the bottom, hold down the Option (PC: Alt) key, and click once on the white slider below Underlying Layer to split the slider. Drag the left half of the slider to the 205 mark, and click OK. This will allow some of the background texture to show through the subject.
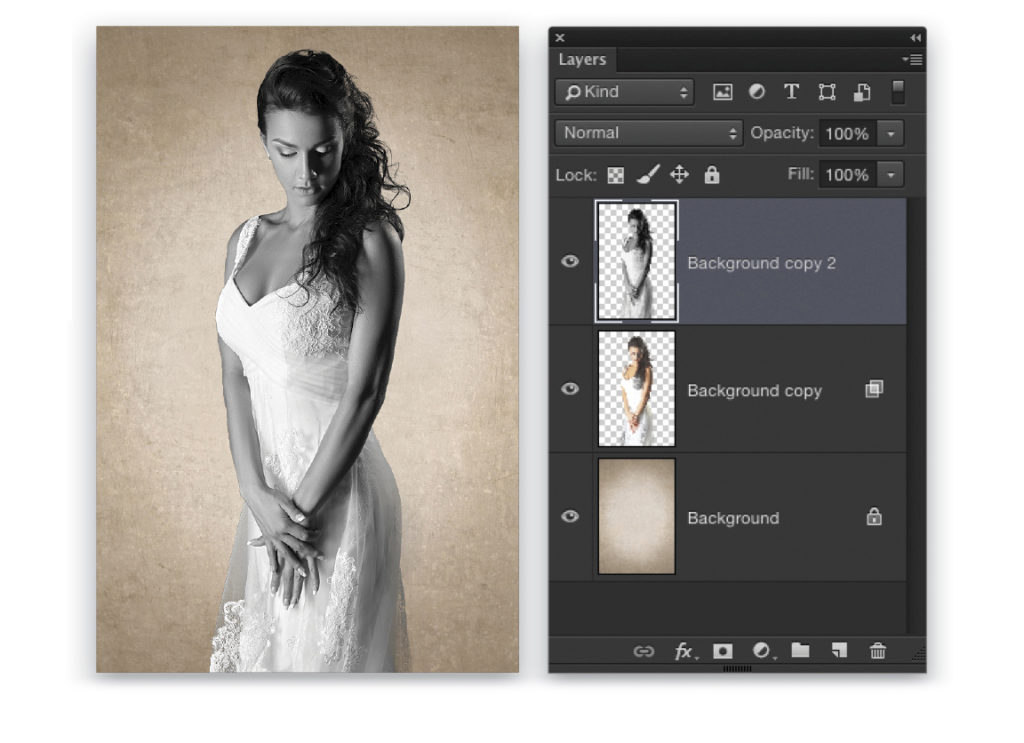
Step Eight:
In the Layers panel, click in the box where the Eye icon used to be on the duplicate layer we created in Step Four to turn it back on, and then click on it to make it the active layer. Remove the color from this layer by pressing Shift-Command-U (PC: Shift-Ctrl-U).
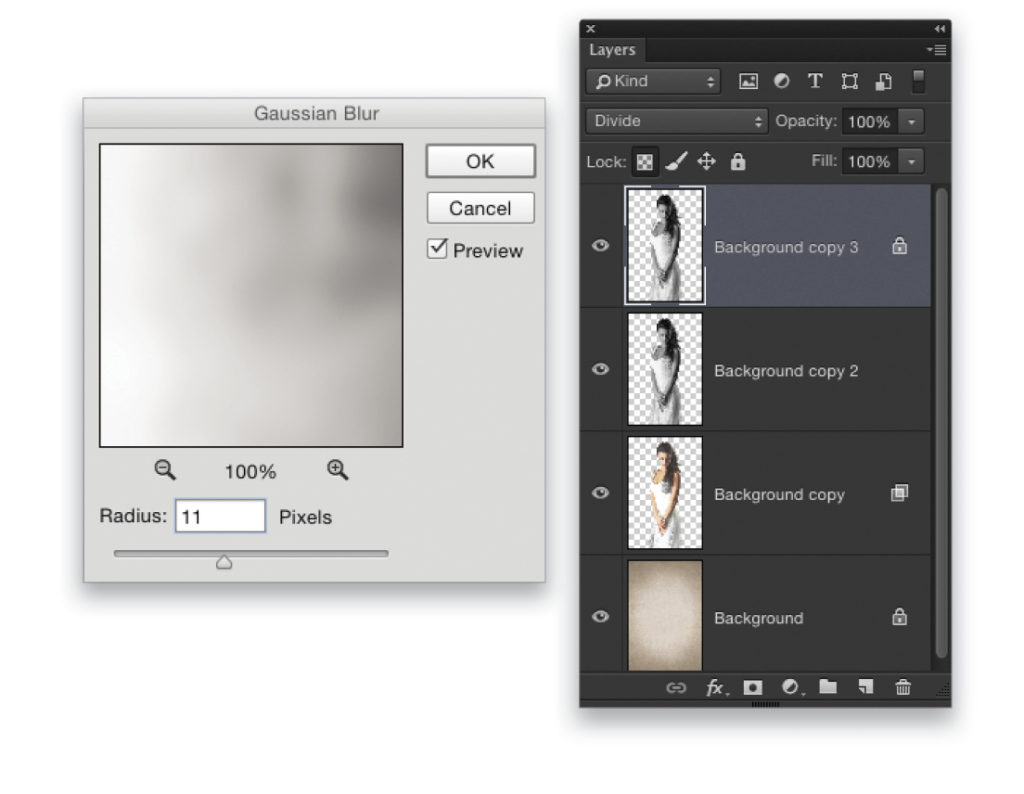
Step Nine:
Press Command-J (PC: Ctrl-J) to make a duplicate of the desaturated layer. Change the blend mode of this new layer to Divide. The image should go mostly white. Go to Filter>Blur>Gaussian Blur, set the Radius to between 5 and 15 pixels, depending on the image (we used 11 for this image), and click OK.
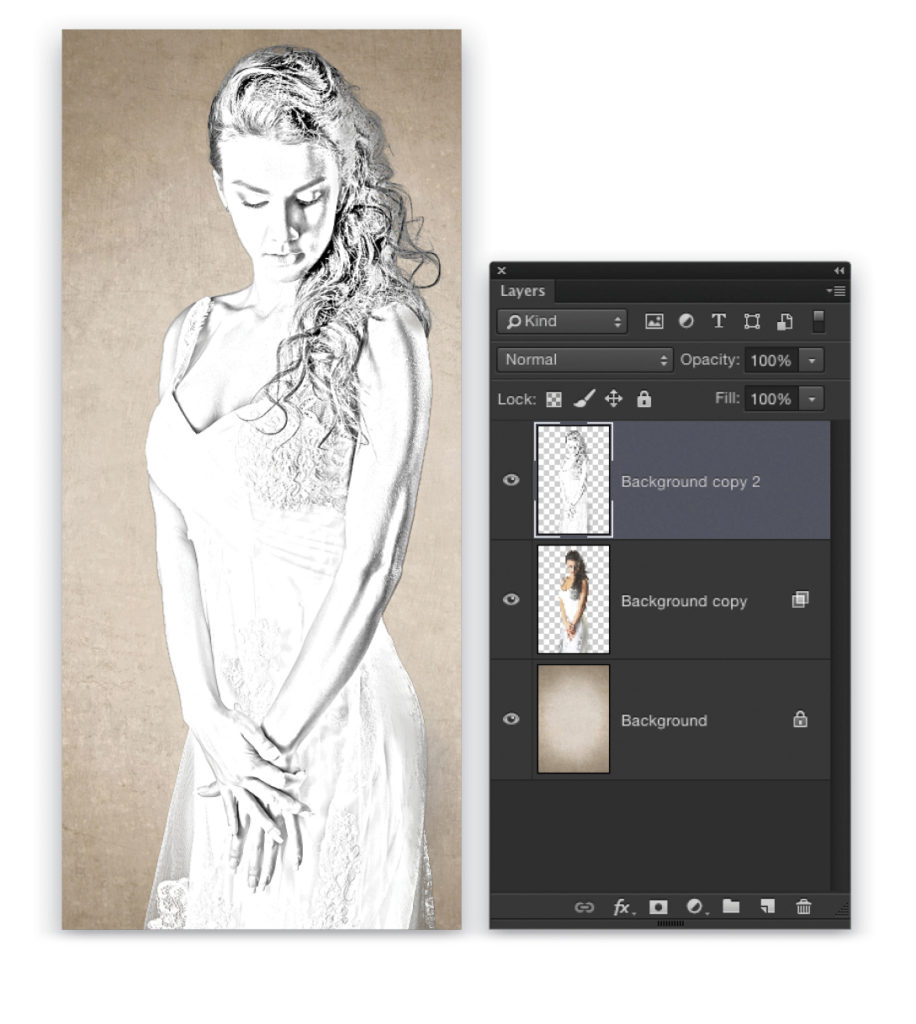
Step Ten:
This will give the image a sketched look. This will be the line drawing for the illustration. Press Command-E (PC: Ctrl-E) to merge the top desaturated layer with the original desaturated layer below it.
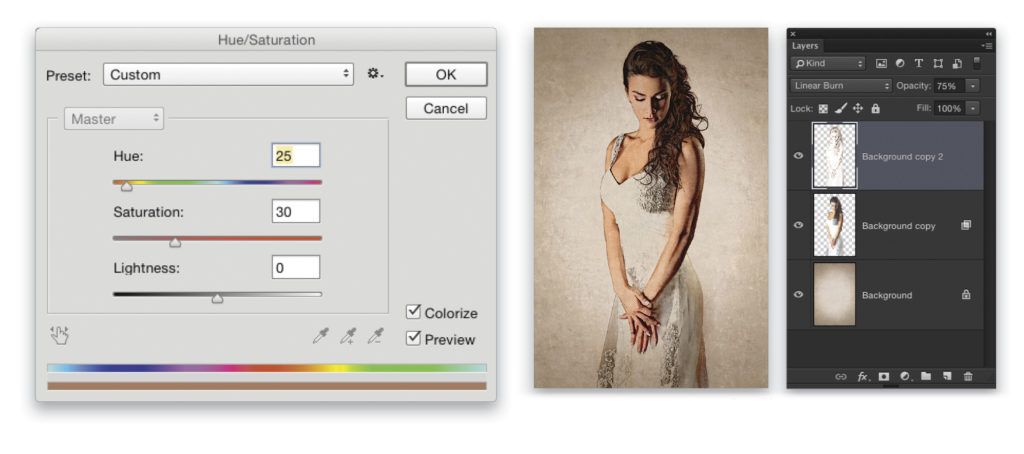
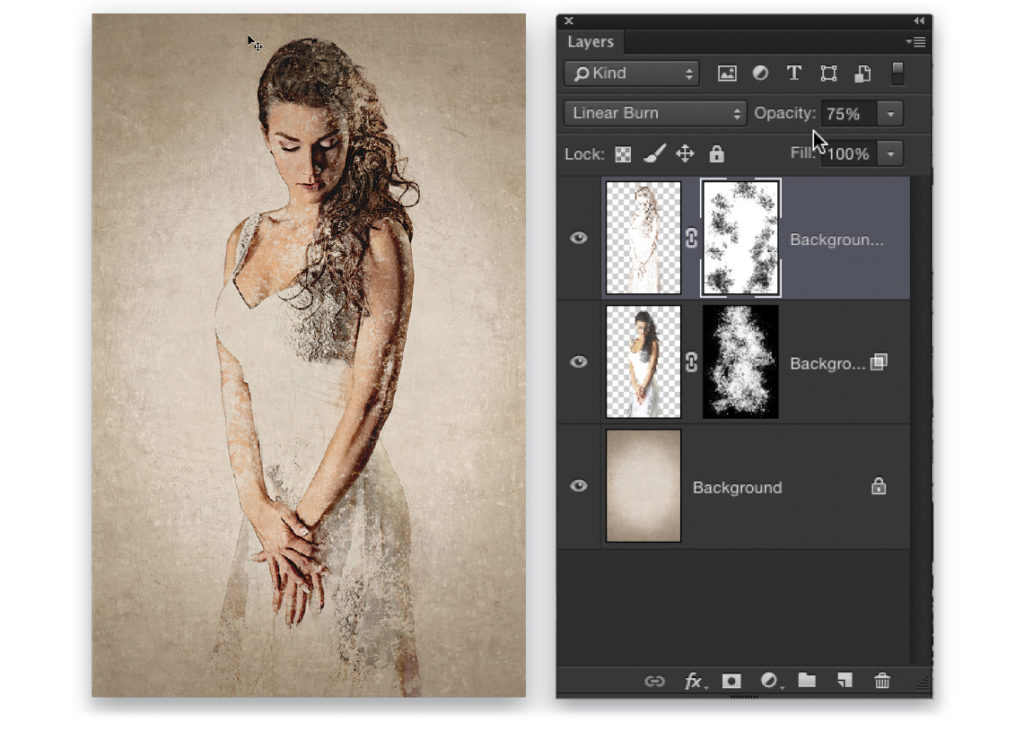
Step Eleven:
Press Command-U (PC: Ctrl-U) to open the Hue/Saturation dialog. Check on Colorize and set the Hue to 25 and the Saturation to 30. Click OK. Now change the layer blend mode to Linear Burn, and lower the layer Opacity to 75%.
Step Twelve:
Open the spatter texture file from the download folder. We’ll use this to create a custom brush. Start by pressing Shift-Command-U (PC: Shift-Ctrl-U) again to remove the color. Press Command-L (PC: Ctrl-L) to bring up the Levels dialog. Adjust the midtone and highlight sliders to boost the contrast of the spatter to make some of the lighter areas a little darker. The more dense the texture, the more opaque the brush will be. Click OK when done.
![]()
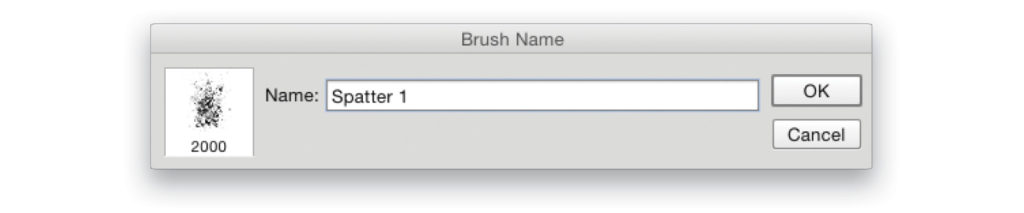
Step Thirteen:
Go to Edit>Define Brush Preset. When prompted, name the brush, and click OK.
Step Fourteen:
Choose the Brush tool (B) in the Toolbox. The new brush preset you just created should automatically be selected. If not, click on the brush preview thumbnail in the Options Bar to open the Brush Preset Picker and locate the brush at the bottom of the list. Then, open the Brush panel (Window>Brush). Click on Brush Tip Shape in the sidebar on the left, and set the brush Size to 700 px and increase the Spacing to around 100%.
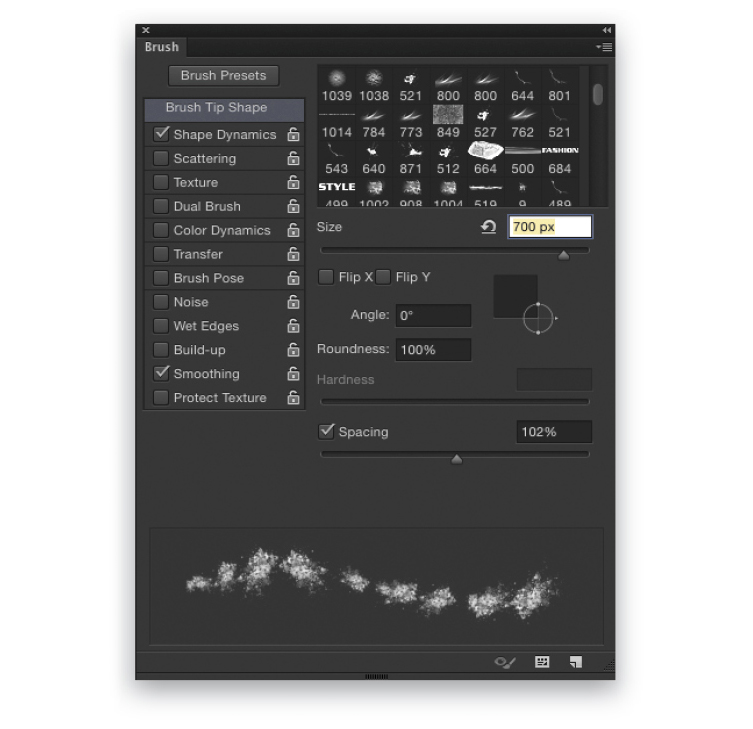
Step Fifteen:
In the Brush panel, activate Shape Dynamics. Set the Size Jitter to 75% and the Angle Jitter to 100%. Also, check on both Flip X Jitter and Flip Y Jitter at the bottom of the panel.
Step Sixteen:
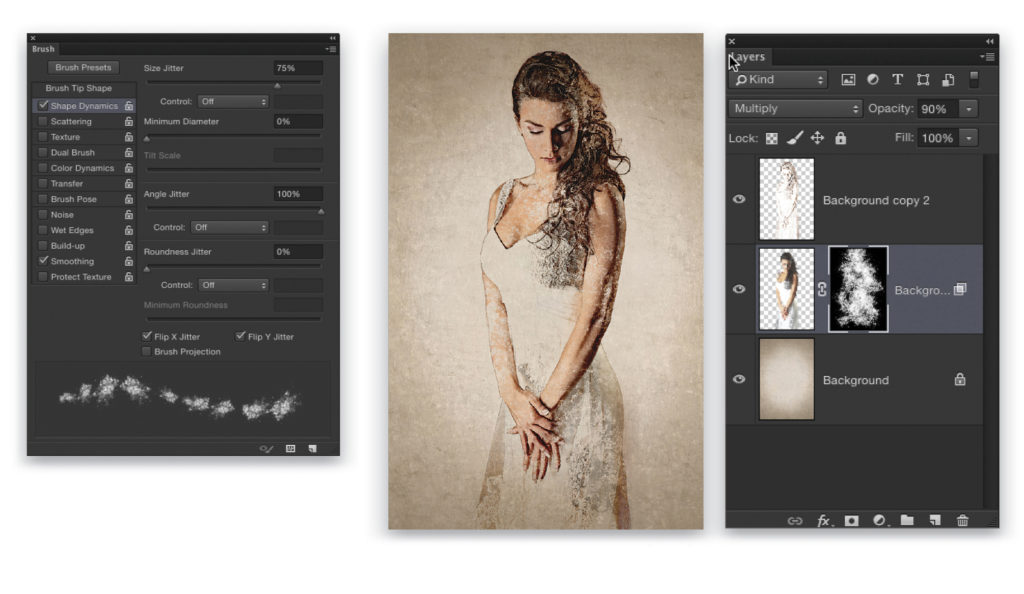
Back in our working document, click on the color subject layer to make it active. Add a Hide All (black) layer mask by holding down the Option (PC:
Alt) key and clicking the Add Layer Mask icon (circle in a square) at the bottom of Layers panel. Set the Foreground color to white by pressing D. Make sure the layer mask thumbnail is active in the Layers panel, and start painting the subject to reveal parts of the color layer—just dab here and there to keep some of the texture visible.
Step Seventeen:
Repeat this with the line drawing layer above, only this time add a Reveal All (white) layer mask by clicking the Add Layer Mask icon with no modifier. Then, press X to switch the Foreground color to black and paint around the subject on the white layer mask to hide parts of the layer.
Step Eighteen:
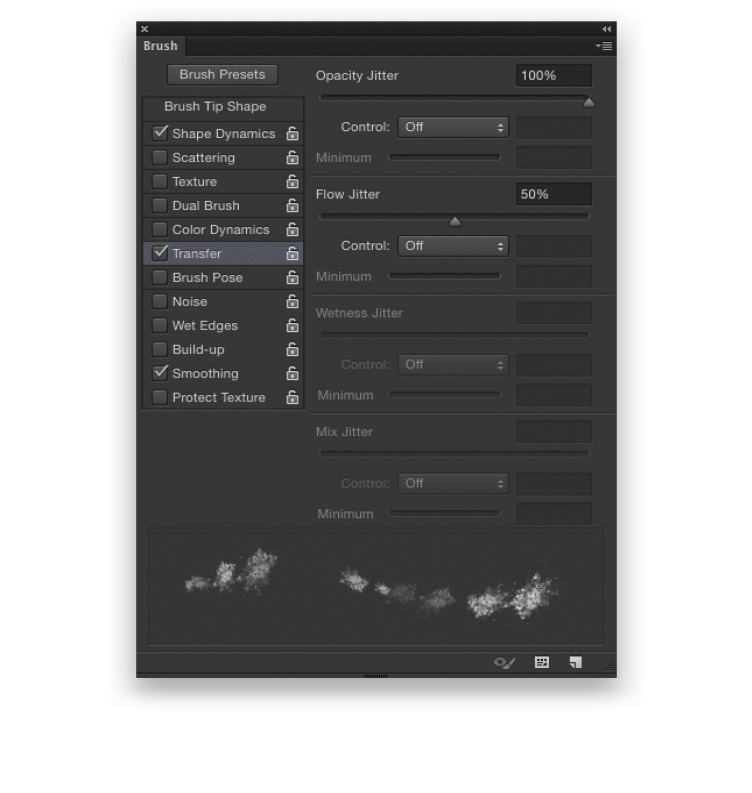
This is an added bonus effect. Click the Create a New Layer icon at the bottom of the Layers panel, position the new layer between the color layer and the line layer, and lower its Opacity to 75%. With the Brush tool still selected, go to the Brush panel and activate Transfer (in addition to the settings already applied). Set the Opacity Jitter to 100% and the Flow Jitter to 50%.
Step Nineteen:
Make sure the blank layer is active, hold down the Option (PC: Alt) key to temporarily activate the Eyedropper tool, and click in an area of the subject’s hair to sample a brown color. Dab a few spatters with this color around the hair area and edges of the image to create a spattered paint look. I also sampled a skin-tone color and added a couple of spatters next to her arm and at the edges of the image. This adds a little more character to the image and helps to unify it.

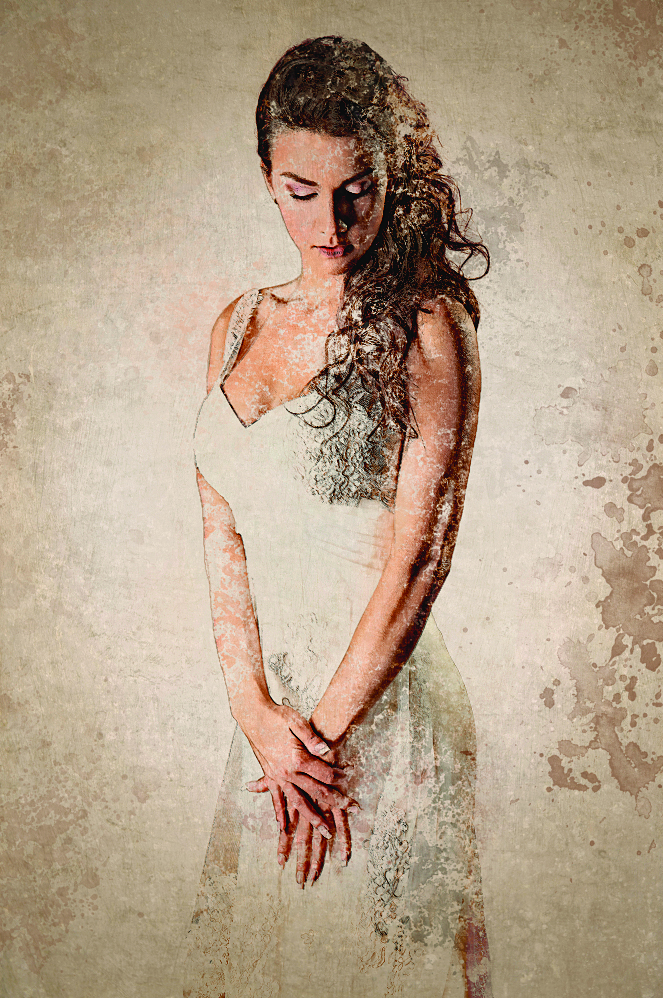
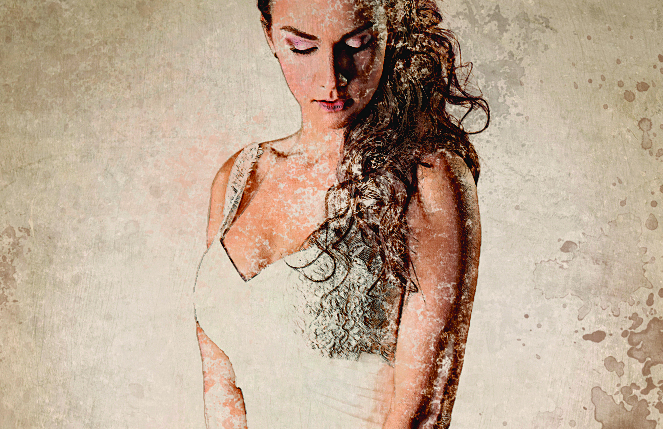
Final Image
This tutorial originally appeared in the November, 2015 Issue of Photoshop User Magazine. To check out what Corey Barker is up to these days, visit him at masterfxtraining.com


