Some of these tricks will only work if you’re a Creative Cloud member, which allows you access to some advanced features and the ability to sync collections from the Lightroom desktop to the Lightroom app on your mobile device or tablet. The app will help you to shoot, retouch, and post photos—all on your phone, which is pretty amazing! So here are my top five tips to help you use the Lightroom app to its full potential!
Tip #1: Shoot with Your Lightroom Camera
Shooting with the Lightroom Camera is a great way to take your phone photography to the next level, and here’s why: You can select your ISO, shutter speed, exposure, and even capture your photo as a DNG (if you have iOS 10 and some android phones)! A RAW file means more data and more fun!

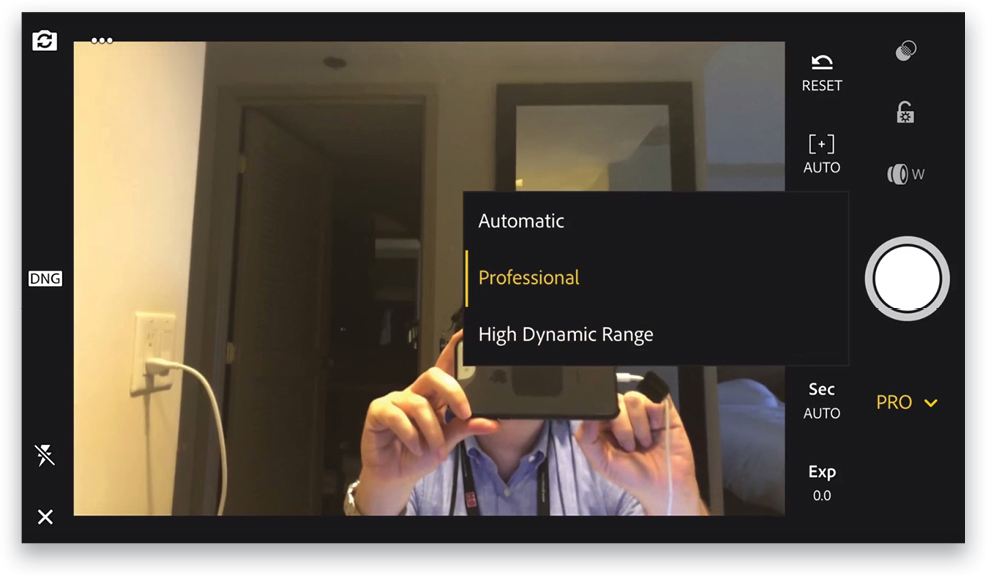
To shoot with the Lightroom Camera, click on the camera icon at the lower right in the Lightroom app.
[Just below the shutter button, select the Professional mode; otherwise, there’s no difference from using your regular phone camera.]
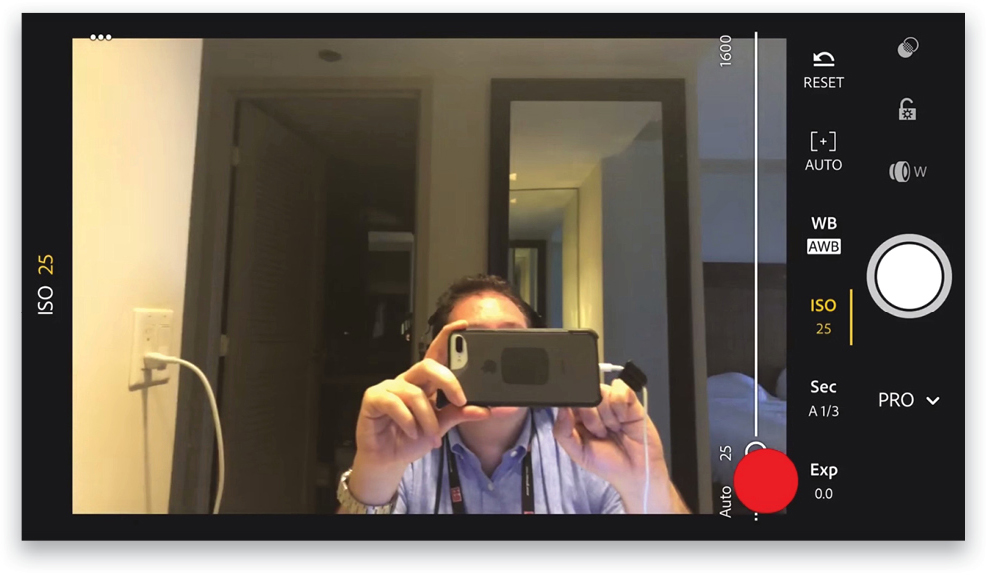
Now that you’re a professional, you’ll have access to the ISO, shutter speed, and exposure! Simply click on the ISO icon, and use the slider to select your ISO. Try to set it as low as possible; I usually go for 25.
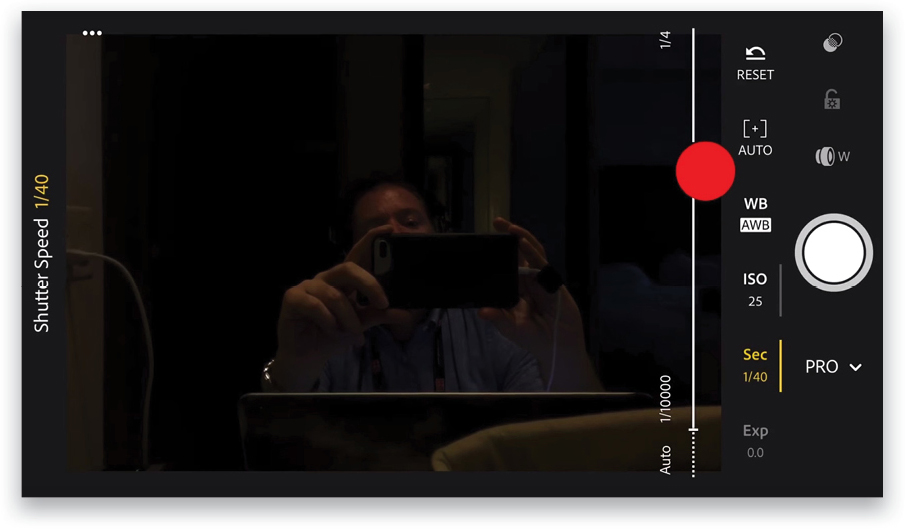
Then you can play around with the speed. You’ll need a tripod if you pick a speed slower than 1/40 because your shot might become blurry. (Here I was in a hotel, so this isn’t the perfect situation to take a photo, but if you have some light, it works great. I had to boost the ISO. You can adjust your speed and ISO depending on the light situation.)
This is why you should shoot with your Lightroom camera: on the left side of your screen, you have the choice of JPG or DNG File Format—please choose DNG! You won’t regret it; it really makes a big different if you want to retouch your photos!

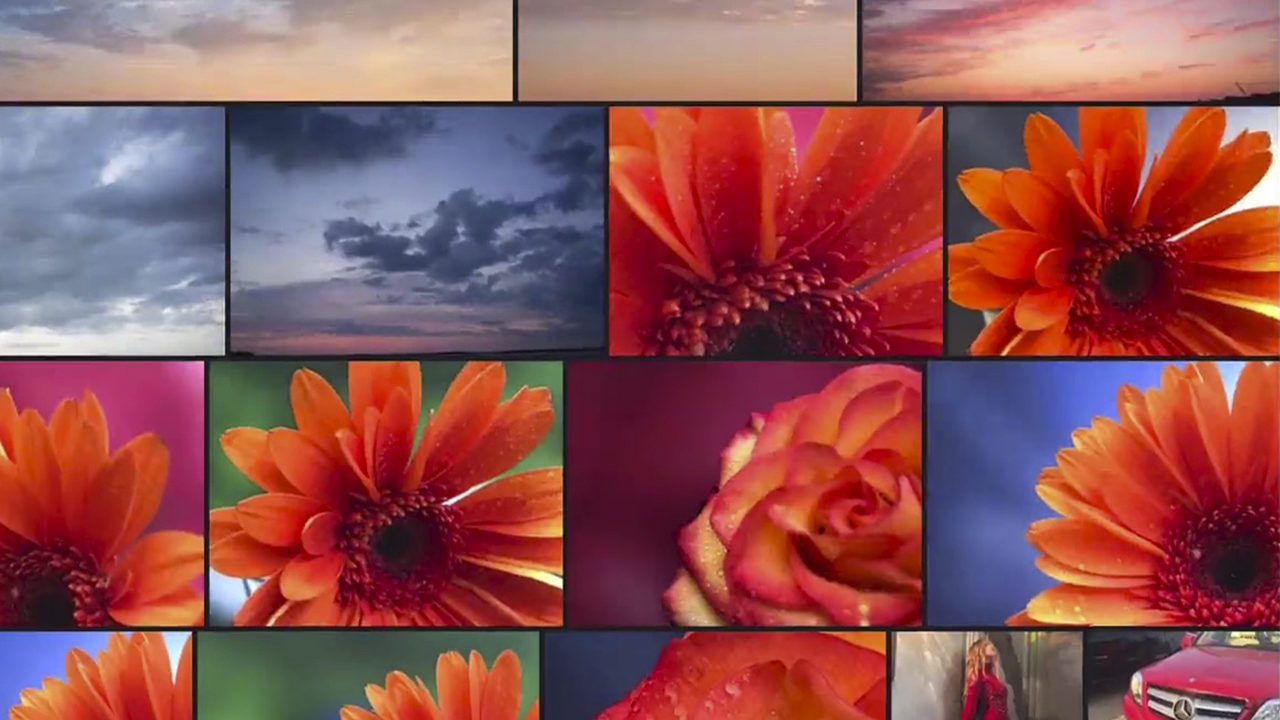
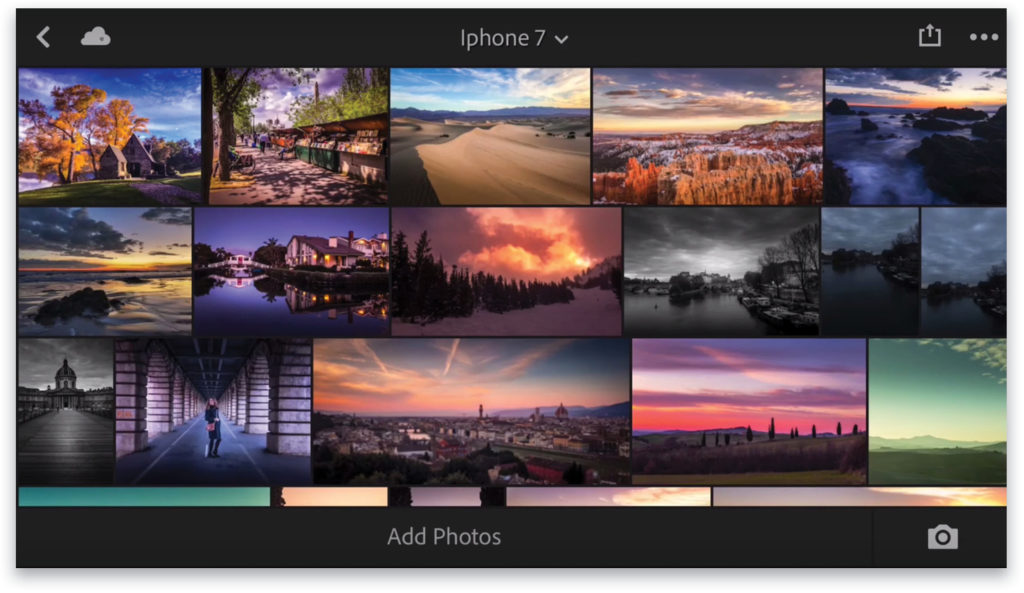
Here (below) are some examples of photos that I shot with my iPhone 7 so you can get an idea of how great it is to shoot RAW with your Lightroom Camera!
Tip #2: Retouch Your Photo Directly in Lightroom Mobile
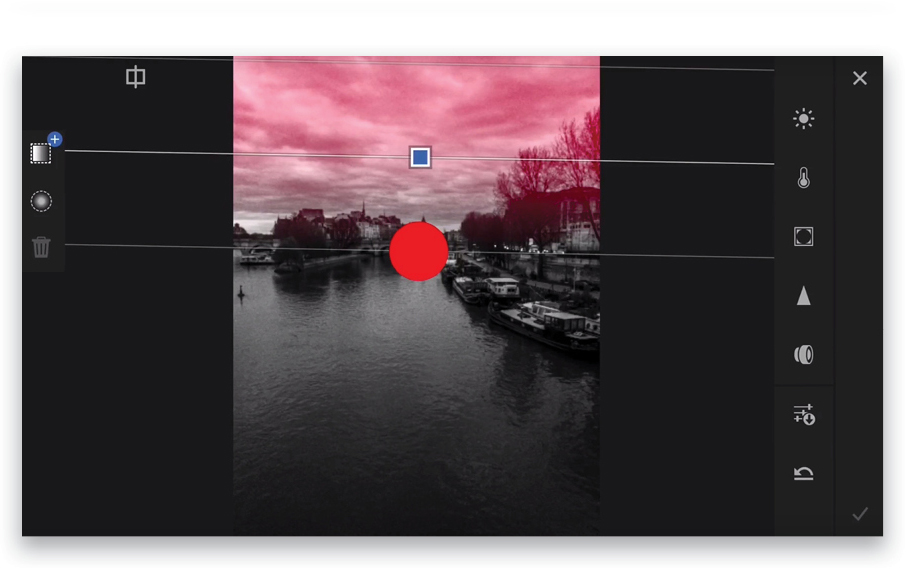
Once you have your RAW file, you can use the same workflow that you use at home on the Lightroom desktop. You can open up the shadows, bring down the highlights, boost the white point, lower the black point, apply radial filters and linear gradients, etc.
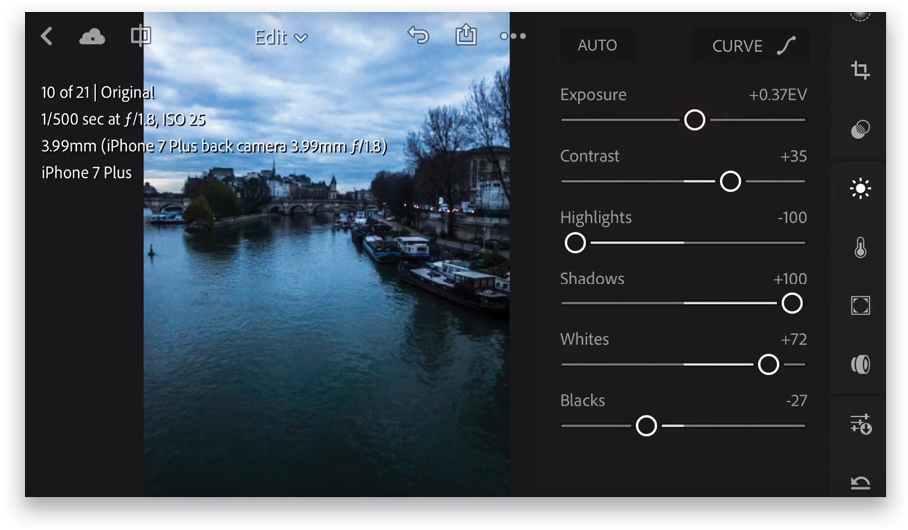
This is very practical for getting immediate results, plus you can save the files to your camera roll and share them right away on social media!
Tip #3: Use Lightroom Collections to Show and Share Your Work
The great thing about Lightroom Mobile is you can see all your collections that you’ve synced in Lightroom desktop, so if you want to show your work to someone on your mobile device, you just have to click on a collection and all your photos are right there.
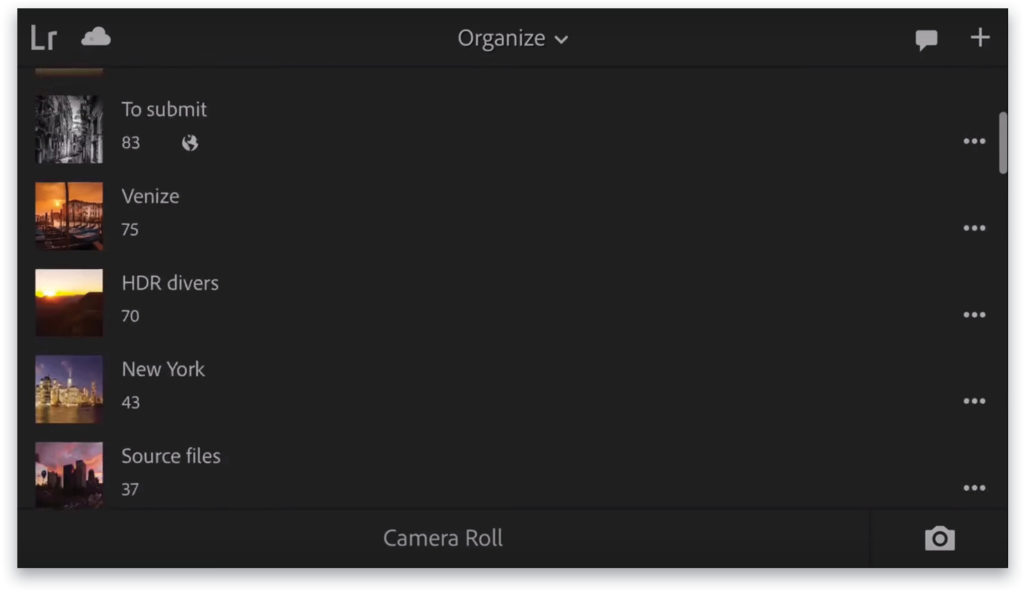
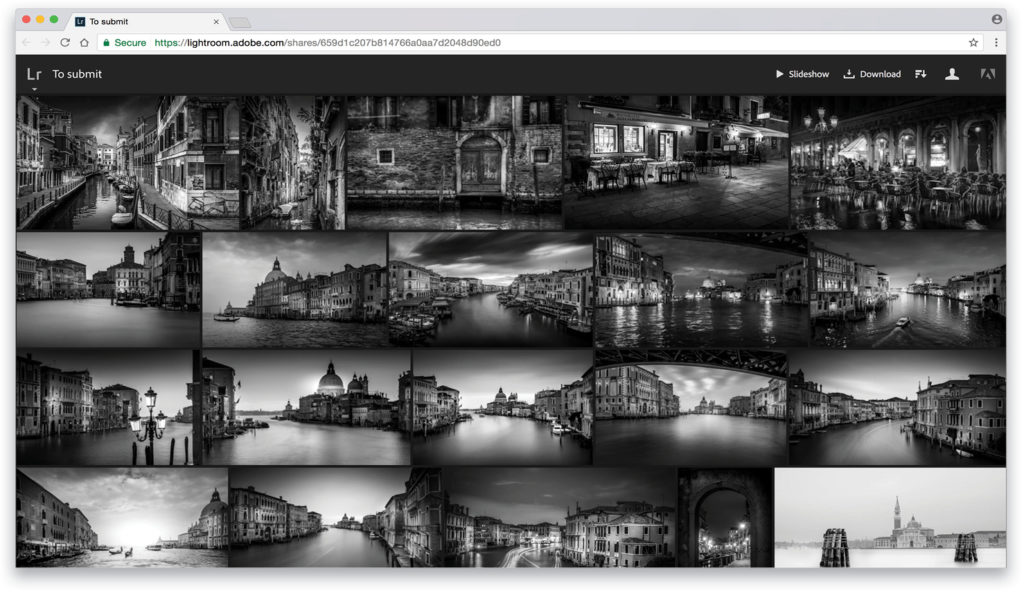
You can also share your collection with anyone; Lightroom Mobile will create a web link for you that you can send to anyone. That way, they can see an entire collection or a single photo. They can even view your photos as a slide show. I use this feature a lot to submit my photos to galleries or to show them to friends. To share a selection, first go into that collection, tap the Share icon (square with an arrow) near the top right, and then tap Share Collection.
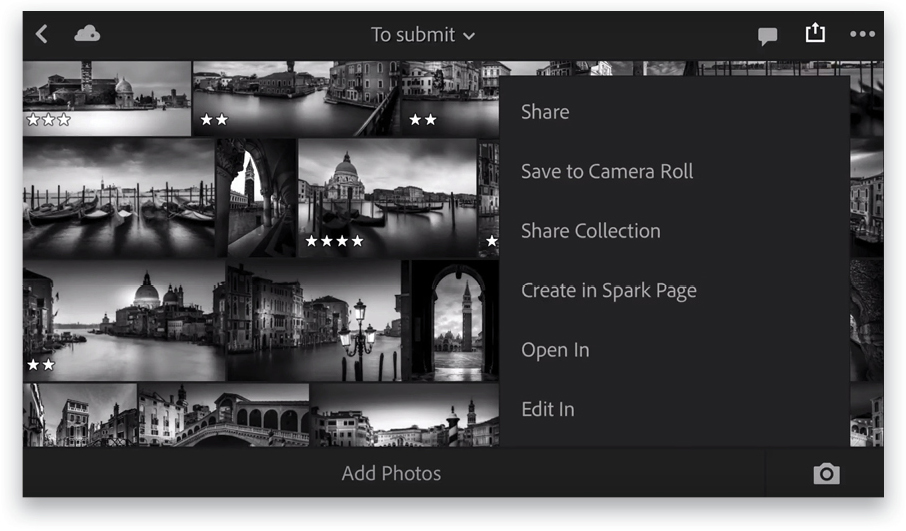
And in the dialog that appears, tap Share.
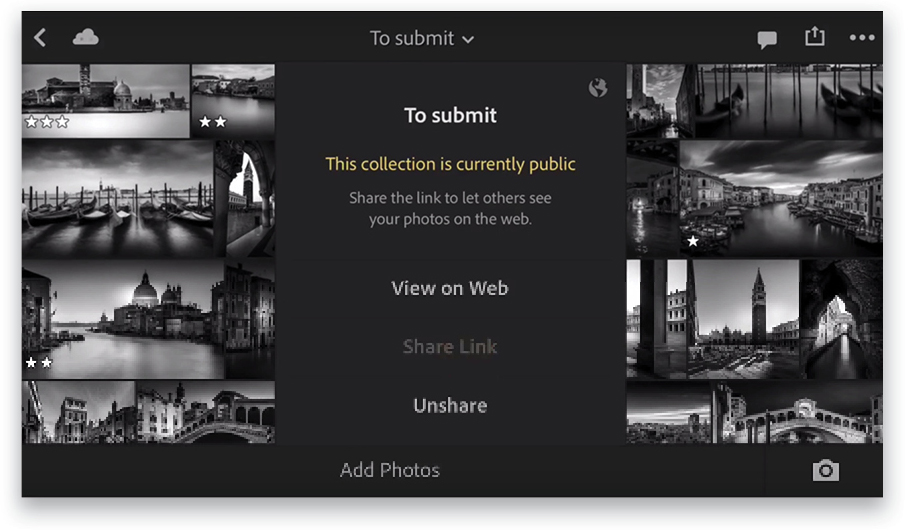
Now you can send the link via email, text, etc., and the other person will have access to a very professional web interface with your photo collection. No need to create or use a template—it’s so easy to use!
Tip #4: Retouch Your Photos Online Using Lightroom.Adobe.com
When using lightroom.adobe.com (creative cloud members only), you can access all of your collections synced with Lightroom Mobile, and the really great thing is that even if you’re logged in on another computer, you can still retouch your photos. They will update everywhere: on your Lightroom desktop and Mobile. It’s perfect to use with a client or a friend because you can retouch a photo right away with his computer, even if he doesn’t have Lightroom. If the colors don’t look nice on his computer, you can fix it right there, and it will synchronize with the collection.
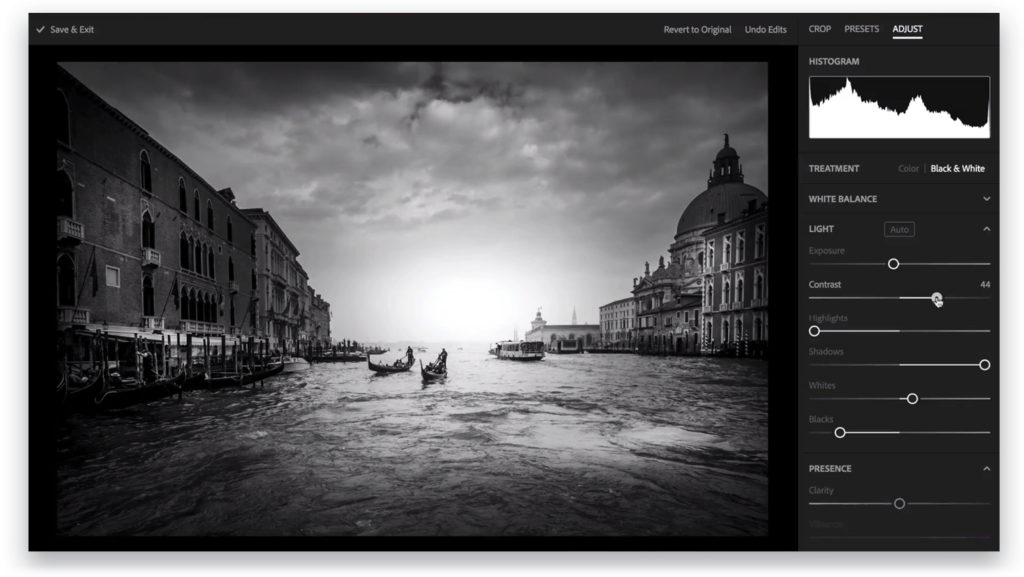
To edit a photo, click on its collection, click on the photo, and then click Edit this Photo in the top left corner. When you’re done, click Save & Exit at the top left.
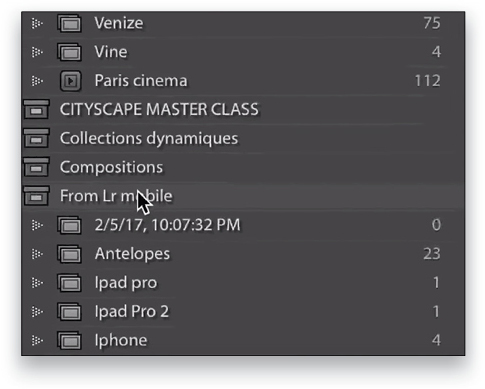
On your main desktop, you can find your collections from your mobile under a folder called From Lr mobile.
Tip #5: Find Your Photo in Seconds!
I always try to apply keywords when I import photos, but I forget from time to time. But this isn’t an issue for me anymore because Adobe developed a very useful tool called Adobe Sensei, which allows you to search your photos without keywords! Currently, this is only available as a Technology Preview on lightroom.adobe.com. To turn it on, click on the Lr icon at the top left, and select Technology Previews. In the window that appears, click on the checkbox for Search, and then click Apply Changes. You’ll see a Search field appear at the top. Now you can type a word such as “sunset” in the Search field, and even if you didn’t keyword your sunset photos, it will still find them!
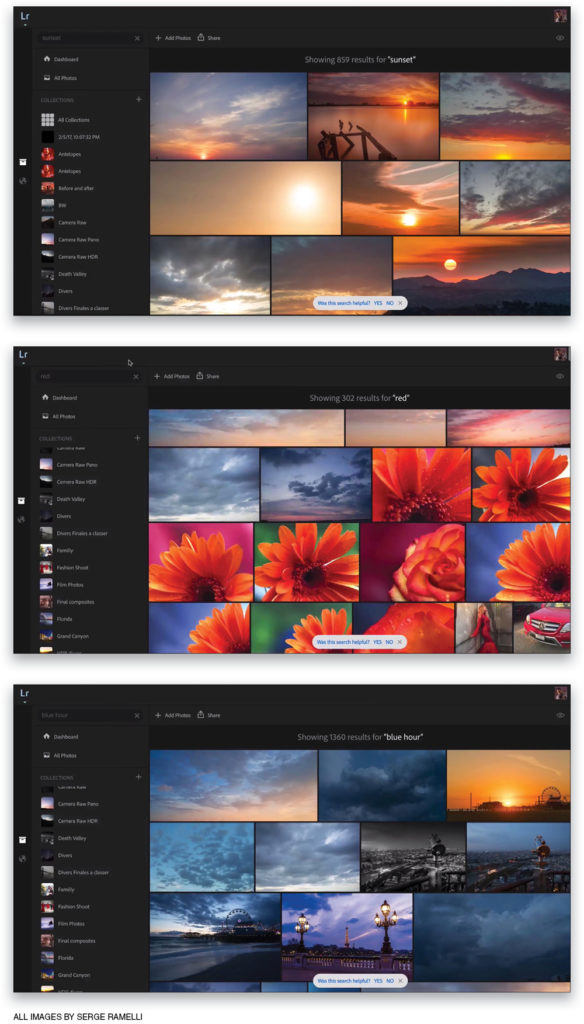
It’s so amazing to be able to find your photos without keywords, and it works great! You can even look for colors such as “red” or “blue hour.”
Well, I hope these five tips for Lightroom Mobile are useful. Now you can’t say that you didn’t have your camera, because you always have your Lightroom Camera to capture great moments!


Very interesting but I’m suffering from information overload right now… one question,however, I’m on thecAdobe monthly plan and do not use the Apple iCloud. Does one need iCloud to do all these things?
That’s a good question for our help desk! Here’s their link: https://members.kelbyone.com/my-account/helpdesk/