Every artistic creation—in photography, music, painting, writing, and so on—starts with an idea. Oftentimes, an idea goes through several incarnations before it becomes a reality. Of course, sometimes we realize that our original idea was not that great to begin with, so we ditch it. Or maybe our original idea takes on an unexpected, and even better, reality.
Endless Possibilities
When it comes to digital-photography image making, which starts with image capture and ends in the digital darkroom or with a print, the idea-to-image possibilities are virtually endless. The only limitations are one’s ideas, as well as not knowing all the possibilities of digital-imaging programs.
In this article, I’d like to share with you three examples of the idea-to-image concept using images I took during the Rural China workshop that I co-led with my dear friend Scott Kelby this past September. One message of this article is to get it right in-camera, and then to explore the possibilities in Lightroom and with plug-ins. Another message is that I’d like to encourage you not to give up on your idea when things don’t go exactly according to plan. Who knows? As stated above, your final image may exceed your expectations.
Be Aware of Light
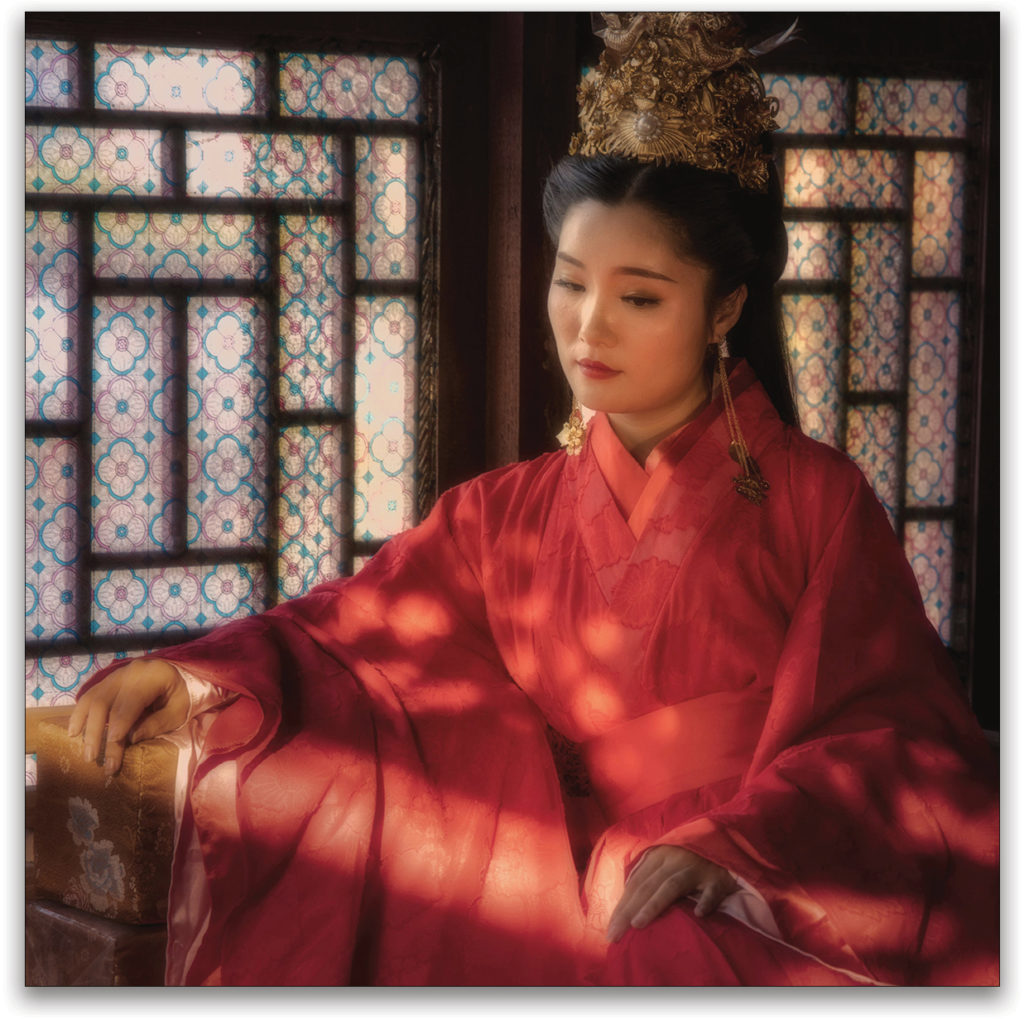
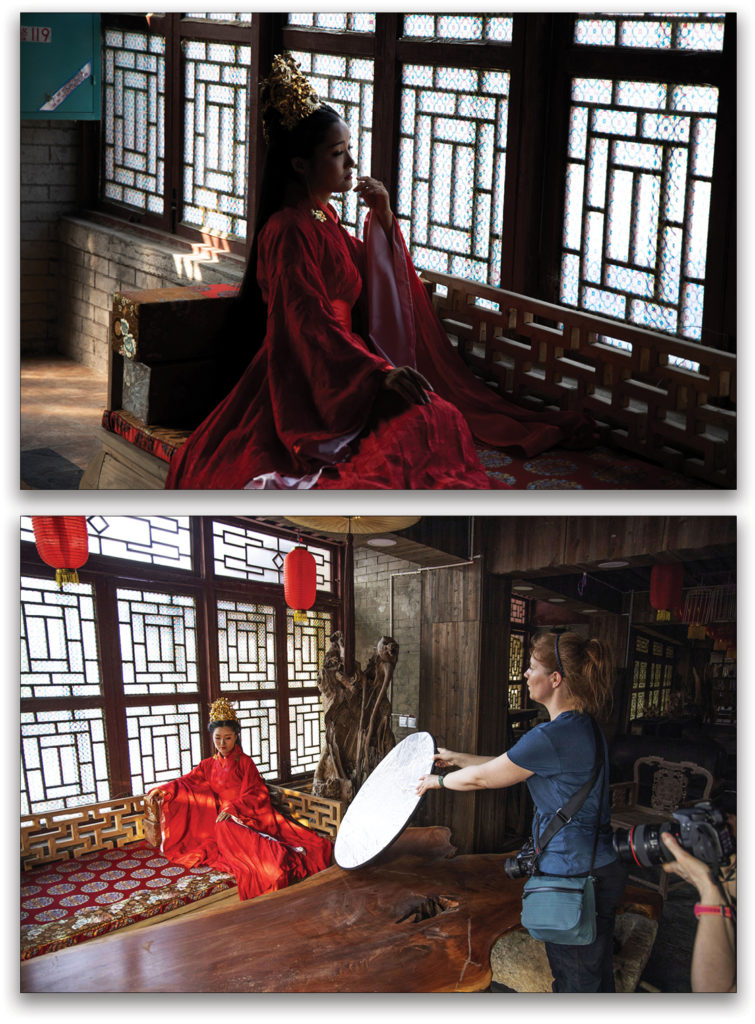
The image below is the final processed image from one of our model shoots. My first try/first idea was to include the model and the window in the frame, and to use only window light to illuminate the subject. When I exposed for the highlights of the window, however, I thought the shadow side of the model’s face was too dark, as illustrated here by this quick shot I took over the shoulder of one of the workshop participants. What’s more, I didn’t like the window bars “running through” the model’s face.
I also thought the entire scene might be more interesting if photographed from the opposite angle, because there were light rays falling on the couch in front of the model (out of the frame here), and also falling on the window ledge behind the model. The idea was to see if the light rays would add nice highlights to the model’s beautiful dress.
As photographers, we always need to be aware of how light can enhance—or ruin—a scene.
The quick fix: I asked the model to turn around 180º, so that the light rays fell on her dress. A pleasant surprise was that there were also “balls” of light falling on her dress.
Next I asked our “fixer,” Mia Beals (who organized our workshop with her husband Andy), to hold a reflector and bounce some window light back onto the shadow side of the model’s face, filling in those shadows. We adjusted the amount of reflected light by asking Mia to move closer to or further away from the subject.
I know. I know! You’ve probably heard me share KelbyOne instructor Joe McNally’s portrait suggestion, “If you want an interesting portrait, don’t light the subject’s entire face.” It’s great advice, which I followed on the other two examples in this article; but for this shot, I wanted soft, even, flattering light, so I didn’t follow Joe’s (and my own) advice.☺
Plan for Your Processing
Here’s the image from the untouched RAW file. I intentionally underexposed the image because I didn’t want to blow out the highlights in the intricate and colorful window. What’s more, I knew I could open up the shadows in Lightroom. (Plus, another idea here was to frame the image for a cover of a magazine, hence the relative free space for type at the top of the image.)
Getting back to those window bars “running through” the model’s face, did you notice how I composed the photograph so her face was positioned against the plain wood panel between the windows, letting her face stand out in the image?
Lightroom & Color Efex Pro
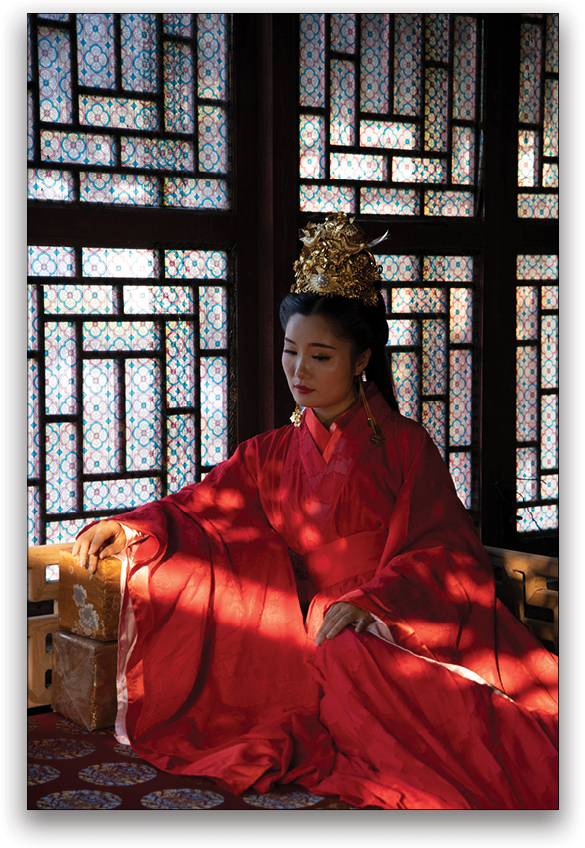
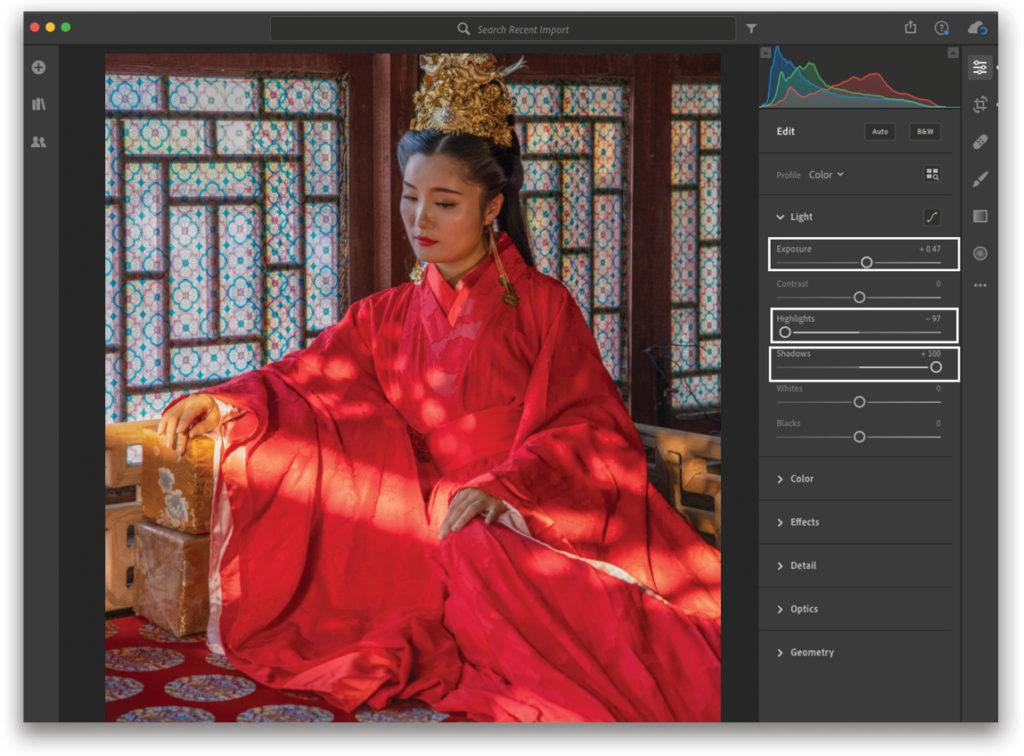
The idea in Lightroom was to make the image I saw in my mind’s eye, and here’s how I reached that goal. I usually start with the thing/problem that bothers me the most. In this case, I wanted to see more details in the model’s face and in her dress. In the Edit panel, I expanded the Light panel, as illustrated here, and increased the Exposure. Then, I toned down the Highlights to preserve detail in the windows, and opened up the Shadows.
In the Optics panel, I clicked both the Remove Chromatic Aberration and Enable Lens Corrections checkboxes, something I often start with when the exposure isn’t as tricky as it was here. Because part of my idea was to make a big print, in the Detail panel, I reduced the noise in this ISO 800 image. Had this shot been only for Instagram, I wouldn’t have worried about the noise. Finally, to draw more attention to the main subject, I added a subtle Radial Gradient to darken the edges of the image.
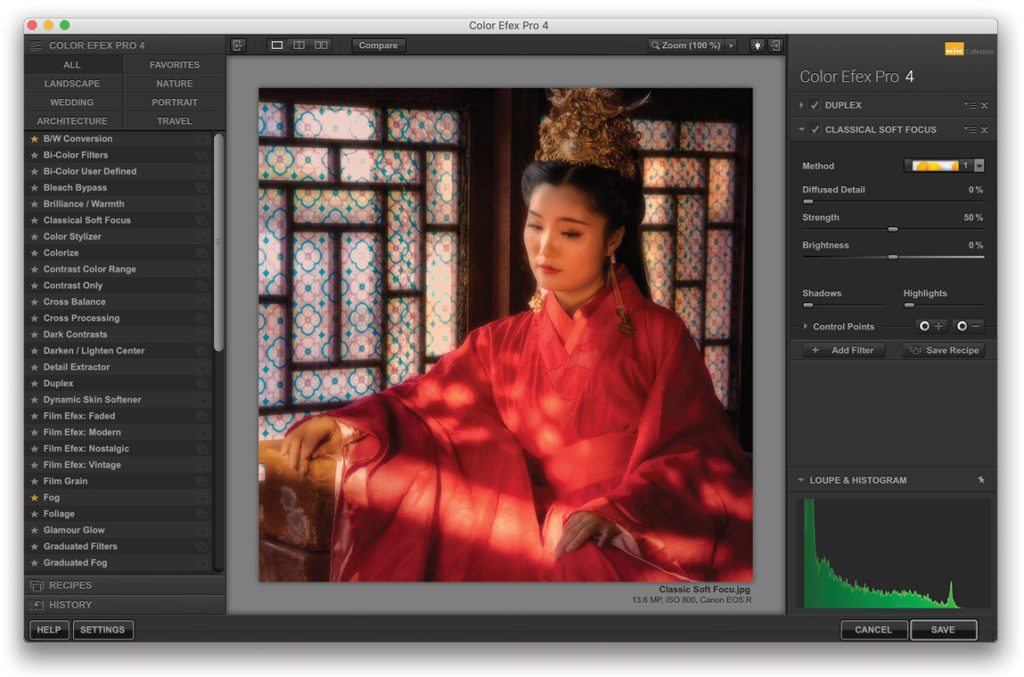
My idea was becoming an image, but after looking at my computer monitor when I returned home, I had the idea for a photograph with an even softer and warmer glow. Using Nik Color Efex Pro by DxO, I added the Classical Soft Focus filter and then the Duplex filter, both at the default setting (you can choose from different presets and fine-tune those presets almost endlessly).
My idea-to-image process was complete—for the time being, anyway. I often find that I go back to images and reprocess them for different end results, depending on my mood. That’s a good idea, and I suggest revisiting images from time to time to all my photo workshop students.
Two More Examples
Following are two more examples of the idea-to-image concept. These pictures were also taken during my workshop with Scott. I’ll start with the final image and then show you the starting point for the idea. And, yes, here I did follow Joe’s advice.
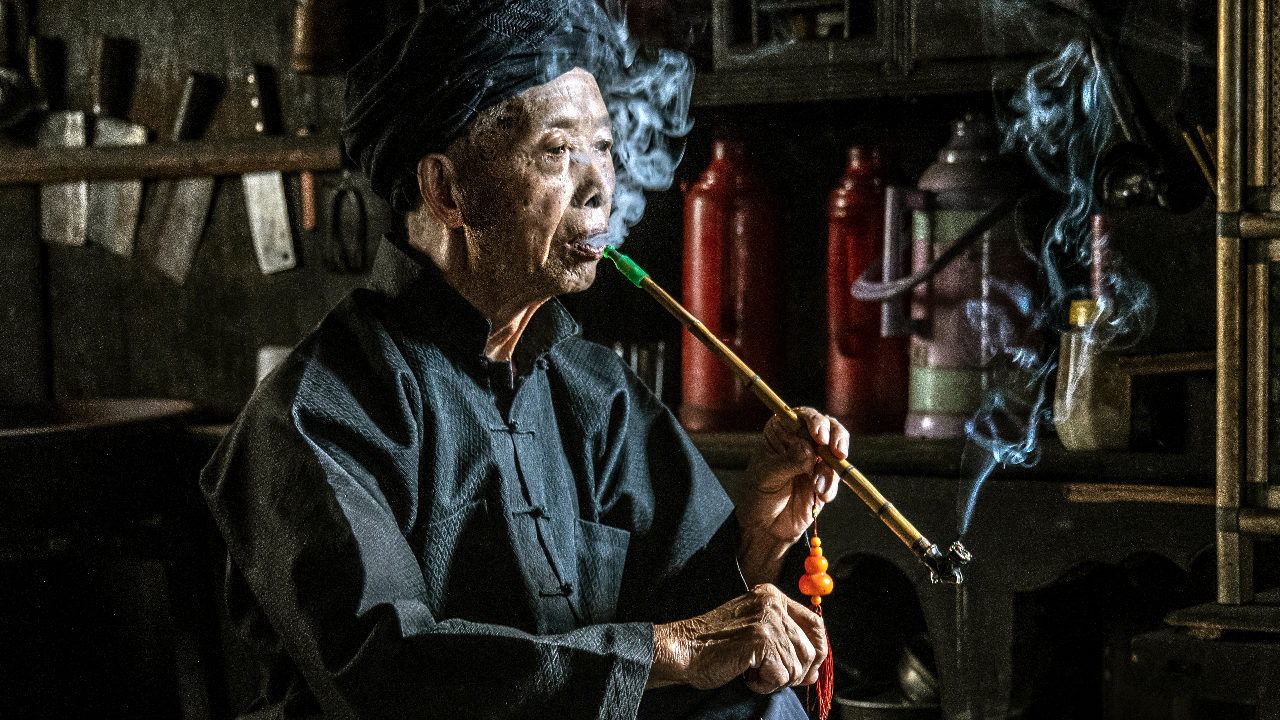
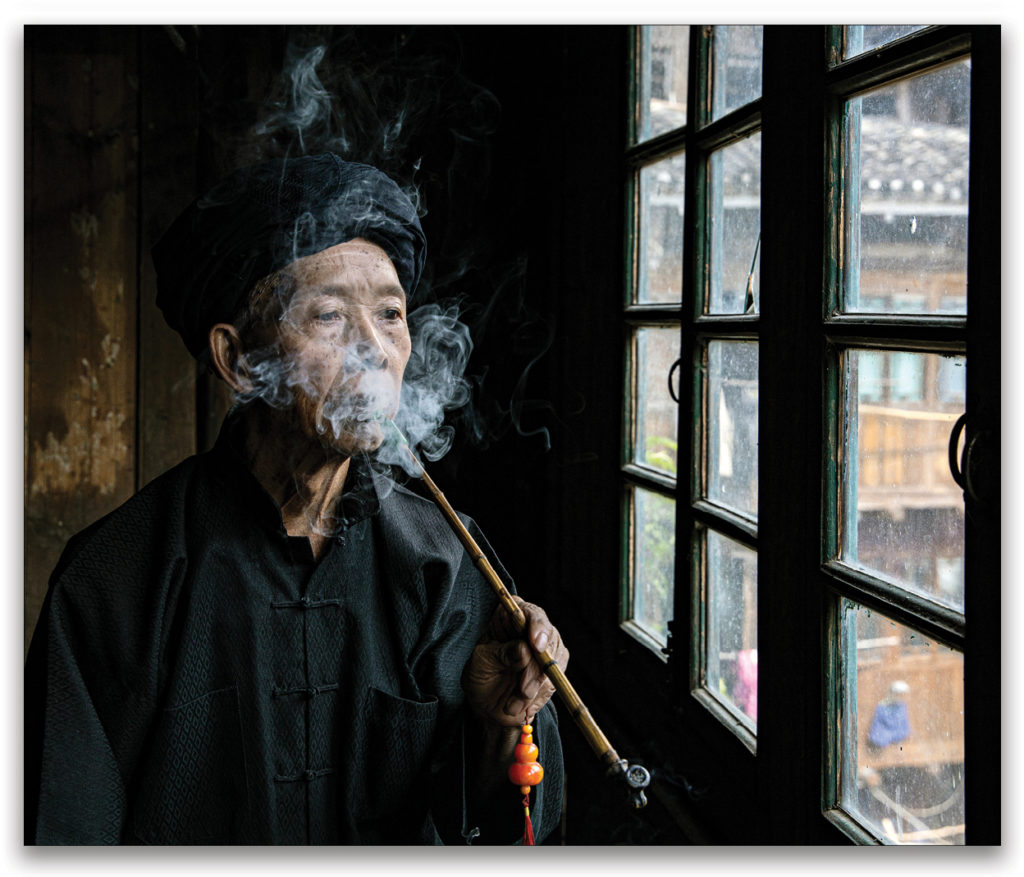
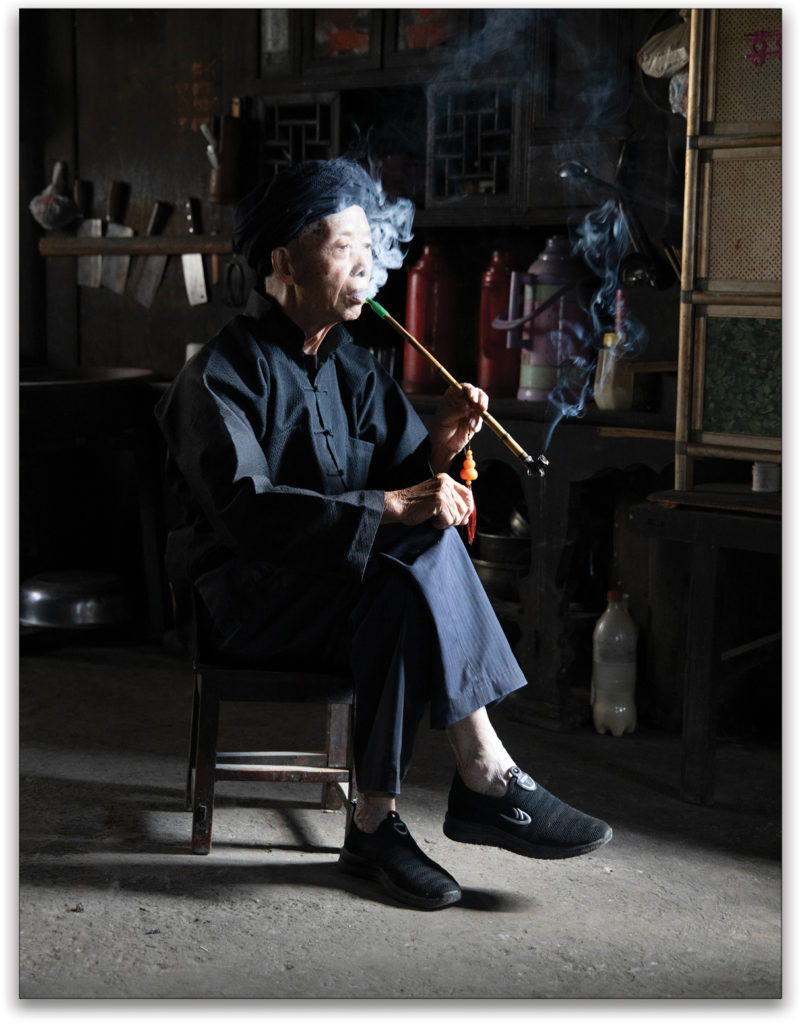
The idea was to make a window-light portrait of this gentleman (one of our models) smoking—a portrait that showed the details of the subject, including the smoke, and the view outside the window.
Here’s the first shot I took when I had the idea, and there are lots of problems with this quick test snapshot (also taken over the shoulder of one of the participants), including: poor composition, the outside courtyard is overexposed, and the man is facing away from the light, so his face isn’t that well illuminated. Yes, I could have opened up the shadows in Lightroom, but I really didn’t like the way the light was illuminating his face.
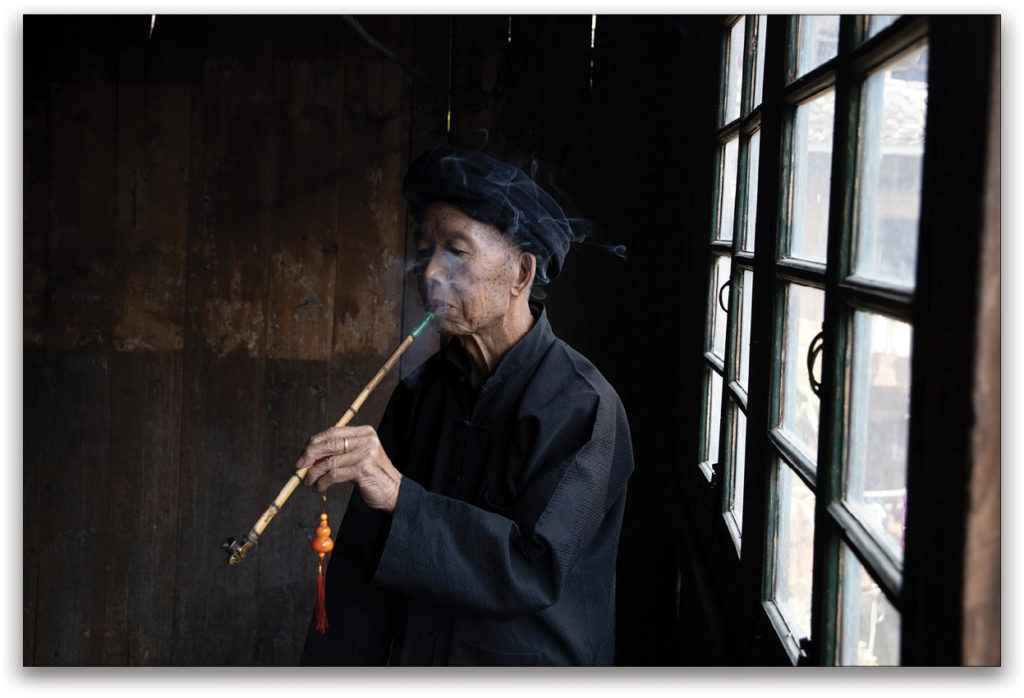
As an aside, here are a couple of basic tips for when you’re photographing people indoors by a window and you don’t have a reflector, LED light, or speedlite:
Have the model’s nose face the light source. As you can see, this technique provides flattering and interesting lighting.
Shoot close to the window and at an angle, so the lines of the window add a sense of depth to your image.
One more tip: Shoot eye-to-eye, so the viewer of your photograph relates to the subject, more so than if you’re shooting above or below eye level.
Back to my image: In Lightroom, I cropped the file, toned down the highlights (so the outside courtyard was visible), and added some texture, which accented the smoke.
After working with the gentleman by the window, we moved into his kitchen and asked him to take a seat on a stool, facing the main window. The light falling on the surrounding area, as well as on the smoke, was perfect because of the large window behind the subject.
But there’s something else this picture and the previous picture (as well as the first final image) have in common, besides using window light as the main subject. That something is gesture: a subject’s body position, body language, facial expression, and the gesture of their hands. Oftentimes, I choose a photograph (when it comes to wildlife shots, too) based on gesture. Also notice the “gesture” of the smoke in the photographs of the man. It changed from second to second, so when choosing my final images, I also looked for the “gesture” of the smoke.
Quick Tip: When photographing smoke (and flames), set your camera to a high frame rate so you capture subtle differences in the position of the subject.
The next image is my original shot of the man in his kitchen (again, taken over the shoulder of one of the participants who was crouched on the floor). The big problem with this window-light shot is that the man’s face is way overexposed, because I was in Aperture Priority mode and didn’t use exposure compensation to reduce the exposure. All that dark area fooled the camera meter into thinking the scene was darker than it was, resulting in the man’s face (a small portion of the frame) being overexposed. If I’d had more time to work on a shot (I always let the workshop participants shoot first), I’d have started at EV –2 to get a good exposure.
In Lightroom, I toned down the highlights, added a bit of contrast, and then added some texture. Basic adjustments, but they made a big difference in the final image.
Hey! I don’t like leaving you with another not-so-great image, but I’m sharing it to give you a behind-the-scenes look at the man’s kitchen, so you can see the two main light sources in the room and where we positioned the subject for the final idea-to-image concept: X marks the spot!
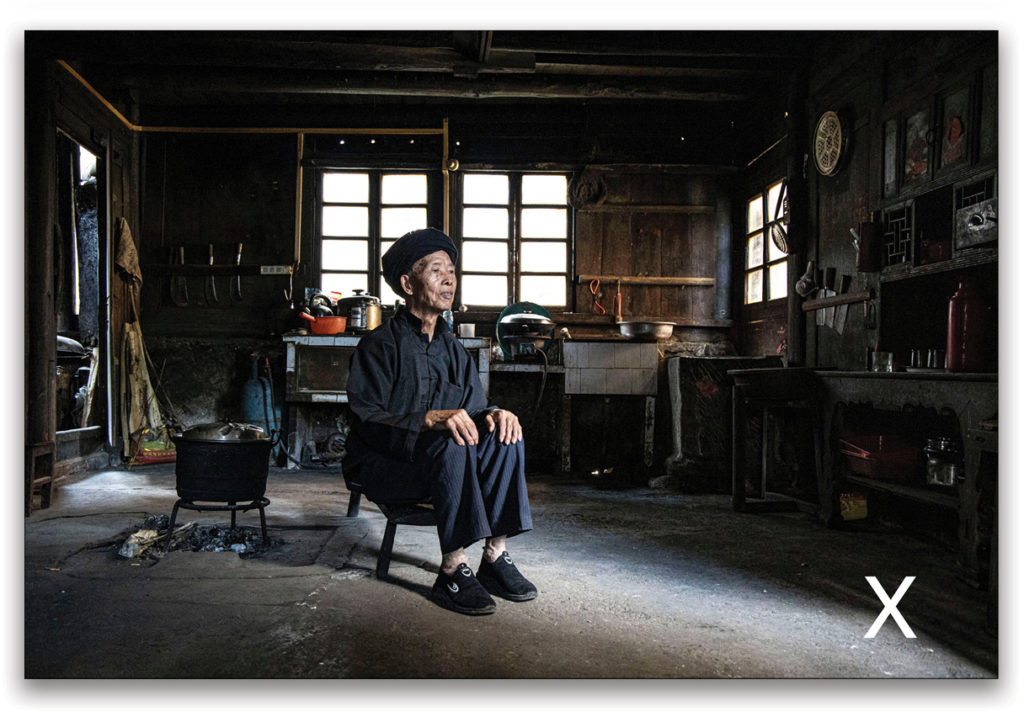
I know that you may think the subject looks stiff and posed, and not exhibiting a good gesture. I thought that, too; however, this is a very typical Asian pose.
Well my friends, have fun with the idea-to-image concept, and always remember to envision the end result when you’re photographing. Also, try to visualize the creative (and image-saving) possibilities there are in Lightroom, as well as Photoshop and various plug-ins.
This article originally published in Lightroom Magazine, Issue 57.


