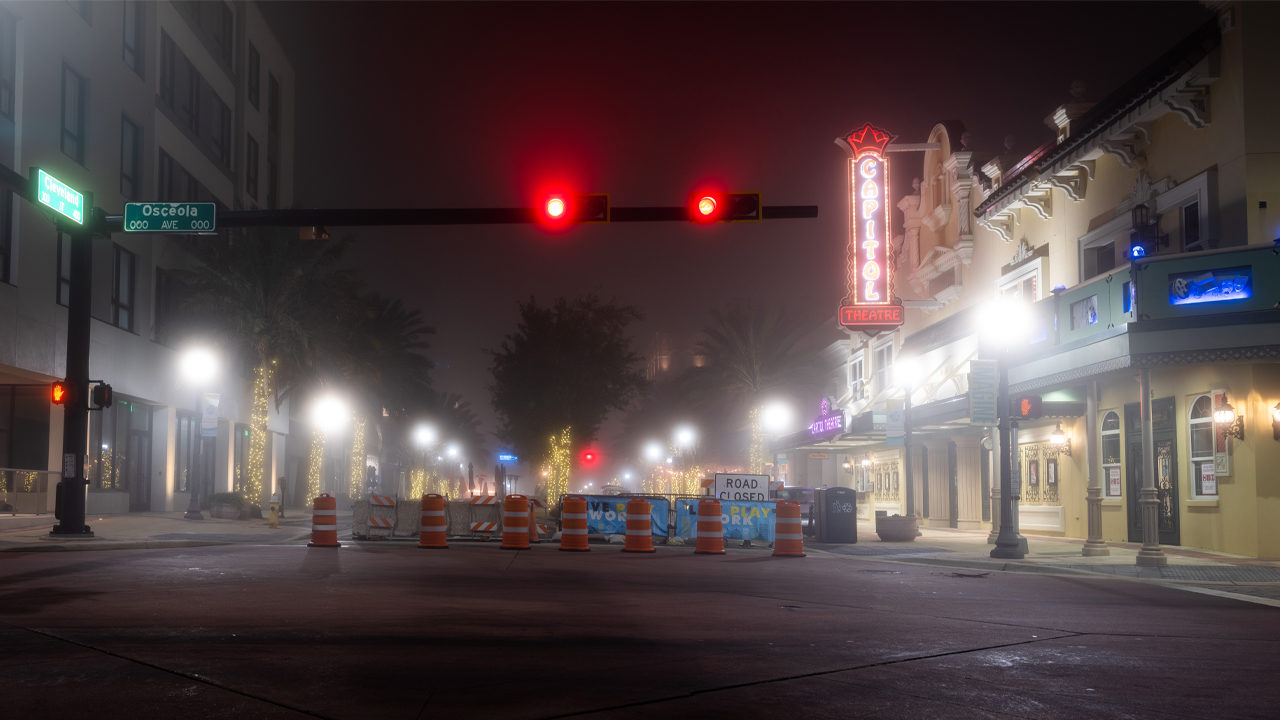
Night photography isn’t always easy, but in this article, I’ll show you how to capture the perfect shot and retouch it in Lightroom Classic for really cool and moody pictures.
First, here are my favorite tips for shooting photos at night with fog.
- Use a Tripod: This is the first key point. With a tripod, you can take longer exposures and keep your ISO at 100 for best quality.
- Shoot RAW: Capturing your images in the RAW file format is important if you want the freedom
to develop your photos the way you want. - Use Tungsten for White Balance: Tungsten will ensure that your photos aren’t too warm and it will give you a good idea of the final look.
- Focus on Composition: Make sure you have a nice foreground element, middle ground, and background. At night your eyes will focus on the brightest part of the photo, so you need to compose the key element in the photo in a way that will contribute to your message.
Retouching in Lightroom Classic
Once you get the shot, it’s time to retouch your photo.
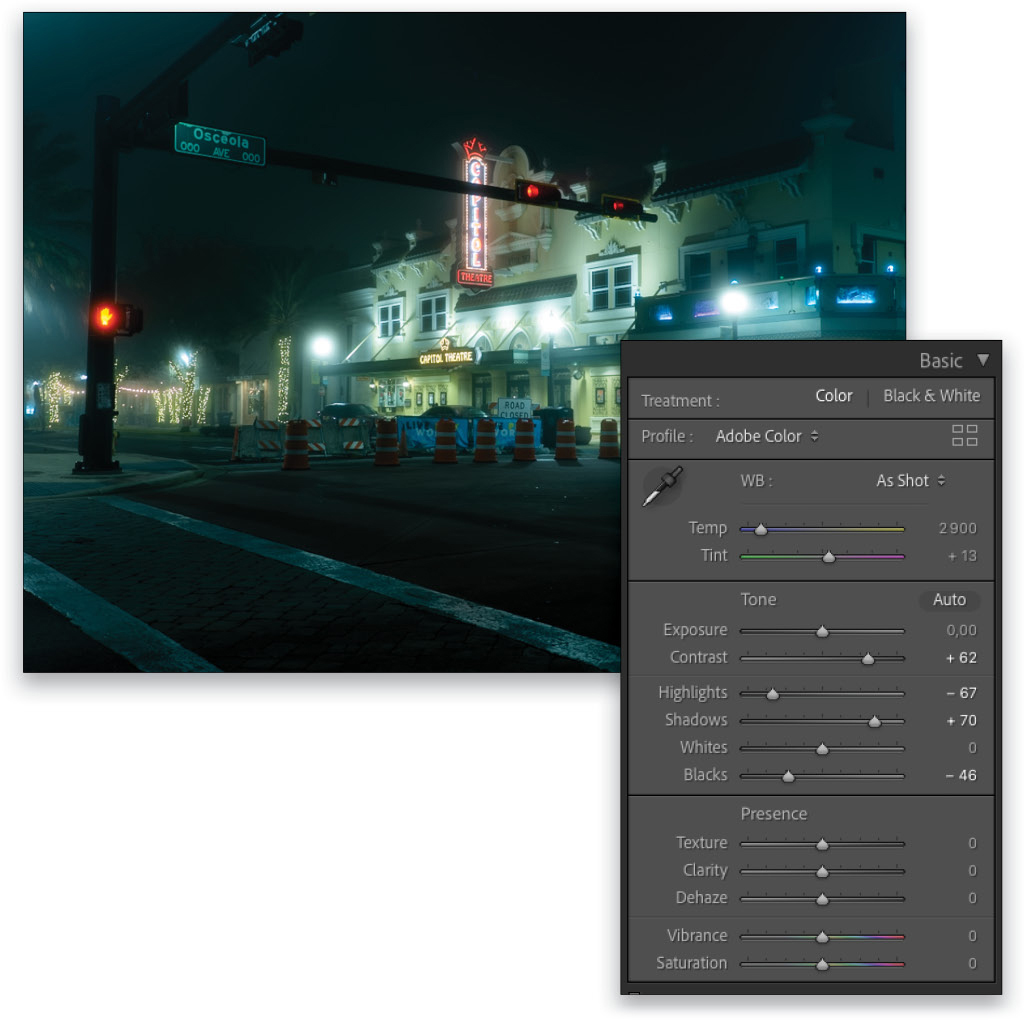
Step One: You can start with the black point, which is represented by the Blacks slider in the Basic panel. Moving the Blacks slider to the left while holding the Option (PC: Alt) key allows you to see the percentage of black pixels in your photo. The preview will turn white with color pixels representing areas that are approaching pure black; pixels that are black are pure black with no detail. In this image, we’ll set it at –46. On night photos, you don’t have to bring down the Highlights very much because it can have a bad effect on the city lights, making them appear too defined as points of light instead of glowing. Here, we set Highlights to –67. We also set the Shadows to +70 to open up the darker areas, and the Contrast to +62.
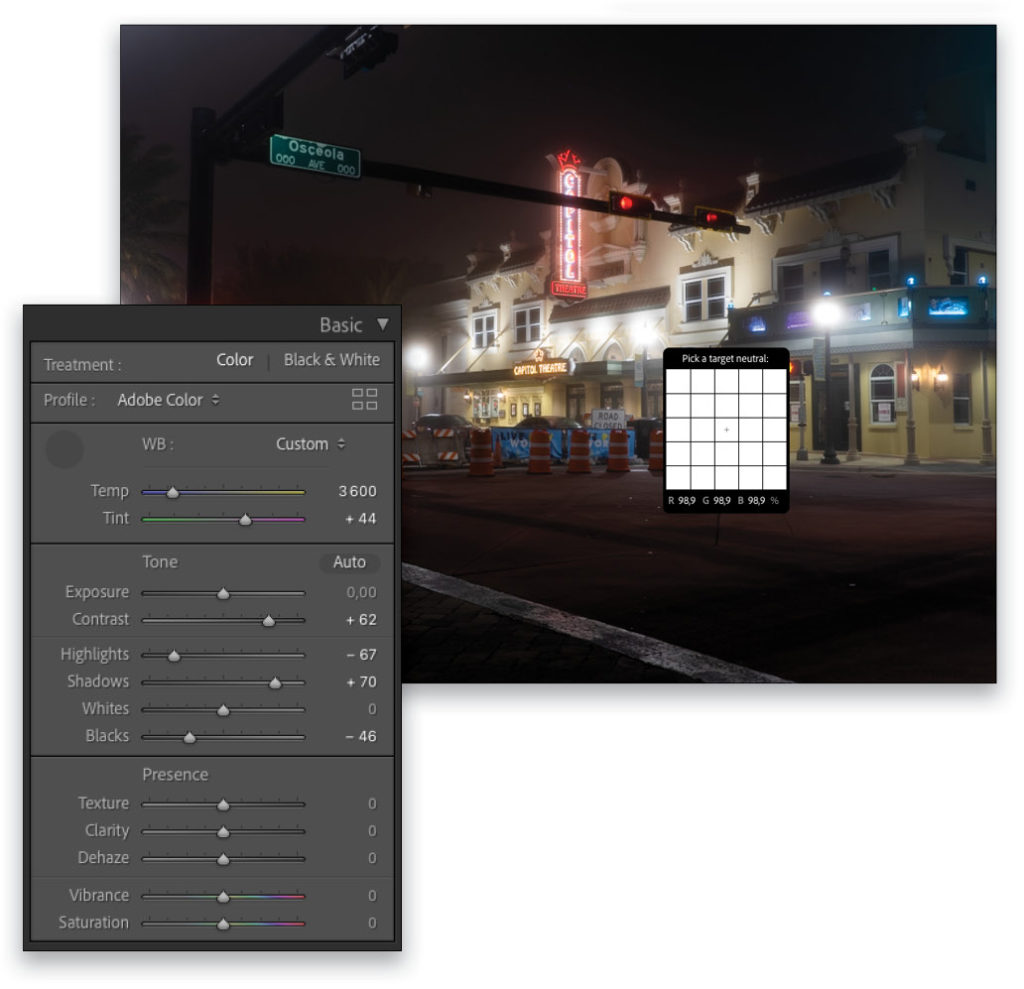
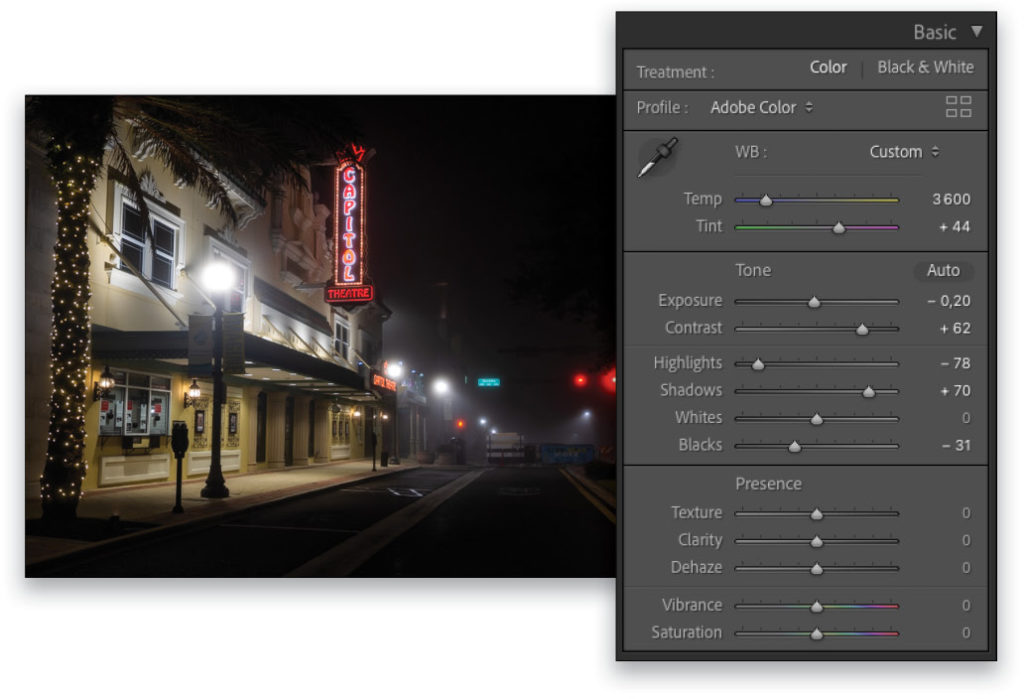
Step Two: Night photography can be difficult when it comes to choosing the right white balance. You have two options. The first option is to set it manually with the Temp and Tint sliders. We set them to 3600 and +44, respectively. Our goal is to add magenta to kill the green color cast. The second option for setting white balance is to use the White Balance Selector tool (W) in the Basic panel. You just need to click on a neutral gray part of your photo and it will adjust the colors accordingly. As you move the tool around the image, the Navigator will give you a preview of what your image will look like if you click on that spot below the tool.
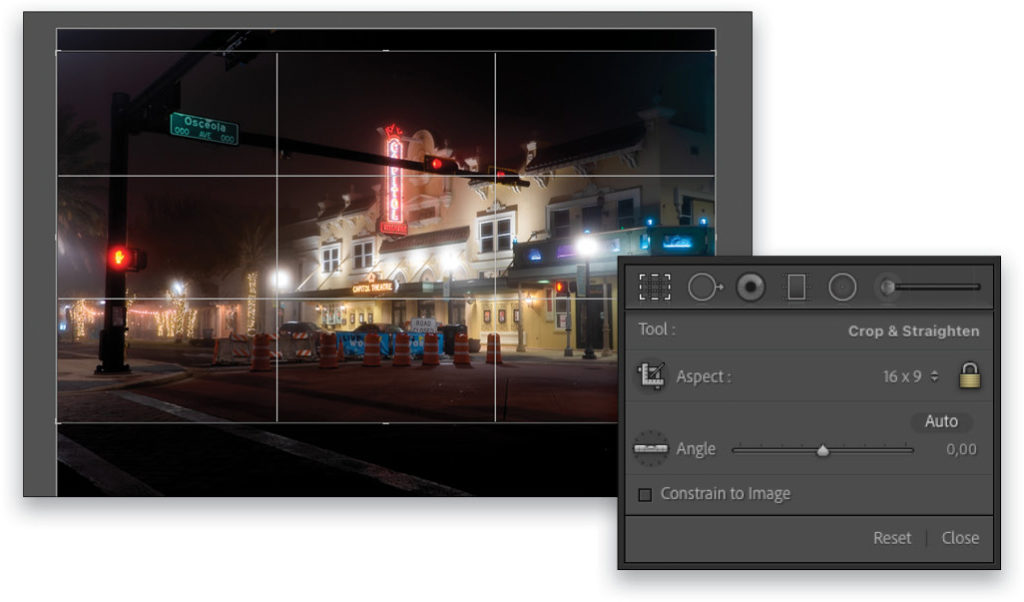
Step Three: To make your images even more dramatic and moody, you can crop them to 16×9 for a panoramic look, which is a cinema format and works great with this photo. Press R for the Crop Overlay tool, and set the Aspect drop-down menu in the tool’s panel to 16×9. Set the cropping boundaries and press Enter.
Step Four: You can also create a panorama with several photos. When you capture the shots, just make sure each one overlaps the previous shot as you pan the camera. In Lightroom Classic, you just need to select all the photos for your panorama in the Library panel, Right-click on any of the selected photos, and go to Photo Merge>Panorama. Lightroom will do a great job at merging the photos together. By selecting Perspective as the Projection method in the Panorama Merge Preview dialog, you have a better chance of getting a good result, at least if you’re shooting at 33mm or above. You can also select Fill Edges to have more photo to work with in the final panorama.

Step Five: To speed up retouching other photos taken in the same series, select your first edited photo, and then press Shift-Command-C (PC: Shift-Ctrl-C) to bring up the Copy Settings dialog. Click the Check All button, but then uncheck the Crop option, as you’ll want to crop each photo individually. Click the Copy button, select your other photos in the series, and press Command-V (PC: Ctrl-V) to paste the settings. Now just tweak the settings for each photo. As an example, I copied the settings of the first photo I edited and pasted them onto this new photo. Then
I changed the Blacks to –31, Exposure to –0.20, and Highlights to –78.
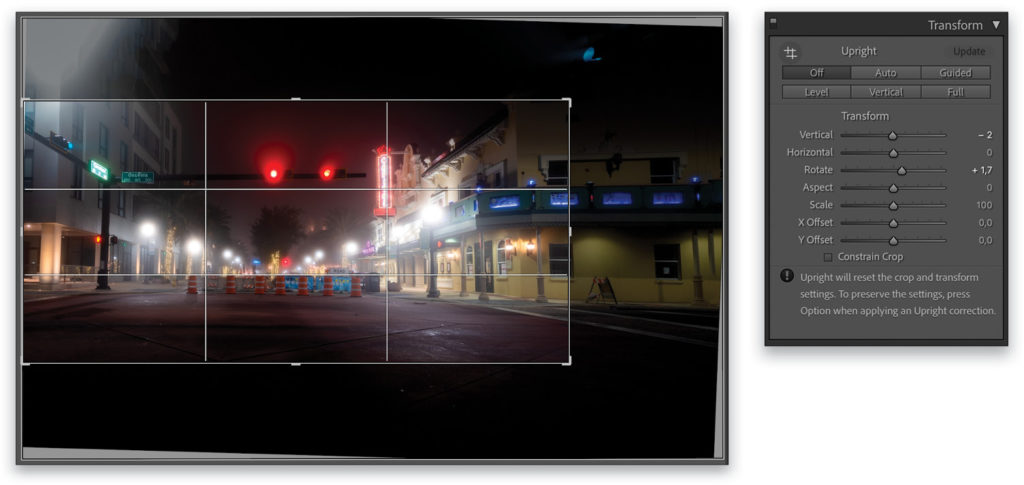
Step Six: You can also copy-and-paste settings to any panorama you created, as we did here with our pano. We also manually cropped the photo for a better look. One very important thing is to have straight lines in your photo so there’s no distortion. For that, go to the Transform panel and use the Rotate slider to straighten the horizon, and the Vertical slider so it doesn’t appear the buildings are falling away from you. We set these sliders to +1.7 and –2, respectively. Play with those two sliders until you have the vertical lines of your photo straight.
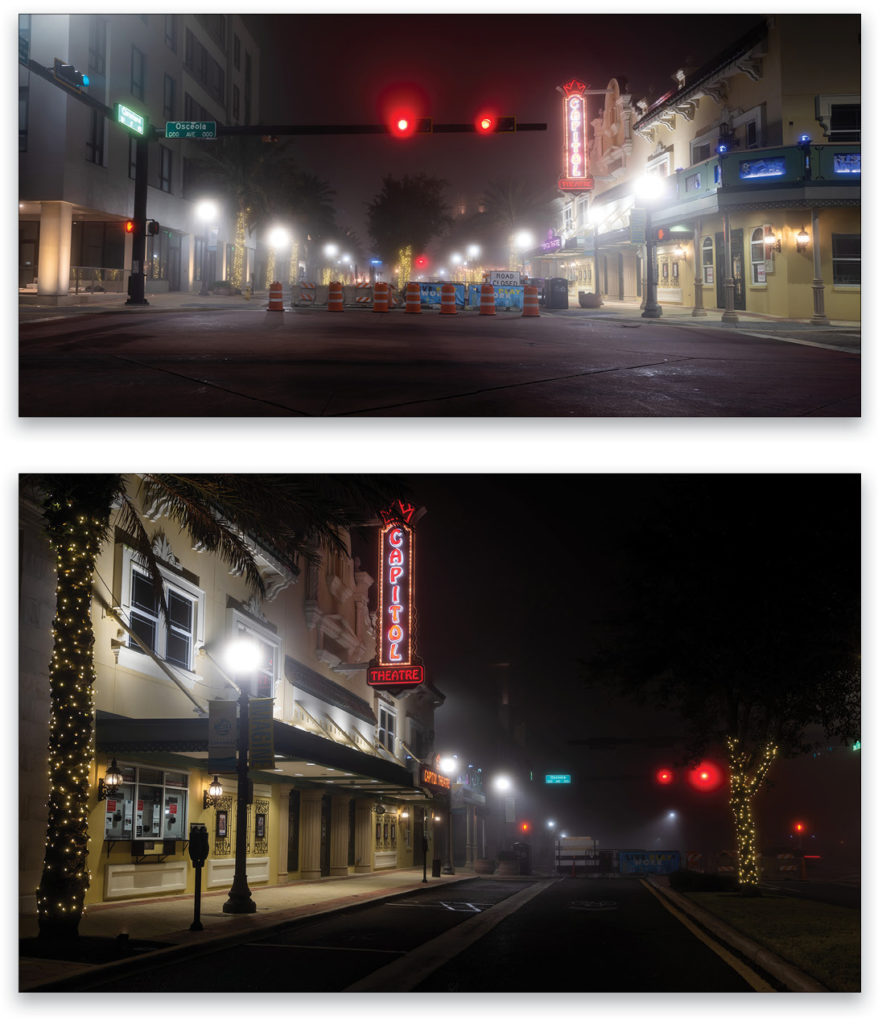
Here are the final results of both our pano and the second shot in which we pasted and tweaked the settings.
I hope you’ve enjoyed those tips. If you get the opportunity to shoot at night with fog, go for it! It’s fun and you can get amazing results. By the way, these techniques also work with night photography when there’s no fog!
This article originally published in the April, 2021 issue of Photoshop User magazine.


