A great way to add the illusion of motion to skies is to photograph them using a slow shutter speed. If the clouds are moving, they appear beautifully blurred. That can be a time-consuming and challenging project, however. Happily, you can easily simulate the effect using the Radial Blur filter in Photoshop, which is available in any version.
Step One:
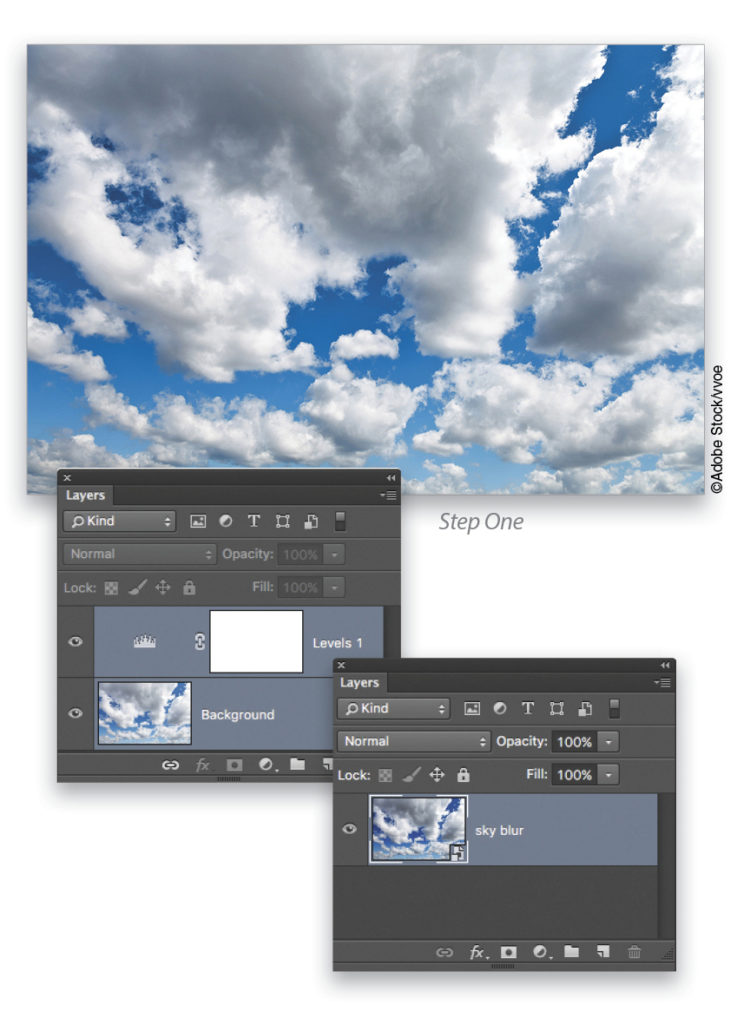
The first step is to prepare the image layer(s) for use with smart filters, which protects your original image and gives you some nice editing flexibility. If the image isn’t open, choose File>Open as Smart Object and navigate to where the image lives. If the image is open, and you have but one layer, choose Filter>Convert for Smart Filters. If the image is made from multiple layers—say, you used an adjustment layer to correct the image, as we’ve done here—Shift or Command (PC: Ctrl) click to activate the layers and then choose Filter>Convert for Smart Filters. Either way, Photoshop sandwiches the layer(s) inside the protective wrappings of a smart object, so the filter will happen to the wrapper instead of what’s inside. Feel free to double-click the layer name in order to enter something meaningful.
Tip: If you manage your images using Adobe Lightroom, you can send an image from Lightroom to Photoshop as a smart object by choosing Photo>Edit In>Open as Smart Object in Photoshop.
How are smart filters exciting?
Let us count the ways:
(1) You can double-click the filter’s name in your Layers panel to reopen its dialog and adjust its settings; (2) you automatically get a layer mask that lets you hide the effect from part of the image; and (3) if you don’t like the effect, you can delete the filter by dragging it to the Trash icon at the bottom-right of your Layers panel. If you need to access your original layers again, simply double-click the smart object’s thumbnail and they open in a new, temporary document. Make your changes in that temporary document, choose File>Save (not Save As), and when you close the temporary document, your changes magically appear in the original document. Sweet!
Step Two:
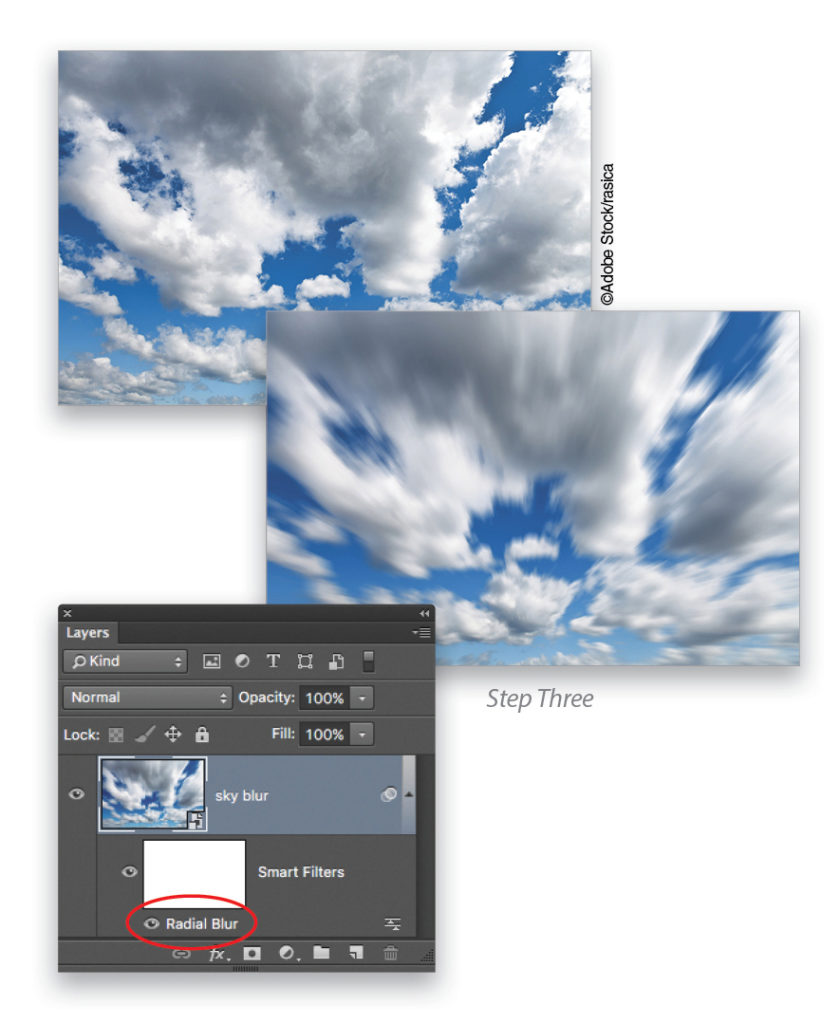
Choose Filter>Blur>Radial Blur. In the resulting dialog, set the Amount between 10 and 40. The higher the amount, the blurrier the clouds get. Start with 20 and see how the image looks. If you’re working with a really big image, you may need to use an amount higher than 40. (Note: You won’t see what the actual blur looks like until you click OK.) Next, set the Blur Method to Zoom and Quality to Best. Before closing the dialog, drag within the Blur Center box to tell Photoshop where in the image the blur should emanate from. Notice how the zoom lines inside the box change as you drag within the box. Think of the box as a miniature representation of your document. For example, if you want all of the clouds to appear to move upward and toward you, set the blur center (circled) at the bottom middle, as shown here. Click OK to apply the blur.

Step Three:
To reopen the filter and experiment with a different blur Amount or Blur Center, double-click the filter’s name in the Layers panel (circled). For a quick before-and-after comparison, click the visibility Eye to the left of the filter’s name to temporarily turn it off; clicking the same spot turns the filter back on.
Step Four:
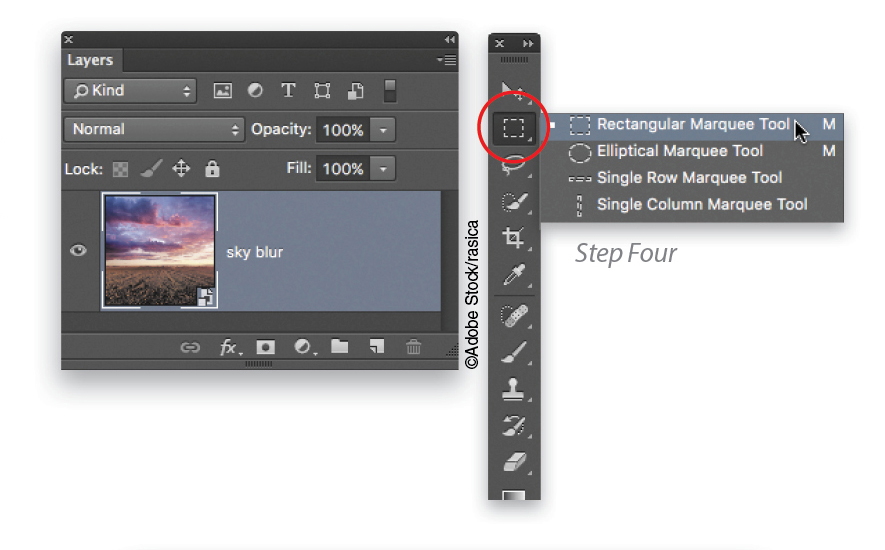
If you want to blur only part of the image, create a selection before you run the filter. Start by creating a smart object as described in Step One and then use the selection tool of your choice to select the area you want to blur. For example, if the area you want to blur is rectangular in shape (as in our example), press M to grab the Rectangular Marquee tool.
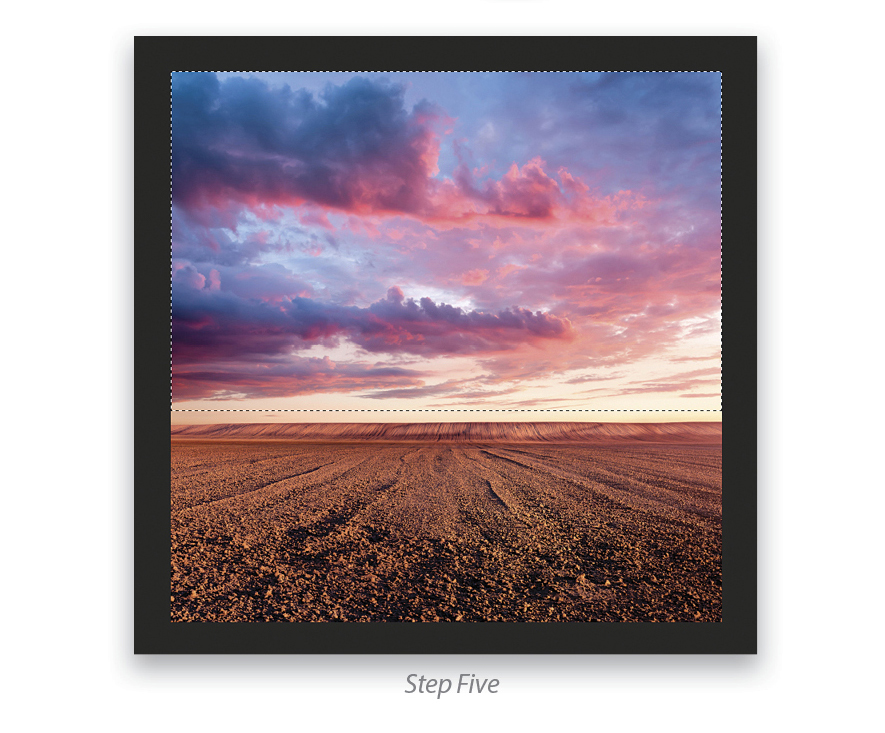
Step Five:
Mouse over to your image and then click-and-drag diagonally downward to draw a selection around the sky. Leave a little space between the sky and the horizon so the blur doesn’t bleed onto the horizon.
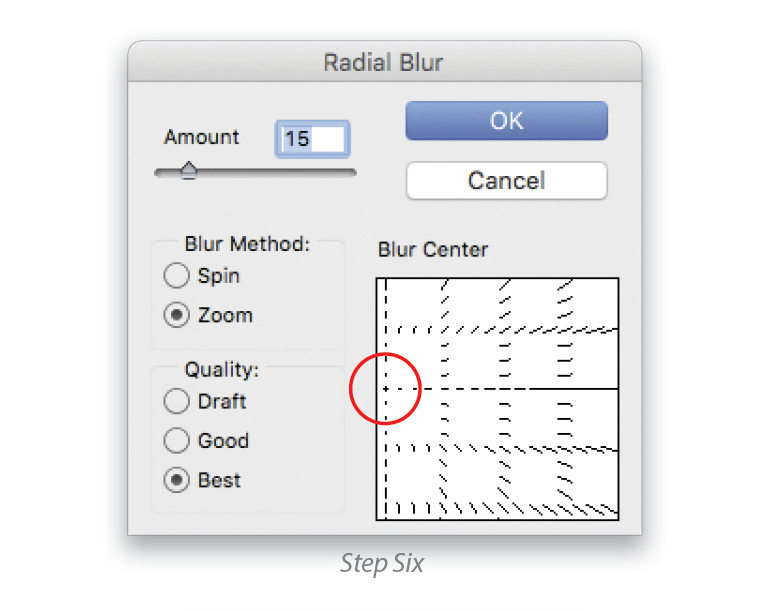
Step Six:
Choose Filter>Blur>Radial Blur and in the resulting dialog, set the Amount to 15, Blur Method to Zoom, and Quality to Best. To make the clouds appear to be moving slightly rightward in this photo, set the Blur Center on the left side of the box. To keep the clouds somewhat level, set the Blur Center higher inside the box. Click OK to apply the blur.
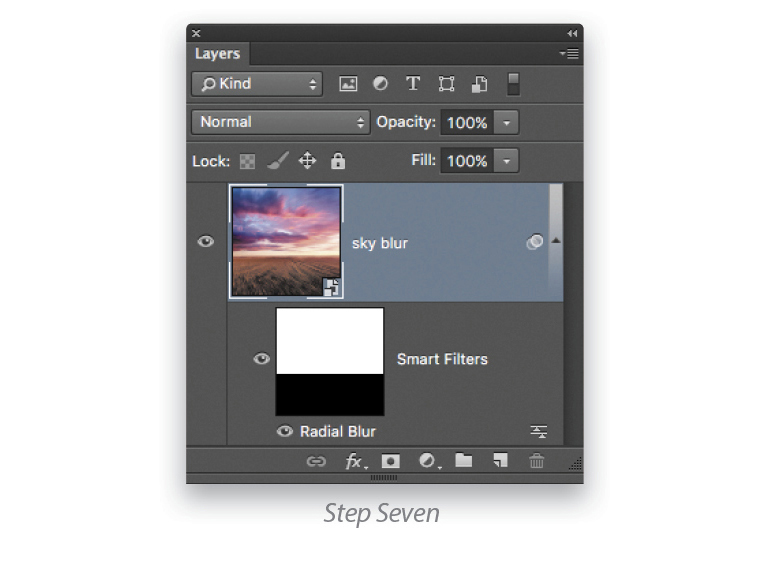
Step Seven:
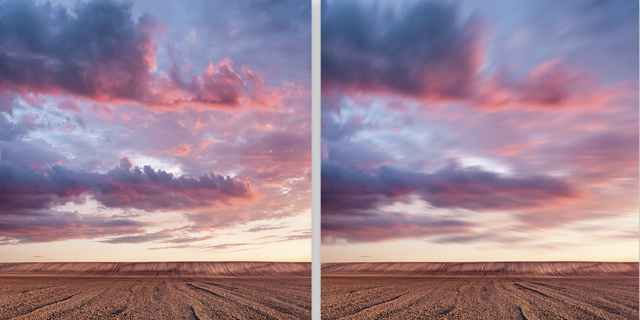
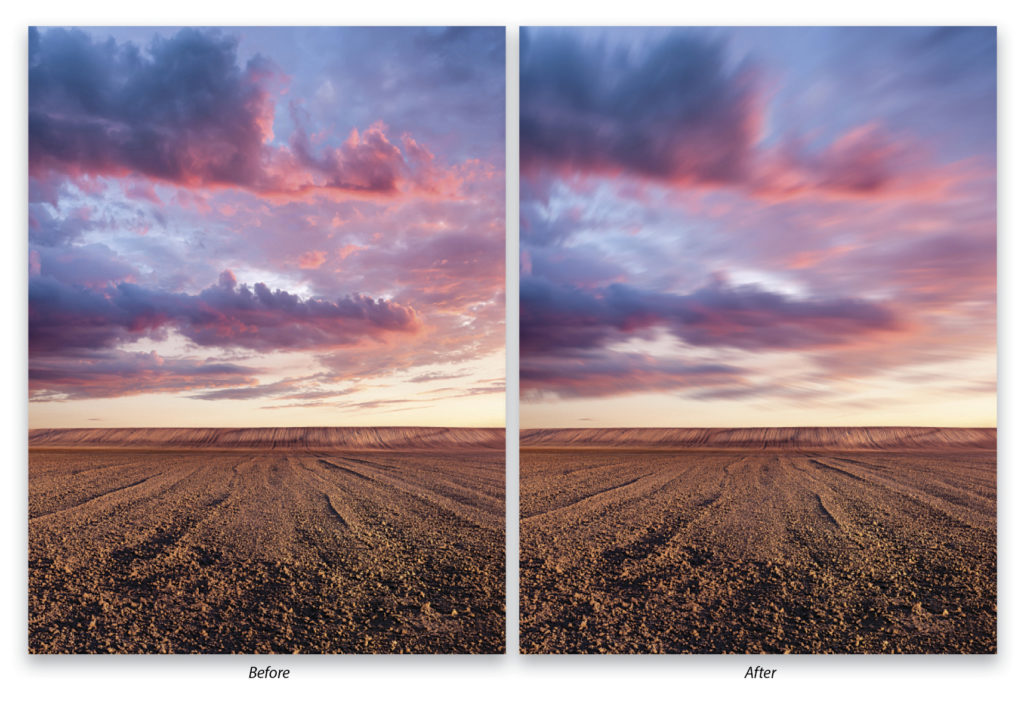
When you’re finished, choose File>Save As, and in the resulting dialog, choose Photoshop as the format so your layers remain intact. This lets you reopen the file later on if you want to tweak the blur amount. To generate a version in a different format—say, JPEG or PNG for posting online—choose File>Export>Export As or File>Export>Quick Export as PNG in Photoshop CC 2015, or in earlier versions of the app, choose File>Export>Save for Web. Here are the before and after versions.
As you can see, blurring the sky introduced some interesting movement. Until next time, may the creative force be with you all!
This article originally appeared in the January, 2016 issue of Photoshop User magazine.


