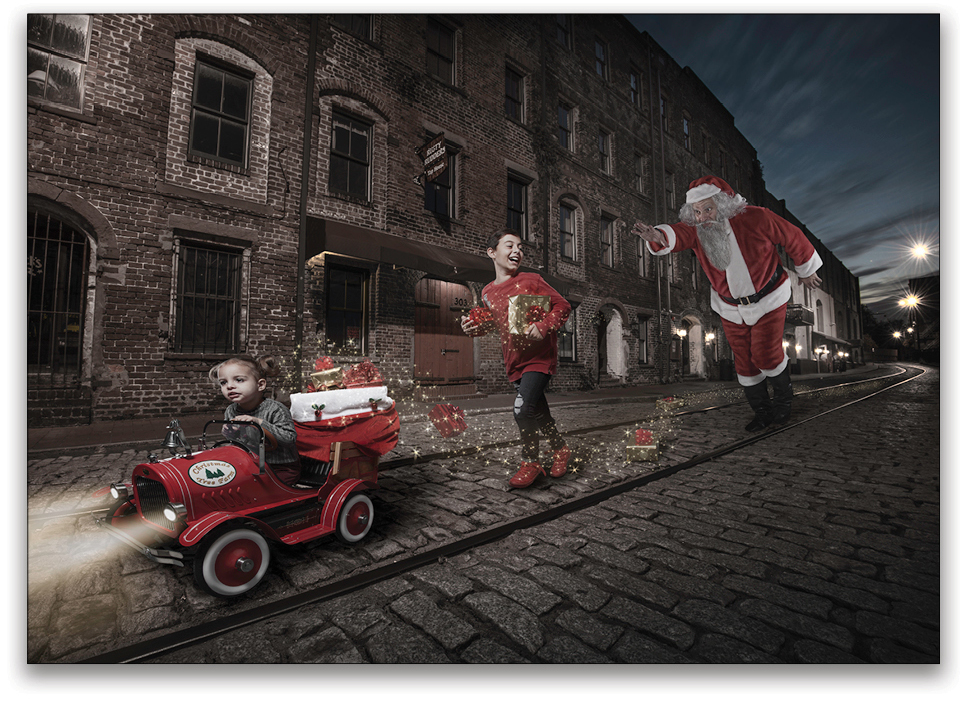
We all get lots of Christmas cards in the mail every year. Most of them, sadly, end up collecting dust on the counter. But what if you could create a fridge-worthy Christmas card that will have everybody talking about it for the next year?
Forget about the forced emotionless pictures taken next to the Christmas tree. Gather your family and come up with fun ideas for this year’s card. Make this a new family tradition! You can portray the more chaotic part of your family dynamics, re-create a scene from your family’s favorite Christmas movie, give a new twist to a Christmas song, or capture what your kids would do if they found out they didn’t make it on the “Nice” list this year?
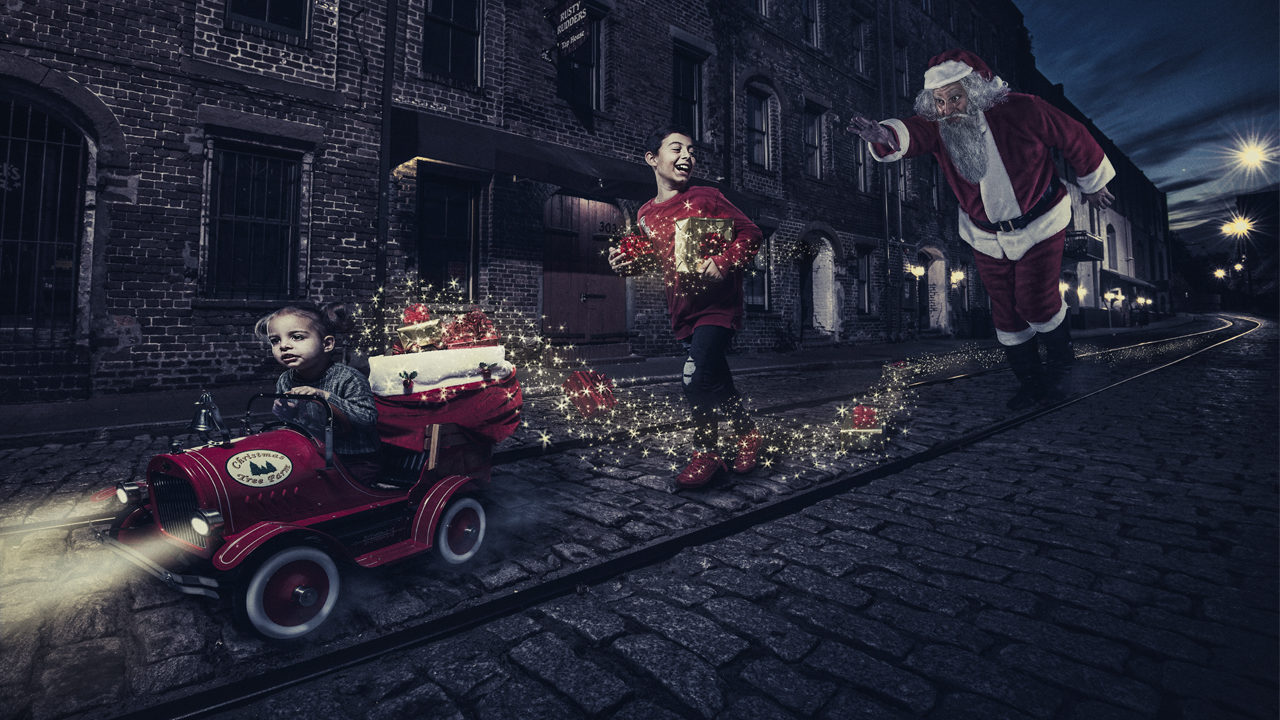
In this tutorial, I’ll supply you with the layered PSD file so you can follow along. We’ll be focusing on the final touches that make an image stand out. I’m also adding a Pixie Dust brush with this tutorial so you can give your pictures a little magical feel.
Before we start editing, here’s some handy information when it comes to creating a composite image. Always have a concept and a real plan of what you want to accomplish—applies to real life too, doesn’t it? Sketching can make you visualize your idea in a better way, and it helps as a visual aid when shooting your images.
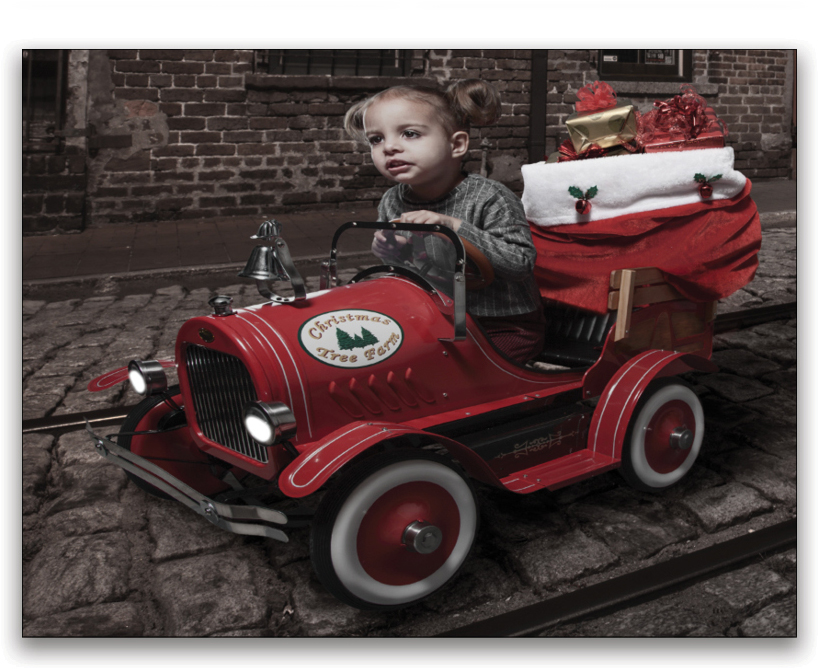
When photographing your subjects separately, it’s always important to do it with the same light setup and lens. Camera angle and perspective are also things to keep in mind. Shadows can be tricky too. If you don’t know where the shadow falls, look how the light falls on your subject, then you’ll see where the shadow is supposed to go. When in doubt, grab an object and light it with your phone’s flashlight the way your subject is lit to see where the shadow falls.
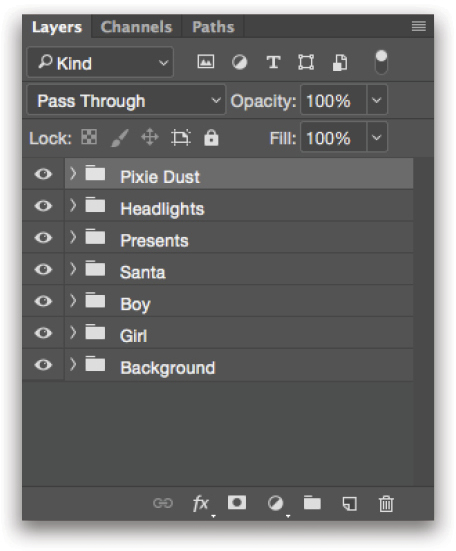
When you’re in Photoshop, keep your workspace tidy, rename your layers as you work, and organize layers into groups. Okay, let’s get started.
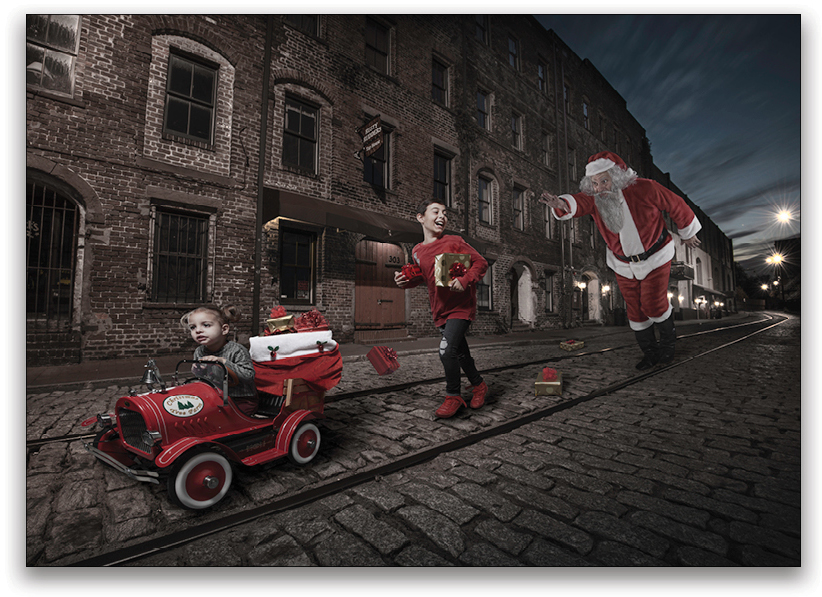
Step One: Download the files provided with this tutorial and open the PSD in Photoshop. As you can see, I’ve already done most of the collage work. You’ll see several layer groups in the Layers panel, and all the groups and layers have been renamed just as I suggested above.
[KelbyOne members may download the files used in this tutorial here. All files are for personal use only.]
Step Two: Add a new blank layer at the top of the layer stack in the Layers panel. Double-click the layer’s name, and rename it “Headlights.”

Step Three: Switch to the Brush tool (B), click on the brush preview in the Options Bar to open the Brush Preset Picker, grab a round brush, and set the Hardness to around 50%. Set the Foreground color to white by pressing D then X, and paint the front of the car headlights to make them look like they’re turned on. Use the Bracket keys on your keyboard to quickly resize your brush. This will make the effect that we’ll be creating next more believable.
Step Four: Add a new blank layer and name it “Light 1.” Grab the Polygonal Lasso tool (nested under the Lasso tool [L] in the Toolbar) and draw a shape mimicking the light spread of a headlight. Click on the starting point to create the selection. Go to the Edit menu and select Fill. Choose white in the Contents drop-down menu and click OK. Press Command-D (PC: Ctrl-D) to deselect the white area.
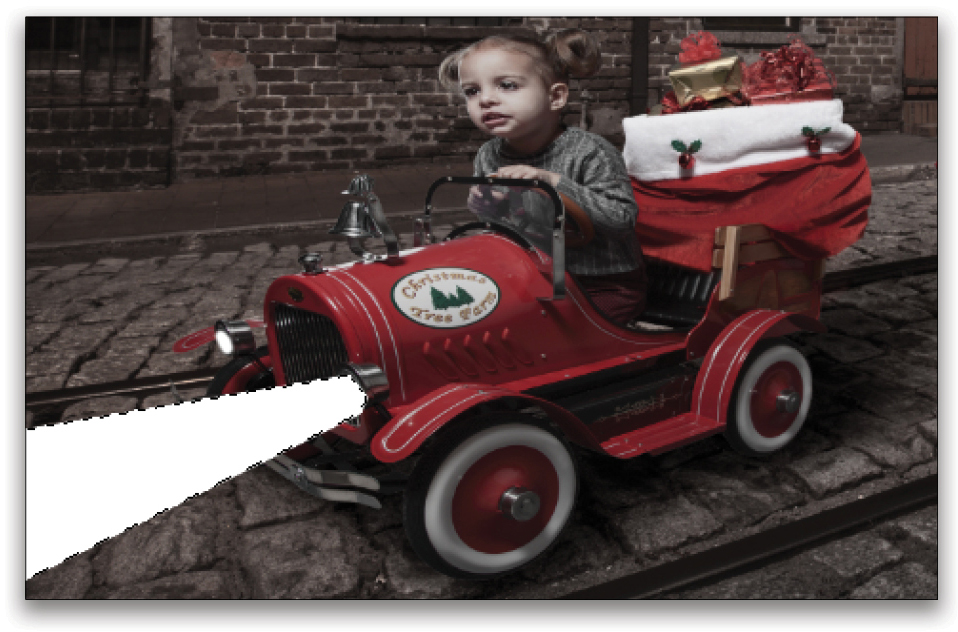
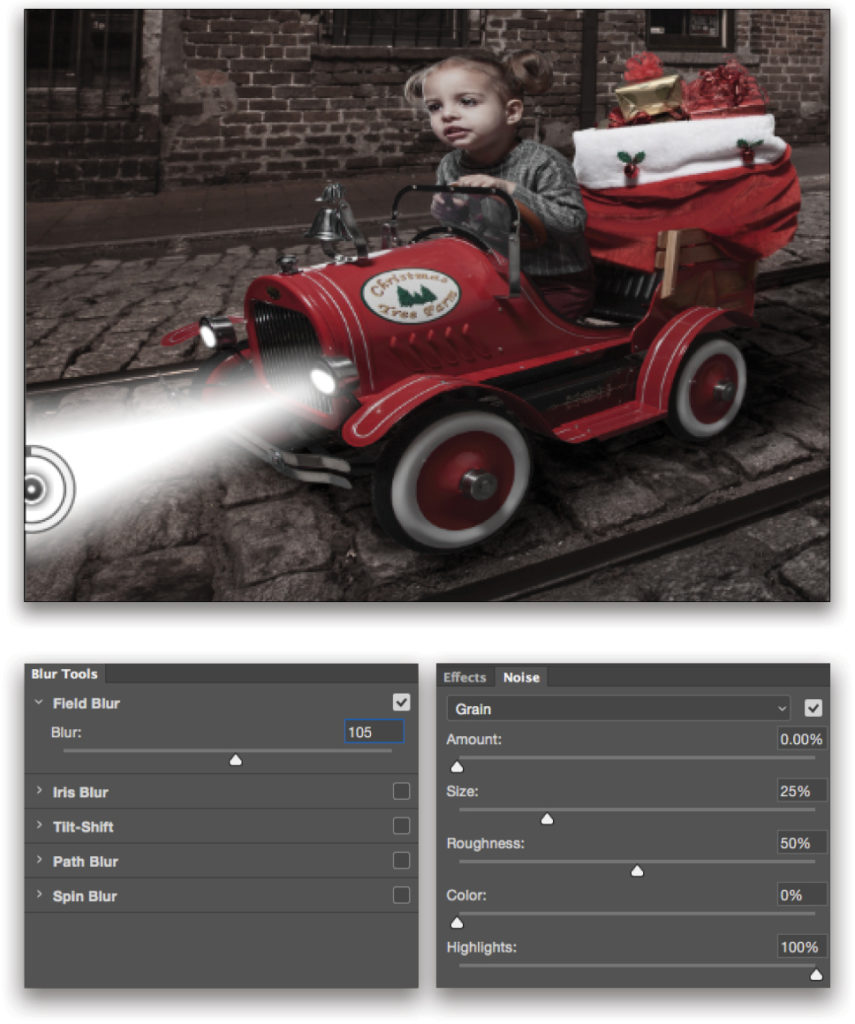
Step Five: Go to the Filter menu, to Blur Gallery, and select Field Blur. Drag the pin to the end of the light spread in the document. In the Blur Tools panel, set Blur to 105 px and click OK in the Options Bar.
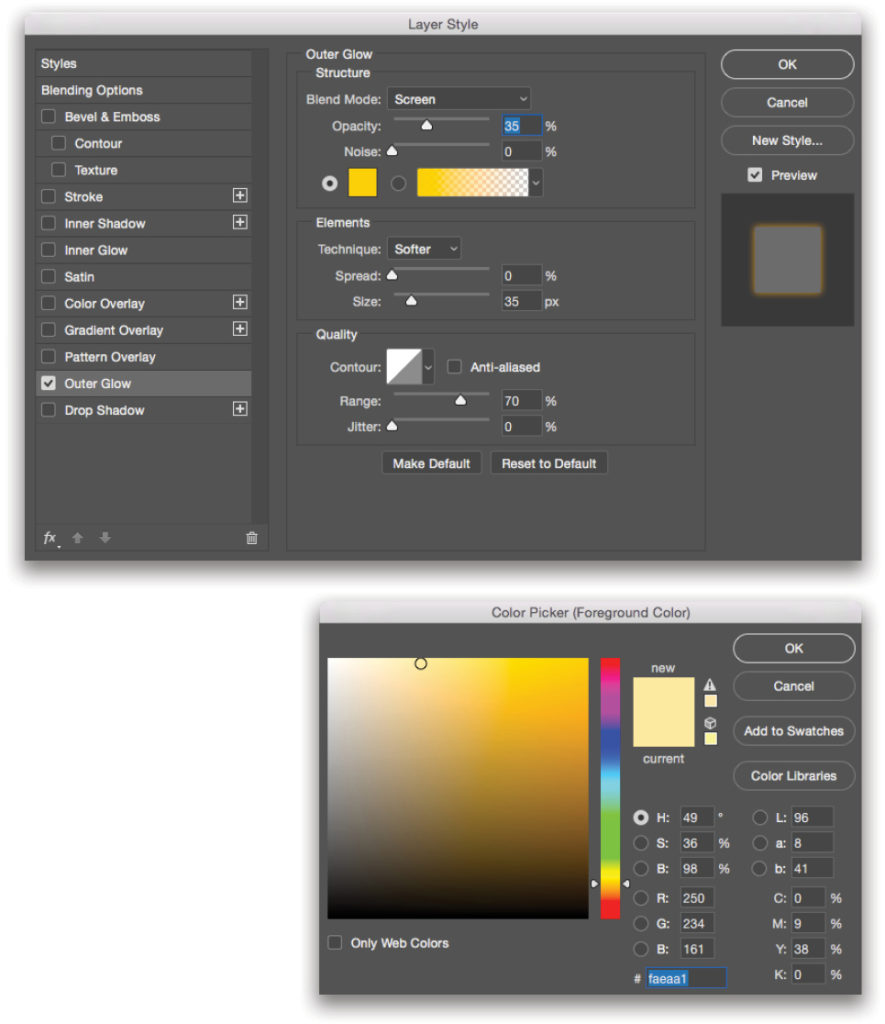
Step Six: Double-click on the layer thumbnail of the Light 1 layer to open the Layer Style dialog, and click on Outer Glow in the list of Styles on the left. Select Screen for the Blend Mode. Set Opacity to 35%, Size to 35 px, and Range to 70%. Click on the color swatch and pick a light yellow color (#faeaa1). Click OK to close the Color Picker, and click OK in the Layer Style dialog.
Step Seven: Press Command-J (PC: Ctrl-J) to duplicate the Light 1 layer. Grab the Move tool (V), and drag the duplicate light spread to the other headlight. Name this layer copy “Light 2.”
Step Eight: Click the Add Layer Mask icon (circle in a square) to add a mask to the Light 2 layer. Grab a soft (0% Hardness) round brush, and in the Options Bar, set the Opacity to 30% and Flow to 30%. Press X until black is your Foreground color. Brush away any excess light on the front of the car. Repeat this step for Light 1 layer.
Step Nine: Add a new blank layer and name it Road. Set its blend mode to Lighten near the top left of the Layers panel. Grab a big soft brush, keeping the Opacity and Flow at 30%. Click on the Foreground color swatch near the bottom of the Toolbar, select a light-yellow color, and click OK. Brush the street under the headlights. Lower the layer Opacity to 85%.
Step 10: Click on the Create a New Group icon (folder) at the bottom of the Layers panel to add a new layer group, and drag the Headlights, Light 1, Light 2, and Road layers into the group and rename the
it “Headlights.”
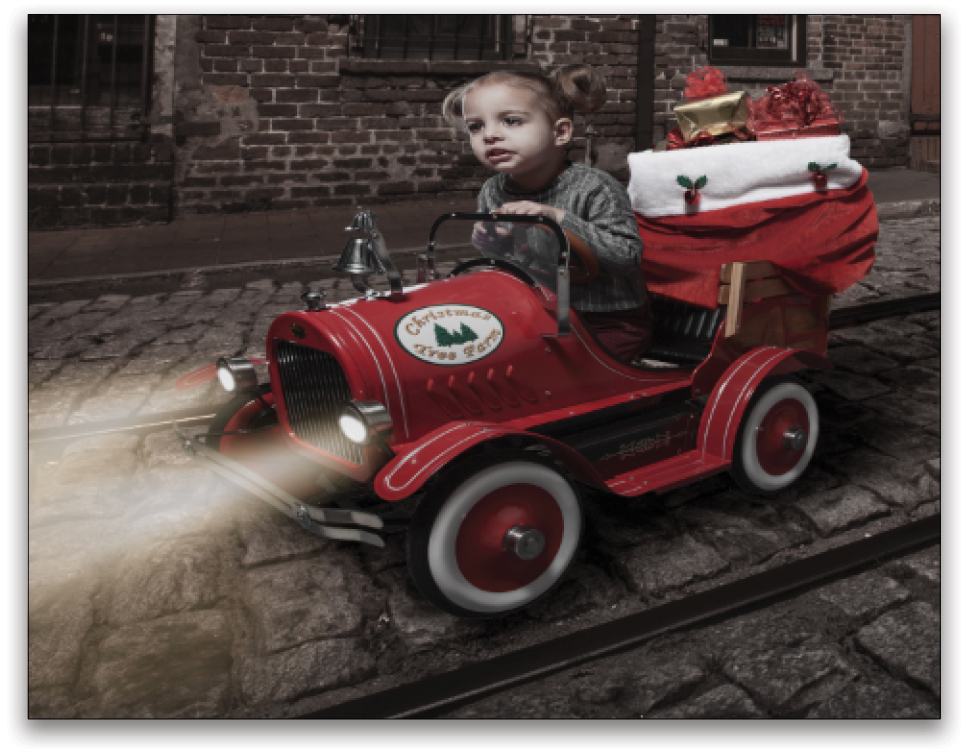
Step 11: Add a new blank layer, change its name to “Pixie Dust,” and set its blend mode to Linear Dodge (Add). In the download files, double-click on the Pixie Dust.abr file to load the brush into Photoshop. With the Brush tool active, select the Pixie Dust brush at the bottom of the list in the Brushes panel (Window>Brushes). Pick another light-yellow color for your Foreground color. In the Options Bar, set both Opacity and Flow back to 100%, and the Size to around 800 px. Paint a pixie dust trail starting from the bag of presents in the car to the first present on the road. Tap the Left Bracket key a couple of times to make the brush smaller, and then paint to the next present on the road. Tap the Left Bracket key a couple of times again, and paint to the next present. This will make the pixie trail appear smaller the further away it gets. Also paint over the presents in the boy’s hands.
Step 12: Add a blank layer, change its name to “Pixie Light,” and set its blend mode to Screen. Select a soft round brush, and set its Opacity and Flow to 20% in the Options Bar. Using a light-yellow color, paint along the top of the pixie dust trail to add light.
Step 13: Add a new layer group folder. Name it “Pixie Dust,” and drag the Pixie Light and Pixie Dust layers into it.
Step 14: Click on the Create New Adjustment Layer icon (half-black, half-white circle) and the bottom of the Layers panel, and select Black & White. Set its blend mode to Multiply and its Opacity to 30% to add contrast to the image.
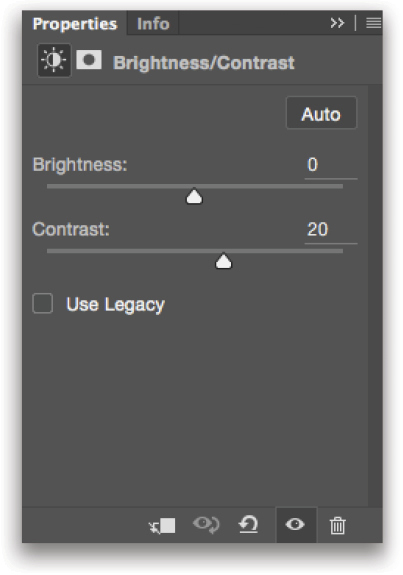
Step 15: Add a Brightness/Contrast adjustment layer and drag the Contrast slider to 20 in the Properties panel.
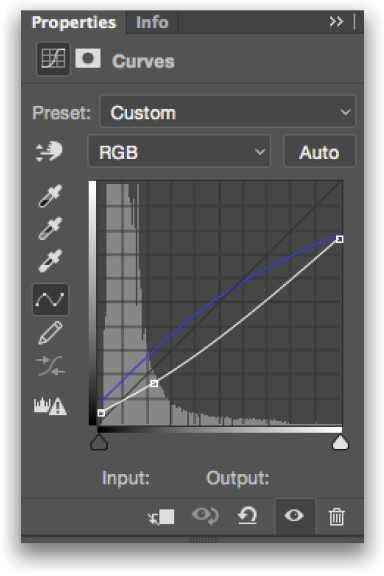
Step 16: Add a Curves adjustment layer. On the RGB channel, edit the curve to add a matte effect. This will give the image a more cinematic look. Now select the Blue channel in the drop-down menu above the curve the Properties panel, and then edit the blue curve to add blue to the shadows and yellow to the highlights. In the image shown here, you can see how your curves should look. The white curve is the RGB channel and the blue curve is the Blue channel.
Step 17: Click on the top layer on the Layers panel. Press Shift-Option-Command-E (PC: Shift-Ctrl-Alt-E). This will merge all your layers into one new layer, while leaving all the original layers intact.
Step 18: For this final step, I used Color Efex Pro from the Google Nik Collection. (We don’t know how much longer we’re going to be able to use the Nik filters, but you can still download them for free on their website.) I added a little bit of Tonal Contrast, Film Grain, and Cross Processing L05 to the image, and then lowered the Opacity to 60%.
A Little Advice
Before I started writing this tutorial, I asked a few fellow photographers who were just getting into creating composites what were their biggest challenges when editing these types of images. Most of them gave me the same answer: They get to a point where they don’t know how to finish the image.
When I find myself in the same predicament, I color grade, either by adding a Color Balance or Curves adjustment layer and tweaking the different color channels. I also use Photo Filter adjustment layers. I like to scroll down all of the Photo Filter presets in the Filter drop-down menu in the Properties panel to see what each of them do to my image. Plug-in filters and textures are a big help too.
When images are complex, we tend to get overwhelmed, so I recommend that you take a break, and come back later with a fresh set of eyes. Always wait a couple of days before sharing your images. You’ll find a few details to tweak here and there.
For the final touches to my images, I go to Lightroom, create a few virtual copies, tweak them, and then pick the version I like best. It’s all about experimenting. I can’t stress enough how important it is to experiment with sliders when editing pictures. I’m a great believer in following tutorials and re-creating other artists’ styles as a good way to learn, but it’s when we experiment that we truly find our own style.
I hope you’ve enjoyed following along with this tutorial and I’d love to see your fridge-worthy Christmas cards at the KelbyOne Community.