
Hi awesome KelbyOne members! Though I’d share this product shoot I was working on quite a while back, but I still wanted to share it here and show a little behind the scenes stuff. The final shot is above.
The behind-the-scene production shot below (by Brad Moore), shows the simple three-light set-up used to light the sunglasses. Now, don’t let all the boom stands and stuff make you think this set-up is more complicated than it really is. I’ll break it down below the photo.
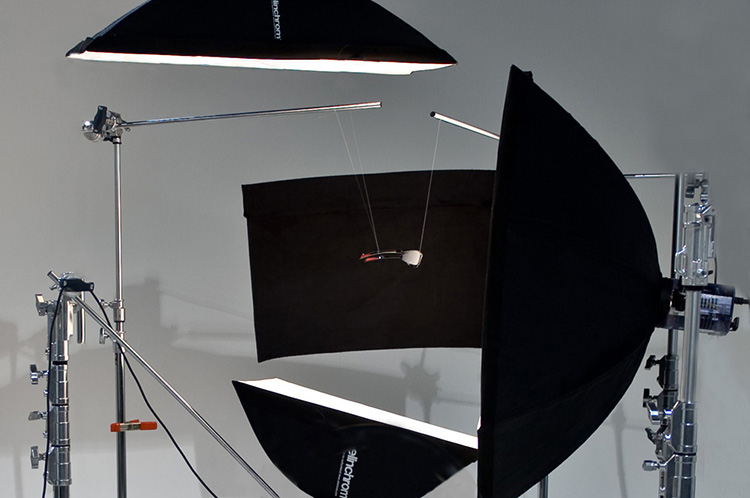
First, I wanted a black background behind the sunglasses, so we slid a black Westcott flag (made of black felt) over a boom stand arm, and that’s what you see behind the sunglasses. We used three boom stands and fishing wire to hold up the sunglasses (you can see them against the black background above).
I used three Elinchrom strobes: (1) One with a 1’x3′ strip bank softbox directly above the sunglasses aiming straight down, to put a highlight across on the top of the sunglasses (2) Another aiming up from below it (just a 24″x24″ square softbox), to add a highlight across the bottom of the sunglasses, and (3)the 3rd light is at the front of the sunglasses to light the glass part in the front of the sunglasses. The flashes were triggered using Skyport wireless triggers.
CAMERA SETTINGS:
The ISO was set at 200. The photo was taken at f/22 at 1/200 of a second (probably should have shot this at f/11 – this was taken a while back, can’t imagine why I used f/22, but anyway, it worked OK). 70-200mm f/2.8 lens at 200mm. I used a Gitzo tripod with a Really Right stuff BH-55 ballhead.
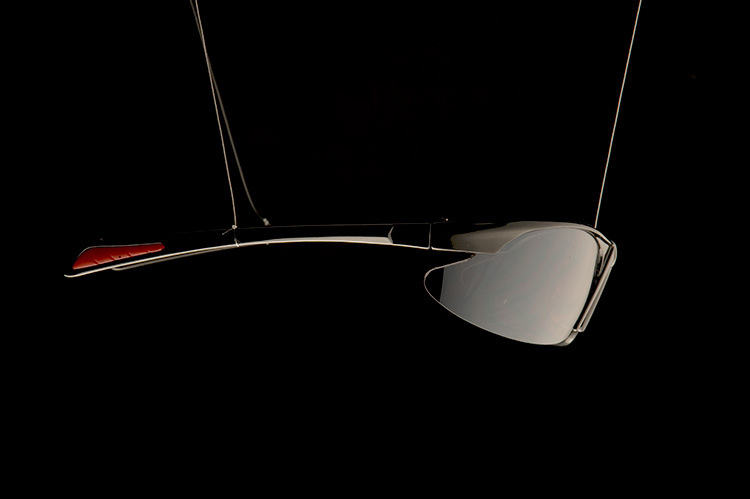
Here’s the before photo as it came out of the camera. As you can see, there are some challenges with the background, the fishing wire, and the front of the glasses, but that’s what Photoshop was born for, right? Right!
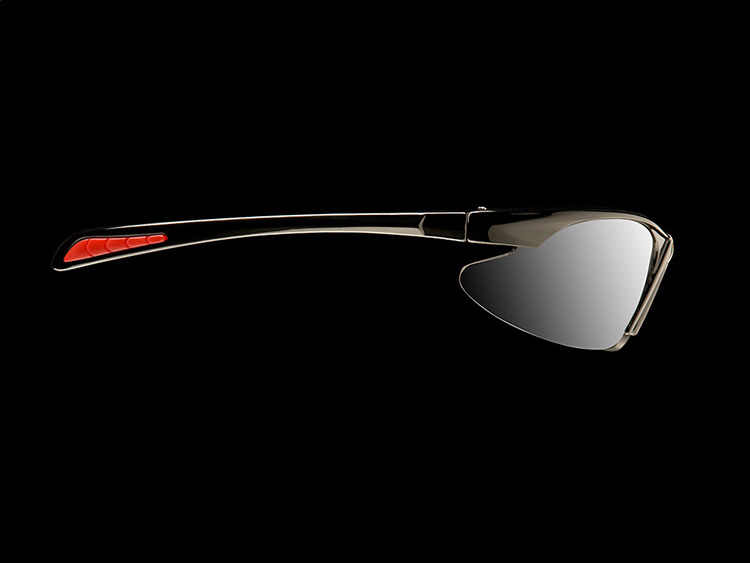
Above: Here’s the final with the fishing wire cloned out; the whole image brightened — especially the highlights, and the glass part of the sunglasses cleaned up.
Hope you found that helpful. 🙂
-Scott


