
Photoshop sports a wide variety of filters that you can use to blur a photo. In this column, you’ll learn: how to change a photo’s depth of field to create a realistic, in-camera blurry background effect; the look of a tilt-shift lens; and realistic motion. Read on for some serious fun!
Using the Iris Blur Filter
The first method uses the Iris Blur filter to alter a photo’s depth of field, which is handy when you want to accentuate the foreground and downplay distracting elements in the background.
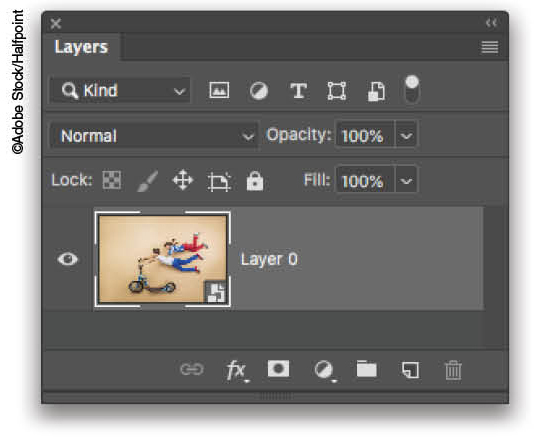
Step One: Open an image in Photoshop. (If you’re starting in Lightroom Classic, select the photo’s thumbnail and choose Photo>Edit In>Edit In Adobe Photoshop CC 2019.) If you have multiple layers, click on the bottom layer and Shift-click on the top layer to select all the layers in your image, and then choose Filter>Convert for Smart Filters. This converts the layer(s) into a smart object, which serves as a protective wrapper around the original content. That way the filter happens to the wrapper, and not to the layers inside it.
Tip: To access the original layers again—say, to fine-tune a color-correction adjustment—double-click the smart object and it opens in a new, temporary document with all your layers visible. Make your changes, choose File>Save (not File>Save As), then close the temporary document. Your changes immediately show up in the original document.
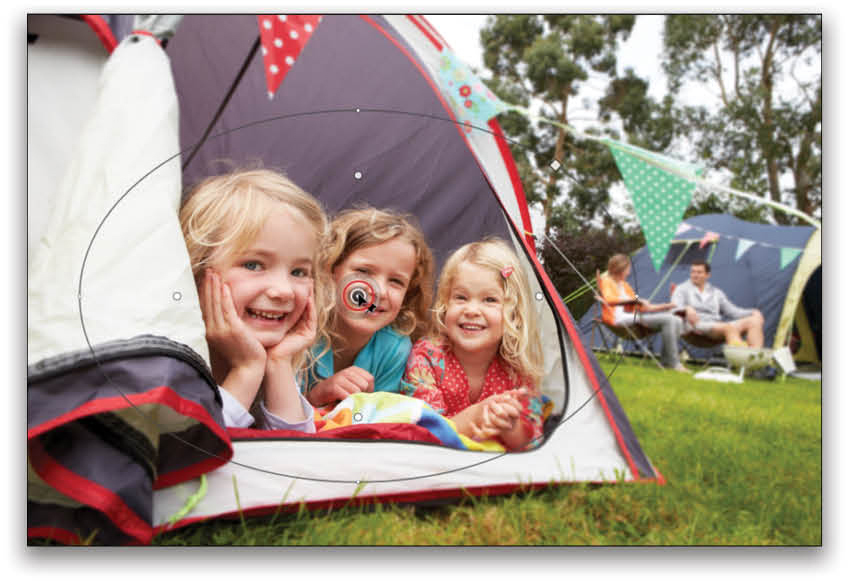
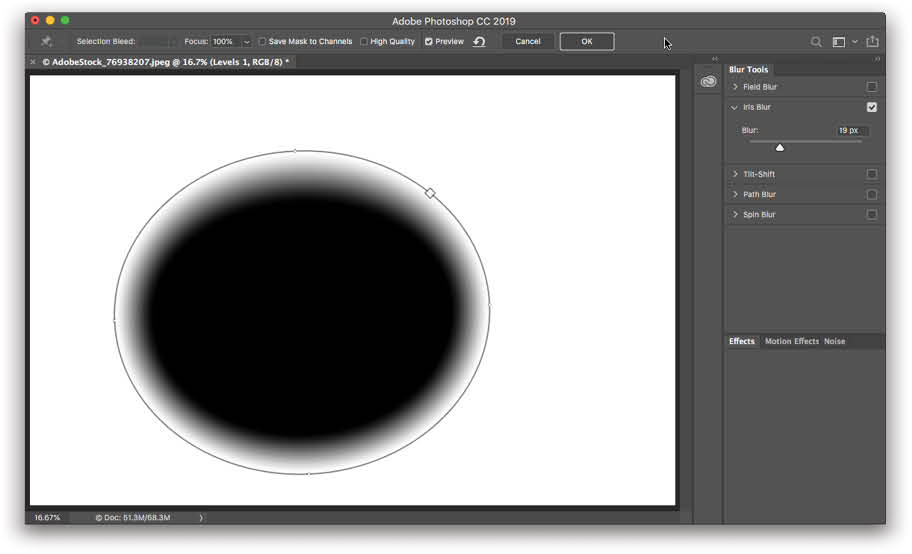
Step Two: Choose Filter>Blur Gallery>Iris Blur. Your view changes to include a big image preview on the left and a set of collapsible controls on the right. In the image preview, you’ll see an oval outline indicating the blur shape. If you move your cursor inside the blur shape, a pin appears (it looks like a dot inside a circle) with a two-tone gray blur ring around it. The pin controls which part of the image is blurred and the blur ring lets you adjust the blur’s strength. Start by dragging the pin to reposition the blur shape atop the area you want to remain sharp. When you do, a little pushpin appears next to your cursor.
Tip: While you could use the Field Blur filter, the Iris Blur filter gives you more control over the shape and size of the blur, which can produce a more realistic effect.
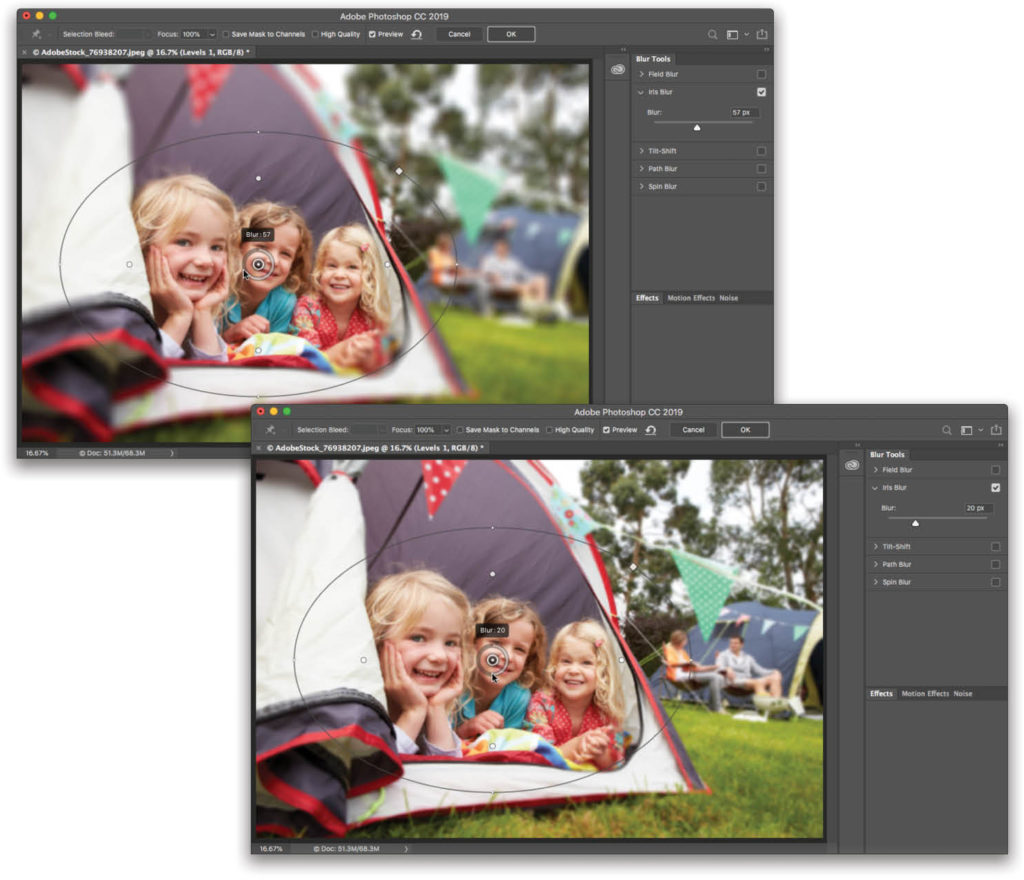
Step Three: To adjust the blur strength, drag the Blur slider in the Blur Tools panel on the right side of the window; drag right to increase or left to decrease it. If you’re feeling feisty, use the blur ring: To increase the blur amount, drag the light gray part of the ring clock-wise in a circular motion (so there’s more light gray on the ring than dark gray).
To decrease the blur, drag the light gray part of the ring counterclockwise (so there’s more dark gray on the ring than light gray). As you drag, an overlay appears showing the blur’s strength from 0 to 500 pixels. A setting of 20 was used here (use a smaller amount for low-resolution images).
Step Four: Let’s fine-tune the shape and size of the blur (see image below). The four size handles (the tiny dots on the blur shape) let you change the blur to make it more oval or round. Position your cursor on the blur shape between these handles to make the shape larger or smaller.
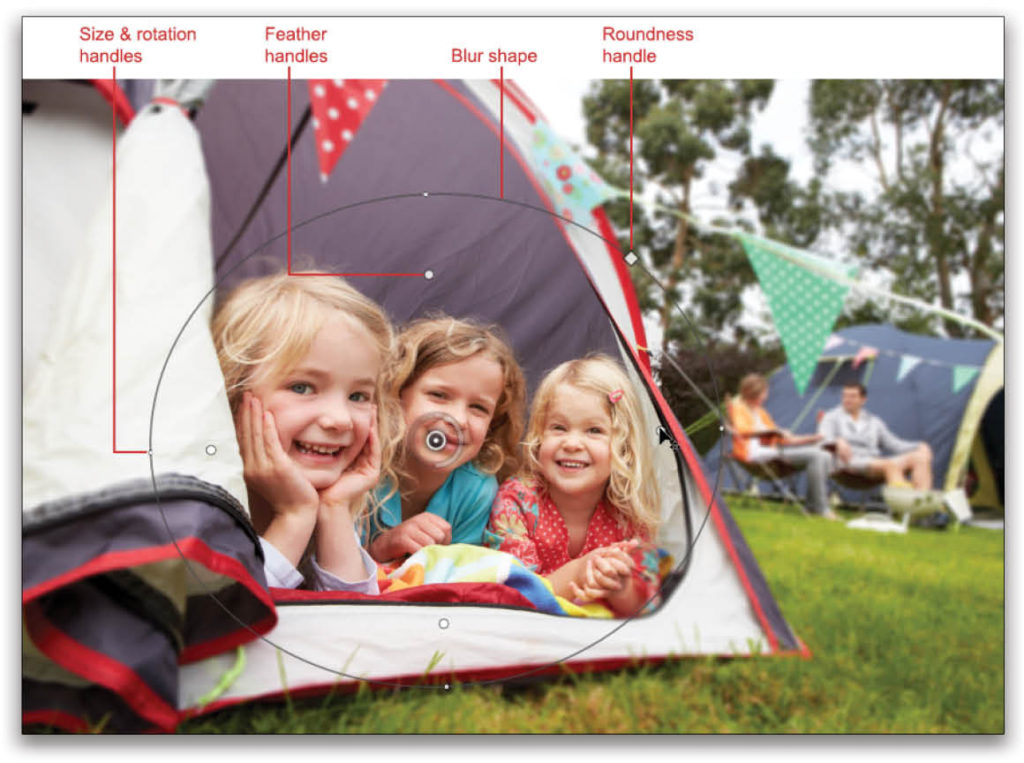
Position it just outside the blur shape near one of these handles and the cursor turns into a curved, double-sided arrow; you can then drag to rotate the blur. Drag the roundness handle (the white square on the blur shape) to make the blur rounder or squarer, and use the feather handles (the dots inside the blur shape) to adjust the feather amount around the blur’s edges (drag toward the pin to increase the feather, or away to decrease it).
Tips: When you drag one feather handle, they all move. If you want to move them independently, Option-drag (PC: Alt-drag) instead. To temporarily see the mask Photoshop created to produce the blur, press-and-hold the M key.
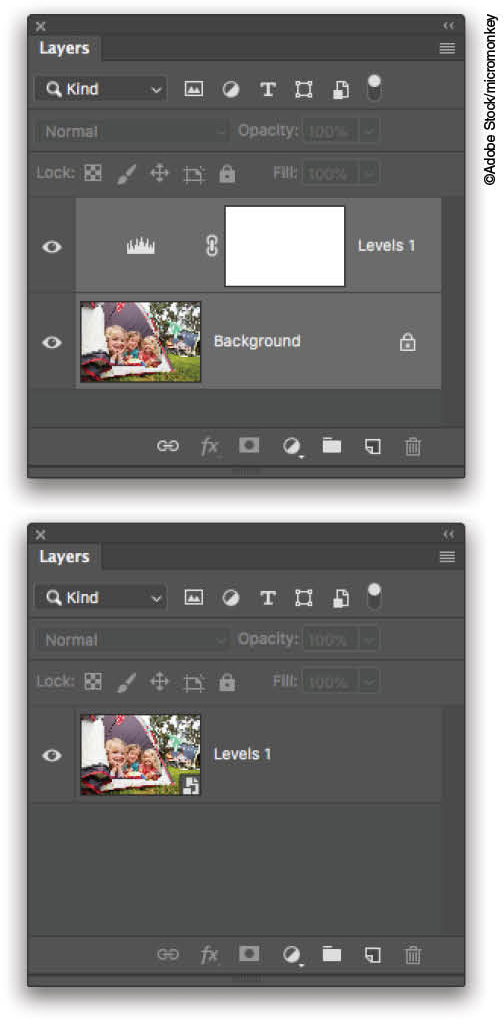
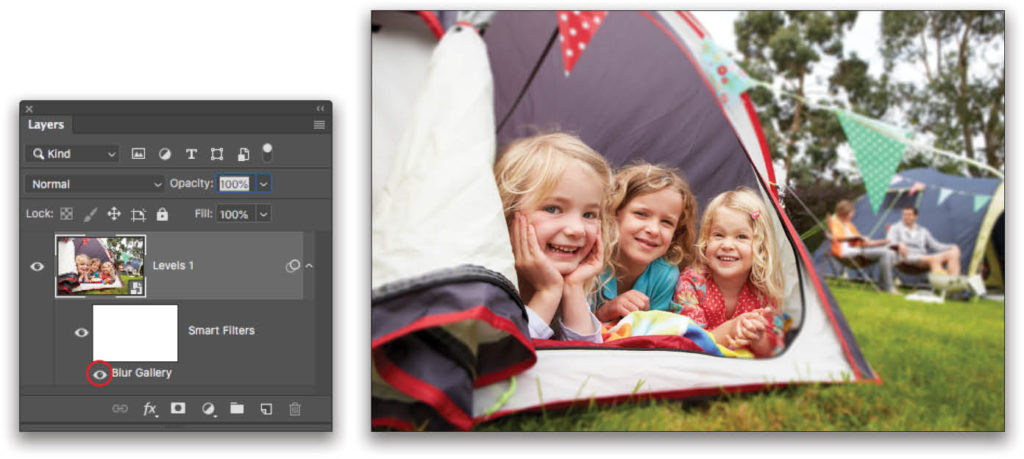
Step Five: When you’re finished, click OK in the Options Bar to apply the filter and switch back to the regular workspace. Alternatively, cancel out of the filter by clicking the Options Bar’s Cancel button or tapping the Esc key on your keyboard. To see a quick before and after version, turn off/on the visibility eye to the left of the words “Blur Gallery” in the Layers panel (circled below).
Using the Tilt-Shift Filter
This filter mimics the effects of popular tilt lenses such as the Lensbaby, a bendable lens whose rectangular focus band lets you control which part of the picture is in focus. It lets you do cool stuff like making a landscape look miniature. It works just like the Iris Blur filter, but with slightly different controls.
Step One: Follow Step One above to open an image and convert the layer(s) for smart filters.
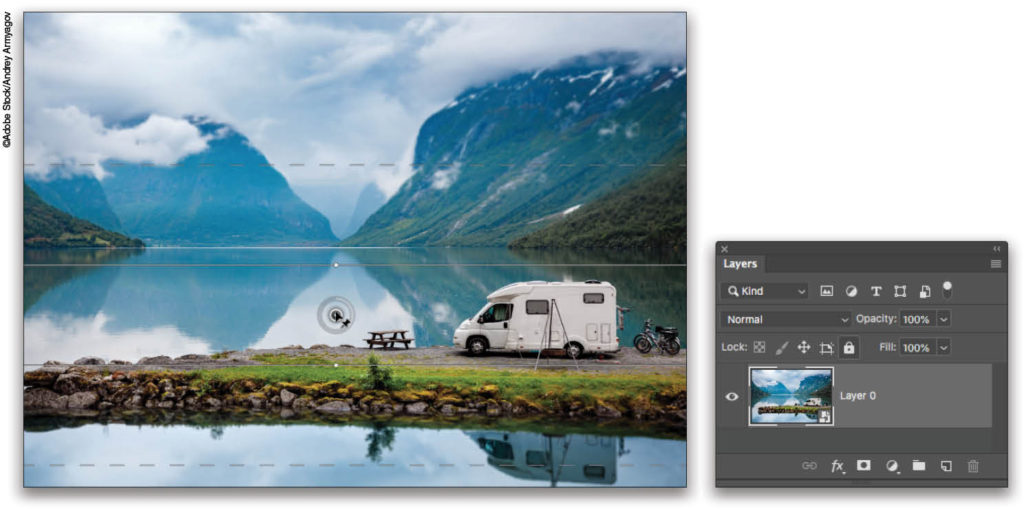
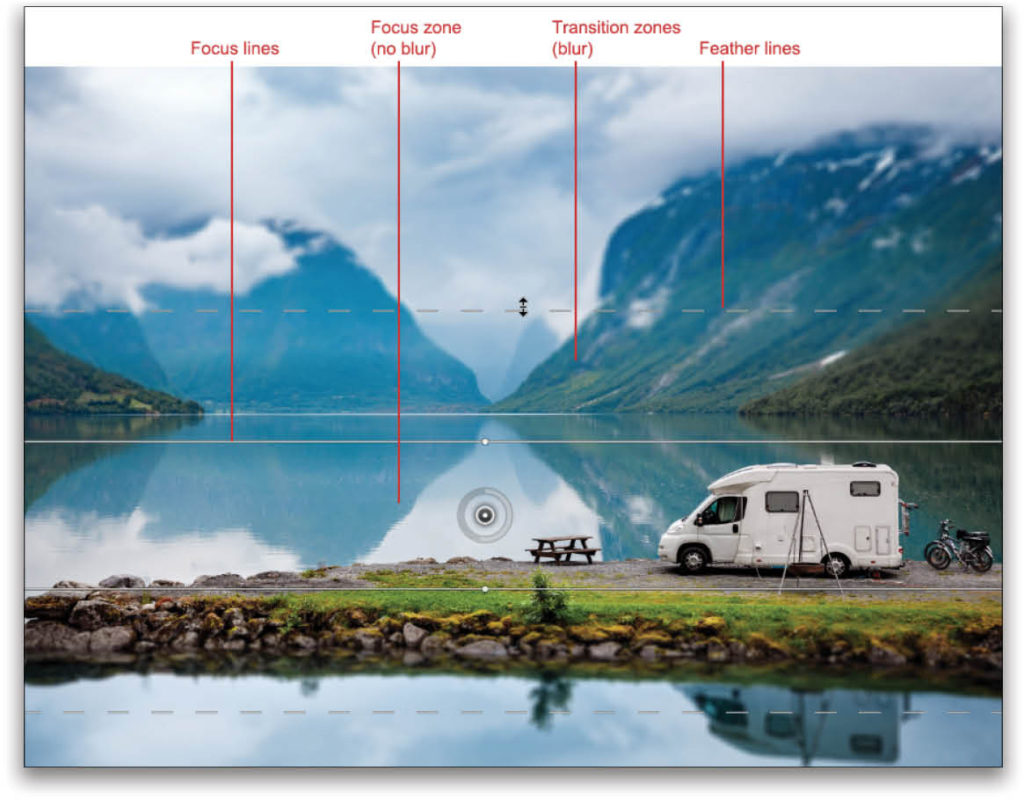
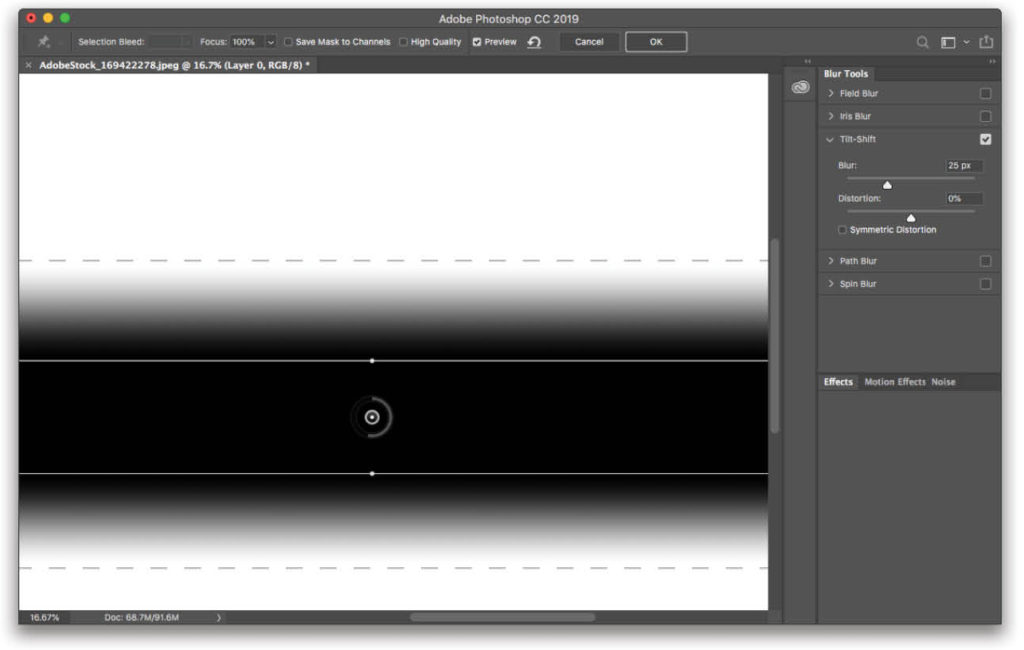
Step Two: Choose Filter>Blur Gallery>Tilt-Shift. Photo-shop places a pin and blur ring in the middle of the image and surrounds them with a horizontal focus band containing a series of solid and dashed lines that you can use to adjust the size of the sharp and blurry areas. Start by repositioning the pin atop your image so the focal point (the RV in this case) is in the focus zone, which is between the solid lines.
Step Three: Use the Blur slider or the blur ring to adjust the blur strength (a setting of 25 was used here). The area between a solid line and a dashed line is partially blurred; and the area beyond the dashed lines is completely blurred. Drag any of these lines to adjust an area’s size. To rotate the focus zone, point your cursor at one of the two dots on the solid lines, and then drag (this was not done here). In the Blur Tools panel on the right, the Distortion slider lets you change the shape of the lower blur zone; drag left for a circular blur or right for a zoom effect. Turn on the Symmetric Distortion checkbox to make Photoshop adjust the blur zones on both sides (no distortion was applied here).
Again, to temporarily see the mask Photoshop created to produce the blur, press-and-hold the M key.
Step Four: When you’re finished, click OK in the Options Bar. Here’s a before and after version.

Using the Motion Blur Filters
Now let’s use the Motion Blur filter to simulate motion. Here’s how:
Step One: Follow Step One above to open an image and convert the layer(s) for smart filters.
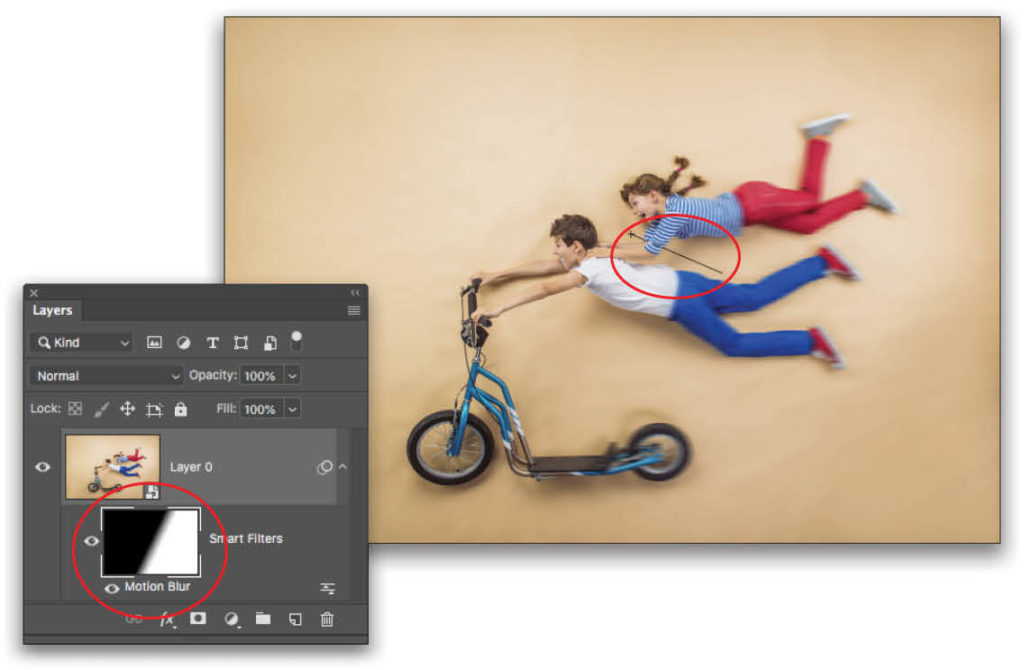
Step Two: Choose Filter>Blur>Motion Blur. In the resulting dialog, adjust the Angle setting to make the blur go in the direction you want. To create a horizontal blur, set the angle to 180°. Drag the Distance slider to the right for more blurring or to the left for less blurring (a setting of 80 pixels was used here). Click OK.

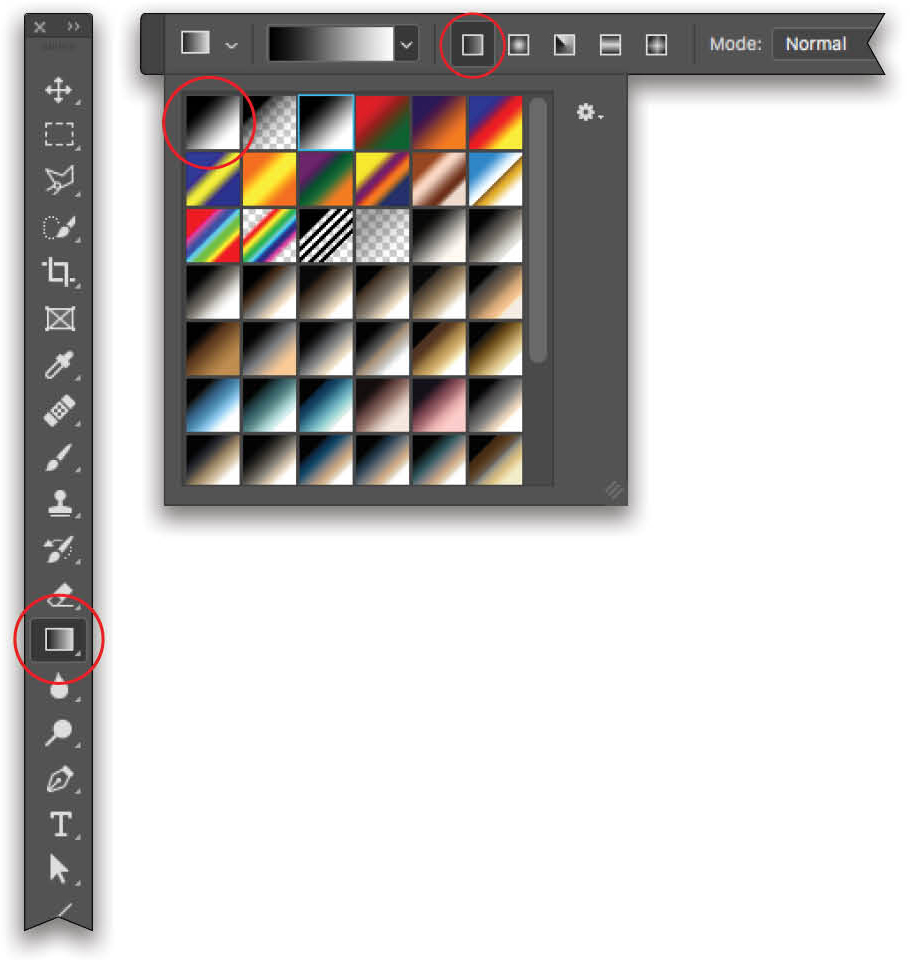
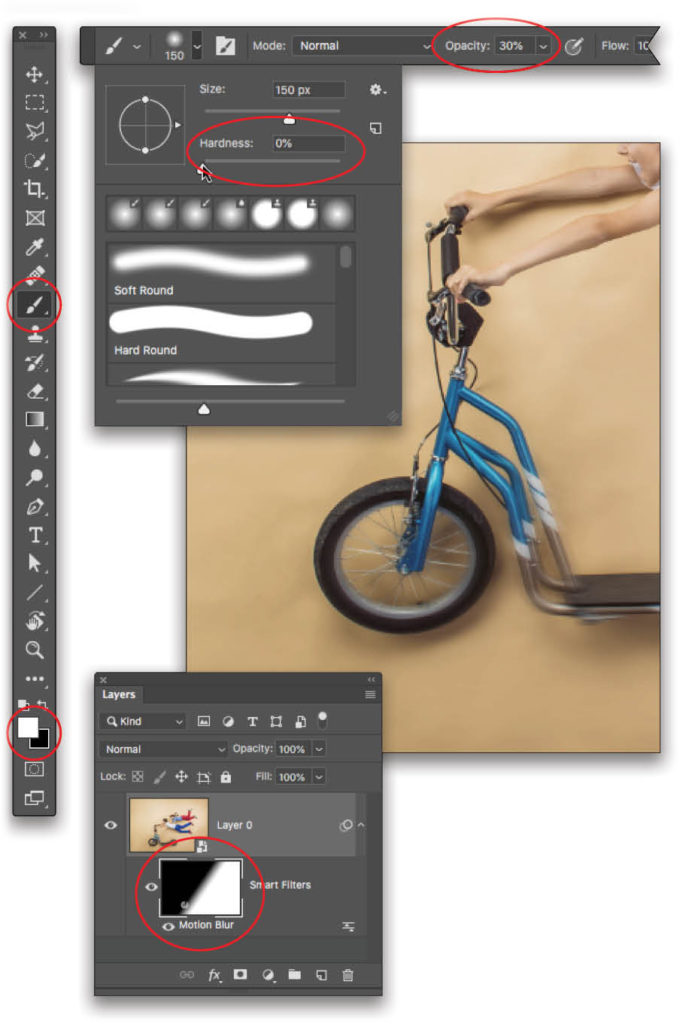
Step Three: To keep the kids’ heads in focus, we’re going to hide part of the filter using a gradient mask. To start, grab the Gradient tool (circled) by pressing G. In the Options Bar, click the down-facing arrow to the right of the gradient preview swatch and pick the Black, White gradient (also circled). In masking, black conceals and white reveals. Make sure the Linear Gradient icon is active (it’s circled, too).
Step Four: In the Layers panel, click the smart filter’s mask (circled). Click-and-drag on the image where you want the blur to be applied. To create a narrow transition between the sharp and blurry areas, drag a short distance. To create a wider transition, drag for a longer distance. You’ll see a line as you drag (also circled).
Step Five: To reveal the blur on the front wheel, use a white brush within the filter mask (in masking, white reveals). To do that, press B to grab the Brush tool (circled). In the Options Bar, click the brush preview swatch and make sure the Hardness (also circled) is set to 0% for a soft-edged brush. Lower the Opacity setting to around 30% (it’s circled, too). Next, press D to set your Foreground and Background colors at the bottom of the Toolbox (also circled) to their defaults of black and white. If white isn’t on top, press X until it is.
Step Six: In the Layers panel, make sure the filter mask (circled) is still selected, and then brush across the tire and spokes to reveal the blur. Keep painting until you reveal enough blur to suit you.
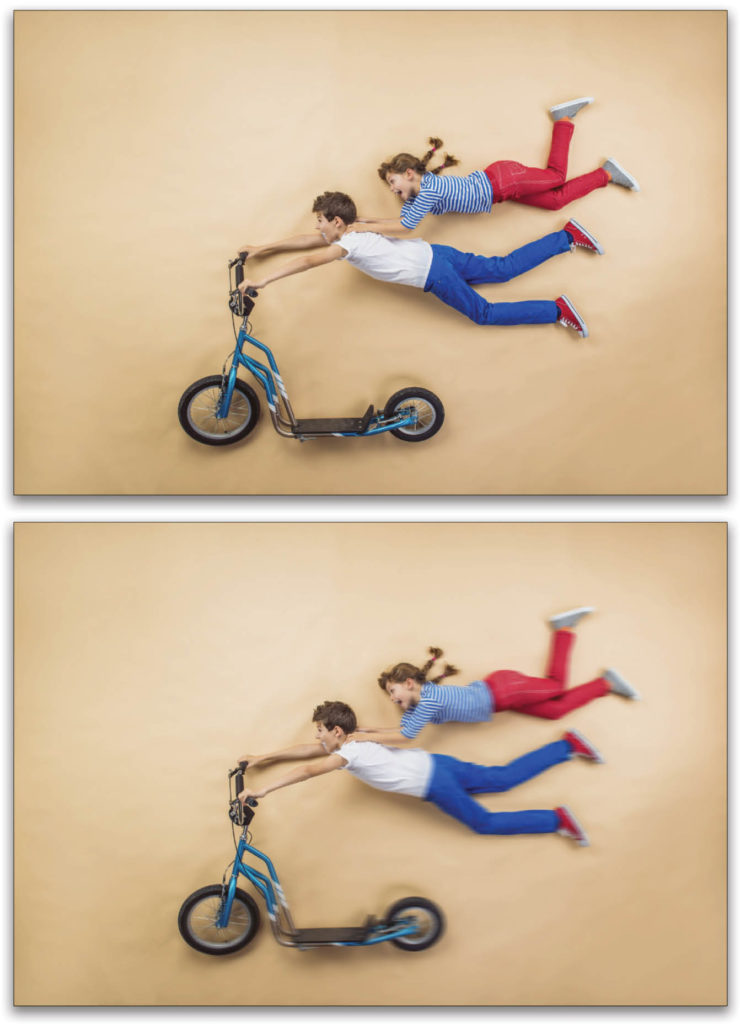
Here’s a before and after version.
As you can see, all three filters produce a different, yet creative, blur. Until next time, May the creative force be with you all!
This article originally published in the June/July 2019 issue of Photoshop User magazine.


