
I think it’s safe to say that the majority of people using Lightroom Classic (LrC) have access to Adobe Bridge, as well. After all, if you have the Creative Cloud Photography plan subscription to get access to Photoshop and LrC, then you get Bridge as part of the deal.
Now, the safe advice to all new LrC users is simply not to ever use Bridge, and it’s true that not using Bridge will help avoid the self-inflicted injury that can come from moving folders and photos around outside LrC; however, I think that it’s possible to be made aware of the potential pitfalls of using Bridge and LrC so that you can avoid them while also adding another useful tool to your photographic toolbox. This makes you smarter, gives you more options for managing your files, and helps you maximize the value of your Creative Cloud subscription plan.
What is Bridge?
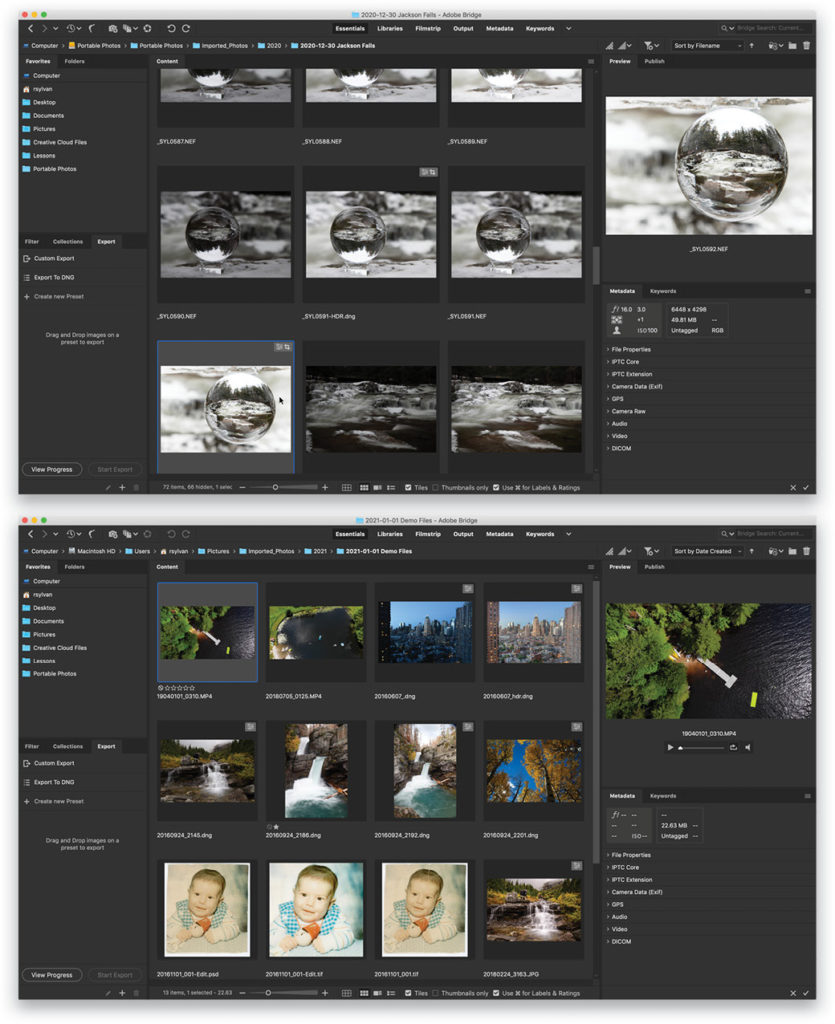
Adobe Bridge is simply a file browser just like Finder on a Mac or File Explorer on Windows. That said, because it’s Adobe’s file browser, it’s designed to be able to display and handle correctly all of the variety of media files creative people might have on their machines.
If you’ve ever looked at a folder of RAW files, PDFs, videos, PSDs, etc. with your operating system’s file browser and only seen icons instead of thumbnails depicting each file’s contents, then you’ve experienced the limitations of that file browser. Adobe Bridge is designed to be “the bridge” between all of Adobe’s various multimedia software tools, so it has to be able to handle all of those various file types correctly.
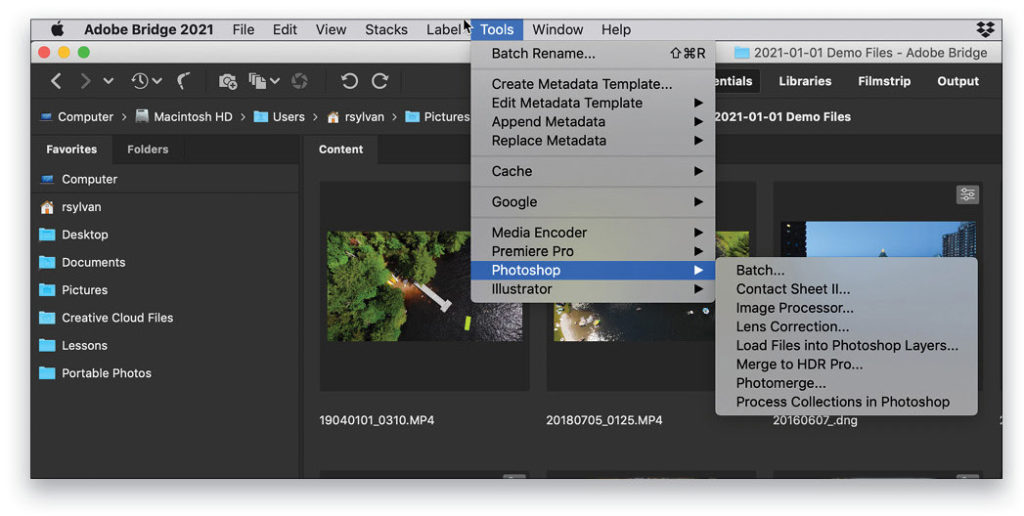
Furthermore, it’s well integrated with products such as Photoshop, Illustrator, Premiere Pro, and so on, which can facilitate certain tasks with those products; however, it’s not (necessarily) integrated with LrC, so don’t go looking for an “Open in Lightroom Classic” menu in Bridge.
File browsers of all types serve two broad purposes. One purpose is a tool for viewing the contents of folders on your system. As a file viewer, Bridge supports and more accurately displays more file types than built-in file browsers do, so that’s a plus for LrC users. The second purpose of a file browser is to facilitate the management of those various files on your system by giving you the ability to move, rename, and delete files, as well as move, rename, and delete the folders that contain those files. This is the danger zone for LrC users, and the root of why most people advise simply not using Bridge at all (okay, and some people just hate Bridge, so there’s that).
Avoiding the Pitfalls
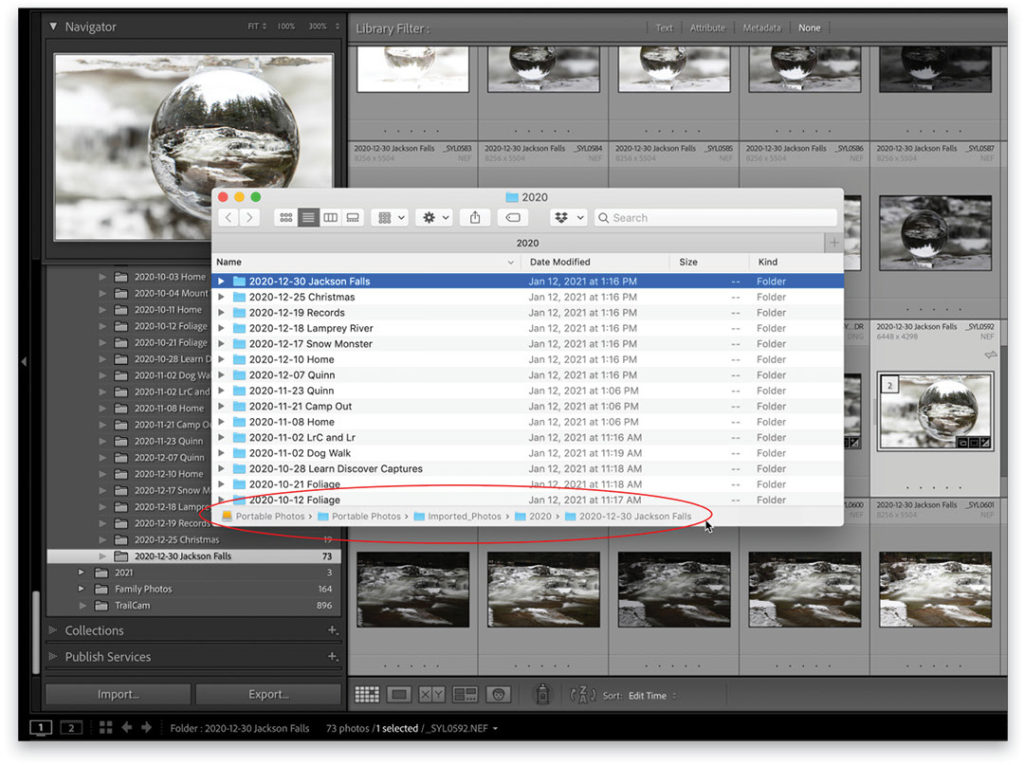
The key to avoiding the self-inflicted injuries that can come from managing your files outside LrC is understanding that during the import into LrC, the exact path to each photo, from the volume name (PC: drive letter) down to the individual filename, and every folder in between, is what’s stored in the LrC catalog file. If an imported photo is moved, renamed, or deleted outside of LrC using any file browser (not just Bridge), then the path stored in the LrC catalog is no longer valid, and that’s what creates the problem. It’s a fixable problem (see my article called When Photos Go Missing on LightroomKillerTips.com), but it’s a problem that’s best avoided by only using LrC to move, rename, and delete files and folders that have been through the import process.
You can use Bridge, however, to view the contents of folders managed by LrC without any problem at all, and this can be useful. Additionally, you can use Bridge to move, rename, and delete files that have not been through the import process into LrC, which is also very useful. If you’ve ever been asked for help by a friend or family member while being handed a hard drive/DVD/thumb drive with all kinds of image files on it, then being able to open, view, and evaluate those files with Bridge can be more useful than importing the lot into a LrC catalog, or using the limited powers of another file browser.
Similarly, if you’re in need of organizing a drive full of old photos before importing into LrC, then it might be useful to use Bridge to get those files organized into a logical folder structure, while weeding out the unwanted files. This gives you the ability to view all supported RAW file formats, as well as the contents of TIFF and PSD files (with easy trips into Photoshop if closer inspection is required); delete at will; and rename and create additional folders.
Many people are just more comfortable doing a big job like that in a file browser. Once you have it organized to your liking, and have deleted all of the unwanted material, then you can import into LrC using the Add option to maintain the existing file structure and, from that point on, only use LrC for those file-management tasks.
Using Bridge and LrC Together?
If you do need to view the contents of a folder that’s been imported into LrC, then there are a few things to keep in mind beyond the don’t move, rename, or delete anything in Bridge advice. First, because LrC only stores edits in LrC as a set of instructions within its own catalog file, by default you won’t see those edits reflected in Bridge. This can be confusing, but is easily corrected.
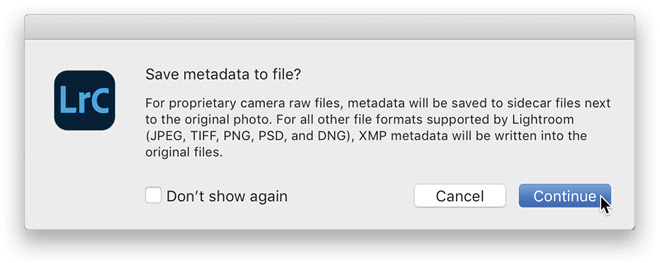
In order for edits made in LrC to be viewable in Bridge, you need to instruct LrC to write those changes to the photo’s own metadata. You can do this manually by selecting the photos in Grid view of LrC first, then using the Metadata>Save Metadata to Files command, or by pressing Command-S (PC: Ctrl-S). For RAW files, a sidecar XMP file containing the LrC edits will be created in the folder, which makes those edits viewable in Bridge (and Camera Raw). For supported non-RAW photos and DNG files, LrC writes directly to the photo’s own metadata. Aside from Develop module edits, any keywords, star ratings, or color labels applied in LrC will also become visible in Bridge.
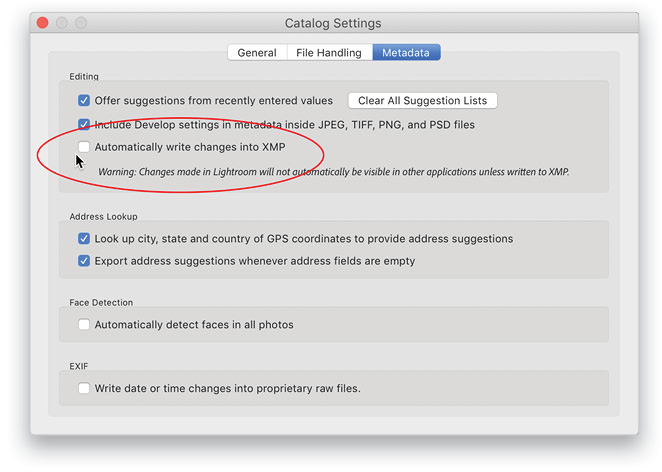
You can also configure LrC to write all changes automatically to each photo’s metadata (in addition to its own catalog, of course), by going to Lightroom Classic (PC: Edit)>Catalog Settings, selecting the Metadata tab, and checking the box to Automatically Write Changes into XMP. Note: This is unchecked by default because it can be resource-intensive. If you have a large catalog and you enable that setting, then be prepared for LrC to be busy for a while as it goes through the process of writing to every imported photo, and that can slow down your experience while it’s happening. Once it’s gone through and written to all photos, you most likely won’t notice it doing this as you work from that point forward, but your mileage may vary. The manual process I outlined previously may work better for those instances when you need it for a given folder. In other words, don’t just go checking that box without thinking through the consequences.
There are a few things, such as virtual copies and flags in LrC that can’t be written to XMP metadata, so don’t look for those in Bridge.
Color Label Quirks
If you use color labels in LrC, especially the Lightroom Default set of color labels that simply writes the color of the label into the Label field in the Metadata panel (meaning if you apply a red color label, LrC writes the word “Red” into the corresponding metadata field while displaying a red label on the photo). If you go through either of the previously mentioned methods for writing from LrC to each photo’s metadata, then you view the contents of the folder in Bridge, you won’t see the color labels display the way you expect. This is because Bridge uses a different default set of color label tags for each color.
In Bridge, if you apply a red color label, the default meaning is to write the word “Select” into the corresponding Label field of that photo’s metadata space. So, a photo with the word “Red” in that metadata field will not display with a red label in Bridge. There are two ways to get these programs in sync with color labels.
One option is in LrC, where you can go to Metadata>Color Label Set, and choose Bridge Default instead of Lightroom Default; however, do not do this if you have been applying color labels previously in LrC because it will mess you up. If you’re coming from a Bridge-only user scenario, and you want to continue that same method of color labels from Bridge, then it could be in your interest to switch LrC to using the same set as you used before.
For most LrC folks, it would probably be better for you to change the color label tags for each color in Bridge instead. The assumption is that LrC is your primary tool, and you may just want Bridge to be on the same page should the situation arise where you’re using Bridge to view the contents of a folder managed by LrC.
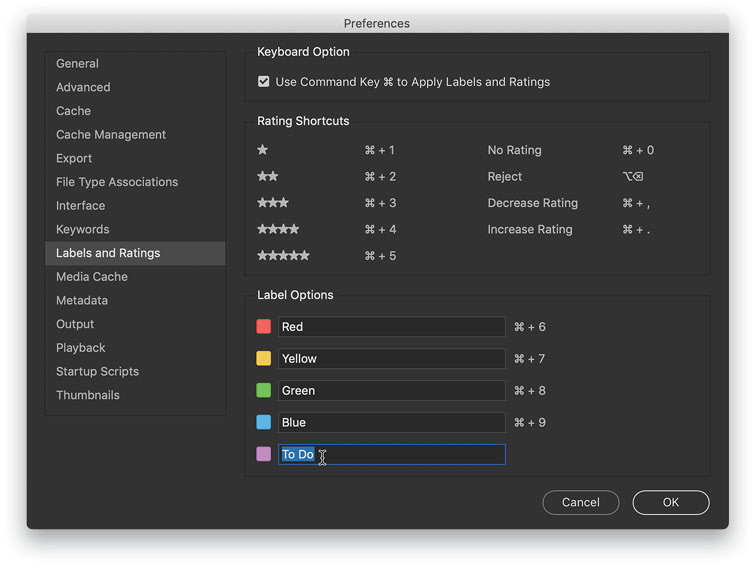
To do this, open Bridge, and go to Adobe Bridge 2021 (PC: Edit)>Preferences, then choose the Labels and Ratings option on the left to view that set of preferences. From there, change the Label Options for each color to match what you use in LrC. If you’ve never customized LrC’s color label set, then just enter the name of each color in its corresponding field (capitalizing the first letter). Once both programs are using the same exact tags for each color label, you’ll see the same colors showing on the thumbnails.
Closing Thoughts
I hope you can see that as long as you’re aware of the potential problems that can arise if you use Bridge to move, rename, or delete photos being managed by LrC (and avoid them), then you can safely use Bridge in a number of ways to help you with your photo library. This isn’t to say that you must use Bridge (because you don’t ever have to use it if you don’t want to), but you don’t have to fear it, and it might just be the thing you need for certain situations (and you’re likely already paying for it). If you have questions or want to explore other workflows, be sure to drop into the KelbyOne Community and start a new conversation. I’m always happy to talk shop.
This article originally published in the February, 2021 issue of Photoshop User magazine.