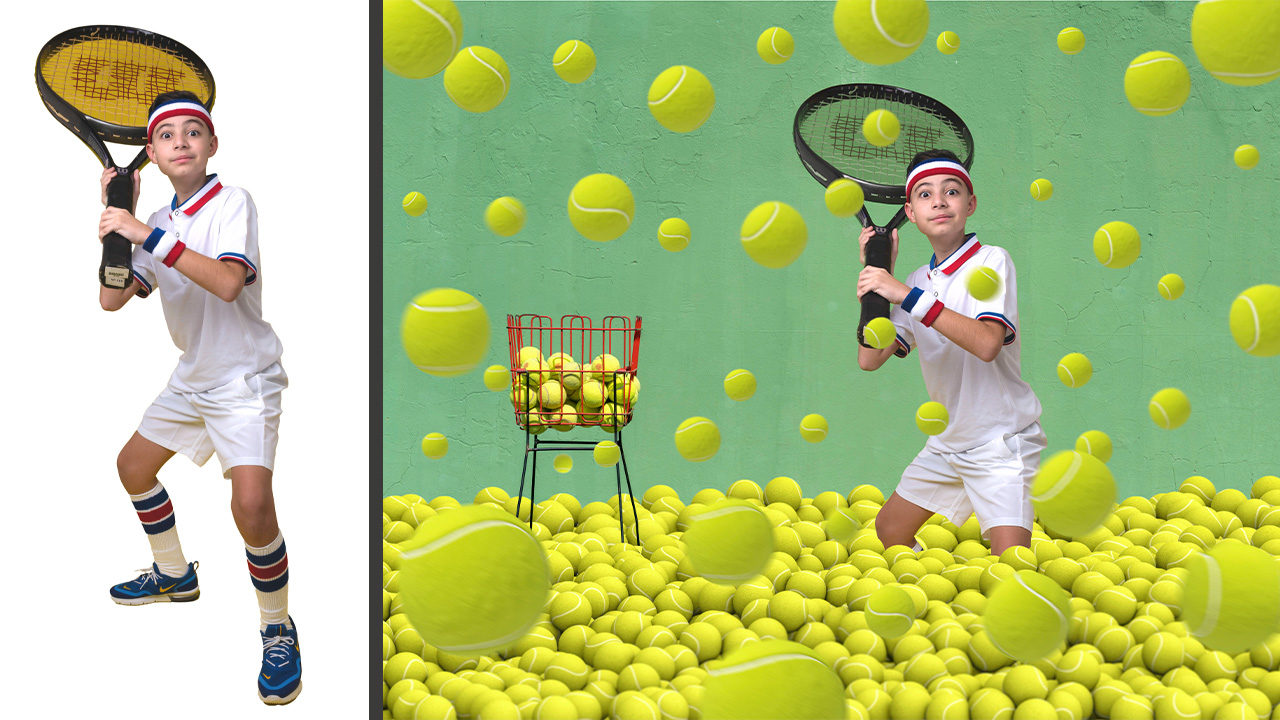
In this installment of “Shortcut City,” I’ll show you how to take an image to another level using very simple compositing techniques. At the beginning of the year, I did a photo series of retro sports images for a campaign. I was scrolling through my library, and I thought it would be fun to create a composite with one of those images.
Shortcut #1: The first command I’m going to use is Select Subject because I want to separate the subject from the background. There are several ways to access Select Subject: (1) Click the lock icon on the Background layer to unlock it, and then click Select Subject in the Properties panel (Window>Properties); (2) switch to the Object Selection, Quick Selection, or Magic Wand tool by pressing the letter W on your keyboard and then clicking Select Subject in the top Options Bar; or (3) go to Select>Subject.
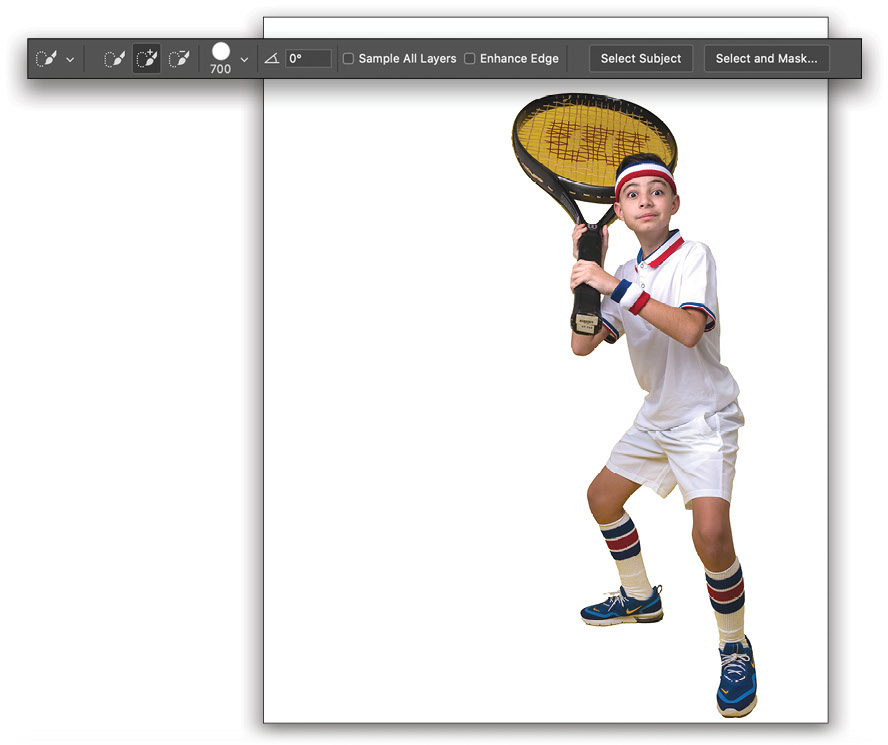
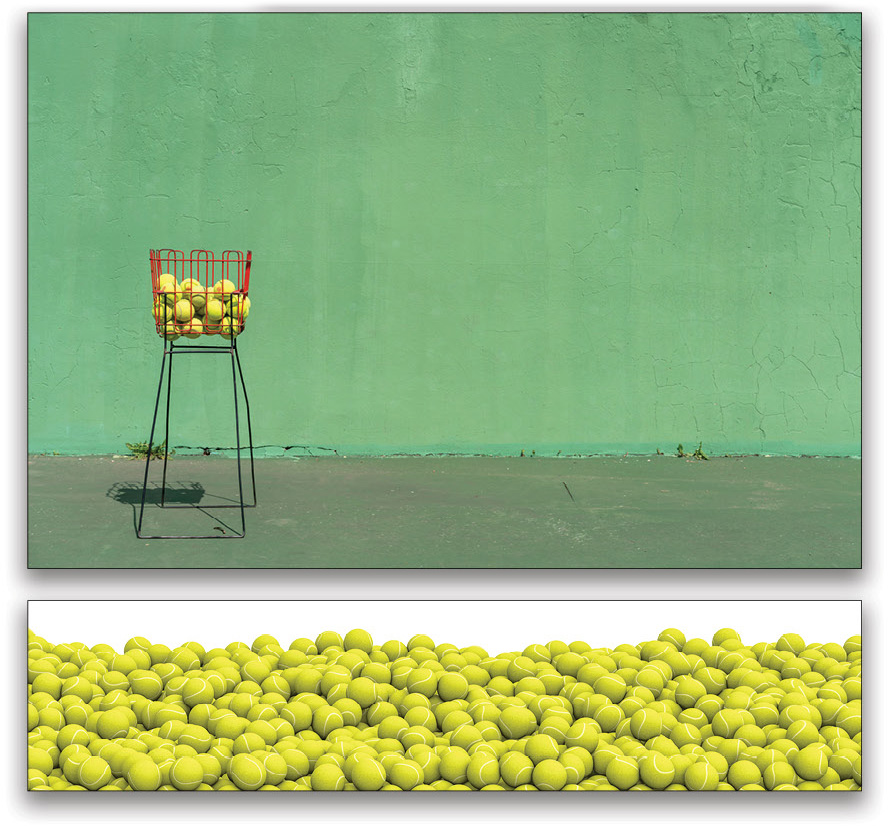
I got a pretty good selection except for the yellow that’s visible through the strings on the racket, but I can quickly fix that later. With the selection in place, I clicked the Add Layer Mask icon (circle in a square) at the bottom of the Layers panel to isolate the subject. I then picked a couple of images from Adobe Stock to build the composite. One of the greatest things about using Adobe Stock is that I can preview how the images look in a composite before I license them. Using the Move tool (V), I dragged the stock images into the main subject image. I then used the Quick Selection tool to select the white in the tennis balls layer and deleted it.
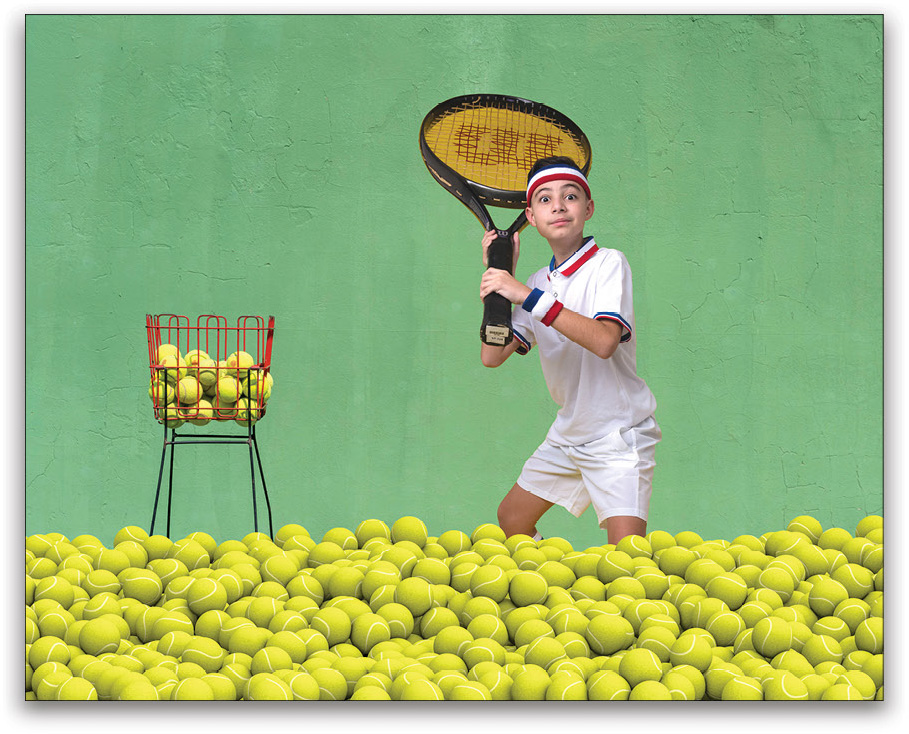
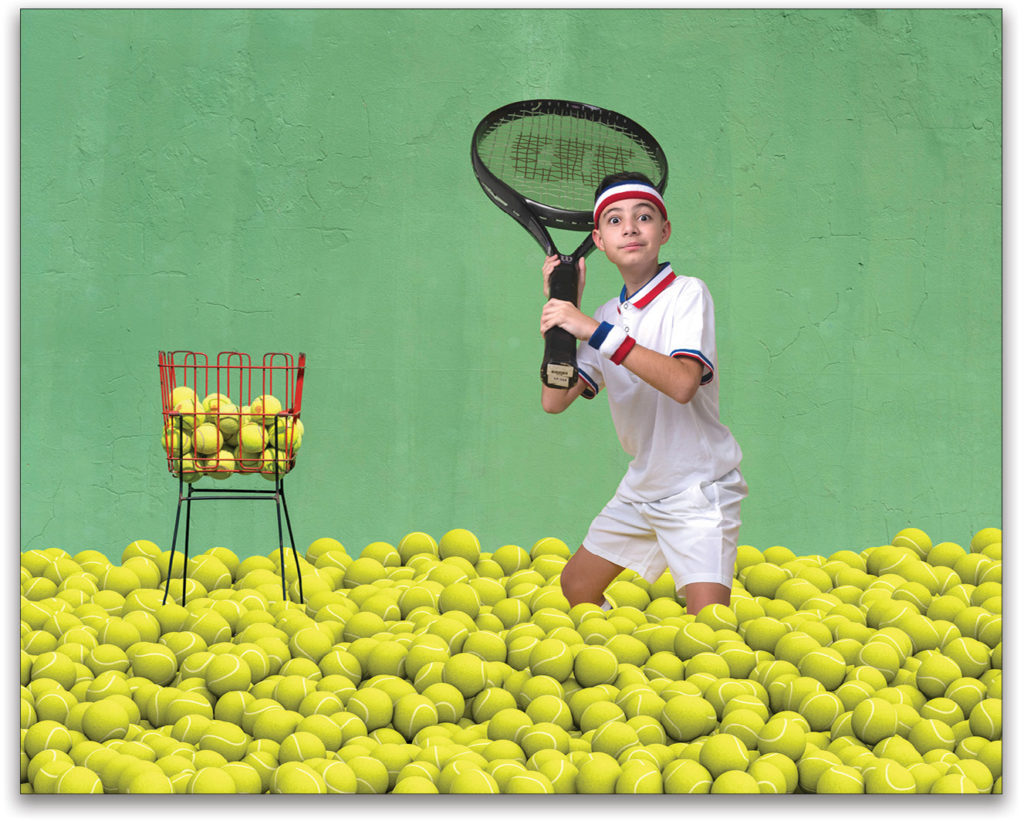
Shortcut #2: I want to create a horizontal image, but my subject was shot vertically. When I added the stock images, their edges were hidden by the vertical crop. Let’s fix that with the Crop tool! To access the crop tool, press C.
My go-to crop ratio (unless I’m working on a project for a client that requires a different ratio) is 4:5 (8:10), mostly because it works on all social media platforms. I also have my camera set to this ratio because it allows me to manage my composition better. You can access all the different crop ratios in the first drop-down menu in the Options Bar. To set the cropping ratio from vertical to horizontal, simply click on the two arrows pointing in different directions between the aspect ratio values in the Options Bar. As I expanded the crop area, it revealed more of the Adobe Stock layers. Press Enter to commit the crop.
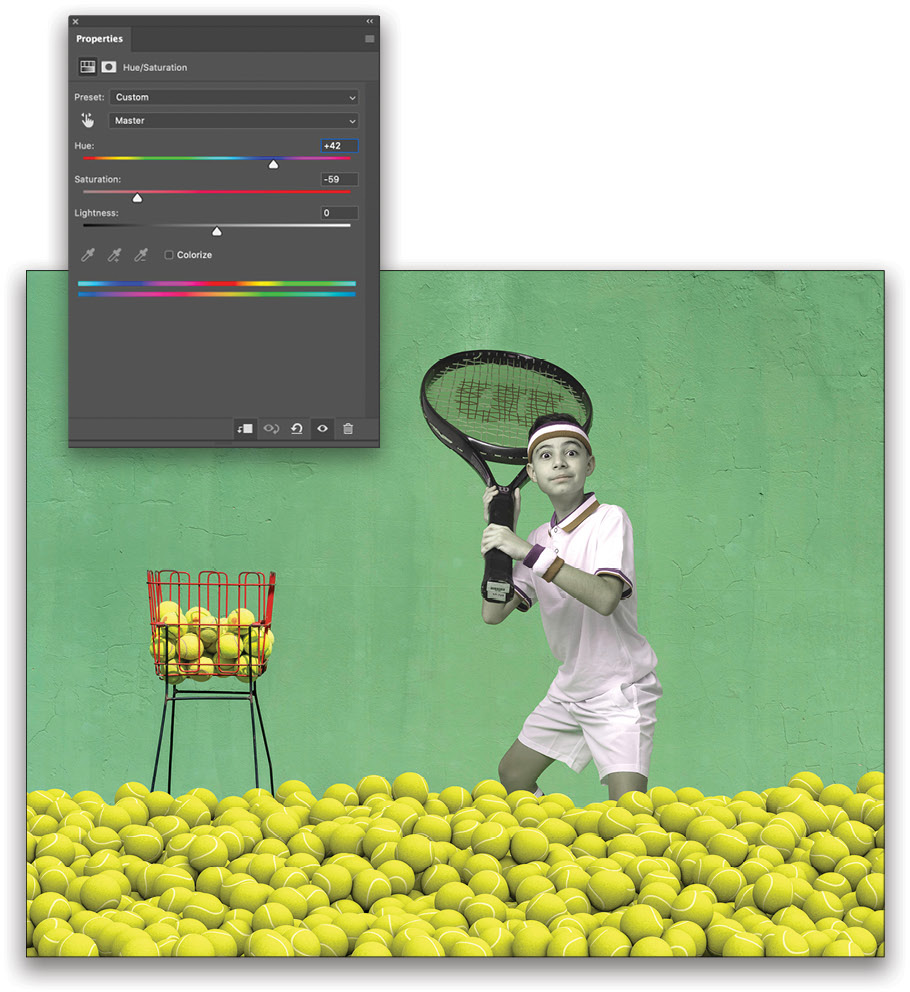
Shortcut #3: Time to fix the yellow on the racket. I first added a Hue/Saturation adjustment layer above the subject by clicking on the half-black/half-white icon at the bottom of the Layers panel and choosing Hue/Saturation. With the Hue/Saturation layer still selected, I clipped it to the subject layer below so that it would only affect that layer. To clip a layer to the one below, press Command-Option-G (PC: Ctrl-Alt-G).
Shortcut #4: I needed to see the colors clearly to match them, so I zoomed into the racket. To quickly zoom in and out of an image, press-and-hold the Command (PC: Ctrl) key and tap the Plus key (+) to zoom in and the Minus key (–) to zoom out.
I played with the Hue/Saturation sliders until the yellow on the racket matched the green on the wall. It ended up looking like this(!), but we only want the adjustment layer to affect the racket.
Shortcut #5: With the mask active on the Hue/Saturation layer, press Command-I (PC: Ctrl-I) to invert it from white to black, which hides the entire effect. I then brushed the effect back in on the racket area using the Brush tool (B) with the Foreground color set to white.
Shortcut #6: It’s starting to look good, but the composite lacks depth. To add more depth behind the subject, I first duplicated the tennis balls layer. To duplicate a layer, press Command-J (PC: Ctrl-J).
Shortcut #7: I placed the copy layer below the original tennis ball layer. To move a layer up or down the layer stack in the Layers panel, press-and-hold the Command (PC: Ctrl) key and tap one of the Bracket keys ([,]). Use the Right Bracket key to move the layer up and the Left Bracket key to move the layer down.
Shortcut #8: I used the Move tool to move the tennis balls up in the image to make the room look fuller. To access the Move tool, press V on your keyboard.
Shortcut #9: I didn’t want the duplicate tennis balls layer to look like the original layer, so I flipped it horizontally. To flip an image horizontally, go to Edit>Transform>Flip Horizontal.
Shortcut #10: I know there’s no depth yet because all the balls are in front of the subject. I want to add a mask to the duplicate tennis balls layer so it looks as if there are tennis balls behind the subject. Instead of wasting time creating a new mask, here’s the trick: I’m going to use the mask of the subject that was created in Shortcut #1. To copy a layer mask from one layer to another, press-and-hold the Option (PC: Alt) key, and click-and-drag it to the other layer in the Layers panel. At this point, the tennis balls now only appear in the subject, so we need to invert the mask. Of course, we now know that the shortcut for inverting a mask is Command-I (PC: Ctrl-I).
Shortcut #11: To create even more depth, I revealed part of the legs of the basket so it appears as if they’re surrounded by tennis balls. I lowered the Opacity of the duplicate tennis balls layer so I could see the legs, and then I painted using the Brush tool with black on the mask that was created in the previous shortcut to reveal the basket legs. Here’s a trick that will save you time and headaches when you need to draw straight lines in a mask: With the Brush tool selected, click once where you want the line to start, hold the Shift key, and click where you want the line to end. Photoshop will draw a straight line between the two clicks.
Final Touches
It’s looking pretty good, but it needs more depth, movement, and fun! I found this set of tennis balls on Adobe stock.
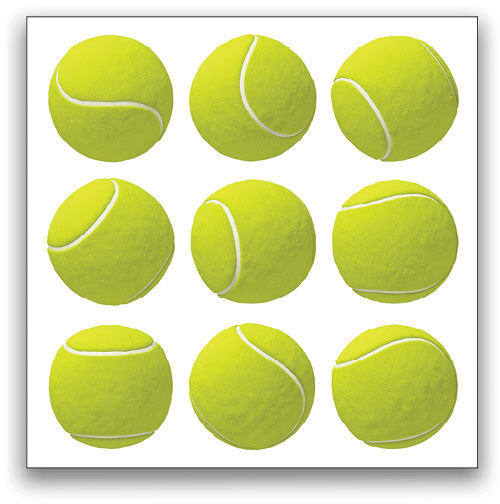
I separated each ball onto its own layer and turned each layer into a smart object (Layer>Smart Objects>Convert to Smart Object). I then duplicated those tennis ball layers and spread them all around the image—the more, the better! The rule of thumb when creating images like this is that the closer the objects are to the camera, the bigger they are. If they’re further away from the camera, they should be smaller. Use Free Transform (Command-T [PC: Ctrl-T]) to scale the balls to different sizes.
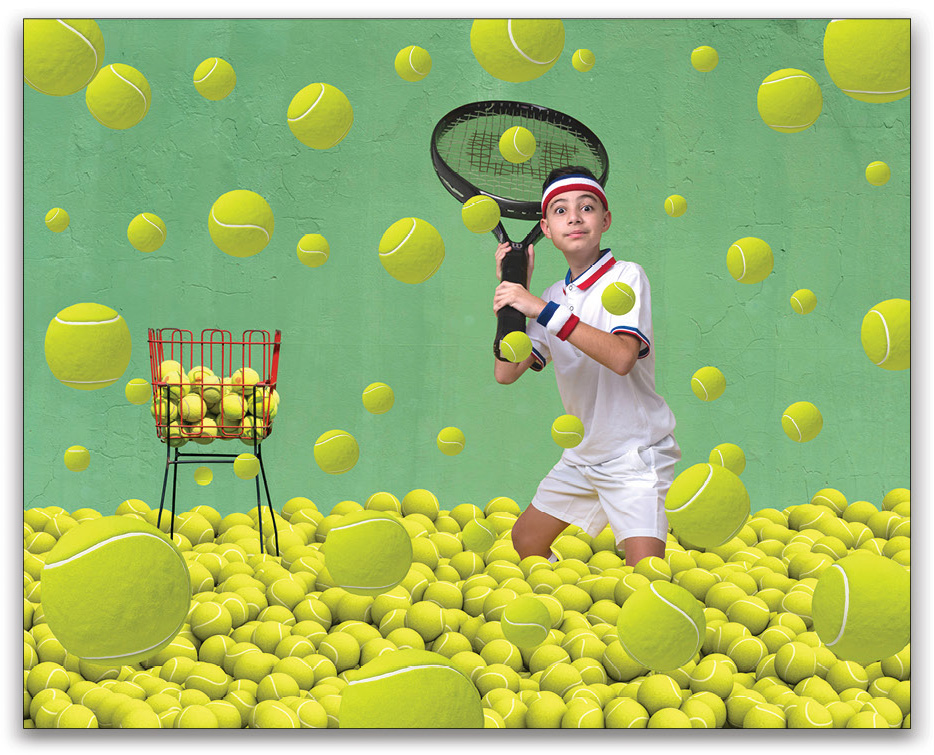
The last step was adding blur to the tennis balls to mimic movement and depth. To do so, I added a Gaussian Blur (Filter>Blur>Gaussian Blur) to these layers individually so I could control the Radius according to each ball’s position. Working on these layers as smart objects allows me to go back and adjust the Radius of the Gaussian Blur any time I want.
After adding all the elements, it was time for making small color adjustments, dodging and burning, and color grading to complete the image.
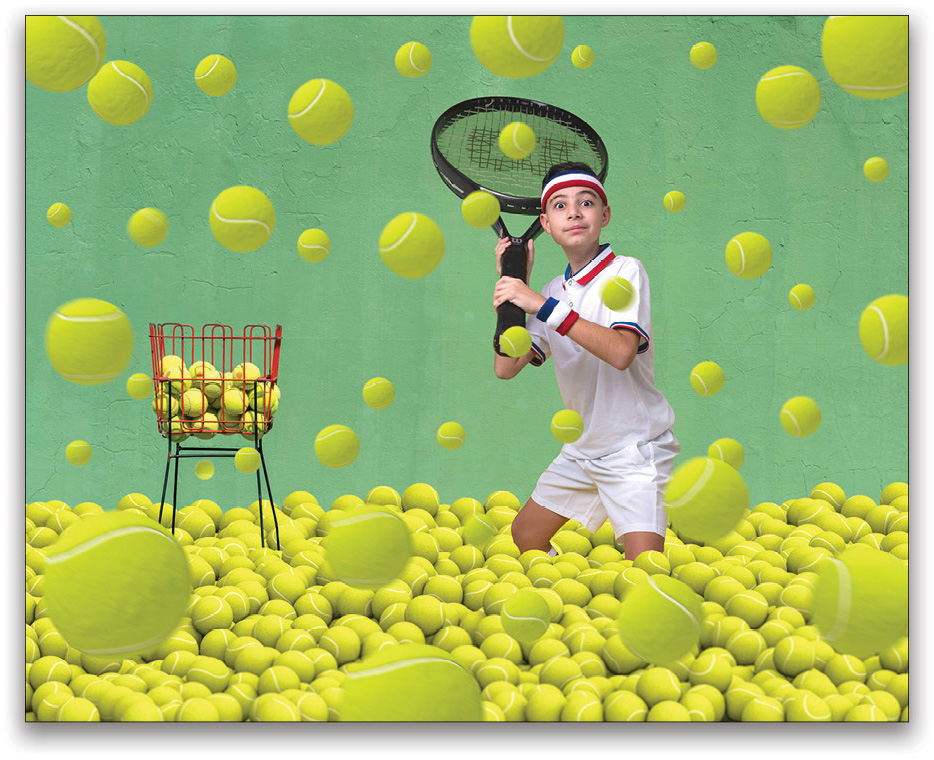
I really hope you enjoyed these few tips. Happy Photoshopping!
This article originally published in the August, 2020 issue of Photoshop User magazine.


