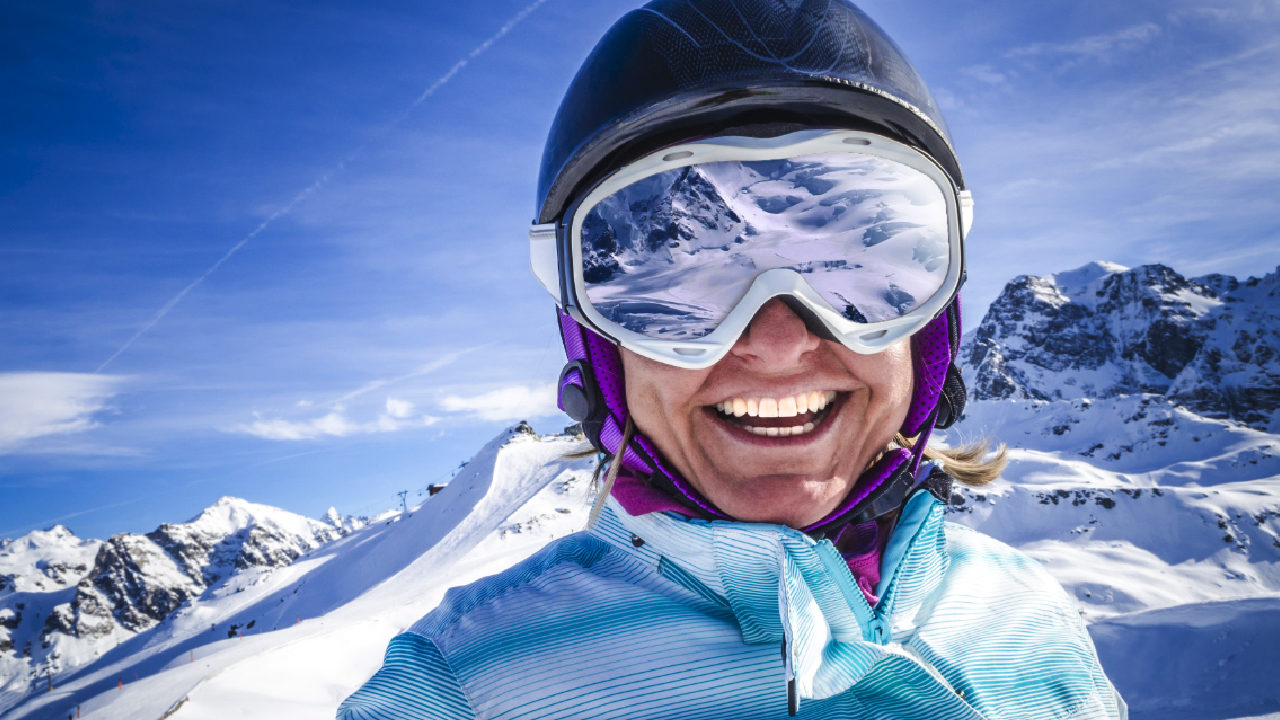
Real life is rarely perfect; but thanks to Photoshop, your photos can be. So, if that stunning shot of you (or your client) atop the ski mountain of your dreams lacks a mountainous reflection in your goggles, you can add it in post. The technique is nondestructive, so you won’t harm the photo,
and covers foundational Photoshop skills. Let’s get started!
Step One: In Photoshop, open an image of a skier with goggles. (If you’re starting in Lightroom, select the photo’s thumbnail and choose Photo>Edit In>Edit In Adobe Photoshop CC 2020.)
If you’d like to download the low-res watermarked version of this image to follow along, click this link, log in with your Adobe ID, and click the Save to Library button. Double-click the image in the Libraries panel (Window>Libraries) to open it in Photoshop.
To make it easier to work with the image, increase the resolution of the practice file. (We normally don’t recommend enlarging images, but this is only for practice purposes.) Go to the Image>Image Size menu, turn on the Resample checkbox, select Preserve Details 2.0 from the Resample drop-down menu, set the Width to 2,000 pixels, and click OK.
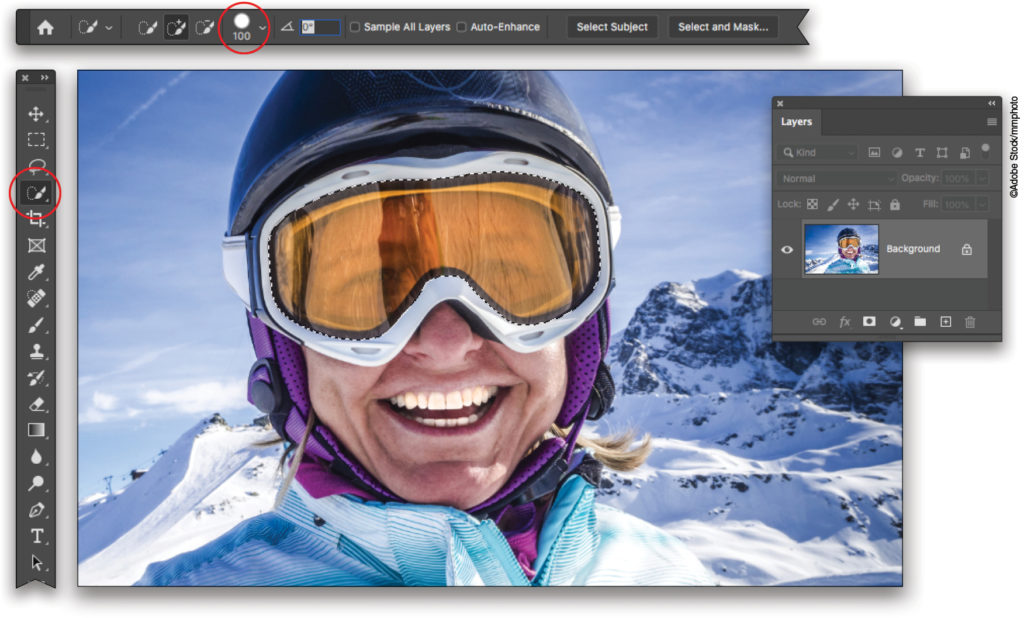
Step Two: The first thing we want to do is select the goggle lens. With a good amount of contrast between lens color and goggle frames in this image, the Quick Selection tool will make short work of the selection. Grab the Quick Selection tool (nested below the Object Selection tool [W]) in the Toolbar (circled here). Mouse over to the image, point your cursor at the area you want to select—don’t click yet—and use the Bracket keys on your keyboard to adjust the size of the brush. You’ll see the size setting change in the Options Bar (circled): the larger the brush size, the larger the area Photoshop will select. We used a brush size of 100 pixels on this 3,464×2,309 pixel image (try a size of 50 pixels for the Adobe Stock preview image). Now click-and-drag across the lens to select it.
If it selects areas you don’t want, hold the Option (PC: Alt) key, and click-and-drag over those areas to remove them from the selection.
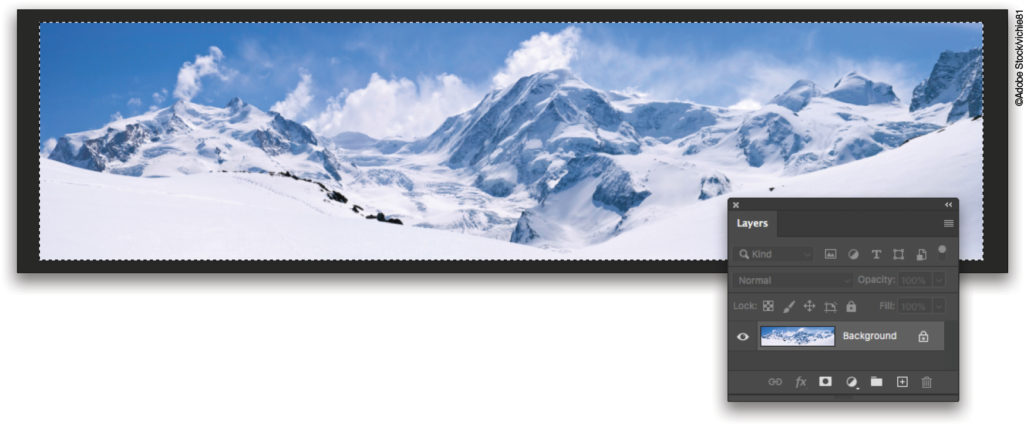
Step Three: Next, open the reflection image as a separate Photoshop document. (You can click here to download the image we’re using from Adobe Stock, and then enlarge it as we did with the skier.) If it’s comprised of a single layer, choose Select>All or press Command-A (PC: Ctrl-A). If it’s comprised of multiple layers, create a stamped copy and select that instead. Doing so combines all visible layers into a brand-new layer, leaving the original layers intact. To do that, activate the topmost layer and then press Shift-Option-Command-E (PC: Shift-Alt-Ctrl-E). You can also press-and-hold Option (PC: Alt) as you choose Merge Visible from the Layers panel’s flyout menu. Once the entire image is selected—you should see what appears to be marching ants surrounding it—choose Edit>Copy or press Command-C (PC: Ctrl-C).
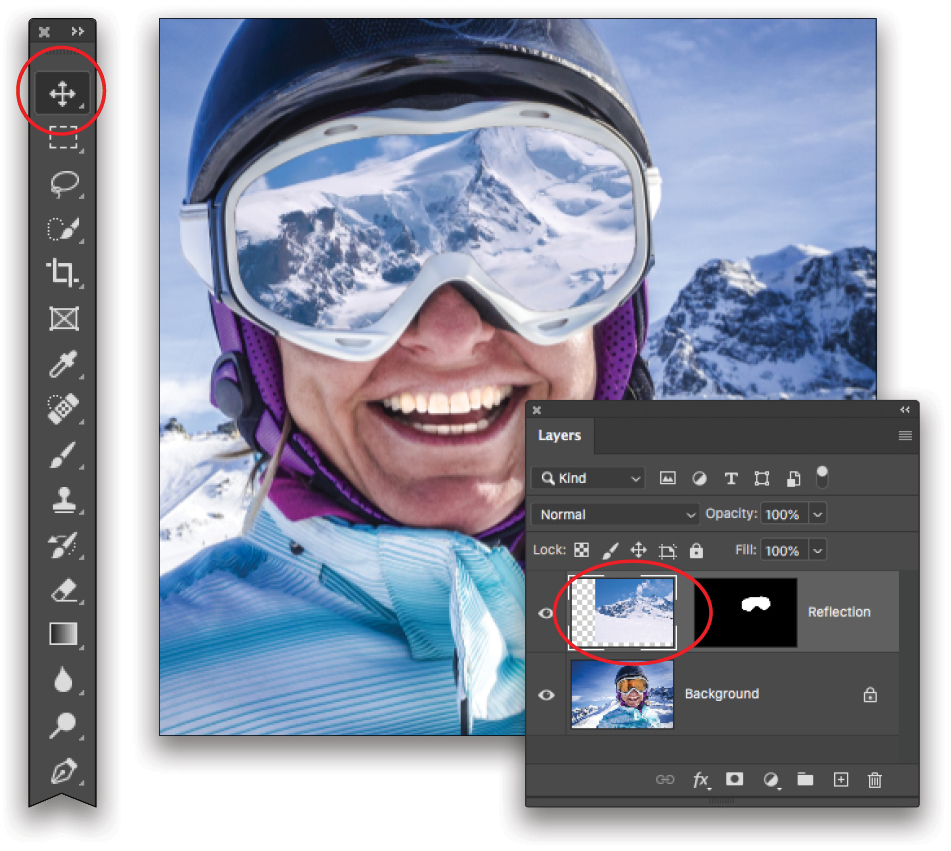
Step Four: Back in the skier image, the goggles should still be selected. Choose Edit>Paste Special>Paste Into. This pastes the reflection image onto its own layer and automatically adds a layer mask in the shape of your selection you made earlier. Sweet!
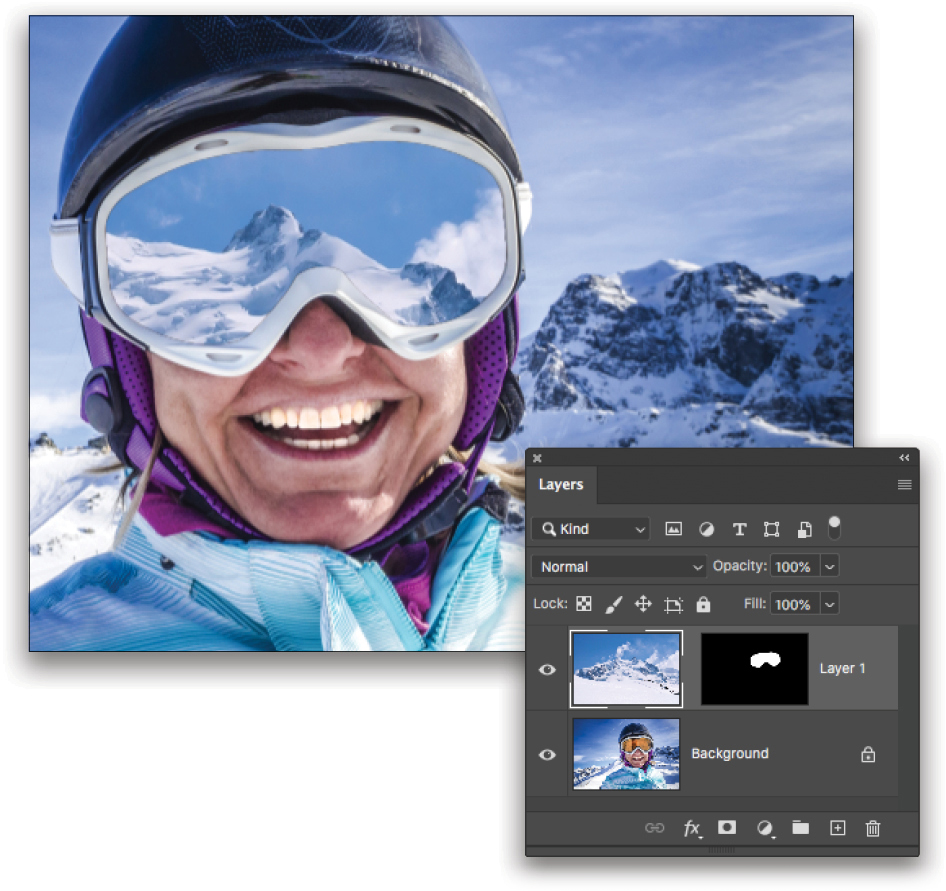
Step Five: Press V to grab the Move tool (circled) and with the thumbnail of the reflection active (also circled; notice the white borders around the edges), drag to reposition the reflection image within the lens. With the reflection layer still active in the Layers panel, double-click the layer name and enter “Reflection.”
Step Six: Choose Filter>Distort>Spherize. In the dialog that opens, set the Amount slider to around 35% (you can increase it if the lens is super curvy). Leave the Mode menu set to Normal and click OK.

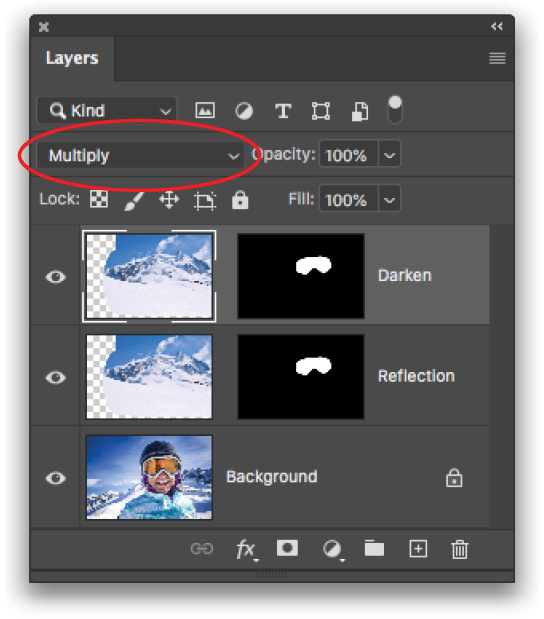
Step Seven: Now let’s darken the reflection to account for the dark tint of the goggles. With the Reflection layer active, choose Layer>Duplicate Layer, and in the dialog that opens, enter “Darken,” and click OK. In the Layers panel, click to activate the Darken layer and change the blend mode menu near the top of the Layers panel (circled) to Multiply.
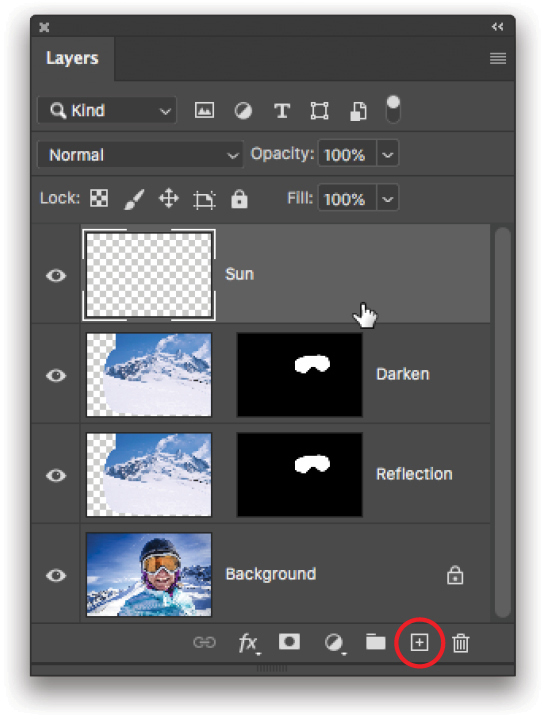
Step Eight: Next, we’ll add a bit of white to the goggles for a sun reflection. Command-click (PC: Ctrl-click) the layer mask (circled) on the Darken layer to load the goggle selection.
Step Nine: Click the Create a New Layer icon at the bottom of the Layers panel (circled) to add a new layer. Double-click the new layer’s name and enter “Sun.”
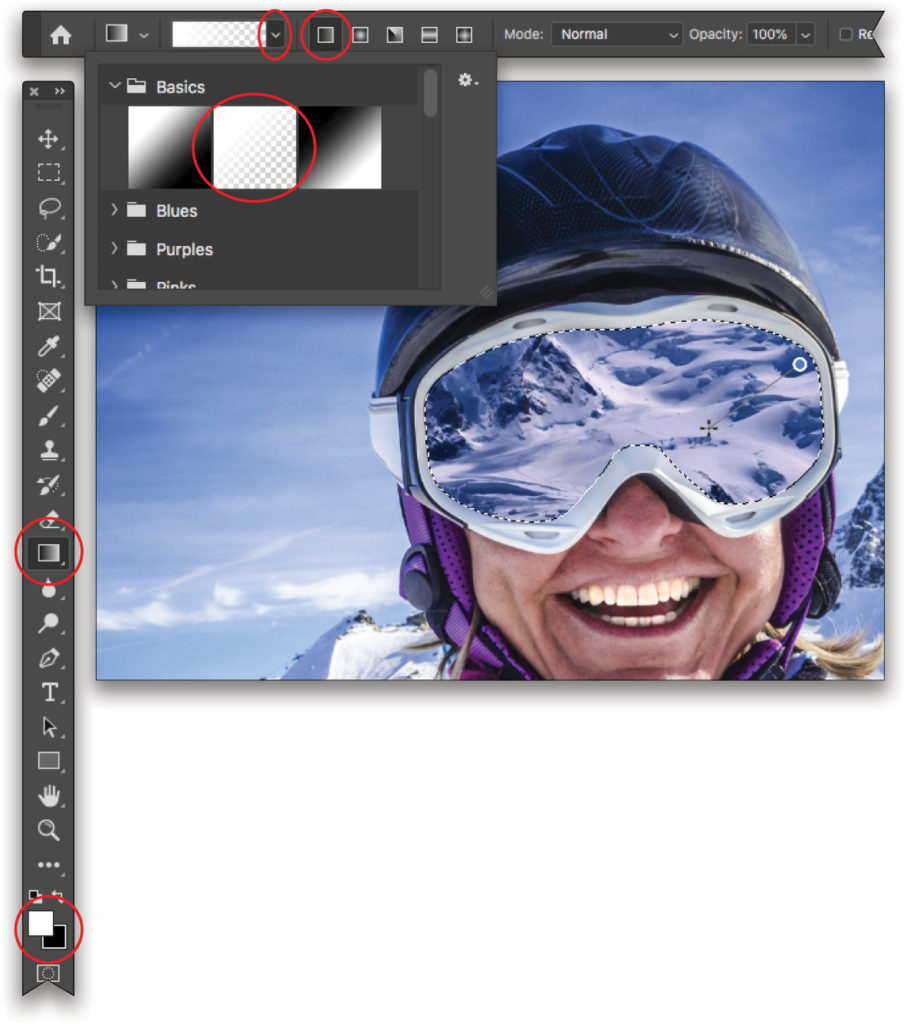
Step 10: Press G to grab the Gradient tool (circled) and on your keyboard, press D to set the color chips at the bottom of the Toolbar (also circled) to the default values of black and white. Press X to flip-flop them so white is on top. In the Options Bar, click the down-pointing triangle to the right of the gradient preview (circled) to open the Gradient Picker, and from the Basics category, choose Foreground to Transparent (also circled). Make sure the Linear option is turned on (it should be unless you changed it previously).
Step 11: Since the sun is hitting her right side in the image (it’s really her left side but let’s call it right because that’s how it looks to us), click-and-drag from the top right of the goggle area at an angle toward her nose. The farther you drag, the larger the resulting gradient. When you release your mouse button, Photoshop adds the gradient. Notice how it remains within the selected area.
Tip: If you don’t like the gradient, choose Edit>Undo Gradient, or press Command-Z (PC: Ctrl-Z), and try again.
Step 12: In the Layers panel, lower the Opacity setting for the Sun layer until it looks right to you. We used a setting of 95% here. Go ahead and choose Select>Deselect or press Command-D (PC: Ctrl-D) to get rid of the selection.
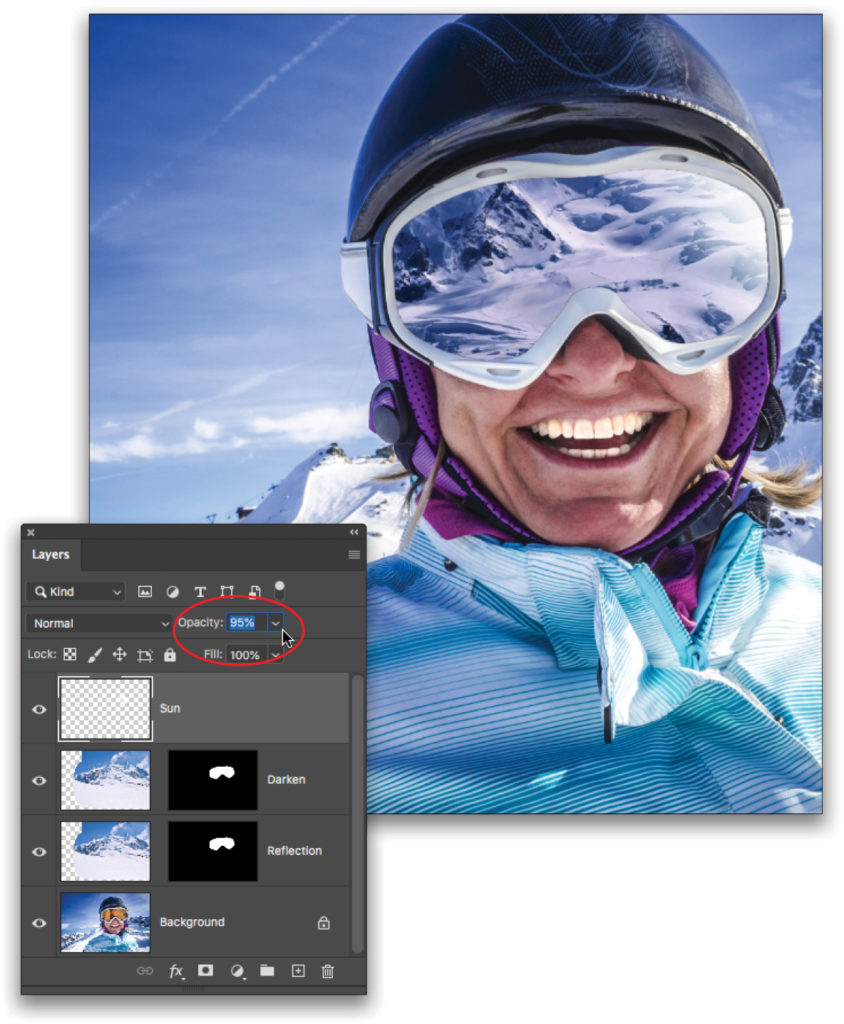
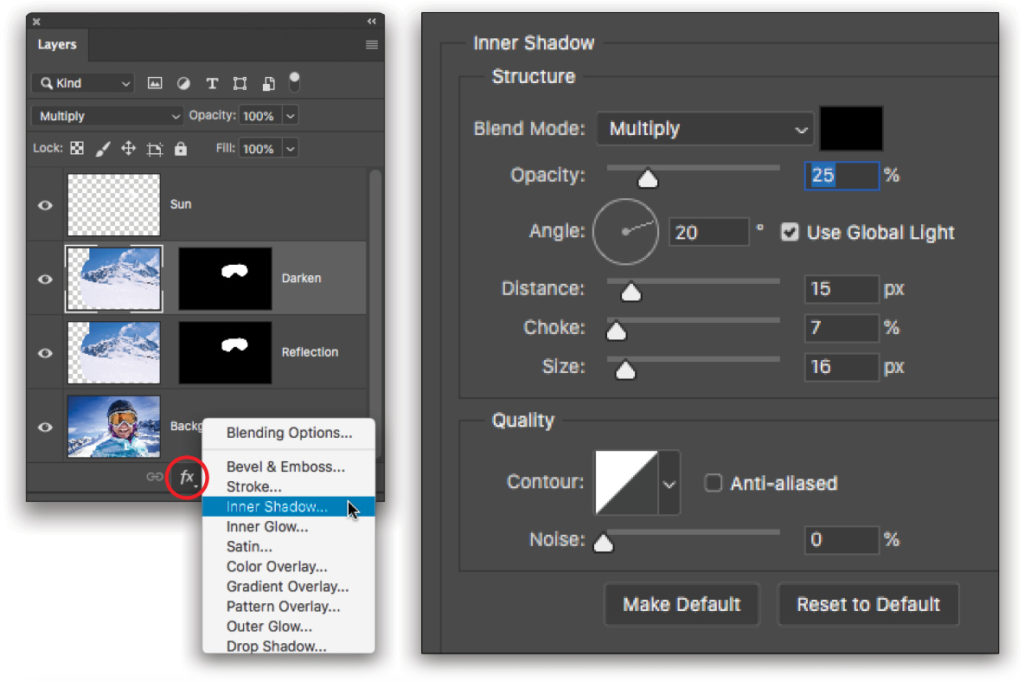
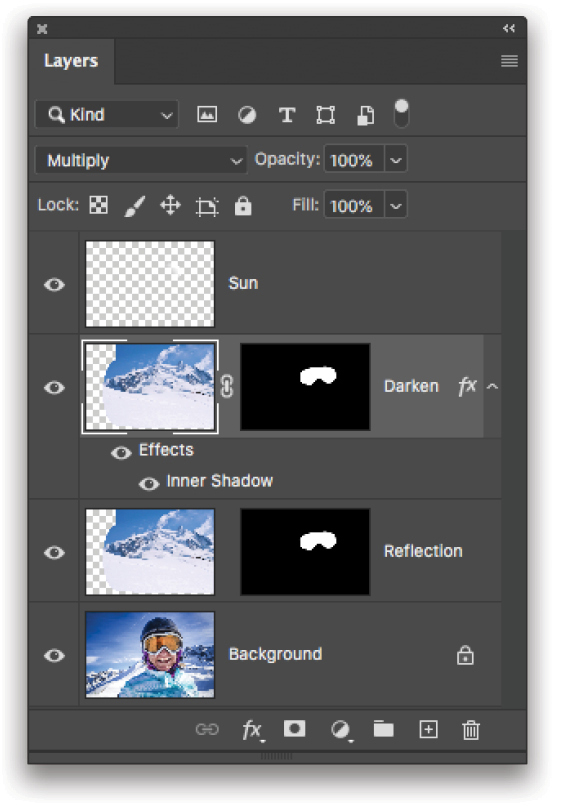
Step 13: The final step is to add an inner shadow to the Darken layer. To do that, click on the Darken layer to activate it and then click the ƒx icon at the bottom of the Layers panel (circled). Choose Inner Shadow and in the (enormous) dialog that opens, set the Opacity to around 25%, Angle to 20°, Distance to 15 px, Choke to 7%, and Size to around 16 px. Click OK.
Tip: To edit the Inner Shadow later, double-click it in the Layers panel to reopen the Layer Style dialog.
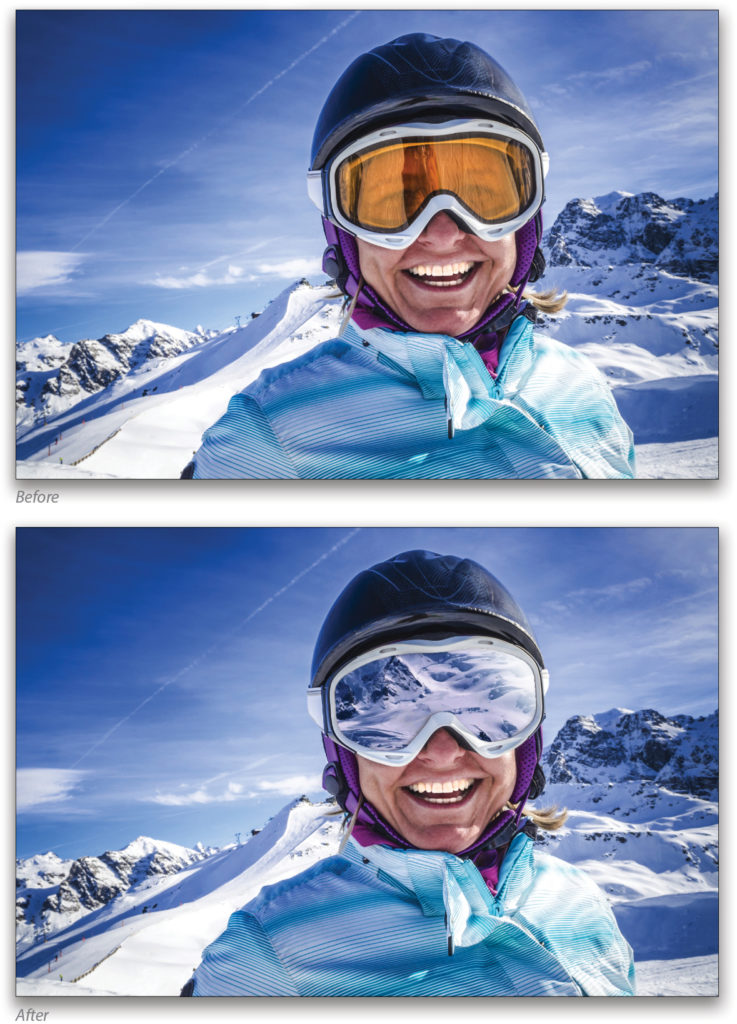
Step 14: Save your work by choosing File>Save As and picking Photoshop (PSD) as the Format. Here’s a before and after version, complete with Layers panel.
Though the technique is a little time-consuming, it produces a slick effect. Plus, it’s a great way to practice fundamental Photoshop skills that you’ll rely upon throughout your career. Until next time, may the creative force be with you all!
This article originally published in the January, 2020 issue of Photoshop User magazine.


